Plasma cutters are widely used in workshops and enterprises related to non-ferrous metals. Most small businesses use a homemade plasma cutter.
A plasma cutter performs well when cutting non-ferrous metals, since it allows local heating of products and does not deform them. Self-production of cutters is due to the high cost of professional equipment.
In the manufacturing process of such a tool, components from other electrical appliances are used.
Is it possible to make a plasma cutter from an inverter?
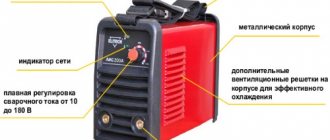
To make a plasma cutter from a welding inverter, in any case, you will need to purchase some additional components. But the device will be able to take on the role of a power source. It will convert alternating current into direct current and maintain the operation of the plasma cutter.
In many cases, a welding transformer is considered the ideal option for designing a cutter. But it has its drawbacks - the unit is too large, consumes a lot of energy and requires connection to a 380 V network. A welding inverter, in contrast, operates from a household outlet, uses electricity sparingly and shows good efficiency.
You can use a plasma cutter from an inverter for welding in a garage without re-equipping the electrical network. Important! The only drawback of an inverter when converted into a plasma cutter is considered to be limited functionality. The unit cannot cope with very thick and dense workpieces.
Examination
To check the assembled device, it is necessary to make a test cut of the metal:
- supply power to the transformer;
- after 10 minutes, turn off and check the windings for heating;
- if they are cold, reapply power;
- turn on the compressor;
- after filling the receiver, open the air valve and direct the air flow through the plasmatron;
- by pressing the microswitch button, light the auxiliary arc;
- If available, make a test cut of the metal.
After completing the tests, disconnect the device from the mains and again check all elements for heating.
How does a plasma cutter work?
Any plasma cutter consists of several parts:
- plasmatron, which is directly responsible for creating a flow of ionized gas;
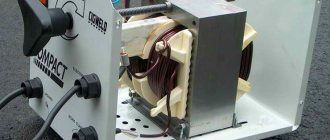
- welding transformer serving as a power source;
- a compressor for pumping air passing through the plasmatron;
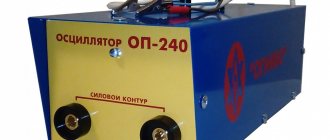
- an oscillator that supplies voltage to form a hot flow when put into operation.
The device also includes cables connecting the welding machine and the torch, and hoses for supplying air or other gas from the compressor.
The operating principle of the plasma cutter is that when the unit is turned on, the transformer supplies voltage to the electrode and nozzle. The oscillator forms an electric arc, and under the influence of the latter, the gas supplied to the cutter is heated to 8000 °C. A hot stream exits the nozzle at high speed and touches the part being cut, and the current flows through the transformer, after which a special relay turns off the oscillator and the pilot arc.
Advantages and disadvantages of plasma cutting
Plasma metal cutting has advantages over other methods:
- the ability to cut any metals and alloys;
- high processing speed;
- clean cut line without sagging or drips of material;
- processing is carried out without heating the parts being cut;
- Flammable materials such as oxygen and natural gas cylinders are not used.
The disadvantages of plasma cutting are:
- complexity and high cost of installation;
- each operator with a plasma torch requires a separate transformer and control panel;
- cutting angle no more than 50°;
- a lot of noise when working.
Schemes of a homemade plasma cutter from a welding inverter
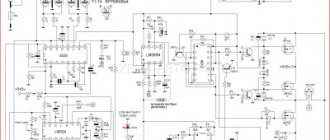
Before assembling a homemade unit, you must familiarize yourself with the drawings. First of all, you need to study the schematic diagram of the plasma cutter device, which shows how the parts are connected to each other.
The schematic diagram gives an idea of the essence of the installation
You will also need to study the control circuit of a plasma cutter made from a welding inverter with your own hands in detail and carefully. It shows the location of critical controls and buttons on the torch and control unit, and also displays the voltmeter, ammeter, air and pressure gauges.
When using a plasma cutter, it is important to control the temperature and electrical parameters of the installation
Lastly, you need to study the connection diagram of the installation elements. It indicates exactly how to connect the parts of the unit with hoses and cables.
The connection diagram marks the length and cross-section of the wires
Attention! Since a plasma cutter is a complex electrical unit, when assembling a device from an inverter, you need to carefully consider all available drawings.
Machine cost
Making a plasma cutting machine with your own hands is an expensive pleasure, both in terms of financial costs and time.
In addition to plumbing skills, you will need professional engineering thinking and knowledge of electronics and electrical engineering. In a specialized workshop where specialists from various fields work, it is quite possible to build CNC walls. The cost of a homemade machine, taking into account all the costs of purchasing components and paying employees, will be in the range of 600-800 thousand rubles. Buying a machine with the same (approximately) capabilities from a not very well-known manufacturer will cost about 1.2-1.5 million.
Taking into account the fact that a self-assembled machine is maximally adapted to specific needs and is 100% repairable without the involvement of third-party service providers (and expensive ones), this is another argument in favor.
How to convert a welding inverter into a plasma cutter with your own hands
Converting a welding inverter into a plasma cutter involves preparing several fundamentally important parts of the device. They are collected and purchased separately, after which they are connected into the final device according to the existing circuit. The inverter itself, unlike the welding transformer, does not need improvement; when an oscillator is connected, it can operate unchanged.
How to make a plasma torch
The plasma torch is one of the most important parts of the unit. The easiest way is to buy a ready-made cutter that has all the necessary characteristics. But you can also make it yourself from a torch for argon arc welding. This device contains most of the necessary components, including:
- terminals and cable for connecting current;
- sleeve and guides for supplying gas to the nozzle;
- tungsten electrode 4 mm with adjustable position.
When turned on, a jet of ionized gas is formed in the cutter under the influence of air and electric current.
When assembling a plasma cutter from an inverter, the cutter only needs to be slightly modified. To do this you need:
- remove the thin brass nozzle and install a fluoroplastic gasket for insulation;
- install a brass retainer for a copper nozzle on top of it;
- solder or secure the cable for the auxiliary electric arc to the body with a clamp.
A switch is also installed on the handle, which is responsible for switching the homemade plasmatron to cutting mode.
How to make an oscillator
An oscillator in a plasma cutter from an inverter is necessary to ignite the arc and maintain it in a stable state. You can assemble the component yourself, for example, from a microwave transformer. First, the primary and secondary windings are replaced on it and the core is equipped with a cable of the required cross-section, and then a spark gap and an oscillating circuit with a high-frequency capacitor are placed on the board.
The connection of the oscillator in the same circuit with the inverter must be parallel
You can even make a part from an old car ignition coil. But it must be taken into account that assembling an oscillator may require greater knowledge in radio engineering than creating the plasma cutter itself from an inverter. Therefore, the easiest way is to buy a ready-made block.
How to choose a compressor
To form a plasma flow, not only current is required, but also a directed flow of compressed air. The compressor is responsible for it; this element is selected in accordance with the thickness of the metal to be cut. In particular, a productivity of 190 l per minute will allow processing workpieces up to 30 mm, 170 l per minute - up to 20 mm, and so on.
It is best to use a factory compressor, but if you wish, you can take a part from a refrigerator
It is also important to pay attention to the parameters of the receiver. A volume of more than 50 liters is required, otherwise the operation of the plasma cutter from the inverter will be unstable.
Important! The operating pressure of the compressor must be at least 4.5 Bar.
How to choose or make a ground cable and hose cable
The ground cable is responsible for closing the electric arc of the welding inverter, which acts as a plasma cutter, to the part. It must be purchased at a specialized store.
The ground cable for an inverter plasma cutter must end with a metal clamp
An important element of a homemade plasma cutter is a hose that combines several wires and tubes. Its design includes:
- electrical wiring to connect the device to the switch;
- compressor hose with a diameter of 10 mm;
- two electrical cables - for ground and for electrode;
- wire for pilot arc with a cross-section of 1.5 mm.
Particular attention should be paid to the parameters of the electrical cable. The cross-section of the element is selected in accordance with the performance of the inverter and the plasma cutter made on its basis. With a current of 50 A and thin metal pieces, a cross-section of 6 mm will be sufficient; if the insulation on the cable is not PVC, but heat-resistant, the figure can be taken even smaller.
A wide hose allows you to compactly close the entire cable system of the inverter plasma cutter
You can buy a cable hose ready-made, or you can make it yourself from a water supply hose. Wiring, a flexible oxygen tube and an electrical cable are placed inside it.
Final assembly
After all the parts of the plasma cutter are prepared, all that remains is to connect them. They do it like this:
- the air hose is secured to the compressor receiver;
- cables for the electric arc, cutter and ground are connected to the corresponding terminals on the welding inverter;
- connect the switch on the control unit and the plasma torch with electrical wiring.
Before turning on the device for the first time, it is recommended to check the correct connection according to the diagram and make sure that the fastenings are secure.
Functionality check
A fully assembled plasma cutter from an inverter must be tested before attempting to perform specific work with it. For this:
- power is supplied to the welding inverter for ten minutes;
- after the period has expired, turn it off and check whether the device has warmed up;
- if the result is positive, turn on the compressor;
- when the receiver is full, open the air supply valve and send the flow through the plasma torch;
- press the switch button on the cutter handle and excite the auxiliary electric arc;
- When plasma is supplied through a nozzle, a test cut of a metal workpiece is performed.
For the first time, the part to be cut should be thin and with minimal density. But in general, a video about a do-it-yourself plasma cutter using an inverter shows that a properly designed device will be able to cope with workpieces up to 10 mm.
For the first time, you cannot use the plasma cutter for a long time; after starting it, turn it off and check the degree of heating
Recommendations for work
Plasma cutting technology drawing.
When working with a plasma cutting machine, to achieve the best results, you must follow the following recommendations:
- regularly check the correct direction of the gas plasma jet;
- check the correct choice of equipment in accordance with the thickness of the metal product;
- monitor the condition of plasma torch consumables;
- ensure that the distance between the plasma jet and the workpiece is maintained;
- always check the cutting speed used to avoid dross;
- from time to time diagnose the condition of the working gas supply system;
- eliminate vibration of the electric plasmatron;
- Maintain a clean and tidy work area.
