Art Studying
Rough molding into plaster
Let's consider the process of "rough" molding into plaster. That is, the technology for creating the simplest plaster mold, followed by casting.
“Roughing” is called molding from a model sculpted in a soft material, with the aim of transferring the model into plaster or another material convenient for subsequent finishing.
In contrast to “finishing” molding, which is carried out, as a rule, from a finished model made of gypsum or other hard material, with the purpose of further transfer to other materials, casting of a run (of several pieces or more), etc.
Simply put, the sculptor sculpted something in a soft material (clay or plasticine), but in this form the sculpture can neither be stored nor displayed - it is easy to dent, and the clay also dries. Consequently, it is necessary to transfer the sculpture into another material, one in which the sculpture can, firstly, be preserved, and secondly, if necessary, modify it.
The most traditional material for these purposes, dating back to the times of Ancient Egypt, is gypsum.
Of course, you can immediately convert the sculpture into other, more durable materials, especially if there is practically nothing to finish, but the essence of the molding operations will not change.
The area where you will be molding can be covered with plastic film. It is advisable to cover the floor and surface of the sculpting machine, work table, or just a stool on which you are going to mold with the same film. These useful actions will significantly reduce the scale of subsequent cleaning.
In the examples below, the portrait and half-figure will be molded "in two pieces", that is, the mold with each of these sculptures will consist of two parts, or, as they say, "pieces" or "shells".
The front, most part, of the mold is obviously not removable, so at the very end of the process, in order to remove the finished casting, the mold must be carefully broken. Therefore, this forming and casting process is also called “chopping”.
First you need to decide where the boundaries of the two parts of the form will be.
The form must be able to be disassembled and removed from a model made of soft material. Therefore, one of the parts is most often made slightly or noticeably smaller, so that when disassembling the mold it can be easily separated.
The remaining part should have a large enough open part through which it will be possible to a) clear the mold of clay and b) visually verify that there is no clay left in the mold and that the entire surface has been treated with a release agent.
So, having placed in front of you a sculpture in a soft material, you need to determine where the boundaries of the parts will be, you can, if desired, outline the outline with a sharp tool.
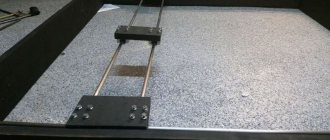
Then, along the intended trajectory, it is necessary to set the sides from thin metal plates.
In this case, we use plates cut from thin sheet copper for this purpose. If possible, ensuring that the gaps between the plates are as small as possible.
If desired, you can go over the plates with tape and thus make the surface of the side smooth, without gaps.
Then the next stage begins - the actual creation of the plaster mold. When molding into splits, the first layer of the mold is tinted. This is done so that when you reach it when splitting the mold, you must act more carefully - the casting will already be located behind it.
To tint plaster, it is convenient to use some inexpensive dry pigment.
It is undesirable to use any paints, such as gouache, because... the plaster may not set or gain strength.
To mix the plaster, including the first (colored) layer, we will need a container, preferably with flexible walls, such as a plastic bucket or rubber ball. This container is easy to clean later.
It is advisable to dilute the colored pigment separately in a small amount of water and mix thoroughly.
To mix the plaster, use cold water. The ratio of water and gypsum by volume is 1.5-1.75 parts of gypsum to 1 part of water.
Water is poured into the container, then the diluted pigment is added, then plaster is poured.
The plaster is given the opportunity to soak in water (1-2 minutes) and then thoroughly mixed.
An option for determining the proportion between water and gypsum is to pour gypsum into water until a small “island” appears. But in order to more clearly understand the proportion obtained in this case, it is better to first measure the volume with two cups (one for water, the other for plaster), noticing at the same time what size the “island” is obtained with a larger or smaller proportion. After a while you will be able to knead by eye.
The development of a sense of consistency of the mixture is also greatly facilitated by mixing with your hands, while you can control the absence of lumps.
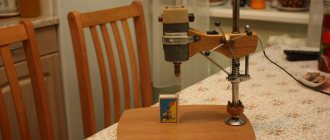
For mixing small volumes, it is convenient to use your hands or a special spatula; for large volumes, it is convenient to use a traditional whorl in the form of a cross, stuffed onto a long handle (picture below), or an ordinary modern metal whorl inserted into a drill, as is done on construction sites for mixing mortar. If you buy such a whorl, it is better to take a rarer version - twisted in the opposite direction, when rotating which the solution will not rise (as is more convenient for concrete), but, on the contrary, will be directed to the bottom - in this case, there is less chance that if you press it carelessly When you press the drill button, you and the entire surrounding area will be in plaster.
Before applying plaster, the surface of the clay work must be sprayed with water from a spray bottle. The gypsum spreads better over a surface moistened with water and fills all the unevenness. Applying plaster to a surface that has not been wetted with water can cause the clay to absorb water from the plaster applied to it, causing bubbles and voids to form on the surface of the mold. In addition, plaster devoid of some water becomes very porous, and this leads to the fact that the release agent is very strongly absorbed into the surface of the mold and the mold can be difficult to separate from the casting. At the same time, the water must have time to drain from the surface of the clay so that the gypsum does not liquefy due to it.
Let the plaster thicken to the viscosity of kefir and spray the surface of the sculpture, trying to get the plaster into all the grooves and crevices.
This stage is called "splashing". Its task is to ensure that the plaster reliably covers the entire surface, leaving no bubbles or empty spaces. To do this, in critical places you can lightly blow on the surface of the plaster, thus expelling possible bubbles.
If the entire surface is covered, wait a little. Gradually, the gypsum we diluted thickens, and we apply a thicker layer over the “splash.” We remember that plaster that begins to thicken cannot be stirred again, otherwise it will “rejuvenate”, that is, it will not be able to set.
It is important to try to ensure that the color layer lies more or less evenly, without places that are too thick (more than 1 cm) or too thin (less than 3 mm). Places that are too thick make the idea of dividing into layers for easy splitting pointless. Places that are too thin can break off from the outer, white layer in the most critical places, severely damaging the future plaster cast.
It is advisable to quickly cover the entire surface with gypsum, avoiding the formation of matte areas before a layer of at least 3 mm has been built up. The dullness of gypsum with a small thickness indicates that the clay has absorbed water from the gypsum. This can lead to the fact that if the mold is not well lubricated from the inside, this layer will be difficult to separate from the casting.
In order for the splitting of the form to occur in layers (first the top, then the color), there must be adhesion between the layers, but it must be weak.
For this purpose, it is advisable to walk the surface of the colored layer with thinly diluted (to the thickness of milk) clay. Thanks to this, adhesion to the next layer will be achieved mainly due to surface unevenness.
Some masters, for example D. Broido in his book “Guide to the gypsum molding of artistic sculpture” (“Art”, 1937) advise coating not the entire surface of the colored layer with liquid diluted clay, but only the protruding and most critical places, but to the required, weak degree adhesion of the colored and subsequent layers is achieved through proper work with the consistency of the gypsum - the next, non-colored layer of gypsum should begin to be applied when it begins to thicken.
As you can see, we are not covering the edges; they still need to be one with the next layer.
In the example given there were no sides, that is, the form will consist of one piece. This can be done if you are confident that all the clay can be removed through the lower open part.
And here are more examples of smearing with liquid clay the middle part of the colored layer, or only the protruding and most critical parts, as some authors advise.
For these purposes, it is convenient to dilute the clay in a small glass until it becomes milk or cream.
After waiting for the clay to dry, we apply the next (not colored, just white gypsum) layer; it should be 2 to 5 cm thick, depending on the size of the mold. Some authors advise strengthening it with reinforcement (wire). Some people lay pieces of wire directly onto the colored layer before applying the white. Someone is in the process of applying white. Personally, I have no confidence that this should be done. On the other hand, when splitting a mold, pulling out parts of the reinforcement greatly simplifies and speeds up the process of splitting itself.
It is also advised to start applying the white layer when it begins to thicken, then the adhesion between the layers will be quite weak and you can even do without coating with clay. At the same time, of course, you need to have time until the plaster begins to set; we remember that you cannot knead the setting plaster, otherwise it “rejuvenates” and cannot set.
It is important to ensure that the outer layer is not unexpectedly too thin, especially on protruding parts such as the nose. During further cleaning and washing of the mold, thin places may be accidentally pressed through and holes in the mold may form in these places.
It is also important to avoid voids between the colored and white layers, since this, when processing the mold from the inside, can lead to shedding of the colored layer and, accordingly, damage to the casting.
To obtain a uniform second layer, you can first lay plaster around the perimeter, creating a kind of frame of uniform thickness, and then apply plaster not randomly, but moving from the edge and maintaining the thickness.
The proportion of gypsum to water in the white layer should not be stronger than in the first layer, but rather a little weaker. A stronger second layer may crack as the plaster sets.
After waiting for the layer to set, turn the work with its back side towards you and carefully remove the plates. In this case, you must pull carefully along the edge of the mold, so that the gap from the plates does not widen.
If on the opened edge of the mold you can see differences in height from unevenly aligned plates and the shell (empty spaces) - don’t be upset, just all these defects will need to be covered up with clay a little later to prevent the back half of the mold from catching on the front.
Then we remove the sides, trim half or slightly less of the opened edge of the plaster mold with a knife and cut out holes for better fixation of the parts of the mold to each other. All this can be seen in the photograph.
Some craftsmen place the plates especially carefully and do not remove them during molding, and make the edges of the plaster mold wider than the plates. In this case, semicircular recesses are made on the part of the mold protruding beyond the edge of the plates.
We lubricate the edge of the plaster mold with liquidly diluted clay, if necessary, we fill with clay the existing shells (voids) in the side of the mold, if there are hooks from differences in height between the plates, we also fill them and stick clay “wedges” - we will need them to open the mold.
Then we dilute the colored plaster, let it thicken to the state of kefir and make a splash, after the gypsum has thickened a little more, we finish the colored layer, let it set, coat the protruding parts with liquid clay, let it dry, apply a white layer, 2 to 4 thick cm.
Since clay work tends to dry out, all shaping should be done within 2-3 hours. In reality, everything happens faster, but if the form is large and complex, the task should be to cover the surface of the clay with plaster as quickly as possible, at least a colored layer and a little white, and then build up a sufficient thickness of the white layer. In my practice, there was a case when two novice molders for some reason molded a multi-part mold from a clay work for more than one day, but they forgot about the need to constantly maintain the moisture of the clay. Accordingly, the mold was made, and the work gradually dried out... When the future molding masters disassembled the mold and made a test casting, they themselves and all their colleagues were quite surprised 
After half an hour or later, you can begin to open the form. To do this, we prepare wooden wedges and carefully begin to hammer them into the places where clay “wedges” stick out at the joints of the mold. If, when applying gypsum from the back side, part of the plaster gets on the front side and the joint between the front and back sides becomes invisible and the form may not open due to sagging, all these sagging can be cut off with a knife (wet plaster is easily cut), or using molds larger ones - with a small hatchet. When cutting away the beads, the joint line becomes visible due to the fact that the edges of the front side mold were painted with liquid clay. This advice is also relevant if, for some reason, clay “wedges” were not made and wooden wedges have to be driven directly into the joint of two parts of the mold - then this joint, of course, should be visible.
We hammer in a little and everything in parallel, then pour water on the pegs, wait for them to swell and begin to open the mold. You should not act too hastily - too much force can cause the mold to crack.
If this suddenly happens, don’t despair, it’s just advisable to notice it in time and if only part of the mold starts to come off, try to return it to its place, so that the edges of the crack are connected as much as possible. After this, you need to dilute the plaster, moisten the cracked area with water and apply a bun 1-2 cm thick and 5-7 cm wide to the sides of the crack. You can also insert a piece of plastic or metal mesh into the plaster as reinforcement. Then you need to wait until the plaster sets (heats up and begins to cool) and continue opening the mold slowly and carefully, trying not to put stress on the cracked area.
When a gap forms, carefully, without sudden movements, separate the parts of the form, if necessary, helping yourself with a chisel or spatula.
If, despite all attempts, the form still does not open, you should not try to open it using rough and sharp actions - it will be so easy to damage it. It’s better to check once again that the shape of the pegs matches (maybe they are too narrow and are simply making their way, instead of carefully pushing the halves of the form apart), water again, carefully and evenly hammer in all the pegs on all sides.
Also in such a situation, you can dismantle the base of the frame and give yourself access to the lower, open part of the form. Next, turn the mold over with the open part up, gradually pour in water, soak it and begin to remove the clay. It could also happen that there are unevenness on the surface of the back of the work, even minimal hooks, and the clay has become too dense (due to insufficient watering during the creation of the work) and cannot come off. If the neck of the mold is wide, you can remove a significant part of the clay before opening the mold, and this must be done anyway. If the neck is narrow, pouring water into it will gradually soften the clay. After some time, you need to try to open the form again.
If, during the process of opening the mold, the necessary pieces still come off from it, you need to collect them and mount them back, either by carefully connecting them and sticking a plaster bun on the outside, or after cleaning and drying the mold, glue them with second glue.
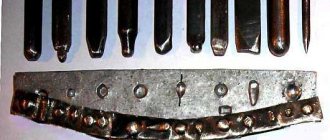
Then you need to clean the mold from clay/plasticine. We do this with a loop stack, a wooden stack and rinse the mold with water and a brush.
If you need to remove a lot of clay or plasticine, then it is convenient to do this with a loop stack, provided that it is strong enough. In this case, you need to act carefully so as not to cut off the parts of the form protruding inward.
When the bulk is taken out, it is better to switch to a wooden stack.
If it so happens that the clay has become very dense and is difficult to remove (as a rule, due to the fact that the work was carried out for a long time and was rarely watered), you can soften it by soaking it in a bath. It is advisable to ensure that clay and pieces of gypsum do not clog the drain.
In a similar case with plasticine (if it is difficult to remove due to its hardness), you can warm it up with a fan heater.
When removing plasticine, prying it from the sides, you can remove almost all the work at once. When removing the frame, you must pull carefully so as not to catch the frame wire and damage the shape.
When the mold is cleared of clay, it must be washed completely, carefully rubbing the rough edges and indentations with a brush. Alternatively, you can do this in the bathtub, remembering to avoid clogging the drain.
The purpose of touching with a brush when washing a mold is to pry up the clay so that a stream of water can remove it, and not to subject the mold to friction. Excessive friction easily leads to distortion of the shape.
If further work cannot take place on the same day and the form must be stored for some time, it is recommended to assemble it and tie it tightly with rope or tape. If this is not done, parts of the mold, being raw and stored separately, may bend slightly (raw plaster parts may bend under the influence of gravity), each in its own direction, and later, when assembling the mold, cracks may be found.
Next, to prevent the casting from sticking to the mold, the entire surface of the mold from the inside must be coated with a release agent.
One of the traditional options for a release agent:
The surface of the mold is covered with liquid soap several times until the soap stops being absorbed. Then it is covered with a thin layer of vegetable oil or Vaseline.
The basic principle when lubricating a mold with any composition is that the entire surface, without exception, should be coated with as thin a layer as possible. A thick layer of lubricant, especially deposited in the recesses of the mold, can greatly damage the casting.
In the old days, for these purposes, the inner surface of the mold was sprayed with “lye” (a strong decoction of birch ash), as it gave the thinnest separating film. To ensure that the molds lag behind the casting in this case, the mold was saturated with water in excess. New plaster no longer sticks to a plaster surface that has been wetted in excess. Cases are also described when an over-wetted mold lagged behind the casting without any lubrication. Naturally, it’s better not to take risks in your first molding experiments. But experimenting with the adhesion of gypsum to surfaces of different humidity and thoroughly soaking the mold with water is certainly useful.
Modern release agents in aerosol packaging deserve attention - spraying the surface of a mold, especially a complex one, with an aerosol is much faster than carefully covering it with a brush. It is fundamentally important that before using any of these compositions on the surface of the mold, be sure to conduct an experiment on any piece of plaster.
The parts of the form are connected, tied with rope; if there are cracks at the joints, they are filled with clay. Or you can simply fasten them with plaster, placing it on the outside at the joints, 5-8 cm wide.
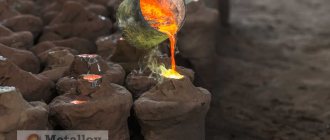
The mold is then turned over, set firmly and filled with plaster.
After mixing the gypsum, remove the foam from its surface with a spatula. The plaster is poured into the mold in a thin stream along the edge of the mold - this also reduces the number of bubbles on the casting.
If you need to get a hollow casting, gypsum is poured to about a third of the volume and the mold is placed almost on its side and turned so that the gypsum gradually settles on the walls, then the gypsum is poured back into the mixing container. Then the mold is not completely filled in again and the process is repeated until the plaster begins to thicken. The remainder of the plaster is smeared along the edges of the hole and these edges are leveled with a spatula along the edge of the mold.
If it is not possible to achieve the required thickness in one batch, a second and sometimes a third portion of gypsum is mixed. In these cases, the solution is mixed weaker than for the first (outer) layer, otherwise the casting may break.
15 minutes after pouring or later, you can start chopping. This must be done carefully, using a chisel or chisel and a mallet or hammer. The blows must be directed not inside the mold, but tangentially, so that the mold is destroyed and no force is transferred to the casting. The tool should not be too sharp, since its purpose is to split, not cut.
If possible, you should first remove the top (white) layer of plaster, and remove the tinted one more carefully. However, in practice, often in some places the plaster can be removed immediately, exposing the casting. In this case, it is advisable to still try to remove the top white layer in other places first.
Because chopping takes some time, the person performing it becomes tired and may become less careful, and may be tempted to hit harder and more often in order to complete the process as quickly as possible. At this moment, the person loses caution and hits the sculpture through the form - either making a notch on the sculpture, or chipping off part of the sculpture along with the form.
It is good if the color layer was applied at a more or less uniform thickness. Then you can quickly get used to striking with the required force and not hitting the casting. Of course, this will work if you have the patience to remove all the white layer first when chopping.
It is advised to start chopping the colored layer from some convex and smooth part of the sculpture.
When you approach the surface of the sculpture during the chopping process, you should slow down and remember that even if the work is completed half an hour later, nothing bad will happen. And in any case, restoring the “cut” surface of the sculpture may take much more time.
When chopping very small things, the outer layer is gradually cut into squares and carefully chopped off with a knife. Do the same with the colored layer, increasing caution.
If the sculptor does not shape and hammer out himself, but turns to professionals, “shapers” for help, this is, on the one hand, good, because a good shaper will carry out the entire process of molding and casting much better, although he will charge a lot for his services, but you need to make sure that the same shaper, if it does kill the mold, in no way tries to disguise it (plaster it with plaster or, as they say, “flind it” ) on your own, because What would be “normal” and “smooth” in the eyes of a non-sculptor may mean a complete loss of shape in this area for a sculptor.
You need to work especially carefully and without haste when approaching small parts, because if something is accidentally knocked off and flies into the mass of fragments of the mold, you may never find this part and will have to patch it up again.
In this regard, the following case can be cited...
In one of the sculpture factories located in Moscow, the sculptor asked one molder to mold and cast a small figurine of a seated Pushkin. The shaper carried out the work successfully, but when the time came to break up the mold, he was already somewhat “under the weather” (which is generally typical for shapers and other workers of our vast Motherland). And Pushkin had a top hat on his head. And the shaper accidentally knocked it off and didn’t notice where it flew off (the sculpture, I remind you, was small). I searched and searched for him among the fragments, but did not find him. As a result, without hesitation, the resourceful shaper took some plaster and created a hairstyle on Pushkin’s head as best he could.
The sculptor came to accept the work, did not notice anything, paid and took Pushkin away.
After a while he comes running and asks:
- “Where is the cylinder?”
“What a cylinder,” says the formator, “there was no cylinder!”
- How could it not have happened when it was! Where did you put the cylinder?
- Yes, there was no cylinder. When you brought me the sculpture, there was no top hat on it. I molded everything as it was.
- Why don’t I remember my work, or what? You must have lost it during the chopping!
- No, there was no cylinder, there was no, there was no, there was no! — the formator never confessed.
The seams can be cut with a knife immediately while the casting is wet, or later, after moistening it with water.
On a casting freed from the mold, bubbles are usually present in small (and sometimes large) quantities, and sometimes there may be casting defects (unspilled areas). To seal large (from 4 mm) defects, it is convenient to use gypsum. For these purposes, gypsum is diluted very thinly (1: 1 or so), and the embedding site is heavily moistened with water. If you try to fill the missing places with gypsum of normal consistency or do not sufficiently moisten the casting itself with water, then the main mass of the casting will instantly draw water from the newly applied plaster, which in turn will become very hard, inconvenient to handle, and if more force is applied, it will easily chip off in a whole piece. Having applied weak plaster to the dampened area, it is best to give it the desired shape as soon as it begins to thicken.
For smaller holes it is more convenient to use putty, for example Maxi, or other “finishing” construction putty.
The same recommendations can be applied not only to sealing casting defects, but also to cases of further refinement of the casting already in plaster. If you need to cut something with a knife, and the casting has already dried and become hard, then the desired place can be moistened with water using a brush. And in this regard, one interesting factor should be voiced that sometimes awaits a beginning sculptor - this is the desire to receive a plaster casting, smooth it all out and polish it. Despite the fact that the same places, while the work was in clay, did not cause concern at all with their “roughness”, but looked quite natural. But something happens in the plaster, the perception changes, and at this moment you can sometimes literally ruin the work by starting to smooth and lick everything, which is why the sharpness and liveliness of the form and surface can be lost. Subsequently, if the work is transferred, for example, to bronze or simply tinted in any shade, the perception changes in the opposite direction - unevenness and roughness cease to irritate, and again begin to be perceived as natural manifestations of the sculpting process, which do not necessarily need to be hidden in any way in order to achieve a smooth surface. Therefore, a novice sculptor can be advised not to rush to smooth out his work, but instead, try to tint, first roughly and approximately, and thus understand how it will really look.
The finished casting can be tinted in any color if desired.
What to do with her next?
If a work is valuable and successful for you, you need to protect it, using it as a model. And for further sale, gifts, etc. use plaster copies removed from it, or copies converted to another material.
Oleg Toropygin
PS And for those who are really interested in the technology of molding into plaster, we can recommend getting or finding this book in electronic form - D. Broido “Guide to the gypsum molding of artistic sculpture”, published by the publishing house “Iskusstvo” back in 1937...
The article is aimed at beginner sculptors and molders, if you have something to add, you can send your valuable thoughts to - Email address is being protected from spambots. Javascript must be enabled in your browser to view the address.
How to make gypsum mortar
- The easiest way is to dilute plaster with water in a ratio of 7 to 10.
- An important point: first, water is poured into the container, and only then gypsum powder is added.
- In this way, the entry of gypsum dust into the respiratory tract is minimized.
- The strength and ductility of the solution can be varied using PVA glue or slaked lime.
- Before pouring the solution, you need to lubricate the mold so that you can easily remove the craft later.
There are many lubricant options:
- Silicone,
- Wax,
- Stearic.
Also use soap solution or kerosene. For small crafts, vegetable oil is often sufficient.
Plaster and fabric products
The main ways to make crafts from plaster with your own hands have already been described above. But if you use fabric in your work, the possibilities become wider.
- This method is perfect for children's creativity: wrap an inflated balloon with a rope soaked in a plaster solution. After drying, pierce the base and pull out its parts. The result is a ball that can be decorated as a Christmas tree decoration, as a piece of fruit, or even as a lampshade.
- Fabric will make excellent vases for your cottage and garden. To make them, simply turn the bucket upside down, wrap it with wire, creating a frame, and then wrap it with strips of fabric soaked in plaster.
There is also room for original creativity - creative flower pots. They are made using a large piece of canvas, which, after bathing in plaster, is simply placed on a bucket, basin or stool, without the ends reaching the floor. After drying, the resulting vase looks like a crystal or stalactite.
Crafts made from plaster are really simple, fast, budget-friendly and fun.
In addition, working with your hands and creative activities have a positive effect on the nervous system of adults and children.