People who want to become tourists should be well prepared for their first backpacking trip. Regardless of where a person is going to go, he needs a standard travel kit. This set should include a camping axe.
You can, of course, take a hunting ax, but it is better to take an ax for tourism; ideas on how to make an ax for tourism with your own hands can be found in various sources.
Use of a tourist ax
Such a travel tool is needed for various purposes, let’s look at which ones specifically.
When to make tent pegs. If you go into the forest for a short time, then this procedure is not needed, but if you decided to go on a long hike, then this procedure is already necessary. This process requires a camping axe.
Driving in manufactured pegs. Now the pegs are ready, but they need to be driven in, and again the ax will help. And you need to drive them in so that the tent stands well on the ground.
Cutting branches. A trip to nature is accompanied by lighting a fire; a camping ax is suitable for chopping branches for a fire. Especially if you go on a long hike.
The types and sizes of tourist axes can be completely different. They are suitable for different purposes, for example, a small camping ax is suitable for preparing stakes, but for chopping branches, a large ax is needed.
Cooking food. If a person or a group of tourists goes on a very long hike, then it is important to make and look for food; a small tourist ax will help chop the carcass of a killed animal. Which tourism ax to choose can be decided after a lot of information has been analyzed.
Work process
Materials and tools for work
Handmade axes require at least basic plumbing and carpentry skills. We will make a DIY Viking ax from a simple ax that can still be used to chop wood. For this we need:
- A block of wood. No, regular pine or spruce will not work. Below is a list of acceptable breeds. There is one requirement for all of them - there must be longitudinal fibers, not transverse ones.
- Paper with pencil for sketch.
- Wedges.
- Varnish or oil (linseed, tung, teak).
- A small piece of leather or leather substitute.
- Ax blade. Any one will do, even one that is corroded.
From the tools:
- Angle grinder.
- Welding machine. Regular MMA welding is sufficient.
- Grinding machine.
- Bormashinka.
Separately, we need to talk about the tree. We will need a little bit - a 40x40 block. But what breed? There is a choice:
- Beech. In principle, inexpensive and beautiful material. Of all hardwoods, it is the cheapest. The only thing that needs to be taken into account is the intensity of moisture absorption. It needs to be covered with a thick layer of oil.
- Oak. Probably the best material for a handle. Strong, durable, reliable.
- Maple. Its advantage is elasticity. Where oak cracks under stress, maple will remain intact. By the way, one of the most beautiful types of wood.
- Ash. The hardest rock of the list, and inexpensive.
Now we can make a Viking ax with our own hands.
Cleaning corrosion
It will also need to be divided into several stages. And the first of them is cleaning:
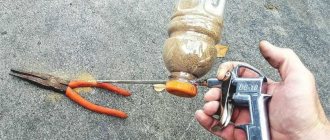
- Before you make an ax handle with your own hands, you need to remove the old one. The easiest way is to knock it out. We cut straight along the beard of the blade and knock it out using a chisel or drift.
- Now let's move on to processing the blade. You need to remove the rust from it using a grinder. For this, a regular petal circle is enough. We'll do the polishing later.
- Now we look for cracks and grooves on the blade. If there are any, we simply brew them and clean them with a grinder. There is nothing complicated here.
Ax is a universal weapon
In addition to the fact that the ax can be used for various purposes, which were described above, this tool is a melee weapon.
There is a known case when a soldier with one ax in his hands dispersed a large number of opponents. This incident occurred during the Second World War. Therefore, the ax also performs a protective function; it can be used if there is any danger to a person’s life.
Adviсe
There are quite a few subtleties in the process of performing each operation. You should pay attention to the main ones:
- cutting metal will take a long time due to its thickness;
- be sure to wear personal protective equipment; Viking battle axe.
- when shaping the ax handle, you should perform cutting movements away from you;
- work with paint and other toxic substances should be done outside or in a well-ventilated room;
- It is advisable to use a welding machine that is in working order;
- Applying patterns requires considerable perseverance and time.
The rest will become clear as we work.
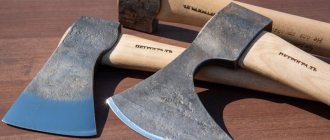
Sharpening an ax
If you plan to go on a hike for a medium period, for example, a week, then it is important that the ax is suitable for such trips. Its weight should be 600 grams, and the ax handle should be about 70 centimeters.
If you need examples of what a tourist ax looks like, you should look at photos of axes for tourism on any specialized website.
If a person plans to chop down the carcass of an animal every day like a hunter, then he needs an ax with a blade that is sharpened to a razor sharpness. The weight of such an ax should be 600 grams.
Ideally, the ax is sharpened at an angle of 20 degrees, this makes it possible to make the ax as sharp as a razor blade.
Making a form
Now we must give the desired shape, also according to the instructions:
- On the blade we draw a contour according to this template. If there is no printer and there is no way to transfer the form, then you will have to work according to calculations. We retreat a centimeter from the top of the butt and put a dot. Now we draw a straight line from the selected place to the toe. We also step back a centimeter from the heel and make a mark. We apply any round object so that it simultaneously touches the selected point and the beard. Let's circle.
- How to make a Viking ax straight? Is it not so easy to cut a circle by hand? We draw rays along the inner circle and cut along them. Now we cut out the circle.
- All that remains is to polish it. We take special grinding attachments for the grinder and polishing pastes. Cheap ones include GOI or diamond pastes.
Hardening
A handmade ax must be hardened and this is best done using technology. The metal can be burned, causing it to become brittle due to carbon burnout. In general, everything consists of 3 stages:
- Annealing. It is necessary to remove the tension from the steel, which is there in any case. This is easy to do - heat it to 760-800 degrees. The metal will be red-burgundy. Then we put it on a brick and let it cool. Next we remove the scale.
- Hardening. A much more complex process. Initially, prepare 2 buckets of water. One contains water, the other contains oil. Anything will do, including working off. Heat the blade to 830 degrees and lower it 4 centimeters into the water for 5 seconds. Then completely lower it into the oil. Don't forget to make circular movements to knock down air bubbles.
- Vacation. After hardening, the steel is hard but brittle, like glass. If it falls, it will simply break and need to be released. You need to heat it to 200 degrees and let it cool slowly with the oven for an hour. Even a regular oven will do.
By the way, you can harden an ax from rails or reinforcement in the same way.
Now the blade can be sharpened. There is no point in doing this in advance, since heat treatment will remove the cut anyway. Moreover, the blade can also lead.
Sharpening an ax is a simple matter. We take a grinder with an abrasive disc and try to maintain an angle of 20 degrees.
Making an ax handle
How to make an ax handle with your own hands? Very simple, you only need a block, a marker or pencil, a bow saw, chisels and sandpaper.
We take the sketch of the ax handle and apply it to the block. Cut out the handle along the contour. We remove sharp corners with chisels and round them with sandpaper.
Now you can decorate it. We apply the design to the ax and cut it out in any convenient way. This could be wood carving or engraving.
Adjusting the ax handle to the blade
There is only one thing left - to connect the handle and blade. How to place an ax on an ax handle correctly? According to the instructions:
- The head of the ax is adjusted to the size of the hole in the blade. To do this you will need a saw and sandpaper. There is nothing complicated about this.
- After fitting, if it fits correctly, it's time to wedge. If we make an ax from reinforcement, the hole is made at our own discretion.
- We make cuts at the end of the planting. A simple option: 1 longitudinal cut and 1 wedge. But it's not that effective. The optimum is a cross. 1 longitudinal and 1 transverse cut. Wedges are cut into them according to size and driven in with a hammer. Professionals say that it is better to make wedges from the same wood.
- We saw off the excess with a saw.
Main components
When making and choosing a weapon, its future owners are often faced with the question of how to calculate the mass of a taiga ax. To do this, you need to focus on its components and compliance with certain proportions between them. On average, the weight of the product does not exceed 1 kg; its main components are a wooden ax handle and a metal head. The main elements are shown in more detail in Figure 2.
Figure 2. Main components of the product
The weight of the taiga ax handle and its length should be proportional to each other. The optimal value for everyone is considered to be equal to the distance from the wrist to the shoulder joint, provided that the shaft is fully grasped by the hand, in order to avoid injuries. 50-55 cm is enough to work for a long time with one hand or chop something with two hands.
How to select and prepare wood
The choice of material and the features of its preparation affect the final strength of the ax made by hand. Only hardwood is suitable for the handle. It must first be dried in a special chamber or left in a dry place for a long period. Carpenters place the preform material in the attic, where it sits for many years. If the wood was purchased at a building materials warehouse, then the cut prepared for the ax handle must be dried at home or in an apartment for 2 months on a radiator or near a stove - the humidity inside should not exceed 8%. The best types of wood for making an ax:
- ash;
- hickory;
- beech;
- oak;
- Jatoba;
- birch;
- maple.
Tools and materials
When the material has dried, you need to inspect the workpiece for the presence of knots or cracks - such areas cannot be used. If the cut is large enough, they can be cut off and removed during processing. Otherwise, the wooden blank is simply replaced. To complete the work of making an ax handle from harvested and dried wood with your own hands, you must first prepare the following set of tools:
- carpenter's axe;
- oblique carpenter's knife;
- chisels of different sizes and shapes;
- a set of files and needle files;
- wood hacksaw;
- drawing supplies;
- sandpaper or sandpaper;
- calipers;
- hammers of different sizes;
- square;
- centimeter.
Attention!
If immediately after installing the ax in place it is planned to apply a protective coating or anti-corrosion impregnation, a brush or sponge is included in the tool kit. You also need to supplement the materials with the selected composition.