Bronze is often used in the manufacture of decorative metal products. This material produces attractive products that retain their decent appearance for a long time. Bronze casting is considered one of the most popular foundry processes and has been used for hundreds of years to make various products from this metal. To understand how suitable this material is for casting and how to work with it correctly, you need to have general information about the metal itself and how it is processed.
Bronze casting
Casting steel at home
Elegant replicas of ancient warriors, miniature works of art, bizarre animals and much more are reflected in metal figurines that can be bought at any gift shop. But what if you want to surprise your friend with an exclusive item? This article describes a method for casting metal at home.
Before you start creating this or that fancy shape, you must think through a clear sequence of your actions. Remember the main thing: since you are working with molten metal and possibly open flame, follow all fire safety rules.
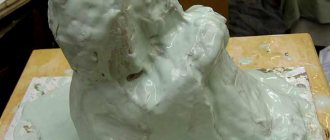
You will need wax (preferably modeling wax), primitive tools (use whatever seems right for you) to give the wax the shape of your figurine. Gypsum, dishwashing liquid (applying a release layer) to create a reusable mold. You also need material to create a flask - a container that holds the molding sand as it is compacted. Figure No. 1, 2.
Figure No. 1 - Molding
Figure No. 2 – Figurine placed in a flask
On the Internet you can find many recommendations on this topic. Please pay attention to the following nuances:
1) If you want to make several figurines, you need a reusable collapsible form. When creating a collapsible form, you will need to provide guides - I have highlighted them in red in the pictures. You need them to ensure that the form always aligns correctly when closing it.
Figure No. 3 - The lower half of the collapsible mold with an installed guide
1- Wax model figurine
The guides must be provided with rhinestones; I recommend filling the lower half of the collapsible mold with plaster, after drying, carefully drill holes and insert wooden rods into them. Then apply a separating layer and fill the second part of the mold, leaving holes for metal and air.
Figure No. 4 – Sectional view of a reusable collapsible form
3 - Sprue for metal;
4 — Hole for air outlet (it is not necessary to make it from the top).
2) Before pouring the metal into the finished mold, it must be well heated to the temperature of the metal.
3) Melt a little more metal than the volume of your figurine - this is necessary so that it fills all the voids in the form. You also need to create pressure using some kind of plug, plugging it into the hole into which the metal was poured, drawing No. 5.
Figure No. 5 - Illustration of the process of pouring metal into a mold
5 - metal is poured through a wide funnel;
6 - air exits through a special hole.
The cork is highlighted in orange, the guides are in red, and the molten metal is in blue.
PS: I tried to clearly show and describe non-tricky tips. I hope that at least something is useful to you. But this is not everything that can be imagined, so go ahead and study the site https://bip-mip.com/
- Reusable plaster moldIf you need to make several identical plaster figurines.
- Electric spark pencil You can engrave on metal with a variety of devices, from pens and...
- Homemade case When you assemble this or that device, it is not enough to purchase it.
- Powder for cleaning metals We all know about the benefits of chemicals in everyday life.
- Do-it-yourself thermal jigsaw For figured cutting in low-melting sheet materials, it is convenient to use this way.
For a long time, men began to think about how to create their own furnace for melting metal at home. It must be portable and meet all conditions. The production facility has furnaces for melting large quantities of metal. At home, you can assemble a furnace for melting up to five kilograms of aluminum. Let's look at how to make a smelter at home.
Equipment and materials you will need
In order to melt metal, you need to buy the following components for manufacturing:
- fire brick;
- nails;
- transformer;
- copper wire;
- graphite;
- mica;
- asbestos and cement tiles;
- gas-burner;
- crucible.
The dimensions will vary depending on the wishes of the person collecting it. It is better to create a small furnace for melting metals if you want to use it only for your needs. You will spend less time making it, and a small amount of kilowatts will be spent heating it. If you do it using diesel fuel or coal, then do not forget about installing thermal insulation and air supply.
Metals such as iron, nickel, tin, and copper are melted in an electric furnace. The output voltage in an electric furnace should be greater, which means the distance between the electrodes will increase. Brushes from an electric motor are suitable instead of electrodes.
Step-by-step instruction
How to make a melting furnace at home - read the following instructions:
- A high-frequency alternating current generator is installed.
- Spiral winding. Made from copper wire.
- Crucible.
All these elements are placed in one housing. The melting cup is placed in the inductor. The winding is connected to the power source. When the current is turned on, an electromagnetic field appears. The resulting eddy currents pass through the metal in the cup and heat it. Melting occurs.
Homemade muffle furnace
The positive properties of an induction furnace are that when melting metals, a homogeneous melt is obtained, alloying components do not evaporate, and melting occurs quite quickly. In addition, the installation of such a stove does not harm the ecosystem and is safe for the user.
Forming tools and casting fixtures by model
To cast precious metal products at home you will need
- Crucible for melting or cleaning metal.
- Muffle furnace or gas burner.
- Steel tongs.
- Fireproof stand.
- Scales
- Modeling wax. Candle wax will not work.
- Molding sands
- Container for diluting the mixture
- Scalpel, knives and files for processing the model and for finishing the finished product.
- Casting mold
- Hammer for breaking the flask.
- Protective gloves, glasses and apron.
- Fire extinguisher.
- Dremel (mini drill)
- Vices, Crossbars and Mandrels
It’s worth going into a little more detail on making a mold for casting silver. First, a model of the future product is created from wax by sculpting and cutting out small parts with a scalpel, completely repeating its shape, but having a thin protrusion in the form of a round rod.
Wax model for silver casting
This is the sprue that will carry the molten metal into the mold. Next, the model is placed in the flask and the molding mixture is poured.
If dry molding mixture is used, then the vibration compaction method is used for molding. Next, the model wax is burned out, and the mold is ready for pouring the melt.
Mold casting: manufacturing, sand, shell molds
According to historians, the bronze casting is 12 thousand years old. Initially, using this technology, jewelry and simple tools were made from bronze. Over time, this technology has been improved, and today it is a method by which many unique products are created from this alloy.
The current level of development of bronze casting makes it possible to produce various objects from this copper alloy not only in production, but also at home.
Thanks to the invention of bronze, as well as the development of its processing technologies, the main of which is casting, we can still enjoy the sight of works of art that were created by masters back in the Middle Ages and ancient times.
Antique bronze set of writing instruments
Bronze casting, as well as brass casting, another alloy based on copper, gained the greatest popularity in the era of classicism and European Baroque. It was in those days that people learned to use these materials to create unique interior elements and decor.
Such alloys created on the basis of copper are still actively used in the manufacture of:
- items used for interior decoration;
- gates and fences that perform not only a decorative, but also a protective function;
- sculptural compositions and souvenirs;
- bas-reliefs and design elements of lighting fixtures - chandeliers and sconces;
- elements of staircase structures and entrance groups.
Bronze casting for making knife handles
Many of these products, which are not large in size or complex in shape, can be made from bronze and brass not only in production, but also at home.
Stages of artistic bronze casting
In order to perform high-quality casting from a metal such as bronze, it is necessary to adhere to a certain sequence of actions. First of all, you should reflect in the sketch the shape of the product that you plan to cast from bronze.
Based on the sketch, which is created by professional artists and designers at modern enterprises, specialists create a drawing that accurately reflects all the dimensions of the future casting.
It is the drawing that is the basis for making an accurate model, which is used to produce a casting mold.
To create a model of a product that will subsequently be made from bronze by casting, various materials can be used, in particular:
- Ivory;
- wood (in this case, preference is given to such varieties of this material as pine, alder, beech, linden);
- gypsum;
- various types of polymer materials.
The cavities of the wax model of the future figurine are filled with clay, which will be removed after casting
To make the surface of the model as smooth as possible, it is primed, puttied and covered with several layers of varnish. When making a casting model, not only different materials can be used, but also different design approaches. So, models can be:
- detachable (these are complex structures consisting of several component elements that can be connected to each other along flat or complex surfaces);
- one-piece (monolithic models, the simplest type, most often used for casting at home);
- special (this includes skeletal or molding templates used in cases where it is necessary to make a casting mold for the manufacture of objects with a complex configuration).
The next step after creating an accurate model of the future bronze product is the production of a casting mold. For this purpose, special devices and equipment are used, and the main materials used in this case are molding mixtures created on the basis of clay and carefully cleaned quartz sand.
The longest stage of bronze casting is molding - making a casting mold
In such a technological process as casting, made from bronze and any other metal, the casting mold plays a decisive role.
It is into such a mold, the internal cavity of which must exactly repeat the product being cast, that the molten metal is poured, and in it it cools, forming the finished casting.
Foundry molds, used both in production and at home, can be single-use or reusable, which is determined not only by the material from which they are made, but also by the features of their design.
Microcasting at home
A lot of cast parts made of non-ferrous metals and their alloys are used in technology, including quite complex and miniature ones, the serial production of which can only be afforded by enterprises with precision technology.
However, single (or even small-scale) microcasting can be organized at home.
It turns out that modern technology can be rivaled by the ancient method of injection molding using a simple manual centrifuge.
Almost everything that is needed for such micro-casting can be made by hand. Costs are minimal.
Indeed, the flask required for casting in this case is a piece of ordinary steel pipe with a diameter of 50-60 mm and a wall thickness of 2-3 mm. For casting products of different sizes, it is good to have several flasks of different diameters, provided that each one fits freely in the centrifuge bucket. If you have such a set, you can cast a whole series of parts one by one.
A centrifuge matches the flask in simplicity. Its wooden handle has a length of about 200 mm and a diameter of 20-30 mm. An M8 bolt is inserted into the axial hole of the handle. A metal earring is attached to it using a locked nut so that both the handle and the earring rotate easily without interfering with each other.
A bucket for a flask is suspended from the earring on a rocker arm made of 6 mm steel wire. The side of the bucket is made of a 60 mm piece of 80x3 mm steel pipe, and the welded bottom is made of a steel sheet 3 mm thick. The 200 mm high bow is made of the same 6 mm steel wire.
In order to confidently use such a centrifuge, you must first practice a little, remembering how in your school years in the physics room you had to twist a bucket of water on a string while studying centrifugal force.
True, now, instead of string and a bucket of water, in my hands I have a homemade centrifuge with a bucket, on the bottom of which there is a plastic cup (to prevent it from breaking).
But the water in it is ordinary, like it was in school physics experiments. And the action of centrifugal force is similar.
Holding the handle firmly, you need to rotate the entire chain (earring - rocker - bucket and vessel with water) around the bolt-axis, trying not to spill a drop.
Technology for producing high-quality micro-injection molding of non-ferrous metals and alloys using a manual centrifuge:
1 — bolt-axle; 2 - wooden handle; 3 — metal, easily rotating earring; 4 — locked nut; 5 — steel wire rocker; 6— bow; 7 — side of the bucket; 8 — bottom of the bucket; 9 — flask; 10 - molding compound; 11 — wax model; 12 — wax ball with technological wire pins; 13—casting mold with sprue channels, formed after melting the wax and removing the pins; 14—molten metal (alloy); 15 — flame of a gasoline burner; filling the mold with the melt while rotating the centrifuge and subsequent operations for removing and finishing the finished product are not shown
Once you get the hang of it, you can subsequently deal not with water, but with molten non-ferrous metal (or alloy), which will be pressed by centrifugal force through the gating channels into the casting cavity in the flask installed in a bucket instead of a plastic cup.
Perhaps the most difficult and time-consuming thing in micro-casting is the production of a three-dimensional, life-size wax model.
This one is molded from wax by hand, using a heated eye scalpel or a hot darning needle. Even small details are worked out with the utmost care, because molten metal (as well as any alloy) does not forgive mistakes and sloppiness. Moreover, casting, performed in a centrifuge under pressure, reveals all the flaws of the model!
In my practice, I use wax models whose height is no more than 40 mm and diameter is 50 mm. At the same time, I try to maintain proportionality so that the mass of metal in the casting does not exceed 40 g. The limitations are mainly due to the low power of the burner I use for melting.
Subtleties of technology
In order to perform artistic bronze casting or make a practical product from this alloy, it is necessary first of all to obtain molten metal.
Various types of furnaces are used for metal melting: induction, arc, flame, etc.
In the simplest version (when casting at home), you can use a regular gas burner to melt bronze, placing it under a special container for the melt.
The capabilities of small furnaces, which you can make yourself, are quite enough to melt non-ferrous metals and their alloys, which also include brass and bronze.
To melt a small amount of bronze you need a fire brick and a gas burner
The most important step in bronze casting is filling the mold with molten metal. Despite the fact that such pouring lasts only 1–2 minutes, the correctness of its execution directly affects the quality characteristics of the finished product. The result of incorrect filling can be such defects as:
These bronze castings developed cavities due to poor cleaning of the crucibles before pouring.
When casting small-sized brass and bronze products, the molten metal is poured not from the crucible itself in which it was heated, but using a special device used as a hand ladle or spoon.
The metal, which has already been poured into the mold, must be allowed to cool to the required temperature, which, depending on the brand of alloy used, may vary.
The procedure for removing the finished product from the mold depends on what type it is - disposable or reusable. In the first case, it is simply broken with a hammer, and the casting is removed using pliers.
Reusable molds, accordingly, do not need to be broken: they are simply opened along the surface to be joined and the casting is carefully removed from them.
The newly removed casting needs to be reworked. This modification consists in the fact that the sprues, spurs, profits and bays formed during the casting process are removed from the surface of the product. This operation, which can be performed using various mechanical tools, is called trimming.
Jewelry casting at home for beginners
But how are we going to fuse paraffin onto a ring when it is incredibly fluid and unpredictable? It turned out that everything is much simpler. In the process, the master realized that paraffin remains plastic for a long time and can be deformed like plasticine. And so it happened. He simply molded the desired ring shape and continued.
True, it wouldn’t hurt to go through a soldering iron in order to fuse the molded boundaries. But the master decided not to do this. Later on the castings this will appear as a defect, but not so bad that you can’t wear this ring. Now we need to process the molded model.
The master decided to do it with sandpaper, but he doesn’t remember whether it was forty or sixty, but it was definitely very rough. And again for good reason. The fact is that a large grain of sandpaper leaves a deep mark on the paraffin and gives it texture.
Therefore, carefully walking along the front part of the ring with coarse sandpaper, we will leave the resulting texture for casting. Since the paraffin could fail at any moment, the master decided to leave the finishing work to the brass casting.
Master class on making a master model from casting wax. Part two. Casting
I continue my story about a cat who was born from wax, grew up in bronze, and will reach the pinnacle of her career by becoming a crystal glass