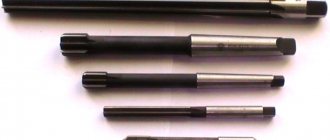
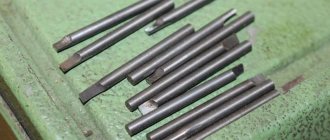
A reamer is a multi-blade tool for a drilling or lathe, designed for final finishing of a hole (countersinking) to the required size, accuracy and roughness. Also used for pre-machining cylindrical holes. Typical reamer sizes make it possible to process surfaces up to 6-11 accuracy grades and up to 6.3-10 microns of roughness (Rz). The main elements of the tool are the working part and the body; the thickness of the removed layer ranges from hundredths to 1 mm.
Manual conical reamer and other types of devices
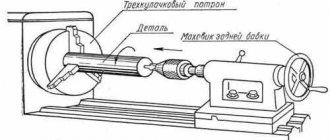
In order to obtain holes with a clean surface, or if a precise fit of the hole is required for some kind of ground part, a process called reaming is performed. It can be done manually or you can use a drilling machine on which reamers are installed. In the first case, during work, a manual conical reamer is rotated with a crank.
These tools are cylindrical, conical and stepped (according to the type of hole they process). In terms of accuracy, they are divided into the following: those indicating quality (for cylindrical reamers), those indicating quality (roughing, finishing and intermediate between them - for conical types). This also includes cylindrical reamers with a calibrated allowance, which are necessary in order to further grind the tool to the desired size. And the last type in this group is adjustable reamers.
According to the way they are clamped, they are divided into:
- manual (they have a square tail for a knob),
- machine (with a cylindrical or conical shank),
- attachments for machines (installed on a special mandrel, as a rule, needed for large tools).
The working part of this device has cut teeth, usually from 6 to 14, along which there are grooves that form cutting edges.
The part that is located at the bottom of the reamer is designed to remove chips, and the part at the top, called the calibrating part, can launch the tool in the desired direction to completely calibrate the holes. In general, a tool is needed in order to ream tapered holes. The allowance allowed during the roughing stage of work is no more than a fifth of one millimeter, and for the finishing stage it is taken equal to a tenth of a millimeter.
Ream size
A countersink is a universal tool that provides the ability to process holes within certain diameter limits due to the possibility of adjustment. The diameter range depends on the size of the tool itself. The larger the diameter, the higher the adjustment range. This is convenient in cases where it is not possible to select the exact size of the cone drill. The size of the countersink is indicated by a fractional number and is selected depending on the parameters of the workpiece hole and accuracy requirements.
Depending on the design of the tool, reamers are available in the following diameter range:
- cylindrical - from 3 to 50 mm.
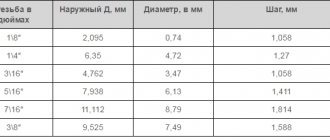
- conical - from 6.39 to 40.9 minimum diameter, from 7.6 to 45.7 maximum.
- machine - from 34 to 50 mm external, from 13 to 22 mm internal.
Deployment - what mistakes should not be made?
To obtain the cleanest possible surface, as well as to cool the tool during operation, the holes that were made with a drill in the steel product are lubricated with mineral oil. If the working surface is copper, the hole is treated with emulsion, with aluminum - with turpentine, and if it is brass or bronze, the holes are left without lubrication, since they unfold in a dry state.
High quality of the machining process can be achieved if the reamer has quite a lot of edges cutting the metal. It is thanks to this tool that you can remove a small allowance. After all, by removing a small thickness of metal, you can achieve fairly high accuracy.
A common mistake is the wrong choice of tool for reaming: many people choose a countersink instead of a reamer for this purpose. This is a semi-finish tool that is not capable of showing greater accuracy, it has fewer cutting sharpenings, and in general it is intended for other purposes. Therefore, you need to be careful when choosing a tool. And within one type of tool, you should choose the type wisely.
TECHNICAL REQUIREMENTS
1. TECHNICAL REQUIREMENTS
1.1. Reamers must be manufactured in accordance with the requirements of this standard according to working drawings approved in the prescribed manner.
1.2. Reamers must be made: manual - from alloy steel grade 9ХС in accordance with GOST 5950*. ________________ * GOST 5950-2000 is in force on the territory of the Russian Federation. Here and further in the text. — Note from the database manufacturer. By agreement with the consumer, it is allowed to manufacture manual reamers from high-speed steel in accordance with GOST 19265; machine - from high-speed steel in accordance with GOST 19265. By agreement with the consumer, it is allowed to manufacture machine reamers from alloy steel in accordance with GOST 5950. It is allowed to manufacture reamers from other grades of high-speed steel, ensuring the durability of the reamers in accordance with the requirements of this standard. (Changed edition, Amendment No. 3).
1.3. Reamers made of high-speed steel with a diameter of 10 mm or more must be welded. The following are not allowed in the welding zone: lack of penetration, ring cracks, surface holes. The shanks of welded reamers must be made of steel 45 in accordance with GOST 1050 or of steel 40X in accordance with GOST 4543. It is allowed to make the shanks of welded reamers from steel 50 HFA in accordance with GOST 14959.
1.4. The HRC hardness of the working part of the reamers should be:
| high-speed steel reamers: | |||
| diameter up to 6 mm | 62…64 | ||
| St. 6 mm | 63…66 | ||
| reamers made of steel 9ХС: | |||
| diameter up to 8 mm | 62…64 | ||
| St. 8 mm | 62…65 | ||
The hardness of the working part of reamers made of high-speed steel with a vanadium content of 3% or more and cobalt of 5% or more should be higher by 1-2 HRC units.
1.3, 1.4. (Changed edition, Amendment No. 2).
1.5. The hardness of the shank legs and shank squares of welded reamers should be 32…47 HRC. The hardness of the square shanks of solid reamers is 37…57 HRC. (Changed edition, Amendment No. 3).
1.6. (Deleted, Amendment No. 3).
1.7. There should be no cracks, chipped areas, burrs, burns, or traces of corrosion on the surface of the reamers. (Changed edition, Amendment No. 2).
1.8. The roughness parameters of the surfaces of the reamers according to GOST 2789 should be, microns, no more than:
| a) front and rear surfaces of ground reamers | 3,2 | ||
| b) front and rear surfaces, finished reams | 1,6 | ||
| c) surfaces of shanks | 0,8 | ||
1.9. (Deleted, Amendment No. 3).
1.10. Limit deviations of the nominal diameter of the working part of the finishing reamer according to h9.
1.11. The maximum deviations of the difference in diameters in mm of the reamer over a length of 100 mm in the direction of decreasing taper should be for the length of the working part:
| up to 100 mm | 0,05 | ||
| St. 100 to 200 mm | 0,04 | ||
| St. 200 mm | 0,03. | ||
1.12. The radial runout tolerance in mm of the working part relative to the axes of the center holes should not exceed for reamers with a diameter of:
| up to 20 mm | 0,02 | ||
| St. 20 mm | 0,03. | ||
(Changed edition, Amendment No. 2).
1.13. The runout tolerance in mm of the machine reamer shank relative to the axes of the center holes should not exceed for reamer diameters:
| up to 30 mm | 0,010 | ||
| St. 30 mm | 0,015. | ||
(Changed edition, Amendment No. 2, 3).
1.14. The tolerance range for the total length, the length of the working part and the length of the square is h16. The tolerance range of the manual reamer shank diameter is h11. Maximum deviations of the size “a” of the shank square are in accordance with GOST 9523.
1.15. Maximum deviations of the Morse taper sizes of machine reamers AT7 shanks - for finishing reamers; AT8 - for preliminary scans in accordance with GOST 2848.
1.14, 1.15. (Changed edition, Amendment No. 3).
1.16. (Deleted, Amendment No. 2).
1.17. The average and established periods of durability of machine reamers made of steel grade R6M5, under the test conditions specified in Section 3, should not be less than those given in Table 1.
Table 1
| Nominal diameter of machine reamer, mm | Duration periods, min | |
| average | installed | |
| Up to 5 | 20 | 9 |
| St. 5 to 10 | 30 | 13 |
| 10 » 15 | 35 | 16 |
| 15 » 20 | 40 | 18 |
| 20 » 25 | 45 | 20 |
| 25 » 35 | 50 | 22 |
| 35 | 60 | 27 |
The correction factor for the average and established service life for machine reamers made of 9ХС steel is 0.5. (Changed edition, Amendment No. 2).
1.18. The criterion for blunting for preliminary reamers is wear on the flank surface, which should not be more than 0.6 mm, for finishing reamers - the output parameters of the accuracy and roughness of the machined surface of the holes. The surface roughness parameter of holes in accordance with GOST 2789, processed with finished reamers, should not be more than 6.3 µm, polished 12.5 µm. The surface roughness of holes processed by manual pre-reaming is not checked. (Changed edition, Amendment No. 2, 3).
Conical reamer - tool features
One of the types of reamers described in this article, conical, is used when working in more difficult conditions than those when working with cylindrical types. This is due to the fact that the latter have small cutting edges, and the allowance they remove is insignificant. Conical reamers, on the other hand, use their entire length for cutting. In this regard, when working with them, the speed of work and the supply of metal are slower than if a cylindrical type of reamer was used.
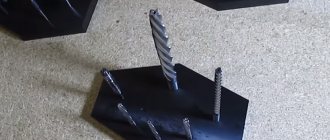
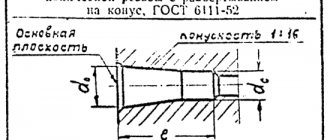
The above-mentioned conical type tools are used to ream conical holes. To do this, the kit contains three elements: roughing, intermediate and finishing tools . They are manufactured for the installation of conical threads and Morse tapers. For high-quality production, steel grades YUA, U12A and others are used, as well as plates made of hard alloys. An interesting feature of conical reamers is the following. They have transverse slots on their teeth, located in a straight line, through which the removed chips are removed, while they are not located along the entire length of the tooth, which allows you to work with the tool with little effort.
Rough development is performed in steps. In this case, it usually takes the form of individual teeth that crush the chips into pieces.
This device can also be made in the shape of a pyramid with three, five or eight sides, with cutting ribs. Conical reamers can be helical, and with only one or a pair of teeth. The size of screw tools is up to 5 cm in diameter, they are widely used in the repair of steam locomotives. Such a tool today has found quite a wide range of applications in the field of construction and repair due to its durability, reliability, as well as the fact that such a reamer can process holes with a large allowance, and especially if they have keyway holes. The disadvantages include the fact that changing the scan, if necessary, can take a lot of time.
Operating principle
The use of a reamer makes it possible to obtain internal surfaces with an accuracy grade of 6-9 and a roughness Ra of 0.32–1.25 microns. High-class characteristics are achieved due to the design of the tool with a large number of cutting edges, which can be from 4 to 14 pieces.
The quality of processing when performing a deployment operation is determined by a set of factors:
Surface roughness classes
- The size of the allowance removed during processing;
- Machine cutting conditions;
- Quality of workmanship and sharpening;
- Features of geometry and design;
- Type of material being processed.
The deployment process goes like this. A cutting tool of the required diameter is brought to the edge of the hole. Then it receives a cutting movement, which, with manual and mechanical feed, consists of rotation of the tool and feed along the axis of the hole.
The amount of allowance in tenths or hundredths of a millimeter is the difference between the diameter of the hole and the selected tool.
Cylindrical and conical holes are processed by reaming using hand and machine tools of the appropriate shape.
Reamer is a cutting tool that is needed for finishing holes
