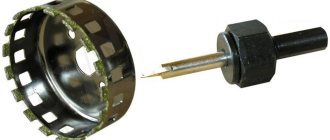
How can I make a hole in chipboard?
Hole in chipboard.
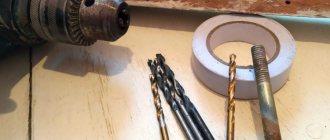
- Small diameter holes from 2 to 12 millimeters are best drilled with ordinary wood drills.
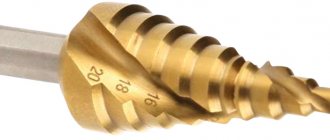
- Holes of average diameter from 10 to 50 millimeters are made with special drills, such as a feather drill or a Forstner drill.
21 Jan
2015 Interesting materials:
Where did the plot of the Song about the prophetic Oleg come from? How much does scrap bronze cost? Why is 1943 considered a turning point during the Second World War and World War II? Why is Baba Yaga called that? Why is mobile communication called that? Why should we protect the environment? Why is the island called Russian? Why are Facebook videos of poor quality? How much is 1,000,000 billion? How much is 100 g of flour?
In construction and finishing works, drilling holes does not play a dominant, but quite noticeable role. And only at first glance it seems that drilling is simple - press the drill button and that’s it. Each material requires the selection of a suitable drill, the required speed and pressure on the drill, a method for cooling the drill and removing chips - all this is felt literally intuitively with experience. And our advice will help beginners.
First, let's determine whether the existing drill can handle the holes you want to drill. The determining parameter in this case is the power of the drill. An ordinary household drill with a power of 500-600 W can handle holes up to 10 mm in steel and up to 25 mm in wood. An impact drill of the same power can drill a hole up to 13 mm in concrete or brick. If your work requires more, then you need to choose a more powerful drill.
The choice of tool and drilling modes greatly depends on the material to be drilled and the diameter of the hole.
Drilling wood, plywood, fiberboard
Drilling chipboard and laminate
Drilling plastic and organic glass
Drilling brick and concrete
Drilling glass, porcelain and ceramic tiles
How to drill wood, plywood, fiberboard correctly?
Drilling small holes in soft materials does not pose any particular problems even for beginners. There is no need to press hard on the drill; the speed should be slightly higher than average - this will result in a cleaner hole. Too high speeds can cause the drill to become hot due to friction, and the wood will begin to burn. This is a good way to make fire, but the part will be ruined.
For holes up to 10mm in diameter, you can use regular metal twist drills. When drilling deep holes in wood, especially in resinous rocks, the drill must be removed more often (every 10-15 mm drilled) and the spiral grooves must be cleared of chips . This must be done carefully so as not to get burned on the hot end of the drill.
When drilling very small holes (up to 1.5-2 mm), any careless movement of the drill, the slightest misalignment will lead to breakage of the drill. Drills smaller than 1 mm can generally be broken by the weight of the drill by placing the drill at the drilling point. In order not to use such drills in batches, keep in mind that wood, fiberboard, and simple plywood can be drilled with a piece of paper clip or a nail . The end of the “tool” is bitten off with side cutters at an angle - and a passable drill is obtained. The drilling point needs to be pricked with an awl.
Special twist drills for wood at first glance resemble drills for metal, but their cutting part is sharpened differently (with a point in the center and edges), and the grooves are wider. This allows for cleaner holes and improves chip evacuation. The diameter of such drills is from 3 to 50 mm.
Large diameter drill bits often have a hex shank, which prevents the drill bit from twisting in the chuck. There are also extensions for the hex shank for drilling deep holes with regular short drills.
The rotation speed when drilling is selected based on the diameter of the drill and the hardness of the wood. Holes up to 15 mm can be drilled at 1400-1600 rpm, 15-25 mm - at 1000-1200 rpm, 25-50 mm - 500-600 rpm. For hard wood, the speed should be reduced by 1.5-2 times.
To drill holes from 10 to 60 mm in wood, feather drills are produced. Outwardly, they resemble a spatula with a point in the center.
Such pen drills of large diameters are much cheaper than twist drills, this is their main advantage. Drilling deep holes with feather drills is not very convenient. The drill does not throw out chips; it has to be removed and the hole cleaned manually. The rotation speed when drilling can be kept higher. For holes up to 25 mm - up to 2000 rpm, over 25 mm - 1500 rpm. For hard wood, the speed should be reduced by 1.5 times.
For drilling large and deep holes (for example, holes for wires and pipes in wooden support beams), use Lewis drills. This drill looks like a drill with a screw at the end.
A wide flute with a slight angle of inclination effectively removes chips. Lewis drills are produced with a diameter of 10 to 50 mm. Holes up to 15 mm are drilled at 1500 rpm, 15-25 mm - at 1000 rpm, 25-50 mm - 500 rpm. For hard wood, the speed is halved.
For special types of woodworking, Forstner drills, router bits, hole saws and hole saws are also used.
How to drill chipboard and laminate correctly
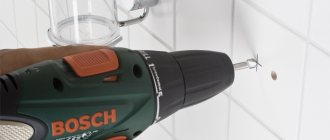
Drilling into particle boards and laminate is generally no different from drilling into wood. Some difficulty may arise due to the heterogeneity of the chipboard - this makes it difficult to start drilling exactly in the intended location. To avoid this, first prick the hole with an awl and drill it with a drill with a diameter of 2-3 mm. Then drill out with a drill of the required diameter.
Laminate flooring can be easily drilled using both conventional wood drills and crowns of any diameter. When drilling laminated chipboard for furniture, it is convenient to use a specialized tool. For example, holes for confirmations (special self-tapping screws for assembling furniture) are drilled with a special drill with three cutting parts. This allows you to simultaneously drill the attached part and make a pilot hole for the threaded part in the main part.
How to drill plastic and organic glass correctly
Plastic and organic glass (polycarbonate, plexiglass), unlike wood, have a homogeneous structure without fibers, but melt easily. In this case, the drill may get stuck and break .
Holes of small diameters (up to 10 mm) can be drilled with conventional metal drills at low speeds (up to 500 rpm) . It is advisable to “puncture” the drilling site with a hot nail. The drill needs to be brought out quite often and cooled in water.
The easiest way to drill holes of larger diameters or complex shapes is to drill along the contour with a 2-3 mm drill, saw through the jumpers with a jigsaw or hacksaw blade, and file the edges.
How to drill brick and concrete correctly?
You cannot drill concrete and brick with a regular metal drill. Or it will work out, but not for long. In this case, the material will play the role of a sharpening stone and simply dull the drill. Holes in brick and concrete are drilled (or rather, drilled) using an impact drill or hammer drill . These tools not only rotate the drill, but also strike it.
In impact drills the impact is mechanical. The parts of this mechanism wear out quickly, so hammer drilling for an impact drill is an auxiliary mode and it is better not to abuse it. In hammer drills, the impact is carried out by an electromagnetic or electro-pneumatic mechanism; it can work hundreds of times longer. And the impact energy of a hammer drill is much higher; with a good drill, a hammer drill can drill concrete no worse than solid wood.
Before drilling into a wall, be sure to check whether there are any water pipes, heating pipes or electrical wires in it. Everything is usually clear with pipes, but it is better to check the presence of electrical wiring with a special device or, in extreme cases, with a simple homemade hidden lead finder.
Drills with carbide tips are used for drilling brick and concrete . By tradition, they are often called “pobedite” drills, although other materials are increasingly being used to make tips, for example. Wolfram carbide.
Please note that drill bits for drills and perforators have different shanks. And if a drill (drill) for a hammer drill with an SDS-plus shank can still be somehow clamped into the drill chuck, then a hammer drill with a simple cylindrical shank will not turn.
When drilling brick or concrete with an impact drill, select medium speed. At high speeds, the drill will overheat and fail; at low speeds, drilling will be ineffective. You need to press very hard on the drill, because the impact energy depends on the force of pressure, and periodically remove the drill to cool.
When drilling with a hammer drill, the speed is quite low (800-1000 rpm) and there is no point in pressing hard on the tool - the impact energy is determined only by the mechanism of the hammer drill. It is enough that the drill does not bounce off the concrete upon impact (5-6 kg).
The holes for the dowels are made 10 mm deeper than the length of the dowel. This will save you any problems if there is some concrete or brick dust left in the hole.
How to drill glass, porcelain, ceramic tiles correctly?
Glass and porcelain are highly hard and brittle. An ordinary drill simply does not take these materials - it slides along the surface, and when drilling with an impact, the product splits. Therefore, drilling glass and porcelain is actually done by grinding using a special glass drill. In this case, the glass simply turns into fine glass dust.
A glass drill looks like a small sharpened spatula. The spatula is made of hard metal and may have one or two cutting edges.
There are also drills with two mutually perpendicular blades, reminiscent of a Phillips screwdriver. This drill has four cutting edges. Drills with more cutting edges are more expensive, but they also drill faster. The diameter of spatula drills for glass is from 3 to 12 mm. Holes of larger diameter (100 mm) are drilled with diamond tubular or sliding drills.
Drilling glass and porcelain is carried out at low speeds - up to 300 rpm, without impact , only clockwise. The use of cutting fluid is mandatory. The best results are obtained by using a solution of rosin in turpentine (1:2-1:3) or camphor in turpentine (3:4). You can also use silicate paper glue. In extreme cases, you can use pure turpentine and even water . To prevent the liquid from spreading, a plasticine rim is made around the drilling site. As the liquid becomes contaminated with glass dust (turbidity), replace it with fresh one.
To avoid chipping at the exit, the glass is drilled on both sides. First on one side - 0.7-0.8 thickness, then on the other. In order to drill a hole exactly in the designated place, you can mark the center of the hole with a diamond glass cutter.
Ceramic tiles are drilled using a glass drill . The most difficult thing is to start drilling exactly in the right place. Here, too, you can use a diamond glass cutter and mark a point on the glaze. Experienced craftsmen place the drill at the drilling point and press firmly on it. This is enough to destroy a small area of glaze to fix the drill. When drilling tiles that are already fixed to the wall, it is important to stop in time and not start drilling into the wall material itself. This can ruin the drill very quickly. Therefore, after passing the tile, the drill is changed and drilling continues with a tool more suitable for the wall.
The hard glaze layer on ceramic tiles is thin enough to allow small holes to be drilled with carbide drill bits designed for brick and concrete. To do this, you need to use a new, well-sharpened drill. And here, too, the most important thing is to start drilling in the right place. The drill tries to slide to the side.
If you are not confident in the strength of your hands, then you can use a little trick - stick a piece of adhesive tape in the right place. If there are a lot of holes, then it is better to make a jig. To do this, drill a hole in a wooden block 40-50 mm thick for the drill rod. On one side, the hole is drilled out so that the carbide plate at the end of the drill fits into it. You can glue several pieces of thin rubber to the bottom of the block - this will prevent slipping.
In this case, you cannot do without an assistant. First, the drill is placed at the drilling point, the block is lowered, and an assistant holds it firmly in place. After this, drilling begins - slipping is excluded.
We recommend reading
- How to drill a hole in a wall without tilting the drill?
- How to choose a knife for modeling?
- Simple DIY key holder
- How to make an inscription on metal with your own hands? Electrochemical engraving
- What rod diameter should I choose for an external metric thread?
- What hole diameter should I drill for metric threads?
- How to use a blowtorch?
- Engraver with EVERISE attachment set
- Hot glue gun - home handyman's assistant
- How to choose a drill?
Tips for using rotary hammers
Below are a few tips that will allow you to use your hammer drill more productively and safely:
- In the mode of chiselling and drilling with chiselling, you should not press hard on the body of the tool - this will only lead to overheating of the engine and waste of energy, but will not speed up the work process.
- Accurate selection of equipment for each type of work is the key to successful and quick completion of the assigned tasks.
- When working locally with a rotary hammer, you can avoid lengthy cleaning of the room if you hold the hose of a running vacuum cleaner under the place of drilling or chiselling. If it is necessary to screw screws into a concrete surface, metal anchors are inserted into the drilled hole. If the loads are expected to be insignificant, you can limit yourself to plastic dowels.
- Use water to cool drills and remove dust only after familiarizing yourself with the composition of the drill. The fact is that some carbide drills can break when cooled with water.
- To drill large-diameter holes, use special diamond core bits instead of a drill - this will reduce labor costs and save time.
Preparing the hammer drill for work
Depending on the purpose for which the hammer drill will be used, the procedure for preparing it may differ. However, in most cases, before using a jack drill, you should perform the following steps:
- Study the tool and its instructions in order to comply with safety precautions and operating rules;
- Select a drill according to the type of surface, as well as the depth of the hole;
- Insert the drill into the chuck;
- Adjust the drilling depth. If a hole is required not through, but of a certain depth, you should install a limiter - it will not allow the drill to go beyond the mark;
- Plug in the hammer drill, select the required drilling mode and get to work.
