Fencing around residential or industrial buildings allows you to delineate the boundaries of the site and protects the territory from entry by unauthorized persons. In addition to solid fences made of profile sheets, lattice structures are used that transmit light and have a low price. Before attaching the chain-link mesh to metal poles, you need to decide on the technology and mount the supports.
Mesh fence is used to fence residential and industrial buildings.
Properties and characteristics of mesh
The material was developed in the late 80s. XIX century German engineer Karl Rabitz. The inventor created and patented a machine that made it possible to quickly weave wire. In the 21st century the flexible fabric is made of drawn steel wire with a protective anti-corrosion coating (zinc or polymer based). The material has a circular cross-section, the lines intertwine with each other, forming diamond-shaped cells with a lower and upper angle of 60°.
Chain-link mesh is a flexible steel sheet with cells.
There are several dozen varieties of mesh, differing in the type of wire and the dimensions of the pattern. The most common sheets are made of material with a diameter of 1 to 6 mm, having a cell size in the range from 15 to 120 mm. Reducing the dimensions of the window increases strength, but at the same time the cost of production increases.
The mesh is supplied in the form of rolls in accordance with the GOST 5336-80 standard (for example, 3x10 m reels are more often used for fences).
Types of chain link
To attach the chain-link mesh to the profile pipe, you need to select the optimal type of mesh material. These products are classified as follows:
- without zinc coating;
- galvanized;
- with PVC coating.
Tension fastening method
In the manufacture of non-galvanized chain-link, wire made of black low-carbon steel without a protective coating, 1 or 5 mm thick, is used. The main disadvantage of such products is their high susceptibility to corrosion and, accordingly, a short service life of 2–3 years. This material is only suitable for installing temporary fencing.
Meshes with zinc and PVC coating have high anti-corrosion properties, therefore they are more in demand. Mesh material is available in various shapes and mesh sizes.
Fence post made of corrugated pipe
The strength of the product is determined by the size of the cells. The smaller they are, the stronger the mesh. The standard hole size of the mesh material used to construct the fence is 40–50 mm.
Advantages and disadvantages of a mesh fence
Positive aspects of the material:
- ease of erection of fencing;
- the low weight of the components allows you to abandon the need for pillar foundations;
- ensuring air flow and lighting the area along the fence;
- lack of windage, the presence of cells removes wind loads from the surface;
- suitability of chain-link for installation of decorative elements decorating the local area;
- the mesh does not require periodic cleaning and painting;
- the ability to install an additional protective line of barbed wire or Bruno spiral on top of the fence.
The mesh fence is not difficult to install and is resistant to wind loads.
Disadvantages of the material noted by builders and home owners:
- reduced mechanical strength of the fence;
- ease of destruction of the mesh by an attacker using wire cutters or metal scissors;
- lack of protection of the territory from prying eyes and strong winds;
- sagging of the canvas during operation;
- the tendency of mesh made of structural steel to corrosion under the influence of atmospheric moisture;
- short service life of the fence (when using chain-link with a galvanized surface, the canvas begins to deteriorate after 8-10 years);
- the cells do not protect the local area from small debris and dust;
- lack of aesthetics, since the mesh fence was originally created to fence off industrial facilities.
What will you need?
Simple installation of a chain-link fence does not pose any difficulties even for novice builders. First you need to prepare building material, as well as ordinary construction tools: pliers, hammer, metal scissors, grinder, concrete mixer.
The following building materials will be required:
Using these affordable and common tools and materials, you can quickly get the job done to build a beautiful and inexpensive fence.
Types of designs
The mesh material is characterized by low rigidity and requires the installation of power elements for reliable fastening. The chain-link is pulled between the pillars, and additional jumpers are introduced between the supports. There is a technology for assembling a fence from ready-made sections of standard sizes. The owner of the site independently chooses the method, focusing on the budget and durability of the fence.
Installation of a mesh fence can be done in several ways.
Without guides
The technology involves installing vertical iron pillars from water pipes in increments of 2.5-3 m; the base is buried 80-100 cm into the soil. The mesh is stretched between the pillars and secured with staples. If the soil in the area is sandy, then rain and melt moisture freely goes into the lower layers. On clay soils, a gravel cushion is provided in the pits for supports; in the absence of a substrate, during the period of soil heaving, the fence warps, and cracks form under the lower edge of the chain-link.
When installing a mesh fence without guides, the chain-link is attached to the posts with staples.
With guides
The design is distinguished by the installation of 2 horizontal jumpers made of steel profiles or timber. For fastening, welding or bolts are used; a rigid joint leads to warping of the fence when the soil swells and the concrete base of the post is squeezed out of the hole. To prevent deformation, holes are dug to a depth below the freezing level (depending on the region). A gravel cushion is poured onto the bottom, and then the vertical element of the fence is filled with concrete mortar.
Mesh fence with horizontal guides.
Sectional
The structure consists of a steel frame in which the mesh is fixed. The sections are installed between vertical pipe elements, the upper part of the support is closed with a plug to protect against moisture and the occurrence of corrosion. The frames are fixed by electric arc welding or metal brackets with bolts. The product has a neat appearance, increased strength, the depth of the holes for the posts should be 20-30 cm below the soil freezing line.
Sections of a mesh fence are represented by separate frames in which a chain-link is fixed.
Final finishing - decoration, photo
A fence built with your own hands using chain-link mesh has a neat appearance, but nothing more. Over time, the desire arises to somehow decorate it. You don't have to be an artist or designer to do this. It is enough to show your imagination, and your fence will become a piece of art.
The easiest way to transform a fence is to plant climbing plants next to it. In a few months, your fence will turn into a flowering wall. The pillars can be decorated with clay pots, this will give the fence ethnic beauty.
Fence cells can be turned into canvas for embroidery. Just like drawing on a canvas, you can weave beautiful patterns with your own hands. For this you will need wire. If you use colored twine, then with its variety of colors and shades you can create three-dimensional images.
Recently, it has become popular to decorate the fence with a photo grid. The drawing can be absolutely anything. The peculiarity of this material is that from a distance a continuous pattern is visible, but in fact it consists of a fine polymer mesh, which is perfectly ventilated.
Wire resembling lace is an interesting option for those who have nothing to hide
Painted roses look elegant. The main thing is that the drawing on the photo grid matches the landscape
Wide grape leaves will decorate and hide the area from prying eyes
How and with what to close the fence from neighbors: options with photographs
Since a chain-link fence is completely transparent, any home owner will want to hide it from prying eyes. It is not advisable to cover it with any shields or boards.
The easiest way is to cover the fence with camouflage netting. Visibility through the fence will be much less, but the appearance will also be unattractive.
You can cover the fence with reed mats. This method is more expensive than the previous one. Attaching them is not difficult; you just need to unwind the roll and secure it in several places with wire.
A similar option is to use artificial pine needles. This material is sold in rolls. It is used in making wreaths and baskets, but it can also be used for fencing.
A fence that is covered with a camouflage net looks aesthetically pleasing only if you are in a paintball zone
Rolls of reeds are a more expensive option
The use of artificial needles looks original
How a mesh section is made
For manufacturing, it is necessary to weld a frame from a steel angle, corresponding in length to the pitch of the supports. A mesh is attached to the resulting frame on welded steel rods, passing the rods through the outer cells, ensuring uniform tension of the web. Instead of guides, you can use steel hooks. Then the frame surfaces are cleaned of scale and traces of corrosion, and then a protective paint coating is applied. The sections are assembled in an industrial environment; the home owner can independently manufacture the structures, taking into account the characteristics of the fence.
Selecting a mesh for metal poles
When selecting material you must:
- Explore the bays. The corners of the squares located at the bottom and top should be formed by intertwined pieces of wire with bent ends. The size of the bent part determines the ease of tension; it is recommended to take a chain-link with bends having a length of about 50% of the size of the cell edge.
- Make sure that the weaving is uniform and there is no deformation of the wire. Bends indicate low quality steel, which will begin to rot after 2-3 winters. If the surface of the wire is coated with a polymer composition, then the warranty period should be specified. Budget plastic is destroyed under the influence of ultraviolet light and temperature changes over 1-2 winters. When a high-quality coating is applied, a mesh fence will last from 15 to 30 years without corrosion.
- Assess the quality of galvanization. The presence of dark spots on the surface indicates cold technology. Zinc is applied in a thin layer with low strength.
Step-by-step installation of SIP cable from pole to house: 12 stages
In order to install a SIP cable from a pole to a house, it is better to seek help from professionals. Installation of a SIP cable from a pole to a house is carried out when it is necessary to insert a power cable into a separate building. Before the start of construction and installation work, design and estimate documentation is drawn up. It takes into account the required power, technical characteristics of the wire, the selected installation technology and standards for safe operation. The more pedantry the builder shows, the less he risks his own life and health.
Advantages of technology: tensioner for SIP
Experienced and less experienced builders always pay attention to the positive and negative aspects of any technological solution. When it comes to SIP, self-supporting insulated wire, the first thing people immediately pay attention to is the aluminum conductors.
Thanks to this, the system is less susceptible to the destructive effects of the vagaries of nature and even minor sagging and tension.
The insulating coating has experimentally proven resistance to aggressive environments and frequent temperature changes.
If we talk about other advantages, they look like this:
- Ease of installation,
- Easy to maintain
- The ability to save the area required for laying a high-voltage line,
- Can be placed on supports in direct sunlight for several days without compromising the integrity of the insulation,
- The guaranteed service life is at least four decades.
Based on the above, it becomes clear that the technical characteristics of the tensioner used must correspond to those that the manufacturer stated for the SIP cable. Experienced builders do not recommend trying to save money, otherwise the actual cable tension will decrease, which will cause rapid wear.
Let's get started: installing SIP cable on poles
The 4x16 cable has proven itself well, so in the absence of technical contraindications, this is what is used. Once all issues with the cable have been successfully resolved, the technically correct fittings must be selected. This is where the difficulties begin, because it is extremely difficult for a beginner to distinguish one species from another. Understanding the entire process will help greatly simplify the situation.
If you decide to install SIPs on poles yourself, then you must first read the step-by-step instructions
The wire is pulled and attached to the wall of the house using a hook and several anchors. If we talk about the pole, then it should be secured using bandage tape. It follows that the hook must have a hole for insertion under the anchor.
In addition, it would not hurt to learn about some other nuances:
- It is recommended to use a hook marked GHP-12,
- To prevent the wiring from shaking in strong winds, a construction staple is used as an additional fastener for the bandage tape,
- The winch will be securely fastened if a tension clamp of two units is used as a fixing element,
- The terminals must be marked TTD151/NTD151.
Caution and attention to detail eliminate many problems at the stage of practical operation. To ensure that work does not have to be forced to stop, it is necessary to ensure that the necessary markings are present on the fasteners and brackets.
What metal posts to use for the chain link
To build a fence, steel supports should be used; wooden products with antibacterial impregnation are not durable and begin to lose strength after 3-4 years. For fences, posts made of round or square steel pipes with a wall thickness of at least 2 mm are used (the diameter and edge length are 50-60 mm).
It is allowed to use a corner with a shelf from 50 to 60 mm.
Steel structures make it possible to weld mounting hooks; in the event of a break, the fasteners can be easily put back in place without partially dismantling the fence.
Installation of supports
The construction of a chain-link fence is carried out on concrete or metal supports with a minimum diameter of 6-10 cm. They are the strongest and most durable. Special hooks must be welded to the metal posts in advance to help fasten the mesh.
Concrete poles are much more expensive than metal ones. To attach the mesh, you will need to use clamps or steel braiding on them, which does not look very aesthetically pleasing, but holds firmly.
Installation work on the construction of the fence is carried out in stages. Even a novice master can handle every stage of the work. But in order to avoid mistakes when installing the fence, it is better to study the instructions thoroughly.
- Markings are made along the entire perimeter of the future fence. To do this, we place small pegs in the corners of the site. We stretch the cable between the stakes. The length of the cable means the length of the mesh required to decorate the fence, but it is better to buy with a reserve.
- We dig deep holes to install fence support posts. The holes for the posts need to be dug to a depth of 1.2 - 1.5 m. In sandy loose soil it is better to dig even deeper - up to 2 meters.
- At the corners of the entire perimeter we install the main load-bearing supports, which require careful fastening. We install additional supports at a distance of 2-3 m.
- We fill the bottom of each hole with crushed stone, and then add a little sand. We carefully compact and compact all the pillars. Be sure to check the vertical position of each support with a plumb line. While the stand is not filled with concrete, you can fix it in the desired direction to avoid distortion of the entire structure.
- We fill the pillars with ordinary cement mortar, but with the addition of crushed stone for strength. It will take at least a week for the solution to harden.
Installation of support posts for a mesh fence
Before starting installation, it is necessary to clarify the boundaries of the site in accordance with cadastral documents. If the marking is incorrect, you can seize part of your neighbors' land or lose part of your own territory. You need to decide on the height of the fence and the method of attaching the mesh, and then purchase a steel pipe or angle. To fill the supports, you will need concrete mortar and fine gravel; it is recommended to immediately purchase paint to protect the metal from corrosion.
Support posts in the form of steel pipes for chain-link mesh.
Required Tools
To perform the work you need:
- tape measure and cord for marking boundaries;
- building level or plumb line;
- shovel or drill of appropriate diameter;
- solution container;
- sledgehammer for hammering parts into the ground;
- electric mixer or drill attachment.
Site marking
When building a fence, you need to know how to properly mark out the surrounding area. At the initial stage, the position of the corners is determined, wooden stakes are driven into the ground, then the installation area for gates or additional gates is marked. A cord is pulled between the stakes and the distance is determined to calculate the installation pitch of the supports (the recommended value is within 2.5-3 m). When using a profile pipe, the distance between the posts is 2 m, which ensures the rigidity of the fence. The installation locations of the supports are marked with additional pegs.
Before installing the mesh fence, it is necessary to mark the area.
Instructions for installing poles
For installation you need:
- Dig holes by hand or drill holes in the ground according to the layout. The depth of the ditch depends on the soil; it is recommended to place the lower edge of the support below the soil freezing line. To increase the strength of the fence, it is necessary to bury pipe or profile blanks 30% of the length into the ground.
- Apply a layer of paint to the metal surface and wait for the protective layer to polymerize.
- Fill the gravel bed, install the pipe manually or by hammering it with a sledgehammer, and align it using a plumb line or level. Use wooden wedges to secure the post in the hole.
- Fill the base of the pipe with concrete solution to a depth of 300-400 mm, carefully pouring the mixture into the hole.
- Wait until the material hardens and fill the hole with crushed stone, forming a small shaft on the surface of the soil.
- Install a plastic or rubber plug on the upper end to protect it from water.
When installing fence posts, it is important to take into account the level of soil freezing.
There is an alternative technology; for installation, holes are drilled in the ground with a depth of 60 cm and a diameter of 20 cm. Then a pipe is inserted into the channels, and the workpiece is driven with a sledgehammer 40 cm into the soil thickness. To protect the edge, a thick board pad is used. The remaining gap is filled with cement mortar; some homeowners use broken bricks or crushed stone.
How to stretch thick wire. With wire
This type of fence is good because it can be installed quickly. But the top edge may sag. If someone climbs through it, the top will definitely become wrinkled. It is unlikely that it will be possible to straighten it. To prevent the top from sagging and “creasing,” a wire is pulled through the first row, either steel or plastic-sheathed so that it does not rust.
To prevent the mesh from sagging, a wire is pulled on top
If wire is used, the technology can be simple: make a loop at the end and throw it over the outermost post. They unwind the wire, trying to tighten it; after two or three posts, make another loop, wrapping the wire around the post. So until the end of the flight. If you use muscle force, you won't be able to pull it enough, and the wire will inevitably sag. This is easy to fix. Take a thick metal rod and use it to twist it, pulling the wire. Is one twist not enough? A little further you do another one. This way you pull up all the “spans”. Afterwards, you can begin to “pull” the mesh, tying it to a stretched wire.
If you weld “ears”—a metal strip with holes—at the top of the post, the wire can be attached to them. It is easier to stretch a piece of 2-3 meters, but the work is slower.
Another way to attach wire
You can also use special wire tensioners. Then, having secured the wire on one pole, on the second it is passed into a device such as in the photo. It is secured in a clamp, and then using a key, the excess is screwed onto the drum.
Special wire tensioners
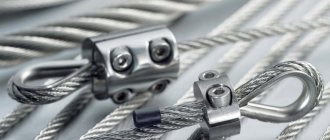
You can use a cable and lanyards - hooks with ties-clamps (at a rigging store). On one side, a cable is twisted around the pole and secured with a clamp. A lanyard is placed on the other. Its middle part has a thread, thanks to which the cable can be tensioned.
Lanyard with cable - another option
Since the cable is more flexible, it can be passed through the links. Each one will be too long, after two or three cells it’s normal. One more thing: take a cable with a polymer sheath: it will not rust.
Methods for installing a chain-link with and without welding
You can attach the mesh to the post using electric arc welding, wire or guide rods. The strength of the fence is determined by the reliability of the installation of the posts and the correctness of the chain-link fixation. During installation, entire sections of mesh should be used between vertical pipes or sections of profile; the fragments of the fabric are connected with a rod.
After installation is completed, the fence is decorated with climbing plants or ornaments made of wire or colored twine. To protect the site from prying eyes, a camouflage net is installed on the chain-link.
Tensioner
At the initial stage, it is necessary to secure the edge of the canvas to the corner post, and then alternately fix it on the remaining supports. You should not skip columns, since the mesh sags; it will not be possible to compensate for the excess length. To reliably install the chain-link without welding, you can use mandrels made of steel rod. The rods allow you to stretch the canvas evenly, but installation will require an assistant.
Wire fastening
The tension fence is not designed for vertical loads; to protect against deformation, horizontal wire with a diameter of 3-5 mm is inserted into the structure. The element is folded into a loop and placed on the outermost pole, and then stretched with tension along the remaining supports.
For additional tension, the wire is twisted with a piece of reinforcement or a pry bar.
Then the mesh is placed on the guide using factory hooks on the edge of the canvas. To fix the wire, you can use strips with holes welded to the posts or special tension devices.
Instead of rigid wire, you can use steel cable. For tension, screw ties (lanyards) attached to the posts are used. During installation, the cable can be passed through the mesh cells and then attached to the next support. The presence of a polymer shell increases the durability of the structure.
The chain-link mesh can be secured with wire or steel cable.
Using a welded rod
The technique involves using a steel rod with a diameter of 6 to 8 mm instead of wire or cable. The rod is threaded through the mesh cells at a short distance from the upper and lower edges of the fabric. Then the rod is welded to the post, the seam is cleaned of scale and covered with a layer of primer and paint to protect against corrosion. To increase the rigidity of the fence, you can introduce an additional central rod.
Chain-link mesh with horizontal steel bar.
With guide rails
The technology involves installing horizontal crossbars located at a distance of 20-30 cm from the ground and the upper edge of the supports. The legs are welded to the posts or secured with bolts or rivets. To increase the strength of the fence, an additional central guide is introduced into the structure. The mesh is fixed with pieces of wire or clamping strips on the threaded connections (with subsequent riveting of the heads to protect against unscrewing by intruders).
Guide rails are horizontal crossbars that increase the strength of the fence.
Installation in problem areas
Even if the terrain in the area is difficult, it is quite possible to stretch a chain-link mesh onto the poles. To do this, the fence is laid out in an area where the height of the supports will be approximately the same. In the first section, the mesh is fastened with normal tension (with or without guides).
At the point of support between two sections of different heights, the roll is first unraveled by unscrewing one wire, then woven lower or higher. The mesh is fixed and continued to be pulled further. In this way, the integrity of the fence will be maintained. At the bottom of the fence you can install a concrete plinth, which will level the terrain and close the empty gaps.
Features of installation on a profile pipe
To install sections on a pipe you must:
- Install the mesh onto the frames using a rod welded around the perimeter.
- Place the section between the supports, level it and secure it with steel corners. For fastening, use screws screwed into pre-drilled holes. Adjacent edges of the frames must be in the same plane; a skew of 5-10 mm gives the fence an untidy appearance.
Profile pipes with a stretched mesh netting.
If it is necessary to fix a rolled mesh on a pipe, then clamping strips with screws are used to hold the chain-link. There are designs on wire threaded through cells and holes in the support, and then tensioned with a crank.
You can secure the mesh with metal clamps or pieces of wire; you should not use plastic fasteners with locks due to the low resistance of the material to ultraviolet radiation and low temperatures.
Selection of auxiliary materials and tools
To complete the fencing, you must first prepare everything necessary. After measuring the length of the proposed fence, you can determine how long the mesh will need to be stretched. Material is purchased with a 10% allowance for overlaps and emergencies.
Mesh tension diagram
In addition to the chain-link itself for tensioning, the owner will need to prepare:
- blanks for supports;
- wires for fixing the chain-link to the supports;
- corner for making supporting structures;
- fastening elements;
- pliers and other plumbing tools;
- angle grinder;
- welding machine;
- concrete for fastening pillars.
In some cases, in order to tension the mesh, you can do without welding. But often for certain fencing options it is impossible to do without a welding machine.
Drawing for mounting poles
If you plan to perform welding work in order to pull the panel onto the fence, you will additionally need to purchase electrodes and supply a power cable to the installation site of the fence.