Drill or shovel
In any case, making a hole for a fence support post is much easier than drilling a well. But still, this will require some skills and abilities. You can dig holes manually or use special equipment for this. Its cost is quite high; not everyone will agree to pay rent.
Most often, cheaper methods are used - using a shovel or a hand drill. With a shovel you can dig wide holes, but to make narrow holes you need a drill. In both cases, you will have to use physical force.
It is easier to work with a drill than with a shovel, but moving it from one place to another is quite difficult, since its weight is rather large. It is worth remembering that a hole alone is not enough to install a post. It is not enough to make a hole in the ground; you also need to properly concrete the support post so that it does not loosen or tilt over time.
Necessary materials
The requirement for the wall thickness of iron pipes (3.5 mm) is explained by the strengthening of the product and the ability to work in hard soil. Discs for work can be removed from the circular saw or made independently. They will require metal sheets with a minimum thickness of 3 mm.
Tools that will be useful:
- Hammer and grinder
- Welding technology
- Locksmith kit
- Electric drill with metal drills
- Sharpening wheel for cutting elements.
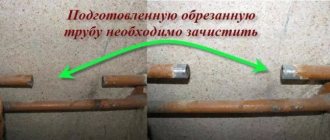
If there is no tip with a drill, they are replaced with a drill with a tapered shank. The diameter must match the screw part. To avoid injury in home production, use soft bicycle handles.
Preparation and necessary calculations
Schematic drawing of the correct installation of pillars
Not a single pillar can be installed without correct calculations and without correctly made holes in the ground. The location of the fence must be marked on the site before its installation. In this case, the installation of the pillars is immediately calculated. All this should be done before purchasing all the necessary materials. The dimensions are entered in the drawing.
The slightest inaccuracy can lead to serious consequences, which will be quite difficult to correct. If one post is installed incorrectly, the entire fence may skew or fall to one side. The basics for proper installation are:
- When making calculations, you need to correctly determine the distance between adjacent support posts of the future fence. It depends on the area of the fenced area, the weight and size of the canvas itself, which will be attached to the posts. Typically, adjacent support posts are no more than three meters apart from each other.
- The diameter of the support pit must be greater than the cross-sectional diameter of the pillar itself. However, it is better not to make the hole too wide, otherwise the soil around the post will be loose. If, on the contrary, the hole diameter is too small, concreting will not be possible.
- In order to determine the number of holes required, you need to make calculations. To do this, the length (perimeter) of the entire fence should be divided by the width of one run. This refers to the distance between adjacent pillars, on average - 250 cm. If you reduce the width, you will not be able to avoid additional financial costs, and if you make it, on the contrary, larger, then the canvas will sag.
- The distance between the posts also depends on the height of the fence. The higher the fence, the shorter this distance should be.
- You also need to pay attention to the depth of the holes. This indicator depends on the soil. The stronger the soil, the shallower the depth of the holes can be made. If the soil composition consists primarily of sand and clay, then such soil is usually considered unstable. And there should be more holes for fence posts. Their depth can even reach one and a half meters, while posts installed on more stable soils need holes with a depth of only one meter.
However, whatever the composition of the soil, the support pillar must extend into it at least a third of its length.
Beginning of work
For installation you will need to drill several holes in the ground. Typically, each support is installed at a distance of 2.5 meters from the adjacent one. To calculate the number of pillars, you simply divide the length of the fence perimeter by this coefficient. It is also necessary to add additional posts for gates and wickets.
In order for the fence to stand firmly on the ground, you need to consider several factors:
- The material from which it will be made. The thickness of the racks and the minimum required depth depend on this.
- Dimensions of the future front garden. Knowing the height and width, you can choose the right material correctly.
- The condition of the soil at the site where holes are drilled for pillars. By assessing this parameter, you can understand how much additional reinforcement of the racks is needed.
Using a shovel, garden auger and motor auger
Using a drill to dig holes
When all the calculations have been completed and all the values have been calculated, and all the necessary markings have been made, the main work of installing the supports can begin. To do this you will need suitable construction tools. Most often, a motor drill, a garden auger, or an ordinary shovel are used to dig a hole. The last tool is the cheapest, but it is also the longest and most difficult to work with.
Using a shovel you can rarely achieve the desired effect. It can be used to dig wide holes of small depth, but if you need to make a narrow and deep hole, then a shovel will no longer help.
Be that as it may, the advantages of this simple tool include two facts:
- A shovel is available in almost all household plots.
- To operate the shovel you will not need electricity or any other type of paid energy. You just need to pick it up and start using it for its intended purpose. If it breaks, it's easy to fix.
Another tool that can be used to make holes is a garden auger. Its price is several times higher, and its mass is much greater (the device weighs almost 10 kg), but it is more convenient to work with. With its help you can drill a hole up to two and a half meters deep.
The average diameter of the holes made with this tool is 15 cm. You can purchase it at a specialized hardware store. When purchasing, it is important to pay attention to the sharpening of the main working part. If it is poorly sharpened, it will be possible to make holes only on black earth or sandy soils. On rocky and clayey soils, the efficiency will be significantly lower.
The easiest way to make holes in the soil is with a motor drill. With its help you can save time and physical effort, but, unfortunately, you won’t be able to save money . After all, this tool cannot work without electricity or fuel. Also among the disadvantages is the excessive noise of this device. But it can make holes up to three meters deep, and it only takes a few minutes. The diameter of the holes made may vary, but the optimal size is considered to be from 15 to 30 cm.
How to drill a hole in the ground for fence posts
Drilling for fence posts must be carried out in accordance with the specified norms and standards. Correct use of a motor drill or garden tool will allow you to make the required number of holes for concreting supports for the future fence as quickly as possible and without much labor.
Error-free drilling process
The well drilling technique involves several stages of work:
- First, it is necessary to mark the area of land where future piles will stand, examine the type of soil and determine at what level the groundwater lies. This will allow you to calculate the time and effort required to carry out the work as accurately as possible.
- Prepare drilling equipment, inspect its blades, sharpen and lubricate with machine oil.
- Install it strictly in a vertical position and carefully remove the top layer of soil.
- Then gradually go deeper into the ground, without leaning on the tool, so as not to damage the metal blades.
- After the depth of the well reaches 30-35 cm, it is necessary to remove the drill, pour a bucket of water into the hole, and thoroughly clean the device from adhering dirt.
- When the water is completely absorbed into the soil, you need to continue drilling, strictly adhering to the vertical position of the tool.
To increase labor productivity, experienced craftsmen recommend drilling several holes at once and filling them with water. This will help save time, and the soil will be able to soften better.
If the drill cannot be removed from the ground, it should be rocked a little and then easily removed. Proper drilling of holes for posts will allow you to obtain the required number of holes for installing supporting metal or concrete posts for any type of fence.
Concreting
Scheme of concreting the fence support
Often, when installing a fence around a private suburban area, the pillars are mounted using the concreting method. This method is considered universal. In this case, a hole is made in the ground, a post is installed vertically into it, and all the remaining space around the post is filled with concrete mortar.
There is an opinion that in this way the pillars are securely fixed in place due to the high strength of concrete. However, the mixture that fills the empty space in the hole around the support post does not do its main job well. After all, soil can swell under the influence of low temperatures. As a result, the pillar may shift, move outward, or even collapse.
Before concreting, it is necessary to take into account the characteristics of the soil on which the fence will be installed. Most often, the result of soil heaving can be detected in the spring, after the snow melts. However, sandy soil is not subject to heaving, and therefore this technology is quite suitable for it. But on clay soils, pillars should be installed using one of two alternative methods: butting using crushed stone or driving.
The last method is very simple. A small hole is made in the ground, smaller in size than the diameter of the post itself, and then the post is driven into this hole using a sledgehammer. To simplify the work, you can use a stepladder.
How to dig a hole for a fence post
After all calculations have been made for the well parameters, you can begin the drilling process. There are several types of tools and equipment that are used for these purposes. Among them:
- shovel;
- garden drill;
- motor drill;
- hydraulic drill
Each has its pros and cons, differs in labor costs and technology of use.
Butting
Sketch of butting a support column
The butting method is otherwise called dry concreting. It is applicable for installing any support - wooden, concrete or asbestos-cement. In this case, after making a hole of the required size in the ground and levelly installing the pillar in this hole, the voids are filled with crushed stone. The void around the pillar should not be filled immediately, but gradually.
First, you need to fill the crushed stone in one layer and compact it, then lay out the crushed stone in a second layer and also compact it, and so on. To simplify the work, you can use a device such as a vibrating plate. Its other name is vibroleg. It will help with compaction.
If you don’t have such a device, you can make it yourself using a cut log. One of the main advantages of dry concreting is soil drainage. Water does not flow to the base of the support, since the crushed stone does not allow it to do so. Poles installed using the butting method can stand for a long time, but still, it is possible that under the influence of a strong wind they will become loose, and then the tamping will have to be repeated.
Useful tips
If you are going to soften the soil with water to make drilling easier, drill several holes at the same time: this will help avoid downtime. Do not try to jerk the garden auger out of the hole, as this may damage your back. It’s better to swing it slightly, after which you can get the tool out without any tension.
You should sharpen not only the end parts of the auger, but also the edges of the round plates: they are not directly involved in drilling, but by cutting off the roots of plants, they will help complete the job faster.
One last piece of advice: if this is your first time getting started, try your hand at a post hole located in the most inconspicuous place, and no one will notice your mistakes. And only then, having gained experience, you can start drilling the remaining wells and do the job flawlessly.
Percussion-rope drilling
Another way to dig a well on a private plot with your own hands. You will need tools: a tripod, a winch, a cable and the drill itself. The average height of the tripod should be 2.5 meters; a block with a cable is attached to its upper part. The winch is located near the supports. The working tool is a part of a pipe with thick walls and a welded seam.
A metal strip is welded horizontally to the upper part, on which a cable loop is made, where the base is suspended. The soil is removed thanks to a slot 75 percent of the length of the base. Sharpen the lower edge of the pipe and make a special petal or ball-type grip inside. The soil will remain in the grip, so its height from the bottom edge of the pipe should be about 6 cm.
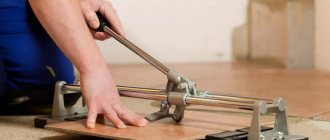
Step-by-step description of tool manufacturing
- Draw a circle on a piece of sheet metal and mark its center - this will be the blade. Cut the workpiece with a grinder. Then a cut line is applied to it (it should go along the diameter line) and a cutout that coincides with the size of the collar circumference. The resulting disk is divided in two and holes for the collars are cut with a grinder.
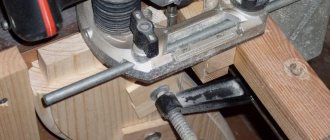
- At the end of the blank pipe intended for making a knob, using a grinder, make 4 longitudinal cuts about 3 - 4 cm long. Then a point is formed from them, armed with a hammer and collecting the cuts at the center of the pipe. Next, the tip is processed by welding so that the pipe-collar is not subsequently filled with earth.
- Weld the halves of the disk with the knob, maintaining a distance between them of 5 cm and an angle to the plane of rotation of 20°.
- The extension pipe is equipped with a handle. The part is welded perpendicularly, achieving the resemblance of the letter “T”, and reinforced with a metal “kerchief”. The workpiece is inserted into the collar pipe and a through hole is made through which the parts will be connected with a pin and wings. Several holes are drilled in the extension - they will help adjust the length of the knob.
- The work is completed by sharpening the blades. The cutting edge on the cutters is processed so that the tip “looks” down when rotated.
Operating rules
When using equipment such as an electric drill, it is important to follow proper storage and safety guidelines during use. Following simple recommendations will extend the life of the tool, avoid premature failure, and also prevent injury.
- Metal parts of the device may be subject to the destructive effects of corrosion processes. Therefore, to protect the blades and rod from rust, they are coated with a special anti-corrosion coating or metal paint.
- To ensure easy drilling, the sharpness of the blade is periodically checked and sharpened if necessary.
- The cause of unexpected failure of the device may be working with an unsuitable blade for a given type of soil. Therefore, before drilling, the soil is first examined, and it would be better to slightly loosen the top layer.
- The electric drill lifts the earth up and can break if you work without interruption and shutdown to remove accumulated earth from the auger. Periodically stop drilling and remove excess soil. This will help avoid bending and breakage.
- Be careful not to get injured.
- After completion of work, it is important to clear away any adhering soil and check the condition of the equipment.
Which drilling mechanism is better
The choice of such a tool should be made based on the soil structure. And only if it matches the parameters of the drill can you count on effective operation. However, some versions are still characterized by increased wear resistance to significant loads.
In particular, when considering non-motorized drills, the best option in terms of functionality and strength is the auger version.
But when choosing, a lot depends on the purpose for which the tool is purchased. Sometimes it is not practical to spend money on a more expensive unit, for example, if you plan to make only a few shallow holes in soft soil. Then a simple plate drill would be an excellent option.
When considering motorized mechanisms, it is necessary to highlight a gas drill - this is a powerful unit that is offered at a relatively affordable price when compared with analogues that operate on a drive. The disadvantage of this option is the heavy weight, as well as the need to work together with a partner.