Material
Plastic
The most popular option nowadays. There is constant demand for them, so their range is constantly increasing. They are very convenient for home use. Such buckets are quite environmentally friendly; you can store food in them and the bucket will not absorb their odors.
The food storage bucket is specially marked hdpe or pp, which means that they are made of food-grade plastic.
Important: In order not to get confused in the letters of the markings, when purchasing, look for an image of a fork or glass, this is the same as hdpe or pp. Buckets made of non-food plastic are marked pvc.
Protect this bucket from high temperatures and severe frosts.
Metal
A metal bucket is an indispensable thing when performing construction work. It can carry any liquids, bulk substances, etc. They have high strength, which allows them to be used even if damaged, dents or deformations.
These buckets are not afraid of temperature changes.
Tin buckets
Such buckets are universal; you can store food in them, use them for cleaning, carry bulk substances, and even dilute fertilizer. It can also be used as decoration if you choose a beautiful design. Yes, yes, now it is very easy to find a durable and beautiful bucket.
Enameled buckets
A very popular model among housewives. For its manufacture, thin sheet steel coated with glass enamel is used. You can store food and various liquids in them, because the enamel does not react with them. Typically, such a bucket is equipped with a lid.
They are very durable, do not corrode or oxidize unless damaged (enamel chips, for example).
Galvanized buckets
Many people still prefer galvanized buckets because of their versatility. In such buckets you can transport crops, and even store milk and food. It is important to know that it is not advisable to cook or boil anything in them and to store food for a long time.
This bucket is durable and does not corrode.
Stainless steel
Like galvanized ones, stainless steel buckets are universal. You can store food in them and use them during construction and in the garden. They are also called cast, because during manufacturing they are made without seams or joints.
Wooden buckets
Wooden buckets have become less and less used, but not entirely. For pickling, pickling and soaking, a wooden bucket is ideal.
Wooden buckets have a peculiar “appearance”. In their production, natural wood is used, and special technologies are used for joining, without glue, fasteners and “synthetics”.
The greatest use of such buckets was found in baths and saunas. They are made from linden or Altai cedar. Under the influence of bath steam, a stunning aroma is released, which adds to the mood during bath procedures.
Master class: miniature enamel bucket
Materials and tools:
- thin cardboard;
- acrylic paints;
- varnish;
- napkin with a small pattern;
- wire;
- thick threads;
- wooden bead;
- second glue, PVA glue;
- scissors;
- compass;
- round nose pliers.
The height of the bucket without handle is 3 cm.
Using a compass, draw two circles with a radius of 11 cm and 8 cm. Draw a chord of 7.5 cm along the smaller circle. For the arms, two parts measuring 6 mm by 11 mm, rounded on one side.
Cut out the bucket parts from cardboard. You can use boxes from tea, oatmeal, etc.
Use instant glue to glue the part along the side seam.
Lubricate the bottom with glue so that a little glue goes inside the workpiece, place it on the cardboard according to size and press firmly. It is best to use thick PVA glue or Moment-gel.
After complete drying, cut the cardboard around the bottom circumference.
Coat a thick thread generously with PVA glue and glue it as shown in the picture.
Bend the parts for the arms and glue them symmetrically.
Use a thick needle or awl to make holes for the arms.
Paint with acrylic paint. The thicker the paint, the better. For hardness, apply several layers to dry. To avoid brush marks, blend the last layer with a sponge.
The last outer layer can be any color.
Decorate the bucket with a design. You can glue a fragment from a napkin; to do this, tear out the design, peel off the top layer and glue it with PVA glue. If the background of the napkin does not match the color of the bucket, then make additional drawings.
Circle the rim of the bucket with black paint, imitate chips in places, and then apply spots of rust-colored paint on them.
After the drawing has dried, cover the entire bucket with several layers of varnish. You can use nail polish.
Make a handle.
Cut a 7.5 cm wire and bend it into an arc. Make a loop at one end with pliers, put on a cylindrical bead, and bend the other end at a right angle.
Insert the loop into the hole for the bow and tighten it.
Insert the second end at a right angle, use round pliers to make a loop and then install it in the hole of the bow and clamp it.
Fix the bead with glue.
If you paint it with silver, you get a galvanized bucket.
Bucket in the interior:
Enameled jugs are made in the same way:
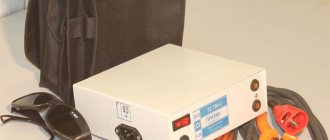
Equipment for the production of galvanized buckets
The production line includes several types of equipment. To facilitate the production process, as well as the “joining” of equipment, individual assembly of the production line is used. The operator is only required to load the raw materials, and all actions for the further production of galvanized buckets are performed by the machine according to a given algorithm.
The cost of the production line is from 6 million rubles.
To save money, you can purchase the following types of equipment yourself.
Metal cutting machines
They are used for cutting metal sheets. The cutting is done automatically. The material is fed to the saw frame thanks to a hydraulic feed cylinder. In automatic mode, the sheet is clamped, the saw frame is lowered and raised, and the vice is opened.
An example of such an installation is the GH-4250 (Blv) machine. Cost - from 600 thousand rubles.
Stamping press
With its help, the walls and bottom are cut out of a sheet of iron. The equipment is large, weighing about 9-10 tons, so delivery requires careful organization.
An example of such a press is JH21-110t (Durmark). The dimensions of the unit are: 1.85mX1.49mX3.06 m. This must be taken into account when calculating the minimum size of the rented premises. Stamping is carried out under a pressure of 110 tons. In 1 min. the press makes 40-60 moves. You can order equipment for 2.1 million rubles.
There are other presses that differ in size and impact force. For example, the JH21-200T (Durmark) unit weighs 17 tons and presses with a force of 20 tons. Moreover, its price will be from 3.5 million rubles.
A press designed for leveling the walls of a bucket, processing the edges
Bending presses are large-sized equipment that bends sheets into a product of the desired shape.
The operating principle is based on the synchronized action of power hydraulic cylinders. The pressure force may vary. For example, in the MetalMaster HPJ-2580 vertical press brake it is 80 tons. The design is a system of powerful hydraulic cylinders; steel plates are used as a press. Thanks to the automation of the system for setting up the operation of the unit, it is easy and safe to operate. The cost is from 1 million rubles.
Serving machine
The device allows you to apply a relief image – “zigs” – to metal. When choosing, you should pay attention to such a parameter as the location of the shafts. Rollers are put on them to create a certain relief. In this case, the part is fixed with screws, and a roller acts on it under pressure. On the reverse side, shafts are pressed onto the steel, which rotate in the opposite direction relative to the roller. The result is a depressed relief. If after the first exposure it is not clear enough, the procedure is repeated. As a result, the cylinder corrugates.
An example of such equipment is Stalex ETB-12 - an electromechanical beading machine, the cost of which starts from 118 thousand rubles.
Folding machine
The unit allows you to connect (roll) a lock joint to seal a workpiece with a round cross-section. The part is affected by 2 rotating rollers. The rolling roller starts moving when the unit is turned on. The control is handled by the operator.
An example of such equipment is the electromechanical folding machine FPM-1300, the cost of which is about 110 thousand rubles.
Rolling equipment
The units are designed for bending rods. Without a machine it will not be possible to make handles for buckets. The device is equipped with shafts with electric drives.
The cost of mechanical equipment is from 120 thousand rubles.
Edge bending machine
It forms “ribs” to stiffen the bucket, allowing the product to be more durable and not deform under the influence of load.
To make the edge hard, a special paste is applied to it.
In total, the cost of the equipment will be from 4.048 million rubles, and this is when choosing the most budget-friendly type of machine. It is advisable to involve an experienced specialist in the production automation process.
Cost and profit calculations will help determine whether it is worth launching a line for the production of galvanized buckets.
On average, the production line produces about 4,800 buckets per month. Since the manufacturer is not interested in retail trade, the wholesale price is used for calculation. On average it is 150 rubles. per bucket with a capacity of 10 liters. As a result, the expected income will be 720 thousand rubles. per month.
Let's get started
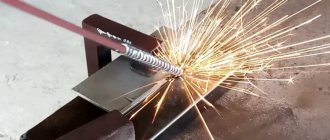
In order to create a pipe from tin, you do not need any special skills (see video). It is necessary to prepare a sheet of metal about 0.6 millimeters thick, pliers, and scissors for cutting metal. In addition, a hammer and rivets made of steel or aluminum should be ready. The metal sheet should be as smooth and polished as possible, and also have 90-degree angles, as in the photo. To make a pipe on a sheet, you need to present an unfolded sample of the structure with your own hands. This can be done either with any sharp object or with chalk. The width of such a sample should match the size of the pipe cross-section, to which another 1.5 centimeters is added. After the above steps, the workpiece is cut out with metal scissors.
Next, the structure is placed on the work table for manual processing of metal products and a so-called bend line is drawn on one side of it, the width of which should be 0.5 centimeters (see video). The drawn line is aligned with your own hands with the opposite corner of the metal sheet, and its edge is bent with pliers and pressed well. Thus, a pipe made of tin is obtained. The edges of such a pipe can be properly secured using rivets made of steel or aluminum. To do this, you need to make holes in both edges of the tin pipe in increments of about 3 centimeters, as, for example, in the video.
If this page loads slowly, its main images can be opened and viewed in the “Drawings, diagrams, site images” catalogue.
A cap is a cap made of galvanized sheet metal for a brick pillar.
Choose any height “h”, or taking into account the dimensions of the finished pillar. It is sometimes useful to increase the planting dimensions “a” and “b” by 5 - 10 mm, depending on the quality of the masonry. The size “d” can be “estimated” with a tape measure directly on the pole, or calculated using the formula below.
* Place the pattern face up. Drill a hole Ф3.5 mm. Bend the stiffeners (15mm) down almost 90°. Bend all dotted lines at an angle of 90°. The bending of the lines should be done in a sheet bending machine, at least in a homemade one of two corners (it doesn’t take long to do). Then the bend lines will be straight, clear, without dents, and the product will ultimately have an aesthetic appearance. If there is no sheet bender, then bend lines “a” and “b” as usual; bend lines “A” and “B” on a piece of angle No. 50 - 63 fixed on the edge of the workbench with the shelf facing up. To bend plane A or B all at once, or almost all of it, use a 25x45 mm block (picket) 30-40 cm long.
Bend the edges along the lines “d” to the correct rectangular shape of the cap or umbrella. To do this, have a narrow mandrel: a 50mm corner with a cut flange, or a metal strip 1.5-2 mm thick attached to it, or even better, a saw blade.
Check the tight fit of the upper (closing) stiffener rib to the rear (rear) plane of the cap. Check again that the product is not distorted; Use a thin marker to mark the response hole (diameter 3.5 mm); punch, drill, and secure the assembly with a 3.2 mm rivet.
Bend the planes along lines “A” and “B” inside the umbrella (into its place), holding it with your hands between a strip of metal (2 mm thick, 40-45 mm wide, ~30 cm long); and a block (picket) 25×45 mm of suitable length. If necessary, compact this bend with a mallet. If necessary, slightly settle the top of the closing stiffener rib at the top of the cap.
The lower belt of the cap can not be included in the pattern, but can be made separately. From a strip of appropriate length and width, bend a rectangle with dimensions “a” and “b”; bend the sides in its upper part for rigidity and fastening, and place it inside the cap before the final bending of the planes along lines “A” and “B”. If necessary, secure with a 3.2 mm rivet.
When making large caps, divide the pattern into two halves, but not along the angular lines “d”, but along the middles of opposite planes-edges. Connect the halves with two slatted “seams”, installing the slats inside the umbrella, with the front side facing the joint. A folded seam, especially on painted material, can (and will) look sloppy. The lower belt for large caps should be made separately.
Appearance of a cap with a small height
— see the picture of a square umbrella on the “Gas hood” page.
Simplified pole cap
with a brick belt:
For support posts and metal pillars made of profile pipes, they are used in the form of small caps. The plugs are made of thicker metal, usually in the shape of a low pyramid.
For the production of single and double connecting seams, see the “Steel Roofing” page.
The passage unit for the exhaust pipe box in the roof roof.
The box is installed (put on) on a rectangular glass, all sides of which are 3 - 4 mm smaller than the sides of the box. The glass at the angle of the roof slope is riveted with a sheet of the same color as the color of the roof. It is convenient to draw the pattern of the box and installation cup of the cutting on one sheet of tin. With a small height of the structure, the ventilation (or protective, heat-insulating) box can be connected directly to the roofing sheet, i.e. without an intermediate glass.
Mark a rectangular hole on the back (not front) side of the roofing sheet. The dimensions of the sheet should be taken such that, with a sufficient margin (minimum 20 cm), they cover the areas of the roof adjacent to the pipes, and cover the part of the sheet from the ridge side with the roofing sheet from above.
Check the tightness of the glass on the sheet. Mark matching holes Ф3.5 mm for fastening the rear side. Remove the glass and drill holes. Before final installation of the glass on the sheet, apply sealant or any water-freeze-resistant glue under the mounting sides. Secure the rear side with 3.2 mm rivets; then side and front.
The glass and the box (already with an umbrella) are alternately installed (put on) on the exhaust pipes to insulate them heat and moisture and improve their appearance. On the side of the roof ridge in the lower part of the structure, additionally install a corner-breaker in front of it to drain the flowing water, especially if the flow pressure increases on a steep or long slope of the roof.
Square umbrella
and its pattern, a pattern for
a round umbrella
for a pipe with a diameter of 160 mm, is on the “Gas Hood” page.
Umbrella, smokebox, weather vane.
Choose any height of the umbrella. If you cut off small sections in the end parts in their upper corner (along the “K” line), then the “smoke chamber” will have two additional windows for exhaust hood. Close these windows from above with a protruding ridge, the ends of which can be cut off figuratively. Along the level of the same line (“K”) you can make one rectangular window at the top of the entire umbrella, which will have to be protected from above by a second umbrella, but of a smaller size. A weather vane is an umbrella with a weather vane; often a weather vane is a combination of two umbrellas of different sizes and shapes; one of its simpler options is on this one. The pattern of the main (large) part can be divided into two identical parts - along the line of its ridge.
Drill four holes Ø 3.5 mm in two end parts.
Bend all the stiffeners along the lines “d” almost 90°.
Bend the stiffeners 15 mm along lines “A” and “B” by 90°.
Bend the umbrella along the line of the ridge to the corner of the planes.
Bend all lines *60 taking into account the slope of the umbrella planes.
It is advisable to do bending in a sheet bending machine - even a homemade one made from two corners will significantly improve the quality of line bending and the appearance of the product.
Temporarily fix the main part on a flat surface, maintaining dimension “B”.
Place the end piece tightly against the main piece. Mark the counter holes Ø 3.5 mm; drill. Secure the assembly with 3.2 mm rivets.
Make the racks from strips of the same material, folding the strip (width 105-110mm, length about 40cm) twice - that is, in three layers of 35 mm each, WITHOUT SETTING along the fold lines to maintain rigidity.
Marking the holes for attaching the poles to the umbrella:
In calculating the size » y
» Take 3 cm for an umbrella for boxes or belts made of tin, 6 cm for an umbrella for a brick pipe.
Tee for exhaust hood.
Mark and cut a hole in the pattern of the main pipe “D”. The lower drawing shows (as an example) the exact marking of the hole for the entrance d 140 mm to D 150 mm. On the “Gas Exhaust” page there is a drawing of the marking of the inlet hole for a tee connecting a diameter of 120 mm with a pipe of 140 mm; and an outlet with a diameter of 120 mm, as most often used when installing individual gas heating in a private house or apartment.
Marking an inlet hole with a diameter of 140 mm into a pipe with a diameter of 150 mm:
Prepare the folds, “roll” the pipe “D” into the shape of a pipe, but do not connect the folded seam.
Temporarily install the inlet pipe “d” into the folded (but not sealed at the seam) pipe “D”. Align the relative position of the pipes. Draw out the branch pipe “d” (inlet) and cut it along the line of the inlet hole. Along the cut line on the pipe “d”, bend the side 8 - 10 mm wide as shown in the figure. Install the inlet pipe into the tee from the inside of the “unfastened” flow pipe “D”, fasten the folds, check the tightness of the parts. Seal the folded seam, drill matching holes Ø 3.5 mm - secure the assembly with rivets Ø 3.2 mm. If necessary, add any sealing material to the connection line from inside the tee: putty, paint, sealant.
When installing an exhaust from gas equipment, from a heating boiler or from a water heating column, special attention should be paid to the tightness of the connections.
Corners, ventilation and flue outlets.
A simplified method for marking the mating line of branch links is presented, which gives, although approximate, a pattern that is quite applicable in practice. Reducing the number of bend links (angle) increases distortion and the need for adjustment (trimming) during assembly. Precise patterns of bends are constructed using descriptive geometry techniques.
Pattern and marking of the mating line of the links of a three-link bend at 90 degrees.
For the exact (in numbers) marking of the pattern line for an outlet with a diameter of 120 mm, see the “Gas hood” page. The pattern and marking of the connecting line of the links for a five-link 90 degree bend is on the page “Tee, bends, transitions”. Mirror the patterns on the left side of the patterns to the right side.
Connect the marking points into a smooth line, mirror the resulting pattern on the right.
Pattern and approximate marking of the line of conjugation of two links of a right angle:
The drawing shows a ninety-degree right angle pattern for a pipe with a diameter of 100 mm.
Feeder for rabbits.
Pattern for making a bunker-type feeder from galvanized sheet. The drawing shows the dimensions of the parts of a feeder with a capacity of 3.5 liters of dry bulk food.
Assembly with rivets can be replaced by resistance welding or spot soldering.
Drill all the holes in the parts of the first (test) copy. Make cuts along the edges of the fold lines of the back and inner walls. Bend the sides of the fastening 15 mm by 90 degrees. Bend the 25 mm line of the rear wall inward by approximately 135 degrees, giving the shape of a feeder tray. Bend the inner and rear walls to their working positions, using the side walls as a jig. Make sure the holes match. If necessary, correct their location on the parts of the following copies. Connect the inner wall with both side walls using 3.2mm rivets. Place into the back wall and install rivets.
The feeder can be supplemented with a top cover and elements for attaching to the cage.
Drainage funnel, drainage gutter.
Dimensions, shaped edge of the top and artistic elements of the water inlet funnel are at the discretion of the artist. It is useful to increase the width of the strip for cutting each section of the gutter following the water flow by 1 - 2 mm.
Due to the large amount of material, some drawings and drawings have been moved to other pages, in accordance with their topics.
Patterns for a confuser, a diffuser, a transition from a round cross-section to a round of a different diameter (bucket), from a rectangular cross-section to a round, to a rectangular one are located on the page “Drawings, diagrams, site drawings.”
Every residential or even country house or bathhouse that is not connected to a central heating system is equipped with a heat-generating device. To remove the products of fuel combustion in the firebox from the interior, a smoke exhaust duct is connected to them. The most affordable option is a galvanized chimney; in construction stores the price of 1 m of pipe made of this material is about 110 rubles. If you add to this the costs of the rotating elements, deflector and brackets, installation will cost a pretty penny. However, in this article we will tell you how to reduce costs by 60% and how to make a chimney from a steel pipe with your own hands.
The advantage of store-bought models of galvanized steel chimneys is that manufacturers produce a wide range of sizes. In addition, among the factory products you can find double-circuit, thermally insulated, corrugated, with increased flexibility and single-circuit. When making a homemade chimney, you have to limit yourself to only single-circuit pipes. In order for the smoke removal system to work effectively, the following parameters should be taken into account:
Important! A sheet of galvanized steel measuring 2500x125 mm in construction stores costs about 600 rubles, with proper cutting, one sheet produces 8.75 m of pipe with a diameter of 100 mm, the cost of 1 m is approximately 68 rubles, which gives 60% savings!
Aluminum
From the middle of the 20th century. and to this day, aluminum utensils, including buckets, have reliably gained their position in the world market, despite the fact that serious wars have been waged against aluminum utensils. Aluminum was accused of increased toxicity. Although it, like chromium, copper and tin, reacts with oxygen and covers the dishes with a protective film. The older the aluminum cookware, the more reliable the protective layer, especially if you do not rub it with abrasive agents.
Note! A person can receive 50 mg of free metal per day without harm to health. When water is heated in an aluminum bucket, no more than 3 mg of aluminum is released.
In general, aluminum cookware is light, durable and looks aesthetically pleasing. Why you should buy aluminum buckets:
- low cost of the product;
- excellent thermal conductivity;
- corrosion resistance;
- easy to clean.
Note! Aluminum buckets should not be used to transport acids and alkalis.
Aluminum buckets are widely used in the dairy industry, and not only them, but also tanks for transporting milk from the farm to the milk processing plants. Aluminum buckets are available in volumes of 5, 7, 10, 12 and 15 liters. The most popular is a 10 liter aluminum bucket.
Manufacturing
To make a pipe from a sheet of galvanized steel, you will need a rubber or wooden mallet that is heavy enough to bend the metal. In the process of work, scissors are used for cutting metal, a long ruler, a scriber for marking, a corner and a “gun” for bending. The bending process occurs as follows:
Note! The installation of a chimney requires rotating parts, which are made by cutting straight pipes at an angle. If you cut the pipes at an angle of 75 degrees, then when joining, you get a 150-degree turn; if you cut them at an angle of 45 degrees, you get a 90-degree turn. To improve the efficiency of a homemade chimney, it is wrapped in non-flammable thermal insulation material.
How to make a galvanized bucket with your own hands
Rice. 7. Details of the cylindrical bucket pattern: 1 - bottom;
2 - side surface
with seam allowances;
surface C = 2-3.14-12.5 = 78.5 cm. To this calculated length we add 3 cm to form a seam fastening the development into a cylinder (1 cm on one side and 2 cm on the other), as a result we get the full length of the pattern side surface 78.5 + 3 = 81.5 cm. The width of the side surface of our bucket is equal to its height H = 25 cm. However, in order to secure the bottom with a seam and bend the top edge of the bucket by placing wire in it, we will add more to the width of the side surface 2 cm (1 each at the top and bottom), that is, the width of the sweep will be equal to 27 cm. This is the full width of the side surface of the cylindrical bucket. The pattern of the bottom and side surface of the bucket is shown in Fig. 7.
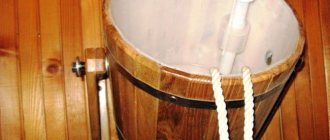
Bath bucket with plastic liner
You can make a doused bucket in the most primitive way, accessible even to people who have not previously had anything to do with wood. To do this, it is not necessary to become familiar with the basics of cooperage and learn to use special tools.
A couple of simple steps will help you quickly make a wooden container that costs a lot of money on the market:
- To begin, select an ordinary plastic bucket of the most successful color. For example, white or azure blue. Water in such a container will look very advantageous.
Next, remove the handle and any other parts present from the bucket. You don't need them at all. Don’t rush to throw them away; perhaps they will come in handy in the future.
Prepare 25–30 not too wide sanded wooden planks. Their exact quantity depends directly on the size of the plastic bucket.
Using super-resistant glue, attach the strips to the outer walls of the plastic container, imitating a wooden bucket. Coat the joints with transparent silicone.
- Cover the “wooden” container with a suitable varnish and strengthen it even more firmly with metal rings.
The wooden dousing bucket with a plastic liner is ready. Externally it is difficult to distinguish it from natural, but internally it meets all the requirements.
Buckets for well
First of all, you need to understand that a bucket for a well should be of much higher quality than an ordinary household one. After all, it is constantly subjected to deforming loads, for example, when falling onto the surface of water or hitting the walls of a well during lifting. It is used much more often than a regular one, so the handle must be reliable. Well, don’t forget about the effect of water on metal, so everything should be made of stainless material. Buckets can be not only aluminum or galvanized iron, that is, metal, but also wooden and plastic. The wooden one is convenient because it is quite heavy and it is easy to scoop up water. It is quite durable if used properly. In addition, if the bailer breaks off the cable or chain, the bucket does not sink and is easy to get out of the well. The bucket is made from coniferous wood; they are least susceptible to rotting. The most common material is larch. The disadvantage is that it must always remain wet, otherwise the wood will dry out and cracks will form in the walls.
A plastic well bucket is more durable, but does not sink well when lowered into water. That is, it is quite difficult to scoop up water with them. But at the same time, it is impossible to drown it if it falls off the rope.
The most universal and most convenient is a device made specifically for a well. It has a cylindrical shape, is made of stainless steel, and most importantly, it is equipped with a special valve on the bottom that allows you to quickly fill it with water. When the bucket hits the surface of the water, the valve opens and liquid flows through the lower holes into the bucket; as soon as it begins to rise upward, the valve closes under the weight of the water. Such a device does not require deft throwing on its side to scoop up water. It can be used in wells of any diameter. The main thing is to secure it well at the end of the cable or chain, otherwise if it comes off, it will be difficult to get it out.
Organizational aspects
To start production, you must follow the plan for creating and launching an enterprise:
- Select an organizational form. Can produce buckets. To register, you must contact the tax service, pay a state fee (800 rubles), present a passport and an application filled out in form P21001. In it indicate the OKVED activity code: 25.92 - Group “Production of containers from light metals”.
- Choose a tax system. For a novice entrepreneur, the best option is to choose a simplified system.
- Rent a room. When searching, you should take into account the dimensions of the equipment.
- Contact Rospotrebnadzor to notify about the start of activities. You should also obtain clarification from the SES regarding the organization of work on site, and install a fire alarm system in accordance with the requirements of the fire service. In particular, to ensure the safety and health of employees, the Machine Shop Sanitation Code (5160-89) must be followed.
- Equip the room. In addition to the main production facilities, it is necessary to purchase office equipment, furniture for office staff, organize a rest area for workers, and, if necessary, make repairs. In general, the cost of preparing for production, excluding the acquisition of a production line, will be about 180 thousand rubles.
- Purchase of raw materials. The process involves concluding contracts with suppliers. You can purchase steel sheets and zinc for melting, but it will be easier to purchase galvanized sheets for the production of buckets. Monthly costs for purchasing raw materials will be about 190 thousand rubles.
- Hire workers. At first, you will need to involve 3 workers, an accountant, and a production and sales manager. Salary costs, taking into account deductions, will amount to about 200 thousand rubles.
- Advertise the product. Information about the start of production should be published in print media and radio. The sales market for products is construction supermarkets and points selling household goods, farms, construction organizations.
When calculating fixed costs, you should take into account the costs of taxes, payment of utility bills, and the purchase of materials for maintaining equipment. In total, the amount will be about 430 thousand rubles. Profit—290 thousand rubles; The payback period for opening production is about 1 year.
Costs can be significantly reduced if you look for used equipment on popular Internet sites (Avito, Yula).
With a responsible approach to setting up production and a preliminary search for a sales market, you can achieve a stable profit after 2-3 months of work.
Galvanized
These buckets are an indispensable household tool. They serve:
Manufacturers produce galvanized buckets with a volume of 15 l, 12 l, 9 l, 7 l and 5 l. There is another variety - a 12-liter zinc bucket with a spout for use as a milk bowl on farms. It is made from galvanized sheet metal using special modern equipment, thanks to which:
- the buckets have only one seam, treated with a special sealing paste before stitching, which makes it airtight;
- handles are made of special reinforced wire;
- Strong steel rivets are used to attach the handles, which makes the bucket reliable when carrying heavy loads.
Tips for use - how to keep the bucket in service!
It’s simply impossible to do without buckets either at country houses, or even more so at construction work. With intensive use, they quickly lose their original shiny appearance and begin to rust and leak. Experienced summer residents recommend soldering a zinc plate to the bottom of the bucket immediately after purchase - this doubles the service life of the container. For convenience, attach a piece of rubber hose to the handle.
After work, the zinc bucket must be emptied of any remaining materials that have been in it during the day. It is important not only to rinse, but also to wipe the inside of the container with a dry cloth. You cannot leave such containers directly on the ground overnight; in extreme cases, place at least a few bricks under the bottom or a piece of wood. It is best to store buckets after work in dry areas.
Enameled bucket with lid
Enameled bucket, with lid, 12 l. 2S28
Enameled buckets are an indispensable item in the household:
- they can hold water;
- collect and transport berries without fear of oxidation;
- they are suitable for milk, sour cream, cottage cheese in those farms where they are engaged in animal husbandry;
- You can use them to ferment cabbage, pickle cucumbers, mushrooms and other pickles.
What are the advantages of enameled containers:
- thanks to the enamel coating, they do not corrode and do not react with aggressive fillers;
- Enameled containers look very attractive. Manufacturers produce them in a wide range of colors. In addition, they are often decorated with printed designs, which cannot but please the eye;
- as a rule, they are equipped with lids and trays, which allows you to boil water, laundry in them, and even cook first courses in large quantities when necessary;
- The handle of the enamel containers is covered with a plastic braid, which is very convenient. When carrying heavy filler in a bucket, the handle does not cut into your hands;
- enameled containers with a lid are most often produced in a standard size - 10-12 l;
- Basically, the shape of enameled buckets is not very diverse: cylindrical and truncated cone.
They are very easy to use, wash well, and do not absorb foreign odors. Usually made from high-quality sheet metal with a thickness of 0.8 to 2.0 mm with double enamel coating, which is carried out, according to technical specifications, in two ways:
- Wet or slip method, in which enamel is applied to the walls of the container using a spray gun or by completely immersing the object in liquid enamel. The item is then dried in an oven and the procedure is repeated.
- Dry method, in which enamel powder is applied to the walls of a red-hot product. After this, the object is fired, a second layer of powder is applied and fired again.
Note! Buckets treated in this way last a long time; the only thing that threatens them is chips of the enamel coating. The thing itself is unpleasant, because it opens access to unprotected metal.
Tin pipe - making it yourself in 3 steps
Despite the many different tin blanks that are sold in construction supermarkets, sometimes when installing drains, ventilation or other similar engineering systems, it becomes necessary to install parts of a non-standard configuration or size. That’s why many home craftsmen are interested in how to make a pipe from tin with their own hands.
If necessary, you can make a tin pipe yourself
Features of the material used
Before starting work, it is advisable to carefully familiarize yourself with the features of the material from which the pipe is supposed to be constructed. Tin is an ordinary sheet of steel with a thickness of 0.1 to 0.7 mm. It is formed by sequentially rolling the workpiece through the rollers of a rolling mill.
However, the processing does not end there. In order to protect the resulting sheet from corrosion, it must be coated with a layer of another substance that does not oxidize in air.
As a result, the finished product warehouse receives steel sheets, the width of which, according to GOST, can be 51.2-100 cm, coated with an ultra-thin layer of zinc, chromium or tin.
Please note! The material is very plastic, which allows you to process it at home.
On the other hand, when arranging stiffeners, you can get a structure that is not inferior in strength to thicker steel.
Considering that the price of tin is also low, it is often used to manufacture many different parts of complex shapes.
Required Tools
Cutting and bending sheets of tin does not require much effort. However, it would be useful to arm yourself with special tools and devices, the list of which is given in the table.
| Tool | Purpose |
| Metal scissors | Used to cut sheet metal into pieces of the required size. The maximum thickness of the material, as you know, is 0.7 mm, so it is enough to apply only a slight muscular effort. |
| Kiyanka | You can replace it with a rubber hammer, as well as a steel tool with rubber pads that do not leave dents on the tin during use. |
| Pliers | Used to make bends. Can be replaced with pliers. |
| Crafting table | For marking and cutting, it is necessary to place the sheet of tin on a flat surface. It is best to use a carpentry workbench, but cutting can also be done on a floor cleared of large debris. |
| Calibrating elements | Their role is played by a thick-walled steel pipe with a diameter of about 100 mm (or round wood) and a steel corner 75 mm wide. It is secured to the edge of the workbench or clamped in a carpenter's vice. The pipe will be needed to make a longitudinal pipe seam. |
| Marker | Used for marking sheet metal. It is a thin steel rod with a sharp end. |
| Measuring tool | This includes rulers, tape measures, squares and other similar devices. |
Outdoor washbasin for a summer residence: main types of purchased models
A garden washbasin or country sink should combine ease of use and affordable cost. When choosing a purchased model, you need to pay attention to the following parameters:
- the street model should fit harmoniously into the overall decor and the entire concept of the summer cottage;
- for frequent outdoor use, it is best to choose a wall-mounted washbasin with a large water tank;
- for rare, periodic use, it is advisable to give preference to small-volume washbasins, which will prevent water stagnation.
An outdoor washbasin can be portable or portable and stationary.
Such a device is usually located in the working area of a personal plot and can be represented not only by a primitive hanging tank, but also by a device with an increased level of comfort:
- a washbasin without a cabinet
or a so-called pour-over street washstand. This is the simplest design, represented by a capacity of three to five liters. Water is poured into the tank from above. The tank is closed by a lid, and a tap is located in the lower part or a special outlet float is installed. For drainage, a bucket or drainage layer on the ground is used. The best option is a durable plastic model. The most modern type is a plastic hanging tank with lids and a magnetic release; - A special feature of the plastic model on a stand
is the ability to attach it to a metal stand. You can firmly install such a device on the ground by pressing your foot on the bottom crossbar. Some models are characterized by the presence of such an additional element as a sink with water discharge directly onto the ground with a built-in drainage layer represented by fine crushed stone or gravel. The device can be installed between ridges or flower beds, as well as anywhere in the garden.
Assembly Rules
To properly assemble a chimney made of galvanized steel, you must first mark out the layout and laying of the pipe. Using this drawing, you should determine how many pipes are required and cut them into sections of the required length. Assembly is performed as follows:
Note! The smoke exhaust duct is installed on the roof at a distance of 30-50 cm from the ridge. To ensure the level of traction, the skate should be 50 cm higher. Incorrect placement on the roof can cause backdraft or wind backlash.
Tags
with your own hands from with your own hands from with your own hands With your own hands...with your own hands from with your own hands with your own hands from Handmade Handmade woman with your own hands. How to make a bucket How to make a bucket made from How to make a bucket made from How to make a bucket yourself make much you can make it do not Make it with your own How to make it How to make a bucket How to make a bucket from tin from tin galvanized tin without tin its own from tin from tin in tinsmithing. its rigidity. roofing tin. types of tin.
rebate pipe with a hammer bend the hoop ear the edges of the hammer hitting read the mandrel
Video: making pipes
With the development of the construction market, the need for tin pipes is gradually decreasing. Today they are used more as integral interior decorations (see photo). Tin is a very thin sheet of steel that is susceptible to rust. That is why today, instead of it, galvanized iron is used to make drainpipes, interesting canopies over them, as well as small roofs over chimneys. But there are still areas where this material is still in demand, for example, for the manufacture of pipes for a samovar, cans, containers for paint coatings and chemical products, household products, information signs and more (see photo).
There are several types of tin. So, today it comes in canned or food grade, thin-sheet black, single- and double-rolled, as well as varnished. They first started making it many years ago, and they did it with their own hands. Sheets of material measuring 1 x 1 meter and about 2 millimeters thick were made using large hammers, after which they were left for some time in containers with lactic acid. Since that time, the technology of its manufacture has changed significantly and today special mechanisms are used for this. Making a pipe from such high-quality sheets is not difficult.