Detachable connections of technical parts made using threaded profiles (trapezoidal, triangular, semicircular, rectangular, etc.) have found wide application in all industries. The basis for thread formation is the principle of a helical line. If a groove is cut on the surface of a cone or cylinder, the cutting edge of the cutter creates a helical surface, the plane of which depends on the shape of the cutting edge. The formation of a helical protrusion can be imagined as the movement of a square, trapezoid, triangle along the surface of a cone or cylinder so that all points move along a helical line.
Types of threaded connections and their purpose
A threaded connection is a threaded connection of two parts, one of which has an external thread and the other an internal thread. According to the operational use of the connection, a distinction is made between special and general applications, used to connect one type of elements of a specific mechanism. The thread obtained on the outer cylindrical surface is called external (conventionally - bolt), and the thread obtained on the inner cylindrical surface is called internal (conventionally - nut). Threaded connections of parts are widely used in mechanical engineering (in most modern vehicles, more than 60% of all elements have threads). The first group includes:
- fasteners (inch, metric), which are used for detachable connection of machine parts;
- kinematic (rectangular and trapezoidal), which are used for lead screws, measuring device tables and machine support screws, etc., the main requirement for which is to ensure accurate movement with the slightest friction;
- reinforcement and pipe (pipe conical, tapered, cylindrical and metric), used for fittings and pipelines for various purposes, the main task of which is to create tight connections.
According to the cross-sectional profile, threaded connections are divided into thrust, triangular, round trapezoidal and rectangular. Based on the direction of the turns, they are divided into right-handed (twisted clockwise) and left-handed (twisted counterclockwise). Based on the number of activities, threaded connections are divided into multi-start and single-start. The characteristics apply to all threaded connections. GOST 9150-81 establishes the only nominal profile for them.
Basic parameters of threaded connections
The main parameters are:
- d (D) – external diameter, the thread of which is designated conventionally;
- d1 (D1) – internal diameter of the screw (nut);
- d2 (D2) – average diameter, that is, the diameter of the represented cylinder coaxial with the thread;
- P-step corresponds to the distance between adjacent identical (left or right) side faces of the profile in a direction parallel to the thread axis;
- t-stroke, which corresponds to the relative longitudinal movement per one revolution of the screw (nut) and is equal to the product of the step by the number of events, t=P·n; for 2- and 3-lead screws, when simultaneous winding of 2 and 3 wires of the specified size occurs, respectively, the stroke value is equal to 2P, respectively, for a 2-lead screw and 3P for a 3-lead screw;
- α is the profile angle; the suitability of the thread is determined by the angle of inclination of the sides, equal to α/2 for symmetrical threaded ones.
Thread profiles and performance characteristics
Thread profiles have significant differences. Let us briefly outline them.
Metric thread
The profile is an equilateral triangle. Thus, the angle at the top of the turn is 60°. Requirements for metric threads are established by GOST 9150-2002. One of them is formulated as follows: the ridges and depressions are made blunt.
In the above figure the following notations are used:
- letter “P” – thread pitch;
- the letter “d” is the outer diameter of the thread;
- combination of symbols “d1” – internal thread diameter.
Pipe thread
The profile of this thread is an equilateral triangle, the angle at the apex of which is 55°. Designed for connecting structural elements with pipe threads. The size of such a notch should not be considered as its physical diameter. This is a number that displays the bore diameter of a standard pipe product.
Pipe threads can be cylindrical or conical.
The first type of notch is used in threaded connections:
- parts with a cylindrical cross-section;
- structural elements having an internal cylindrical thread with objects on the conical surface of which a corresponding external cylindrical thread is made.
Conical inch thread
The apex angle of this type of thread is 60°, and its profile is an equilateral triangle. This notch is made according to GOST 611-52 standards with a taper of 1:16.
In this case, the following requirement must be observed: the angle, the rays of which are segments of the surface slope line and the line parallel to the longitudinal axis of the thread (in the figure indicated by the letter “φ”), must be as follows: φ/2=1°47′24″.
Round thread
A round thread profile is obtained by pairing two arcs, characterized by the same radius, with segments forming an angle of 30°.
This notch is used in plumbing fittings:
- shafts capable of rotating in two opposite directions - spindles;
- shut-off devices installed at the entrance of the system, which includes one or more plumbing points - valves;
- devices that provide the ability to adjust the power of water flow - mixers;
- water taps and for washing hands (toilet).
The requirements for round threads are specified in GOST 13536-68.
Trapezoidal thread
This is a metric thread. The angle of its profile at the apex is 30°. Designed to perform the function of transmitting motion. It is found in cargo and steering screws, as well as in lead screws and caliper screws. It is used in various units and technological equipment, for example, in car lifts and lathes/milling machines.
Technical characteristics and requirements for trapezoidal threads are specified in State Standards under the numbers:
- 9484-81. Sets the thread profile and its dimensional characteristics;
- 24737-81. Here are the main dimensions of a single-start trapezoidal thread;
- 24738-81. This standard specifies the diameters of trapezoidal threads and their pitches;
- 24739-81. Approves the profile and main dimensions of trapezoidal multi-start threads.
Thread persistent
The thrust thread has a profile that looks like an unequal trapezoid with an inclination angle of the non-working side equal to 30°, and the working side – 3°. Used in devices designed to produce significant one-sided pressure.
These are, for example, screw drives for pressure rolling mills and screw presses. Requirements for thrust threads, as well as its profile and main dimensional characteristics are specified in GOST 10177-82.
Rectangular thread
The rectangular thread profile is not standardized. That is, today the State Standard has not been adopted, establishing such operating parameters as the value of the stroke and cut, the size of the diameter and pitch.
Meanwhile, manufacturers usually adhere to a certain approach to the formation of a rectangular thread profile. It is formulated as follows: its depth is ½ P, where P is the thread pitch.
Currently, rectangular threads are rarely used. This is due to:
- the formation of a large number of gaps between the turns as a result of wear;
- technological difficulties associated with the implementation of a threaded connection.
A rectangular notch is successfully replaced by a trapezoidal thread. Elimination of gaps formed in it is carried out by tightening the split nut.
Metric threads
Metric threaded connections of each diameter in the range of 1–600 mm can be manufactured in several pitch sizes. However, they should be no more than 6 mm. Large pitches are only available in threads with a diameter of 1–68 mm. They are used when large parts need to be connected. In addition, there are a number of small steps that are taken with thin-walled parts and limited twist length to increase strength and self-braking properties under vibration loads. And also in cases where it is necessary to obtain small axial movements at significant angles of rotation (for example, micrometric screws of devices). The fine-step twist length is variable and ranges from 0.3 to 2d. GOST 8724-81 contains all the instructions on the availability and advantages of metric threads (table).
The table “Dimensions and pitches of metric threads” is given below.
| Diameters, d, D, mm | Steps, P, mm | ||||||||||
| 1st row | 2nd row | 3rd row | big | small | |||||||
| 4 | 3 | 2 | 1,5 | 1,25 | 1 | 0,75 | |||||
Trapezoidal thread
Threaded spiral profiles with trapezoidal contours. They are the most popular shapes used for lead power screws. The main advantages are increased strength and ease of production.
Mostly found in a vice or lead screw of a lathe, as well as in other applications where high load is required. Standard variations include multi-valued, left-handed and self-centering threads, which are less likely to bind under the influence of lateral forces.
The trapezoidal profile provides the highest possible level of bonding. Therefore, it is actively used for coupling structural parts in mechanisms that operate under the strong influence of dynamic loads, for example, in running nuts, which are responsible for fixing rod valves.
Designation of threaded connections in the drawings
When designating connections in drawings of all areas of construction, industry and mechanical engineering, according to GOST 2311-68, it is accepted as a convention when lines in the form of a screw are replaced by two lines - a solid thin one and a solid main one. In this case, the pattern of internal and external threads has the following features:
- The drawing represents internal threaded connections with main solid thin lines along the outer diameter and continuous lines along the inner diameter. A cut displayed as invisible is shown as thin dashed lines of the same thickness along the inner and outer diameters.
- The drawing depicts external threaded connections with main continuous lines along the outer diameter and continuous thin lines along the inner diameter. The thread designation shows the type of thread, nominal diameter, pitch (if it has a fine pitch), direction of the thread (if left-handed), tolerance ranges (table).
The table of threaded connections is shown below.
Thread type and standard number (GOST or ST SEV)
(ST SEV 1157-78)
Pipe conical, GOST 6211-69
R3/4, GOST 6211-81 (external)
R3/4, GOST 6211-81 (internal)
Pipe thread
It wraps around a conventional cylinder and is made in the form of a triangle with equal hips and an inclination angle of 55 degrees. Moreover, in the upper part of the ridges there are curves that give unique characteristics to this type of cutting.
This eliminates gaps in protruding or recessed parts, providing a higher degree of sealing at the junction of individual parts. It, like the previous version, is inch, but its diameter can reach from 0.06 to 6 inches. The cutting pitch is 11-28 turns.
Unlike other types of inch cuts, the pitch of a pipe cut is considered reduced. This is done in order to achieve maximum strength without allowing a dangerous reduction in the wall thickness of profile metal pipes. This type of thread has a cylindrical or conical shape, which will have a taper ratio of 1 to 16.
Gauges for inspection of threaded bolts and nuts
Gauges for monitoring the suitability of cylindrical threaded connections act as a set of rigid means that monitor the suitability of threads. Their advantage is that they provide complete interchangeability of the threads of the twisted parts. All gauges are divided into two main groups: for external and internal threads. According to the principle of construction, they are divided into non-through and through, each of which controls its own tolerance zone, and according to the shape of the surface - into threaded and smooth. Threaded connections with a full bore gauge profile have a nominal profile contour and parameters made with high precision.
Read also: How to choose a UPS for a computer based on power
Application of calibers
Insert plugs are the main type of threaded plugs and have a tapered shank. They are manufactured with diameters from 1 to 50 mm. The sealing of threaded connections with an outer diameter from 50 to 100 mm is made in the form of nozzles, fixed at the ends of the plastic handle with screws. External threads are checked using threaded rings made with a diameter of 1 to 100 mm. Pass-through rings are cut along the entire width of the ring. Their outer surface is rolled. Impassable rings have a shortened thread (only two or three turns with a shortened thread are left). They create a distinctive groove in the middle of the outer knurled cylindrical surface of the ring.
Tools for measuring thread parameters
The insert micrometer is the main device for measuring the average diameter of threads in mechanical engineering (it is often called a "rifling micrometer"). To calculate threaded connections, use a definition in which the average thread diameter is the length between the parallel sides of the threads located on opposite sides of the thread axis, and measured perpendicular to the thread axis.
The difference between a micrometer and a smooth micrometer MK is that at the ends of its heel and microscrew there are holes in which inserts are placed. When the device covers a real thread with inserts, the conical insert fits into the recesses, and the prismatic insert covers the thread. In this arrangement, the reading on the drum and stem scales gives the size of the average diameter of the part being measured.
A micrometer with inserts has a division value c = 0.01 mm. The measuring range is 25 mm, and the measurement limits are: 0-25; 25-50, etc., up to 325-350 mm.
A micrometer from 0 to 25 mm is set to “0” with nuts together with inserts raised to the stop, and micrometers for measuring sizes over 25 mm are set to the lower limit of measurement with a setting measure attached to each device. Inserts for measuring the average diameter are attached in pairs to each micrometer: prismatic and conical. The size of the measuring surfaces of each pair depends on the thread pitch. The measurement error with a micrometer with inserts ranges from 0.025 to 0.20 mm.
Edison carving
The Edison thread profile consists of arcs, the characteristics of which are prescribed in the corresponding GOST. The sides are inclined by 60 degrees, which makes the cutting more resistant to mechanical wear. Therefore, the service life of such connecting parts is quite long.
Therefore, it is quite often used to fasten components of structures where periodic increased loads of a non-permanent nature are observed. For example, it is often used in pipeline fittings.
If you require fasteners of high quality and various types, then the assortment of the First Fasteners store will certainly please you. We have a huge variety of fasteners:
- nuts;
- hairpins;
- nails;
- clamps;
- bolts;
- screws;
- rivets;
- anchors, etc.
Large wholesale orders are delivered throughout Russia. For example, if you choose wholesale self-tapping screws from a manufacturer in Moscow in our store, the price for you will be as favorable as possible. If necessary, a company consultant will answer any questions related to products or store operations. To place a pre-order or clarify any information, call 8-800-201-81-96 or request a call back from a specialist through a special form on the website.
Measuring medium threads using the three-wire method
Measuring the average diameter using wires is much more accurate than using a micrometer with inserts. The wire size is selected so that the forming wires touch the helical surface in the area of the actual average diameter d2. The largest wire diameter for metric threads is dnp=0.577Р. Conversion from size M to the size of the average diameter d2 for a metric thread is calculated using the formula d2=M-1.438dnp (the measurement method is indirect).
Wires for measuring average diameter are produced by the tool industry, producing them in sets of 3 pieces. The nominal wire sizes depend on the pitch and range from 0.101 to 3.464 mm. Permissible deviations of wire diameter from the nominal size are ±0.5 µm. The shape deviation is within the tolerance of the wire size. The cutting of the wire surface is especially strictly controlled. The error in measuring the average diameter using three wires is small and amounts to 1.5-2 microns. The average diameter of the working and control plug gauges is measured using only three wires.
Instrumental measuring microscope
Two models of instrumental microscopes are used: BMI and MMI. Both of them are created according to the same concept and differ from each other, primarily in overall dimensions, a set of accessories and measurement limits. The devices allow you to measure all the main elements of the external thread profile, thread gauges, taps, various cutters and other tools. By measuring in polar or rectangular coordinates, microscopes also check the force of a threaded connection, the dimensions and contour of gauges and parts of complex shapes, shaped cutters, shaped cutters, shaped parts of dies and molds, templates, etc. All measurements on a microscope are performed using a non-contact method.
Definition of thread type
There are several options for determining the type of thread. A specialist immediately sees, for example, the difference between a metric thread and an inch thread with the naked eye. However, taking into account all the types of threads, it is only possible to qualitatively measure the parameters with a caliper or a specialized metal template. In the case of measuring parameters with instruments, the data obtained must be compared with GOST.
Using a template, it is easier to determine the type; to do this, you need to pay attention to the markings on the template. Structurally, the templates are a stack of metal sheets with corresponding holes on the same axis. For identification, a value indicating the thread pitch is applied to all elements.
About the method of manufacturing a self-locking threaded connection
It is known that existing threads and threaded connections are produced using specially designed and standardized tools. This often requires appropriate equipment and is carried out using existing cutting techniques. But known techniques and methods for producing standardized threads cannot be used for special self-locking threads developed and introduced into production. The problem is that in this case it is cut into a conical shape at the end of the bolt with a special profile. Moreover, the turns have a variable height, but the diameters of the bolt remain constant.
The cross-section of a screw thread has three characteristic parts, that is, a triangle at the apex and two trapezoids in its middle and base. The strength indicators and friction moment in the thread compare favorably with similar parameters of standard threads. A special durable threaded pipe connection has also been developed around the world, which has already received positive reviews. The main result of the invention is a successful solution to the problem by changing the profile.
A self-locking thread lock of a similar prototype consists of a rod and a threaded nut. The threaded end of the bolt also has a conical surface on which the thread is made so that its diameters along the entire length of the thread are also constant. The profile vertices of one component of the threaded connection are made in the form of segments with the same arc radius. The roundings of the depressions of the second connection element are made with the same radius as the tops of the bolt turns. The centers of the arcs of the rod segments are located on a line that is parallel to the generatrix of the cone of the outer surface of the rod. Making the tops of the profile of a nut or bolt shaft in accordance with the given parameters with the specified geometry of the depressions of the rod or nut makes it possible to obtain a strong lock of threaded connections, ensure reliable locking of the nut without the use of additional locking parts, increase the structural and operational characteristics of the connection and reduce its metal consumption.
Types of carving
A large number of criteria are used to subdivide threads into types. Let's consider only the main ones.
Purpose. According to this feature, carvings are:
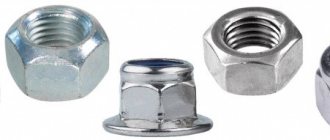
- fastening. Used to implement fixed connections. Threading is carried out in/on special elements of products and on fasteners - in the holes of nuts, as well as on the rods of screws, bolts and on the surface of studs. Often, threads of this type perform another function - they ensure the tightness of the threaded connection, sealing it. They are usually called fastening and sealing;
- kinematic (another common name is chassis). Used when you need to create a moving connection. Kinematic threads are guaranteed to have gaps between mating surfaces. They hold a lubricant that serves to reduce friction. In addition, the presence of gaps is designed to compensate for temperature deformations;
- special. As the name suggests, these threads are designed to perform specific (read: specific) functions.
Surface configuration:
- cylindrical;
- conical
Surface location. Thread,
- made in a hole is called internal;
- applied to the rod – external/external.
Turns profile. According to this feature, threads are triangular. They, in turn, are divided into: metric, conical, pipe, inch; rectangular;
trapezoidal. They are divided into thrust reinforced, thrust, trapezoidal;
round; with a special profile.
The distance between points of the same name on a threaded thread is the thread pitch:
- small;
- large;
- special.
Number of visits. According to this criterion, the thread is:
- single pass. Characterized by high friction and a small helix angle;
- multi-pass The rise of the helix is much steeper than that of the thread of the previous version.
Helix direction:
- right-hand thread. The thread is cut in a clockwise direction;
- left-handed thread. The thread is cut in the direction opposite to the clockwise movement.
In addition, threads are usually divided into two types:
- standard. Their parameters are established by State standards. In particular, the values of the main operating characteristics of the so-called. general purpose threads are approved by the provisions of GOST 11708-82. A separate group is formed by special threads that have a standard profile, but whose diameter and pitch differ from the standardized values. This also includes threads with a non-standard profile;
- non-standard. This group includes threads with turns of rectangular and square sections. For their production, individual drawings are developed that display all cutting operating parameters.
Basic Power Tool Analysis
Threaded connections account for up to 60-80% of all types of connections that are found in the designs of machines, tractors, cars, and trailers. The labor intensity of unscrewing and tightening screws, bolts, nuts, studs and all other parts with a threaded surface in specialized repair shops is 26-64% of the total labor intensity of disassembly and assembly work, and in service stations this percentage is even higher. This information makes it clear that priority mechanization is necessary when working with threaded parts. During disassembly, a power tool helps preserve a significant amount of fasteners suitable for reuse and reduces the duration of the operation by three to five times. There is an increase in labor productivity by approximately 15%. It is advisable to use a power tool when there is a significant number of fasteners of the same size on the machine, and also when it is not necessary to strictly adhere to the established force. When choosing a power tool for disassembly and assembly work, you need to know in advance the tightening torques of threaded connections. When re-twisting parts, this value must be increased by 10-15%. When unscrewing rusted nuts and screws, the tightening torques of threaded connections must be increased by 1.5-2 times.
Read also: Drilling machine with Morse taper
Power tools (nutrunners, stud drivers, etc.) are constantly being modernized. According to the type of engines, it can be electric, hydraulic and pneumatic, and depending on the design - manual, suspended, mobile and stationary.
A threaded connection is the main method of joining two structural elements together. In plumbing and construction practice, threaded connections are used when installing pipelines, shut-off and control valves and connecting consuming equipment to utility systems.
This article presents threaded connections. We will look at their varieties, the components of the fastener, and methods for determining the size and configuration of the thread.
Locking fasteners
The main criterion according to which locking methods are divided into types is the nature of the impact on fasteners. Based on it, 3 groups of methods are distinguished that prevent the loosening of a threaded connection.
- Providing the formation of additional friction due to pressure directed along the axis or oriented radially. The most widespread of this group is the use of a lock nut: it is tightened after the main nut, which actually creates the fastening, is screwed all the way. Another option is locking with a screw. A hole is drilled in one of the faces of the nut and a thread is cut into it. Then the screw is selected. Its length should slightly exceed the thickness of the nut face, and the thread parameters should coincide with the characteristics of the thread knurling previously made in the side hole of the nut. Further actions are as follows: the nut is screwed until it stops, after which a locking screw is screwed into the socket on its edge until it comes into contact with the bolt shaft. To prevent the threaded thread of the last part from being crushed, a ball of soft metal, such as aluminum, is usually placed in the hole in front of the screw.
- Fixing the relative position of the components of the bolt kit. These methods include fixation with wire, deformable or spring washers, and cotter pins. Installing the lock washer is quite simple. It is placed under the nut, its tendril is inserted into a groove previously prepared on the surface of the part to be fastened, and a fragment of the washer itself is deformed so that it fits tightly to one of the faces of the nut. This product cannot be reused.
- Carrying out local plastic deformation. This is mainly corening. This operation can be carried out both with the bolt shaft and with the side surface of the nut.
Purpose and scope of application
A thread, according to the provisions of GOST No. 2.331-68, is defined as a surface formed by a set of alternating depressions and protrusions of a certain profile, located on the internal or external walls of a body of rotation.
The functional purpose of the thread is:
- keeping parts at the required distance in relation to each other;
- fixing parts and limiting the possibility of their displacement;
- ensuring the tightness of the connection of abutting structures.
The basis of any thread is a helical line, depending on the configuration of which the following types of thread are distinguished:
- cylindrical - thread formed on a cylindrical surface;
- conical - on a conical-shaped surface;
- right - thread, the helix of which is directed clockwise;
- left - with a helical line counterclockwise.
A threaded connection is a joining of two parts by means of a thread, ensuring their immobility or a given spatial movement relative to each other. Such compounds are classified into two main categories:
- connections made using special connecting elements - screws, studs, nuts and washers (this includes all types of flange mounting);
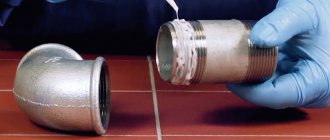
- connections formed by screwing together two abutting structures without third-party fasteners (in plumbing - a coupling connection of pipes).
Pipe coupling diagram
Current GOSTs define the following basic thread parameters:
- d – nominal outer diameter of the screw or bolt, indicated in millimeters;
- d1 – internal diameter of the nuts, the size of which must coincide with the value d of the mating fastener;
- p – thread pitch, indicating the distance between two adjacent helix ridges;
- a - profile angle, indicates the angle between adjacent protrusions of the helix in the axial plane.
The thread pitch determines which class it belongs to - main or small. In practice, the differences between them are that small threaded connections (all fasteners with a diameter of 20 mm or more are made in this configuration), due to the minimum distance between the ridges of the helical line, are more resistant to self-unscrewing.
Advantages and disadvantages
The wide distribution of threaded connections is due to the presence of many operational advantages in this fastening method, which include:
- reliability and durability;
- the ability to control the compression force;
- fixation in a given position due to the self-braking effect;
- the ability to assemble and dismantle using widely used tools;
- comparative simplicity of design;
- a wide range and standard sizes of fasteners, their low cost;
- minimum dimensions of fasteners in comparison with the dimensions of the parts to be connected.
The disadvantages of these connections include uneven distribution of load along the helical thread line (about 50% of the pressure falls on the first turn ), accelerated wear and weakening of the joint during frequent disassembly of the fastener, and its tendency to self-unscrew under the influence of vibration loads.
Differences between metric and inch threads (video)
Thread Creation Methods
Threading is the process of forming a helical line by removing chips (or by plastic deformation) on the surfaces (external or internal) of manufactured fasteners or mating structural elements. Let's briefly look at the most commonly used methods.
Tapping
A tap is a tool with which an internal thread is cut with the required operating parameters. It can be universal or complete.
The working segment of the first type of tool consists of three sections. Each is characterized by its own unique geometry. The first section to penetrate the hole carries out rough processing of its surface, the second – intermediate, and the third – finishing.
When work is carried out with a set of taps, it is important to observe the order in which the items included in the set are used. First you need to use tool No. 1, then No. 2 and then No. 3. Then a high-quality thread will be obtained. When a set is formed, the manufacturer applies appropriate markings to each tool.
When performing tapping, the following rule must be observed: after every two revolutions in the direction of thread cutting, one revolution is made in the opposite direction. Then chips will be thrown off the cutting part of the tool, which will reduce the load on it.
Die cutting
External threads are cut using dies. They come in two types.
- Round. Using such a tool, a thread is formed whose diameter does not exceed 52.0 mm. This operation is performed in 1 pass.
- Kluppovye (they are also sliding). Their design includes 2 halves. Each of them is installed in a die. This device has special guides. The parts of the die are secured using a cracker and a screw. The thread diameter is adjusted using the last part.
Typically, die plates are equipped with several dies. This makes it possible to cut threads with different diameters when purchasing one set.
Cutting on machines
Thread cutting is also carried out on machines.
On a lathe
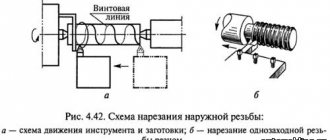
On a lathe, this operation can be carried out using various tools, including taps and dies. It is also possible to form a thread thread on such equipment by knurling. But in this case, this is most often done with a cutter. Everything is very simple here: the tool moves along the longitudinal axis of the rotating workpiece. At the same time, its pointed tip forms a screw-type recess on it.
On a milling machine
External threads are cut on a milling machine in two ways.
- Using a disc cutter. This method is relevant when it is necessary to form a long thread or a thread with a large pitch. A disk cutter is installed relative to the workpiece along a helical line so that its edges can deepen by the value of the average diameter of the thread being formed. After this, the cutter begins to rotate and at the same time rotate around the workpiece, making a groove in its surface. The spiral configuration of this recess is obtained by uniformly moving the cutter itself downward along the axis of the workpiece.
- Using a comb cutter. This method is used to create a short threaded thread with a triangular profile. The length of the thread to be cut is less than this cutter parameter. Install the tool parallel to the longitudinal axis of the workpiece. Then the radially oriented feed of the rotating cutter is carried out. Delving deeper into the body of the workpiece, it forms a thread on its surface. This process is accompanied by periodic axial movement of the tool or workpiece from a special threaded drum at a distance equal to the pitch of the thread being cut, while the workpiece makes one revolution.
Thread rolling machine
Such a device extrudes (rolls) the external threaded thread onto solid workpieces of a cylindrical configuration without heating them. The main components of this machine are two rolling rollers with a screw groove corresponding to the profile of the thread to be rolled. During its formation, they perform a rotational movement in one direction with the same frequency. The sequence of stages looks like this:
- the workpiece is placed on the stop between the rollers;
- one of the rollers is fed radially until it is inserted into the workpiece to the required depth;
- the thread is calibrated - rolling is carried out, not accompanied by radial feed;
Upon completion of this procedure, the roller takes its original position, and the finished part is extruded into the receiving container with a special punch.
Casting
The feasibility of producing threaded parts by casting is a characteristic derived from the number of holes, as well as the degree of complexity of the form. This issue is resolved on a case-by-case basis.
External thread
To create external threads, two technologies are used:
- using ring inserts, the shape of which coincides with the profile of the thread to be manufactured. Usually they are pushed out together with the casting and screwed from it already outside the forming equipment;
- the thread is formed by a mold connector using dies inserts that have a detachable design and look like a thread in a negative image.
Internal thread
Casting of internal threads is carried out today using only one technology. It involves the use of plug rods. A thread is pre-applied to their surface. These plug-rods must be unscrewed from the casting after removing it from the forming equipment.
Types of threaded connections
Depending on the type of profile, threads are classified into the following types:
- metric;
- inch;
- cylindrical pipe;
- trapezoidal;
- persistent;
- round.
Types of thread profiles
The most common is metric thread (GOST No. 9150-81). Its profile is made in the form of an equilateral triangle at an angle of 60 0 with a pitch of turns from 0.25 to 6 mm. Fastening elements are available in diameters of 1-600 mm.
There is also a metric conical thread that uses a 1:16 taper. This configuration provides a sealed joint and locks fasteners without the need for lock nuts. The table below indicates the main parameters of the metric profile.
Metric Thread Size Chart
Inch threads do not have regulatory standards in domestic construction documentation. The inch profile is made in a triangular shape with an angle of 55 0. The profile pitch is determined by the number of turns in a section 1″ long. The design is standardized for fasteners with an outer diameter from 3/16″ to 4″ and a number of turns per 1″ from 3 to 28.
The conical inch thread has a profile angle of 60 0 and a taper of 1:16. This profile ensures high tightness of the connection without additional sealing materials. This is the main type of thread in small diameter hydraulic and pressure pipes.
Inch thread sizes
Cylindrical pipe threads (GOST No. 6357-81) are used as fastening and sealing threads. Its profile has the shape of an isosceles triangle with an angle of 55 0. In order to obtain increased tightness, the profile is made with rounded upper edges without additional gaps in the places of depressions and protrusions. This type of thread is standardized for diameters 1/16″-6″, the pitch varies between 11-28 turns per 1″.
Pipe threads are always made in a small configuration (with a reduced pitch), which is necessary to maintain the wall thickness of the structures being connected. This type of profile is widely used for connecting steel pipelines of heating and water supply systems and other cylindrical parts.
Pipe thread sizes
Trapezoidal threads (GOST No. 9481-81) are most often used in screw-nut fasteners. The profile has an equilateral trapezoidal shape with an angle of 30 0 (for fastening elements of worm gears - 40 degrees). Used in fasteners with diameters 10-640 mm.
Compared to a rectangular profile, a trapezoidal helix, with identical dimensions, provides greater connection strength. This configuration allows for efficient movable transmissions (converts rotational motion into translational motion), which is why trapezoidal threads are widely used in running nuts that secure the rod of pipeline valves.
Trapezoidal thread profile
Thrust threads (GOST No. 24737-81) are used in fasteners that experience strong unidirectional axial loads during operation. Its profile is made in the form of a scalene trapezoid, one of the faces of which has an angle of 3 0, the opposite - 30 0. The profile pitch is 2-25 mm, used for fasteners with a diameter of 10-600 mm.
Read also: Single-line diagram of a 15 kW 380V metering panel
The round thread profile (GOST No. 6042-83) is formed by interconnected arcs with an angle between the sides of 30 0 . The advantage of this configuration is increased resistance to operational wear, which is why it is widely used in the designs of pipeline fittings.
Inch thread
It has a profile that has a triangular shape with equal hips, and the angle is 55 degrees. The main feature for people accustomed to the metric system is that diameter is measured in inches rather than centimeters.
The thread pitch depends on the number of threads per 1 inch. Such cutting is not typical for the CIS countries, since it is mainly used at production enterprises in America, England and some other countries. It is especially often used when installing pipelines for various purposes.
As in the previous type, inch connections can be produced with a cone-shaped shape, due to which increased tightness is achieved in the jointed area. Therefore, the use of sealing elements is usually not necessary. Inch conical cutting is actively used in hydraulic systems when pipes with a relatively small diameter are pulled. However, if necessary, you can buy curved wavy washers for additional compaction.
