We recommend purchasing:
Installations for automatic welding of longitudinal seams of shells - in stock!
High performance, convenience, ease of operation and reliability in operation.
Welding screens and protective curtains are in stock!
Radiation protection when welding and cutting. Big choice. Delivery throughout Russia!
General information
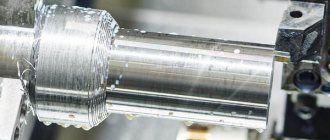
The tip of the cutter, when moving at a constant feed speed along the rotating workpiece, cuts into, leaving a helical line on its surface (Fig. 4.42).
The inclination of the helix to the plane perpendicular to the axis of rotation of the workpiece depends on the rotation speed of the spindle with the workpiece and the feed of the cutter and is called the angle μ of the helix (Fig. 4.43). The distance between the helical lines, measured along the axis of the workpiece, is called the pitch P of the helical line. If a segment on the surface of a part equal to the pitch of the helix is turned onto a plane, then from the right triangle ABC we can determine
tgμ= P/(πd),
where d is the diameter of the workpiece along the outer surface of the thread.
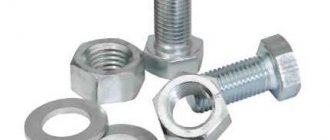
When the cutter is deepened into the surface of the workpiece along the helical line, a helical surface is formed, the shape of which corresponds to the shape of the tip of the cutter. A thread is a helical surface formed on rotating bodies and used to connect, seal or ensure specified movements of machine parts and mechanisms. Threads are divided into cylindrical and conical.
Depending on the purpose of the threaded connection, threads of various profiles are used.
The thread profile is the contour of the thread section in a plane passing through its axis. Threads with acute-angled, trapezoidal and rectangular profiles are widely used.
Threads are left and right. A screw with a right-hand thread is turned clockwise (from left to right), and a screw with a left-hand thread is turned counterclockwise (from right to left). There are single-start and multi-start threads. A single-start thread is formed by one continuous thread, and a multi-start thread is formed by several threads equidistantly located on the surface of the part. The number of threads is easy to determine at the end of the part, where the threaded surface begins (Fig. 4.44, a and b).
There are strokes Ph and pitch P of multi-start threads. The stroke of a multi-start thread (GOST 11708-82) is the distance along a line parallel to the thread axis between any initial midpoint on the side of the thread and the midpoint obtained by moving the initial midpoint along a helical line at an angle of 360° between the same points of one turn one thread of thread, measured parallel to the axis of the part. The stroke of a multi-start thread is equal to the thread pitch multiplied by the number of starts:
Ph= kP,
where k is the number of visits.
Classification of threads
Division of threads by surface type:
- conical;
- cylindrical.
In the direction of the turn:
- left;
- right.
Without indicating the direction, the thread is cut in the left direction. It is considered standard. The same tool is used. It changes to reverse rotation, and the cutting edge turns over 180⁰ - the caliper is brought in from the opposite side.
The tooth profile in section has different shapes. Types of threads used, made on lathes:
- metric;
- metric-conical;
- cylindrical pipe;
- pipe conical;
- inch;
- trapezoidal;
- persistent;
- round.
To use taps and dies, the part is mounted in a chuck. The threaded cutting tool is pressed by the center of the tailstock. When cutting with a cutter, the long part is pressed by the tailstock, the short part by the mushroom. The tool is mounted on a support and aligned in the axis of the part.
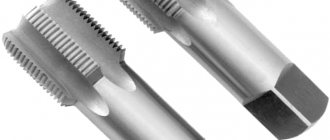
Dies and taps for cutting
Thread cutting with cutters
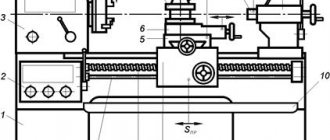
On screw-cutting lathes, the most widely used method is cutting external and internal threads with cutters (Fig. 4.45). Threading cutters are rod, prismatic and round; their geometric parameters do not differ from the geometric parameters of shaped cutters. Triangular profile threads are cut with cutters with a leading angle at the apex ε = 60° ± 10′ for metric threads and ε = 55° ± 10′ for inch threads. Taking into account the errors in the movement of the caliper, which can lead to an increase in the thread angle, cutters with an angle ε = 59°30′ are sometimes used. The tip of the cutter can be rounded or chamfered (in accordance with the shape of the root of the thread being cut).
Threading cutters are equipped with plates made of high-speed steel and hard alloys. The part is first ground so that its outer diameter is smaller than the outer diameter of the thread being cut. For metric threads with a diameter of up to 30 mm, this difference is approximately 0.14 ... 0.28 mm, with a diameter of up to 48 mm - 0.17 ... 0.34 mm, with a diameter of up to 80 mm - 0.2 ... 0.4 mm. The reduction in the diameter of the workpiece is due to the fact that when cutting a thread, the material of the workpiece is deformed and, as a result, the outer diameter of the thread increases.
Threading in a hole is carried out either immediately after drilling (if high demands are not placed on the accuracy of the thread), or after boring it (for precise threads). Hole diameter (mm) for thread
d0 = dP,
where d is the outer diameter of the thread, mm; P — thread pitch, mm.
The diameter of the hole for the thread should be slightly larger than the internal diameter of the thread, since during the threading process the metal is deformed and, as a result, the diameter of the hole decreases. Therefore, the result obtained from the above formula is increased by 0.2...0.4 mm when cutting threads in viscous materials (steel, brass, etc.) and by 0.1...0.02 mm when cutting threads in brittle materials ( cast iron, bronze, etc.).
Depending on the requirements of the drawing, the thread may end with a groove for the cutter to exit. The internal diameter of the groove should be 0.1 ... 0.3 mm less than the internal diameter of the thread, and the width of the groove (mm)
b=(2…3)P.
In the process of cutting bolts, studs and some other parts, when the cutter is removed, as a rule, a thread run-out is formed.
For more convenient and accurate thread cutting, a shoulder 2...3 mm long is made at the end of the workpiece, the diameter of which is equal to the internal diameter of the thread. This shoulder is used to determine the last pass of the cutter; after threading is completed, the shoulder is cut off.
The accuracy of the thread largely depends on the correct installation of the cutter relative to the center line. In order to install the cutter along the bisector of the thread profile angle perpendicular to the axis of the workpiece, use a template, which is installed on the previously machined surface of the part along the line of the centers of the machine. The cutter profile is combined with the template profile and the correct installation of the cutter along the clearance is checked. Threading cutters should be installed strictly along the center line of the machine.
On screw-cutting lathes, threads are cut with cutters in several passes. After each pass, the cutter is retracted to its original position. Using the vernier of the lead screw of the transverse feed movement of the caliper, set the required cutting depth and repeat the pass. When cutting threads with pitches up to 2 mm, the feed is 0.05...0.2 mm per pass. If a thread is cut simultaneously with two cutting edges, the resulting chips become tangled and deteriorate the quality of the thread surface. Therefore, before the working pass, the cutter should be shifted by 0.1...0.15 mm alternately to the right or left, using the movement of the upper support, as a result of which processing is carried out with only one cutting edge. The number of roughing passes is 3...6, and finishing passes - 3.
Thread cutting with dies and taps
Dies are used to cut external threads on screws, bolts, studs and other parts. The area of the part where it is necessary to cut the thread with a die is pre-treated. The diameter of the machined surface should be slightly smaller than the outer diameter of the thread. For a metric thread with a diameter of 6...10 mm, this difference is 0.1...0.2 mm, with a diameter of 11...18 mm - 0.12...0.24 mm, with a diameter of 20...30 mm - 0.14...0.28 mm. To form a thread entry at the end of the part, it is necessary to remove a chamfer corresponding to the height of the thread profile.
The die is installed in a die holder (chuck), which is secured in the tailstock quill or turret socket. Cutting speed v when cutting threads with dies for steel workpieces is 3...4 m/min, for cast iron - 2...3 m/min and for brass - 10...15 m/min.
Internal metric threads with a diameter of up to 50 mm are often cut with taps. Typically, a lathe uses machine taps, which allows threads to be cut in one pass. For cutting threads in parts made of hard and viscous materials, sets consisting of two or three taps are used. In a set of two taps, the first (roughing) does 75% of the entire work, and the second (finishing) brings the thread to the required size. In a set of three taps, the first (rough) does 60% of the work, the second (semi-finish) - 30%, and the third (finish) - 10%. The taps in the set are distinguished by the intake part; the intake part of the rough tap has the greatest length.
When installing a tap in a turret, a ring is put on its shank and secured with a screw, together with which the tap is installed in a chuck for dies and secured like a die.
Cutting speed v when cutting threads with taps for steel workpieces is 5... 12 m/min, for cast iron, bronze and aluminum - 6...22 m/min. Thread cutting is carried out with emulsion or oil cooling.
Main profile of external and internal trapezoidal threads
The following table shows the characteristics of the main profile of external and internal trapezoidal threads:
| Distance between adjacent profile points (step) | Distance between top and bottom |
| 1.05 – 1.07 | 2.08 – 3.01 |
| 2.03 – 2.05 | 3.07 – 5.05 |
| 3.03– 3.05 | 5.06 – 7.02 |
| 4.03– 4.05 | 7.05 – 8.08 |
| 5.03– 5.05 | 9.03 – 10.04 |
| 6.03– 6.05 | 11.02 – 12.09 |
| 7.03– 7.05 | 13.06 – 14.05 |
| 8.03 – 8.05 | 14.09 – 15.02 |
| 9.03– 9.05 | 16.07 – 18.03 |
| 10.03– 10.05 | 18.06 – 21.08 |
| 12.03– 12.05 | 22.03 – 26.01 |
| 14.03– 14.05 | 26.02 – 28.04 |
| 16.03 – 16.05 | 29.09 – 31.05 |
| 18.03– 18.05 | 33.06 – 35.09 |
Thread cutting with die heads
Thread-cutting screw heads are used for cutting external and internal threads on lathes, turret lathes and automatic lathes.
Using a shank, the threading head is installed in the tailstock quill or in the turret of the machine. Radial, tangential and round combs are used in screw cutting heads. At the end of thread cutting, the dies automatically diverge and do not come into contact with the thread during the return stroke.
When cutting external threads, heads with round combs are widely used, since they are simple in design, allow for many regrinds and have greater durability than radial and tangential combs. The design and operating principle of existing screw-cutting heads have minor differences.
Internal threads are most often cut with threading heads with prismatic combs, the cutting edges of which are located at the same diameter and have a lead-in cone. The number of combs included depends on the size of the head. The combs are offset in the set one relative to the other in accordance with the angle of the helix of the thread being cut.
When cutting long screws and worms, cutting heads are used to increase productivity, which are mounted on the machine support. These heads are equipped with ordinary and cup cutters and are used for cutting external and internal threads.
Types and properties of cutters
A metal turning tool consists of a holder and a working head. The quality of parts processing directly depends on these elements. The holder has a rectangular or square cross-section. With its help, the cutter is fixed on the lathe.
The working head is used to process parts. It is composed of various cutting planes and edges. The sharpening angle of the head is determined by the material from which the part is made.
External and internal threads are cut using different types of thread cutting tools.
Threading cutters
The most used ones:
- rod;
- prismatic;
- round.
Rod cutters consist of a rod with a working head. These types come in different profiles. The most wear-resistant are cutters to which carbide working edges are soldered. They do not need frequent sharpening as they remain sharp for a long time.
Prismatic cutters are used to process only the outer side of the blank. Their advantage over rod ones is their ability to process large surfaces. But they should be sharpened more often.
Round cutters are used in the process of cutting internal and external threads. These tools are very easy to use and their scope of use is quite wide. Round cutters allow repeated sharpening.
Round thread cutters
Based on their design differences, metal-cutting tools are divided into several types:
- straight;
- curved;
- bent;
- drawn out.
The top of any threading tool is a rounded head or chamfer. The thread profile is formed by a cutter of the proper configuration. Using curved cutting tools, the threaded thread is cut on the surface of the blank.
Straight incisors are rarely used here. The carving inside the part is made with curved cutters, sometimes straight, fixed in a special holder.
Cutters are divided into categories:
- made of high-speed alloy steel;
- with carbide plates soldered onto the working element;
- cutting devices with replaceable multifaceted inserts mounted on the head.
According to the direction of the screw thread, the tools are differentiated into right-handed and left-handed. When working first, the feed goes from left to right, when working second, the feed goes to the left. The right ones use it more often.
Cutting the thread with a die
Thread control
The thread pitch is measured with a thread template, which is plate 2 (Fig. 4.46), on which teeth are applied with a thread pitch indicated on the template plane. A set of templates for metric or inch threads is fastened into cassette 1. Thread templates are used to determine only the thread pitch.
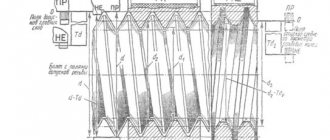
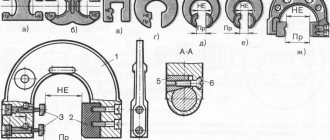
The correctness of the internal and external threads made on a part is comprehensively assessed using thread gauges (Fig. 4.47). Thread gauges are divided into go-through gauges, which have a full thread profile and are, as it were, a prototype of a threaded connection part, and non-go-through gauges, which control only the average diameter of the thread and have a shortened profile.
To measure the outer, middle, inner diameters and thread pitch, thread micrometers are used (Fig. 4.48). A thread micrometer has mounting holes in the spindle and heel into which sets of replaceable inserts are installed that correspond to the thread elements being measured. For ease of measurement, a threaded micrometer is fixed in a stand and then adjusted according to a template or standard.
Before testing, the parts being tested must be cleaned of chips and dirt. During the inspection process, you should handle the gauges carefully so that nicks and scratches do not appear on their working threaded surface.
