Threaded connections are present in all machines, tractors and other mechanisms. They are used when parts must be detachable. This is very convenient and allows you to quickly replace what is broken. But sometimes it happens that the screw cannot be unscrewed, it is impossible to remove a stuck pin, or the head of the bolt has been licked off. How to unscrew a screw with a broken head? How to get a broken pin? How to unscrew a crimp in a hard-to-reach place?
We’ll talk about how to unscrew a broken, broken or licked bolt or screw later in the article.
Why the screw does not come out: the main reasons for souring of bolts and stripping of threads
Every driver or auto mechanic faces the problem of how to unscrew a bolt with a torn head, a hexagon with torn edges, or a broken fitting. When operating cars, tractors and other special equipment, threaded connections often come into contact with oily or caustic liquids, become clogged with dirt and experience increased stress when the loads are exceeded. All this negatively affects the strength of bolts and studs.
It is imperative to unscrew the hexagon with the broken head. If this is not done, you will not be able to install the new part using standard connections. And drilling nearby will reduce the strength of the spare parts and compromise the integrity of the structure.
To prevent the appearance of broken studs and bolts with a torn head, it is important to carefully inspect the condition of the threaded connections during each maintenance and replacement of parts. If defective ones are found (with traces of corrosion, sagging, torn threads or licked hexagon faces), they must be replaced with new ones. This will help maintain the quality and strength of the connections.
But problems can arise even with proper and regular maintenance. The main reasons why it is difficult to unscrew a bolt with a broken head are the following:
- natural metal fatigue that occurs under constant stress during operation;
- contact with technical liquids (diesel fuel, oil, antifreeze, etc.);
- violation of the protective layer of fasteners, resulting in rust or corrosion processes;
- loss of metal strength as a result of constant overheating;
- fasteners that are too tight;
- manufacturing defects.
But whatever the reasons, it is important to know how to unscrew a screw with licked edges, a torn head or rust, as well as how to carefully remove the crook of the bolt. Let us further consider in detail with photos special cases and propose the optimal method for each situation.
What are the “bummers”?
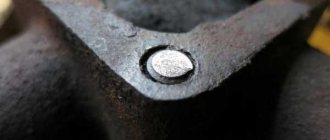
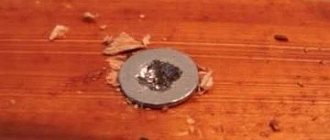
Bolts can break in different ways, the most unpleasant “bolt break” is when it is cut off flush; in such a situation, it is simply impossible to unscrew it without special tools (drill, welding, etc.). You will be more lucky if the bolt breaks already at the exit from the thread and a little “body” remains on the surface. Firstly, in this case you have already “broken” the bolt, which means it will be unscrewed, which is important, and secondly, such a torn bolt can be manipulated, for example, using pliers, a screwdriver, welding, etc.
A universal algorithm for unscrewing a broken pin
| If the threaded part sticks out | Screw on two nuts. Unscrew the stud by grasping the bottom nut with a wrench. |
| Screw on one nut and weld it to the stud. Remove the fastener by grasping the nut with a wrench. | |
| If the smooth part sticks out or the thread is broken | Fit the nut and weld it to the protruding part of the stud. When the metal has cooled, unscrew it using a wrench. |
| If the pin breaks off with a protrusion, place a thick screwdriver at its base and hit it with a hammer in the direction of unscrewing. | |
| Use a chisel to knock out a groove at the end of the broken stud and unscrew the fastener with a flat-head screwdriver. | |
| Use a pin driver. | |
| If the head of the bolt is torn off or the stud breaks off flush | Use a chisel to knock out a groove at the end of the broken stud and unscrew the fastener with a flat-head screwdriver. |
| Semi-automatically weld the protrusion and then weld a nut or rod to it, which will make it easy to unscrew the stud. | |
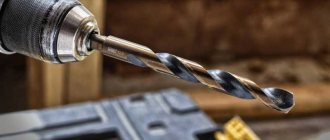
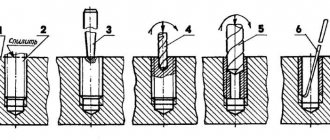
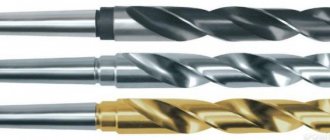
| Drill out the crease. Drill along the entire length, gradually increasing the diameter of the drill. The remnants of the thread are removed with needle-nose pliers, having first been sprayed with a wedash. | |
| Use an extractor or TORX. |
A universal algorithm for unscrewing a bolt with a damaged head
The mechanics of how to unscrew a bolt if the head is broken will be similar to the situation with unscrewing a stud. You can unscrew a bolt without a head using one of the methods described above.
Tips on how to unscrew a bolt if the head has been licked are briefly given in the table.
| If the edges of the bolt are licked (not too much) | Use a file to sharpen the edges and unscrew the bolt with a wrench. |
| Place a 6- or 12-point socket under the socket wrench and unscrew the bolt with the wrench. | |
| Weld a nut whose inner diameter corresponds to the outer diameter of the bolt head. Unscrew using a wrench. | |
| Use a chisel to make a groove along the diameter of the bolt head, and unscrew it with a screwdriver. | |
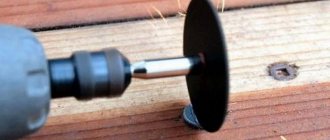
| If the bolt head is torn off or severely damaged | Cut off the head with a grinder, unscrew the rest of the fasteners using one of the methods for studs. |
| If a bolt with a broken head has a protrusion, place a thick screwdriver at its base and hit it with a hammer in the direction of unscrewing. | |
| Use an extractor or a suitable sprocket. |
How to remove a stud from an engine block
Scheduled replacement of cylinder head studs
It is recommended to replace the cylinder head studs at the same time. By installing fasteners from the same batch, we ensure that all studs have similar characteristics. Accordingly, the load will be distributed evenly, and this will increase the service life of the unit.
Before unscrewing the stud from the engine block, thoroughly moisten the joints with WD-40. If you don't have it on hand, kerosene or brake fluid will do. You need to unscrew the bolts with a special wrench, but if you don’t have one, you can unscrew the stud from the aluminum block with a gas wrench.
Important: you should not sharply pull or yank the key - this is a sure step towards the appearance of a breakage.
If you fail to unscrew the stud from the aluminum engine block the first time, you need to re-apply technical fluid to the connections - it’s better to find WD-40. After 10-15 minutes you can try again.
To make removing the cylinder head studs easier next time, lubricate each one with graphite lubricant before installation. When tightening, use a torque wrench and ensure that the torque does not exceed the recommended values.
If you follow these recommendations, unscrewing the stud from the cylinder head next time will not be difficult. But what to do if last time you were not so prudent or others did the repairs?
How to remove a broken bolt from an engine block
It is often not possible to avoid broken studs from the engine block even with careful attempts to remove the fasteners - metal fatigue and manufacturing defects have not been canceled. The situation is unpleasant, but there are ways to fix everything and still unscrew the broken bolt from the engine block. Let's look at the simplest and most effective methods.
If a fragment of a pin remains sticking out
To unscrew a broken pin from the engine block, proceed as follows:
- Place a nut on the stud piece (a slightly larger diameter is needed) and weld it to form a bolt. After this, you can easily unscrew the aluminum stud with a regular spanner.
- A piece of reinforcement is welded to a broken bolt in the aluminum engine block. The longer it is, the larger the shoulder will be, which means it will be easier to unscrew the pin. It is optimal to take a 35 cm piece of reinforcement. Next, unscrew the structure like a regular screw.
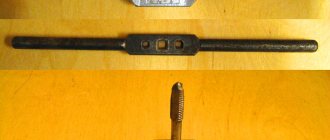
- If the broken bolt from the block head is of sufficient height, it can be sharpened with a file to make it square. After this, unscrew the bolt using a tap wrench.
If the cylinder head stud breaks flush
To unscrew a bolt from the engine block that has broken flush with the surface, you will have to drill it out.
- Wrap the cylinder block with thick cloth to prevent soot and fumes from getting inside.
- Sand the crease with a grinder with an abrasive attachment to remove chips and protrusions.
- Make a small hole in the center of the cylinder pin.
- Drill out the stud to its full depth using a smaller drill bit. It is very important that the drill does not deviate from the vertical and does not go to the side. To do this, the cylinder head block must be placed or fixed.
- Restore the thread for the cylinder head stud using standard taps of the appropriate diameter.
If it was not possible to unscrew the broken aluminum cylinder head bolt, you will have to install a new stud of a larger diameter. To do this, a hole is drilled in the place of the crease for a new pin. After drilling, you need to cut the thread, this is done using a tap of a suitable size. A cylinder head stud with a diameter larger than the standard one is screwed into the prepared hole. Accordingly, it will require a new nut.
How to remove a stud from an exhaust manifold
The exhaust manifold causes the most problems with soured and broken studs. The fasteners here are exposed to temperature changes, soot, fumes and dirt get into the joints - and these are the right conditions for the appearance of stuck nuts and brittle bolts.
If the stud and nut have become sour and cannot be unscrewed
Upon visual inspection, it may seem that the nuts are tightly soured - this is due to the adhesion of dirt and soot. Inside, the thread may be intact and quite amenable to unscrewing.
If you cannot immediately unscrew the pin from the exhaust manifold, proceed as follows:
- Treat the connections with WD-40, wait 10-15 minutes and try to unscrew the nut from the stud again. If it doesn’t work, repeat the steps described. Sometimes you need to handle it with a wedge several times to get the nut to give way. Before repeated treatments, you can carefully clean the joints with a brush with metal bristles.
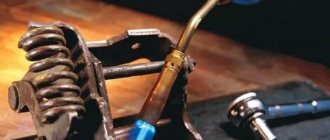
- If you cannot release the exhaust manifold stud, you can heat the nut with a torch. But before unscrewing, you need to let the metal cool completely.
- If the nuts do not budge, they can be cut off with a grinder or split with a chisel.
Usually, after this, unscrewing the studs from the exhaust manifold will not be difficult, since soot and fumes rarely get under the nuts. But if the fasteners have stood for a long time, then the metal may burst due to temperature exposure.
How to remove a broken pin from an exhaust manifold
Use the following tips to quickly remove a broken exhaust manifold stud:
- Grind the crease with a grinder with an abrasive disc to remove any unevenness. Use a chisel to hammer into the deep groove and unscrew the broken pin from the exhaust manifold using a flat-head screwdriver.
- Weld a nut onto the broken stud, wait until it cools completely and then unscrew it using a wrench. The method is suitable even when the fastening has broken off flush, since welding will not take hold of the aluminum base.
- If all else fails, you can remove the broken stud from the exhaust manifold with good old fashioned drilling. Using a file or a grinder, cut off the unevenness from the crease so that you get a more or less flat area. Mark the hole exactly in the center and drill to the full depth, first with a thin drill (you can take a two-piece), and then with a thicker one (3.5). Treat the remains of the broken pin with WD-40 and unscrew it, helping yourself with pliers or needle-nose pliers. To restore the thread, you need to go through the appropriate tap.
see also
Comments 231
So I dug in, broke off the belt tensioner support bolt, tomorrow I’ll start going crazy)))
Thank God, the rest of the thread of 8 turns was thought less, planned argon and so on, everything worked out, I glued a hardened pin. VK9 aviation glue for aluminum (like epoxy but more complicated) Now everything is fine, no whistling)
I have the same problem. The M8 bolts securing the intake manifold broke off. In general, 3 out of 6 bolts have burst, two are flush with the cylinder head and one is slightly sticking out on the surface. I drilled through the ones that were flush with a 6mm drill, but even this did not help, although in fact the pin was already loosened. They precisely weld with welding strength, to death. I also etched with nitric acid, it’s almost etched. I thought about unscrewing that protruding piece with the welded nut screwed on, but now I doubt my success. The welder said he would weld the bubble on Monday, something tells me it will be a waste of money. It’s probably easier to drill the same way and etch it out without reinventing the wheel.
Greetings! How much time has passed, but it’s still relevant! Thanks for the post. Now I'm etching the manifold mounting pin. When disassembling the exhaust for repairs, I didn’t like the studs on my Muscovite and decided to change them. The top row unscrewed without problems. The lower one completely refused to unscrew and as a result there were three broken pins and one that I decided to save in case it had to go to service. I decided to remove the cylinder head and try to somehow unscrew them. As a result, three, after a long soaking in white spirit, turned away at the broken ends, and one broke under the cut of the cylinder head. I decided to drill it and extract it with an extractor (the bolts are not hardened). The result is a broken extractor for cutting the cylinder head. Now I'm pursuing this matter. I'll post the results
How to unscrew a stud or bolt on a wheel
Car owners and tractor drivers get into a lot of trouble when they need to unscrew a pin or bolt from a wheel hub. There are several mechanics for fastening wheels, and they all require strict adherence to manufacturers' recommendations (withstand a certain force, center the disk, use spacer rings, etc.). Otherwise, the load is unevenly distributed across the wheel mounts with all the ensuing consequences.
There are no particular differences in how to unscrew a wheel stud or bolt. The only thing is that before unscrewing the studs you must first remove the nuts. If they become stuck, it is enough to treat them 1-2 times with WD-40. There are usually no particular difficulties with them: although they look “scary”, in the sense that they are covered with dirt, they unscrew without problems. But then the fun begins.
Studs and bolts very often crack and break off. To unscrew a broken stud from a hub on a passenger car, proceed as follows:
- Remove the wheel and brake discs.
- If the broken bolt from the wheel hub is too long and, when knocked out, will rest against the steering knuckle, you can file it or grind off the interfering edge with a file.
- After all the preparations, the licked wheel bolt is knocked out with a hammer.
If a wheel stud is damaged, it must be replaced immediately, since a bent mount cannot support the designed loads. It is also advisable, when replacing, to immediately unscrew all the studs from the hub and replace them with new ones - hardware from the same batch will distribute the load as evenly as possible.
To unscrew a broken stud or bolt from a wheel hub on a tractor, truck, or in particularly severe cases on a passenger car, you can use one of the following methods:
- Unscrew the wheel bolt or stud using a meat grinder. This is a special gear wrench that serves to increase torque. Even the tightest fasteners, from which ordinary keys bend, can be easily unscrewed with a meat grinder. It can be used to install heads for nuts and bolts of different sizes.
- If there are no special tools, then in order to unscrew a bolt or stud from the wheel hub, you must first loosen the fasteners. To do this, you need to treat the connection with WD-40. If the Vedashka does not help, you can treat the sour areas several times with vinegar essence or a rust converter.
- In some cases, the fasteners must be additionally heated. A torch or blowtorch is suitable for this. Hot metal is cooled by cold water. After this you can start twisting.
- To increase the leverage and make it easier to unscrew a stud or bolt from the wheel hub, insert a crowbar into the key and use it as a handle.
Communities › Kulibin Club › Blog › Tools: Removing a broken aluminum bolt
The time has come to change the levers, but bad luck. The bolts securing the silent block holder to the subframe were welded to death with the subframe itself. This phenomenon is known and predictable. Iron alloys and aluminum alloys become welded over time, especially in a humid environment. Normal manufacturers understand this and use thread sealant, which, in addition to its ability to fix fasteners, also insulates, thereby preventing welding of parts. But the previous owner had already changed the levers and tightened the bolts dry. As a result, two of the four bolts were unscrewed, the remaining two broke off.
I started with simple but unsuccessful attempts. Vedashka, heating, welding of iron. Everything is in vain, boiled to death. The Vedashka did not help simply because there was no gap left in the thread where it could leak. Welding a piece of iron in order to unscrew it also did not lead to success. A piece broke off, not due to welding, but the bolt itself, just like the first time.
All that remains is to remove the debris. You can drill it, but you need to understand that we have a hardened bolt in soft aluminum, and the length of the fragment is more than four diameters. There is a risk that the drill will go to the side, and drilling a hardened bolt is not much fun. Then it’s not a fact that all the carvings will be saved. Although, if you make a jig and have straight hands, you can drill it, I’ve done this more than once, but now I decided to use a different method, corresponding to my nickname, chemical.
First of all, we clean the surface from dirt and degrease.
Let's take nitric acid. I came across a chemically pure one with a concentration of 64%. This concentration is not particularly poisonous, and even passivates the surface of the iron. But for etching, the optimal concentration is about 30%. So we use water for dilution.
They stuck a plasticine bucket over the object to be etched. We poured the solution and observed the process.
We have two bolts in total, one bucket is red, the other is black.
The next day I changed the solution and looked at how the process was going. Everything is in order, half of the bolt is gone, the thread is intact.
When a third of the bolt remained, I decided to try to unscrew it. I didn’t have any welding tools at hand, so I used a small nut-pick and grabbed the tip of the piece of wood.
As a result, the thread is intact, nerves are saved.
How to unscrew a bolt in a hard-to-reach place
To unscrew a bolt in a hard-to-reach place, you can use a mini-driver. This is a compact induction device that can be used to heat nuts, studs and bolts. Thanks to the long and thin nozzles, you can use a mini-ductor to get into the most inaccessible places to loosen soured fasteners and unscrew the bolt more easily.
The following technique can be used to remove a broken bolt or stud from a hard to reach area. If the fastener does not break off flush and the crease protrudes by at least 2-3 mm, then you need to screw a suitable nut onto it and weld it. Once the metal has cooled, using a wrench or a socket with a wrench, you can unscrew the broken bolt.
If the crease of a bolt in a hard-to-reach place breaks off flush with the surface, then first it must be extended. To do this, a “slide” is welded using a semi-automatic welding machine. If you can’t clamp this build-up with pliers and unscrew it, then you can, as in the previous case, weld a nut onto the protrusion and then unscrew the broken bolt using a spanner.
If the methods described above fail to unscrew the crook in a hard-to-reach place, the part will have to be removed and then drilled out the broken bolt.
If the bolt breaks above the surface
In this situation, you can first try to unscrew the bolt with pliers or an adjustable wrench. If you can’t unscrew it this way, you can use a grinder to cut the bolt a little so that you get a hole for a flat-head screwdriver and then use a screwdriver to unscrew the bolt; sometimes you can make a hole for the screwdriver with a chisel.
Also, if possible, you can weld another bolt or some kind of curved metal rod to the protruding piece of the bolt and unscrew it. Some do not even weld, but glue with aggressive glue, but this option does not always work.
How to unscrew a rusty screw or stuck hairpin
How to unscrew a screw if it is rusty? This task may not be as simple as it might seem at first glance. Especially when it comes to threaded connections that have not been touched for decades. And if the car or tractor has been outside all this time, problems with rust cannot be avoided.
To unscrew a rusty or stuck stud, proceed as follows:
- Treat the joint with WD-40 every 10-15 minutes, working the screw with a wire brush before each application.
- In case of strong sticking, you can use a rust converter or vinegar essence.
- If the stuck pin still does not give in, the connection is heated. To do this, use a blowtorch, gas torch or mini-inducer. In a hot state, it is better not to unscrew a rusty screw, but first cool it (you can pour cold water on it). If the pin still does not give in, you can unscrew it hot, but in this case there is a high probability of damage.
How to unscrew a broken hex bolt
Hex sockets are often used to fasten automotive and tractor parts. And, of course, they can also sour and break off. But most often problems are caused by a licked hexagon with knocked down edges - it is impossible to unscrew it using standard keys. Let's figure out what to do in this situation.
How to unscrew a licked hex bolt with knocked down outer edges
If the hexagon is licked from the outside, you can unscrew it in the following ways:
- Use a file to re-file the edges, reducing the size of the bolt head, and then use a standard spanner with a suitable head.
- Place the head of a 12-point spanner onto the licked hexagon. The diameter of the nozzle must be equal to the outer diameter of the hex bolt. After hammering the head, use a spanner to unscrew the hexagon. After this, remove the head and knock out the broken hexagon from the reverse side with a hammer.
- Another way to unscrew a hex screw with stripped outer edges is to use asterisks (torx). But you can hammer in the sprocket only if the bolt has not “boiled”, otherwise you can easily break it off and get even more problems.
How to unscrew an internal hexagon with licked edges
The easiest way to unscrew an internal hex bolt is to use TORX sprockets. You need to take a torx with a diameter slightly larger than the dimensions of the internal hexagon. Taking into account the licked edges, they will fit each other just right.
To unscrew a screw with torn edges, hammer the sprocket to the limit with a hammer. After that, just unscrew it with a key. The method is only suitable for hexagons made of relatively soft metal - the sprocket will simply break on high-strength hardened steel, and then you will have to drill out tool steel.
It is much easier and safer to use a 12-point socket from a spanner wrench that is the size of the outer diameter of the hexagon. It needs to be pressed onto the hexagon socket bolt and then unscrewed using a spanner.
If you don’t have TORX sprockets at hand, but you need to unscrew an internal hexagon with licked edges that goes flush with the surface of the part, you can use welding. A semi-automatic machine welds a “hill” onto the bolt head, to which a nut or rod is then welded. If you have welded a nut, you can unscrew the bolt with a licked internal hexagon with a wrench; if it is a rod, then unscrew it using force.
A slightly more labor-intensive, but still workable way to unscrew the bolt under the internal licked hexagon, if it protrudes above the surface, is to cut off the head to make a stud. If it has not soured, it can be easily removed with an extractor. If it becomes sour, treat it with WD-40 and, as a last resort, drill it out.
How to unscrew a hexagon without a key
Well, to top it off, a little trick on how to unscrew a hex bolt without a hex key. To do this, you will need a thick long pin and two nuts that fit it. The nuts need to be screwed onto the stud at a distance from each other and the hex head should be fixed between them. By tightening the nuts to the hex head, you can unscrew it without a key.
Another trick on how to unscrew a hexagon without a hexagon is as follows. Use a chisel to make a deep cut in the head of the bolt. Next, hit the chisel with a hammer in the direction of unscrewing the hexagon. It should move, and then you can try to unscrew it by hand.
What are the “bummers”?
Bolts can break in different ways, the most unpleasant “bolt break” is when it is cut off flush; in such a situation, it is simply impossible to unscrew it without special tools (drill, welding, etc.). You will be more lucky if the bolt breaks already at the exit from the thread and a little “body” remains on the surface. Firstly, in this case you have already “broken” the bolt, which means it will be unscrewed, which is important, and secondly, such a torn bolt can be manipulated, for example, using pliers, a screwdriver, welding, etc.
