Why is it needed?
Along with other semiconductor devices, the LED is not an ideal element with 100% efficiency. Most of the energy it consumes is dissipated into heat. The exact efficiency value depends on the type of emitting diode and its manufacturing technology. The efficiency of low-current LEDs is 10-15%, and for modern white ones with a power of more than 1 W, its value reaches 30%, which means that the remaining 70% is spent as heat.
Whatever the LED, for stable and long-term operation it requires a constant removal of thermal energy from the crystal, that is, a radiator. In low-current LEDs, the radiator function is performed by the leads (anode and cathode). For example, in SMD 2835 the anode lead takes up almost half of the bottom of the element. In high-power LEDs, the absolute value of power dissipation is several orders of magnitude greater. Therefore, they cannot function normally without an additional heat sink. Constant overheating of the light-emitting crystal significantly reduces the service life of the semiconductor device and contributes to a gradual loss of brightness with a shift in the operating wavelength.
Structurally, all radiators can be divided into three large groups: plate, rod and ribbed. In all cases, the base can be in the shape of a circle, square or rectangle. The thickness of the base is of fundamental importance when choosing, since it is this area that is responsible for receiving and uniformly distributing heat over the entire surface of the radiator.
The form factor of the radiator is influenced by the future operating mode:
- with natural ventilation;
- with forced ventilation.
A cooling radiator for LEDs that will be used without a fan must have a distance between fins of at least 4 mm. Otherwise, natural convection will not be enough to successfully remove heat. A striking example is the cooling systems of computer processors, where, due to a powerful fan, the distance between the fins is reduced to 1 mm.
When designing LED lamps, great importance is given to their appearance, which has a huge impact on the shape of the heat sink. For example, the thermal energy dissipation system of an LED lamp should not go beyond the standard pear-shaped shape. This fact forces developers to resort to various tricks: using printed circuit boards with an aluminum base, connecting them to the radiator housing using hot-melt adhesive.
System of Thick Film Materials.
- Additive Process
- Thick Film is a selective additive deposition process in which material is used only where it is needed. Provides a more direct connection to the aluminum radiator; therefore, thermal interface material is not required to construct the circuit. Reduces heat dissipation layers and heat footprint. Processing steps are reduced along with the amount of materials and the amount of materials consumed. - Insulated aluminum material system
– increases thermal coupling and provides high tensile strength. The materials can be fired at temperatures below 600 °C. Circuits are embedded directly into aluminum substrates, eliminating the need for thermal interface materials. Thanks to improved thermal coupling, LED junction temperature can be reduced by up to 10°C. This allows the designer to reduce the number of LEDs on the board while increasing the power of each LED; or reduce the size of the substrate to manage dimensional constraints. Reducing the LED junction temperature has also been proven to significantly increase its lifespan.
Radiator materials
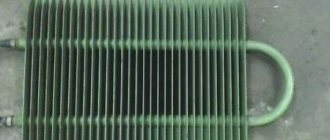
Currently, cooling of high-power LEDs is carried out mainly using aluminum radiators. This choice is due to the lightness, low cost, flexibility in processing and good heat-conducting properties of this metal. Installing a copper radiator for an LED is justified in a luminaire where size is of paramount importance, since copper dissipates heat twice as well as aluminum. Let's consider the properties of materials that are most often used for cooling high-power LEDs in more detail.
Aluminum
The thermal conductivity coefficient of aluminum is in the range of 202–236 W/m*K and depends on the purity of the alloy. According to this indicator, it is 2.5 times higher than iron and brass. In addition, aluminum lends itself to various types of mechanical processing. To increase heat dissipation properties, the aluminum radiator is anodized (coated black).
Copper
The thermal conductivity of copper is 401 W/m*K, second only to silver among other metals. Nevertheless, copper radiators are much less common than aluminum ones, which is due to the presence of a number of disadvantages:
- high cost of copper;
- complex mechanical processing;
- large mass.
The use of a copper cooling structure leads to an increase in the cost of the lamp, which is unacceptable in conditions of fierce competition.
Ceramic
A new solution in creating highly efficient heat sinks has become aluminum nitride ceramics, the thermal conductivity of which is 170–230 W/m*K. This material is characterized by low roughness and high dielectric properties.
Using thermoplastic
Despite the fact that the properties of thermally conductive plastics (3–40 W/m*K) are worse than those of aluminum, their main advantages are low cost and lightness. Many LED lamp manufacturers use thermoplastic to make the housing. However, thermoplastic loses competition to metal radiators in the design of LED lamps with a power of more than 10 W.
How to fix the LED
There are two main methods of fastening, let's consider both of them.
First way
- it's mechanical. It consists of screwing the LED with self-tapping screws or other fasteners to the radiator; for this you need a special “star” type substrate (see star). A diode, pre-lubricated with thermal paste, is soldered to it.
On the “belly” of the LED there is a special contact patch with the diameter of a slim cigarette. After that, power wires are soldered to this substrate, and it is screwed to the radiator. Some LEDs go on sale already mounted on an adapter plate, as in the photo.
Second way
- it's adhesive. It is suitable for mounting through a plate or without it. But it’s not always possible to attach metal to metal; how to glue an LED to a radiator? To do this, you need to purchase a special thermal conductive glue. It can be found both in hardware stores and in radio parts stores.
The result of such fastening looks like this:
Cooling features of high-power LEDs
As mentioned earlier, effective heat removal from the LED can be achieved by organizing passive or active cooling. It is advisable to install LEDs with a power consumption of up to 10 W on aluminum (copper) radiators, since their weight and size indicators will have acceptable values.
The use of passive cooling for LED arrays with a power of 50 W or more becomes difficult; The dimensions of the radiator will be tens of centimeters, and the weight will increase to 200-500 grams. In this case, it is worth considering using a compact radiator together with a small fan. This tandem will reduce the weight and size of the cooling system, but will create additional difficulties. The fan must be provided with the appropriate supply voltage, and care must also be taken to protect the LED lamp in the event of a cooler failure.
There is another way to cool powerful LED matrices. It consists of using a ready-made SynJet module, which looks like a cooler for a medium-performance video card. The SynJet module features high performance, a thermal resistance of no more than 2 °C/W and a weight of up to 150 g. Its exact dimensions and weight depend on the specific model. Disadvantages include the need for a power source and high cost. As a result, it turns out that a 50 W LED matrix must be mounted either on a bulky but cheap radiator, or on a small radiator with a fan, power supply and protection system.
Whatever the heatsink, it can provide good, but not the best, thermal contact with the LED substrate. To reduce thermal resistance, heat-conducting paste is applied to the contacted surface. The effectiveness of its impact has been proven by its widespread use in cooling systems for computer processors. High-quality thermal paste is resistant to hardening and has low viscosity. When applied to a radiator (substrate), one thin, even layer over the entire contact area is sufficient. After pressing and fixing, the layer thickness will be about 0.1 mm.
Solving the cooling problem
Low-power LEDs, for example: 3528, 5050 and the like, give off heat due to their contacts, and the power of such specimens is much less.
When the power of the device increases, the question of removing excess heat arises. For this purpose, passive or active cooling systems are used. Passive cooling is a regular radiator made of copper or aluminum. There is debate about the benefits of cooling materials. The advantage of this type of cooling is the absence of noise and the almost complete absence of the need for maintenance.
Installation of LED with passive cooling in a spotlight
Active cooling is a cooling method that uses external force to improve heat dissipation. As the simplest system, we can consider a radiator + cooler combination. The advantage is that such a system can be much more compact than a passive one, up to 10 times. The disadvantage is the noise from the cooler and the need to lubricate it.
Calculation of radiator area
There are two methods for calculating a radiator for an LED:
- design, the essence of which is to determine the geometric dimensions of the structure at a given temperature;
- calibration, which involves acting in the reverse order, that is, with known radiator parameters, you can calculate the maximum amount of heat that it can effectively dissipate.
The use of one or another option depends on the available initial data. In any case, accurate calculation is a complex mathematical problem with many parameters. In addition to the ability to use reference literature, take the necessary data from graphs and substitute them into the appropriate formulas, you should take into account the configuration of the radiator rods or fins, their orientation, as well as the influence of external factors. It is also worth considering the quality of the LEDs themselves. Often, in Chinese-made LEDs, the actual characteristics differ from the declared ones.
Exact calculation
Before moving on to formulas and calculations, it is necessary to become familiar with the basic terms in the field of thermal energy distribution. Thermal conduction is the process of transferring thermal energy from a more heated physical body to a less heated one. Thermal conductivity is expressed quantitatively as a coefficient that shows how much heat a material can transfer through a unit area when the temperature changes by 1°K. In LED lamps, all parts involved in energy exchange must have high thermal conductivity. In particular, this concerns the transfer of energy from the crystal to the case, and then to the radiator and air.
Convection is also a process of heat transfer that occurs due to the movement of molecules of liquids and gases. In relation to LED lamps, it is customary to consider the exchange of energy between the radiator and the air. This can be natural convection, occurring due to the natural movement of air flow, or forced, organized by installing a fan.
At the beginning of the article it was stated that about 70% of the power consumed by an LED is consumed as heat. To calculate a heatsink for LEDs, you need to know the exact amount of energy dissipated. To do this we use the formula:
PT – power released in the form of heat, W; k is a coefficient that takes into account the percentage of energy converted into heat. This value for high-power LEDs is taken equal to 0.7-0.8; UPR – forward voltage drop across the LED when the rated current flows, V; IPR – rated current, A.
It's time to count the number of obstacles located in the path of the heat flow from the crystal to the air. Each obstacle represents a thermal resistance, indicated by the symbol (Rθ, degrees/W). For clarity, the entire cooling system is presented in the form of an equivalent circuit of series-parallel connection of thermal resistances
Rθjc – thermal resistance pn-junction-case; Rθcs – thermal resistance of case-surfase radiator; Rθsa – thermal resistance radiator-air (surfase radiator-air).
If you plan to install an LED on a printed circuit board or use thermal paste, then you also need to take into account their thermal resistance. In practice, the value of Rθsa can be determined in two ways.
Rθja – resistance pn-junction-air; Tj – maximum pn-junction temperature (reference parameter), °C; Ta – air temperature near the radiator, °C.
Find from the graph “the dependence of the maximum thermal resistance on the forward current.”
Based on the known Rθsa, a standard radiator is selected. In this case, the rated value of thermal resistance should be slightly less than the calculated value.
Approximate formula
Many radio amateurs are accustomed to using radiators left over from old electronic equipment in their homemade products. At the same time, they do not want to delve into complex calculations and buy expensive new imported products. As a rule, they are only interested in one question: “How much power can the existing aluminum LED radiator dissipate?”
We suggest using a simple empirical formula that allows you to obtain an acceptable calculation result: Rθsa=50/√S, where S is the surface area of the radiator in cm 2.
Substituting into this formula the known value of the total area of the heat sink, taking into account the surface of the ribs (rods) and side faces, we obtain its thermal resistance.
We find the permissible power dissipation from the formula: Pt=(Tj-Ta)/Rθja.
The above calculation does not take into account many nuances that affect the quality of operation of the entire cooling system (directionality of the radiator, temperature characteristics of the LED, etc.). Therefore, it is recommended to multiply the obtained result by a safety factor of 0.7.
Why is it necessary to control the junction temperature of LEDs?
When using high-power LEDs, it is critical that you dissipate heat through effective temperature management. Without good heat dissipation, the junction (internal) temperature of the LED rises, resulting in poor LED performance. Its accelerated degradation and failure.
As the LED junction temperature increases, both the forward voltage and the lumen output decrease (see Figure 1). Not only does this reduce the brightness and efficiency of your LED, but the junction temperature also affects the overall life of the LED. LEDs usually don't fail catastrophically (although some can, especially if you overheat them); instead, the LED's lumen output will decrease over time. Higher junction temperatures cause LEDs to wear out faster. This is why it is so important to keep the LED junction temperature low. Also note that if you overload your LED (by putting more current into it than it's rated for), this will cause the temperature to rise to the point where permanent damage can occur.
DIY LED radiator
It’s not difficult to make an aluminum radiator for 1, 3 or 10 W LEDs with your own hands. First, let's look at a simple design, the manufacture of which will take about half an hour and a round plate 1-3 mm thick. Along the circumference, cuts are made to the center every 5 mm, and the resulting sectors are slightly bent so that the finished structure resembles an impeller. To attach the radiator to the body, holes are made in several sectors. It's a little more difficult to make a homemade heatsink for a 10-watt LED. To do this you need 1 meter of aluminum strip 20 mm wide and 2 mm thick. First, the strip is cut with a hacksaw into 8 equal parts, which are then stacked, drilled through and tightened with a bolt and nut. One of the side faces is polished for mounting the LED matrix. Using a chisel, the strips are bent in different directions. Holes are drilled in the places where the LED module is attached. Hot melt adhesive is applied to the sanded surface, a matrix is applied on top, fixing it with self-tapping screws.
How to fix the LED
There are two main methods of fastening, let's consider both of them.
The first method is mechanical. It consists of screwing the LED with self-tapping screws or other fasteners to the radiator; for this you need a special “star” type substrate (see star). A diode, pre-lubricated with thermal paste, is soldered to it.
On the “belly” of the LED there is a special contact patch with the diameter of a slim cigarette. After that, power wires are soldered to this substrate, and it is screwed to the radiator. Some LEDs go on sale already mounted on an adapter plate, as in the photo.
The second method is glue. It is suitable for mounting through a plate or without it. But it’s not always possible to attach metal to metal; how to glue an LED to a radiator? To do this, you need to purchase a special thermal conductive glue. It can be found both in hardware stores and in radio parts stores.
The result of such fastening looks like this:
First method
The area is calculated using the formula F = а x Сх (T1 – T2), where Ф is the heat flux, and S is the surface area of the radiator (the sum of the areas of all fins or needles and the substrate in sq. m), T1 is an indicator of the temperature of the outlet medium heat, and T2 is the temperature of the heated surface.
When calculating the area, you should also pay attention to the fact that the rib or plate has two surfaces for heat removal.
The needle surface is calculated using the circumference (π x D) multiplied by the height.
For surfaces that have not been polished, the heat transfer coefficient is 6-8 W/(m2 K).
What affects the transition temperature?
The ambient temperature and the current passing through the LED affect the LED junction temperature. Other factors influence the nature of the light, whether it is steady state or pulsed, and the parameter we are really interested in is the power of the LEDs per unit area of the heatsink (the surface that dissipates heat).
The most important part of LED cooling is the thermal path from the LED junction to the outside of the fixture. Heat must be efficiently removed from the LED and then removed from the area using some kind of cooling or dissipation.
Heat sinks are an important part of LED lighting because they provide a path for heat to flow from the LED light source to external elements. Heat sinks are capable of dissipating energy in three ways: conduction (heat transfer from a solid to a solid), convection (heat transfer from a solid to a moving fluid, air in most cases), or radiation (heat transfer between two bodies at different temperatures through thermal radiation).
Before you start choosing a heatsink, you should know that when you buy metal backed LEDs, LED stars, it is already a sure step towards better thermal control. LEDs come in coils as bare emitters which are encased in a clear resin which is generally a poor conductor of heat so when we mount them on an aluminum base they act as a heat spreader and are an integral part of the PCB which helps in thermal conductivity .
Adhesive: Thermal conductive compounds
When mounting LED boards on heatsinks, it is best to use a thermally conductive material for further steps towards optimal thermal performance. We recommend this Arctic Silver epoxy or Hexa Therm Thermally Conductive Adhesive Tape, which is essentially just thermally conductive double-sided tape to the exact shape of the LED star boards. HexaTherm is not as thermally conductive as epoxy, but it will still get the job done.
Which thermal paste for LEDs should I choose?
Radiator material
The thermal conductivity of a heatsink material directly affects how effectively heat is dissipated by conduction. Copper is better, but due to its price, aluminum is used more widely and is the material for most radiators. Thermoplastics, like composite LED heat sink, can be used for small LEDs with lower heat dissipation requirements. The use of thermoplastics can be very beneficial as they can be molded into more shapes and are much lighter in weight.
Radiator shape
Thermal transfer occurs on the surface of the radiator. This is why the best radiators have a large surface area. This can be achieved by increasing the size of the heatsink or using a finned heatsink. Approved radiators help because they provide many more surfaces for heat transfer. Considering that the fins dissipate heat, there must still be enough room for air to move between the fins to create a temperature difference between the fins and the air. When the fins are made too close together, the air between them will not cool and will become almost the same temperature as the fins, which will stop heat transfer all together. Therefore, more fins does not automatically mean better cooling, you need to think carefully about the design of the radiator.
Radiator trim
The surface of your radiator also has a direct impact on thermal conductivity. A painted surface will perform better than a bright, unpainted one. This also applies to anodizing and etching heatsinks, which will reduce thermal resistance and improve heat dissipation overall.
Forced convection (air cooling)
As I said earlier, for large LED arrays or fixtures that are in an enclosure where their airflow is low, you may want to consider some sort of ventilation system. This will help as the air surrounding your radiator will in turn become cooler and allow for better heat transfer from the surface of the radiator to the outside.
Summary
That's all, now you should know why you need an LED radiator. When choosing your radiator and finding which radiator to use, be sure to consider all the factors that affect heat and the cooling process:
- LED power
- Number of LEDs you turn on
- Temperature of the environment in which the LEDs will operate
- Whether the LEDs are installed in an enclosed or open space.
- Installation density of LED chips.
Lenses for LEDs.
Second calculation method
There is another simple formula, which was obtained through experiments.
S = [22 – (M x 1.5)] x W, where S is the heat exchanger area, W is the supplied power (W), and M is the unused power of the LED.
For the finned type of radiator made of aluminum, you can use the data provided by engineers from Taiwan. The data is not accurate, as it is indicated in ranges with a large run-up rate. In addition, the definition is suitable for the climatic conditions of Taiwan. They can be taken as a basis only when making preliminary calculations.
Design features of radiators
Many people ask the question: which LED radiator is better?
There are two groups of modifications:
- needle-shaped;
- ribbed.
For example, a radiator for a 10W LED is represented by a ribbed LED device.
The first type is usually used for the natural method of cooling LEDs, and the second for forced cooling. With the same dimensions, the passive needle device is 70% more efficient than the ribbed type.
Radiators for high-power LEDs have a needle-shaped design. They are designed for high-power LEDs, but this does not mean that finned plate-based devices are only suitable for operation in conjunction with a fan. Depending on the geometric parameters, they are also used for passive cooling.
A radiator for LEDs of any configuration can be square, rectangular or round.
Option 2
You can make a radiator for LEDs with your own hands from a fragment of an aluminum pipe with a rectangular cross-section.
Required materials:
- pipe measuring 30x15x1.5 mm;
- press washer whose diameter is 16 mm;
- thermal glue;
- thermal paste KTP-8;
- W-shaped profile 265;
- self-tapping screws
To optimize the convention, three holes are drilled with a diameter of 8 mm, and in the profile there are holes with a diameter of 3.8 mm for fastening using self-tapping screws.
The LEDs are glued to the pipe - the main part of the radiator - using thermal glue. In places where the radiator parts are connected, a layer of KTP-8 thermal paste is applied.
Then they begin to assemble the structure using self-tapping screws with a press washer.
