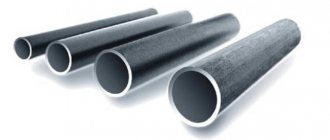
The wide use of epoxy resins in everyday life, industry, aircraft and shipbuilding, electrical engineering and electronics, and construction has prompted a detailed study of such parameters of epoxy resins as their thermal conductivity and electrical conductivity coefficients.
There is a program for calculating the uncertainty of verifications in accordance with GOST 8.461-2009, certified by the Federal State Unitary Enterprise named after. Mendeleev, on the basis of which the parameters of materials used in a particular industry are selected.
Characteristics of epoxy resin
Epoxy resin is a synthetic oligomeric compound that, when in contact with a hardener, forms a durable polymer. Moreover, this polymer has amazing adhesive abilities, thanks to which it glues almost any material - leather, wood, glass, metal, etc.
Important! Only plexiglass, polyethylene, nylon and other elastic materials that do not have pores cannot be “epoxyed”.
Essentially, epoxy resin is a powerful two-component synthetic adhesive that looks like resin. Its color can range from white to dark orange, although most often you are working with a yellow, clear liquid similar to liquid honey or tree resin.
Properties and technical specifications
This brand of glue is characterized by the following properties:
- high mechanical strength,
- small shrinkage,
- excellent adhesion to most materials,
- electrical insulating abilities (considered a dielectric),
- resistance to water (the adhesive seam is waterproof).
After complete curing, the product can be subjected to further processing - grinding, polishing, sawing, drilling, and it can also be painted. If necessary, pigments are added to the epoxy before mixing with the hardener, and only then the adhesive composition is prepared. At a temperature of 18-25 degrees, the lifetime of the resin after introducing the hardener is 4 hours. The shear strength of surfaces (using metal as an example) is 8 MPa.
Epoxy resin and epoxy glue
It is worth saying that many people confuse the concepts of epoxy glue and epoxy resin. Resin is a synthetic polymer, of which there are a huge variety in nature. But for this substance to be beneficial, it must be mixed with a hardener. Tertiary amines or various phenolic compounds can be used as a hardener.
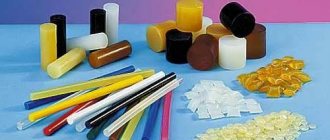
The final product we want to obtain depends on the choice of specific components. It can be a resin that is as hard as metal, or it can be a resin that resembles rubber. And they can differ significantly in color.
Epoxy adhesive is one of the options for combining a synthetic polymer with a hardener. It was created in one version and was initially used only for gluing parts. Today, epoxy adhesive is used in many areas of production and in everyday life.
This product is produced in tubes of 30-70 ml, as well as in construction syringes, bottles, construction buckets and even in industrial barrels (from 15 to 19 kg). Large volumes of epoxy adhesive are usually used for the manufacture of self-leveling floors.
What is epoxy, application instructions
The main polymer of the epoxy adhesive mass is a resinous substance. Resin (epoxy) has technical characteristics similar to glue and is sold together with a hardener. The scope of application of epoxy is similar to glue - agriculture and industry, therefore it is sold as an independent adhesive material. Also, the production instructions “How to use epoxy resin” indicate that it is suitable for pouring floors, making mosaics, design creativity and preparing building mixtures.
Technical characteristics of epoxy adhesive
- Glue consumption is 1.0-1.1 kg per 1 m² of surface.
- The temperature at which this glue is used varies from -20°C to +120°C.
- Not suitable for gluing dishes (as it may cause poisoning).
- Hazard class – 3. The composition is considered low-hazard, however, during the application process it is important to protect the respiratory tract and skin. Contact of glue on the skin causes burns!
- You can store glue only if the sealed packaging is intact. The storage period should not exceed 3 years.
Important! The glue perfectly repels water and can be used to connect products operating in conditions of high humidity.
Advantages and disadvantages
Epoxy has a number of positive characteristics, thanks to which it continues to lead among analogues. Here are the advantages of glue:
- elastic seam - the presence of slight mobility of the adhesive joint will prevent the appearance of cracks and prevent destruction;
- the ability to withstand temperature fluctuations - the product is heat-resistant, the finished product can be used at temperatures up to +250 degrees (some adhesives are even higher temperature);
- no harm from low temperatures - the adhesive joint is frost-resistant, does not lose strength characteristics even at -30 degrees, this allows the material to be used for outdoor work;
- moisture resistance - epoxy adhesive is waterproof and does not react to water or water vapor during operation;
- suitability for gluing most known materials - the glue is truly universal, suitable for almost any surface;
- short drying time - after application, the parts quickly become a single whole, and after final polymerization it is almost impossible to peel them off.
Despite the high quality and ultra-strong composition of the product, it has a number of disadvantages. Here they are:
- Do not use the mixture for gluing objects in contact with food, this will harm the body and may cause poisoning;
- the instructions prohibit gluing silicone, polyethylene, Teflon with the product; these materials will be destroyed by the action of the resin, the glue can even partially dissolve them;
- the glue has too high a hardening speed, and a novice master may not have time to cope with the task;
- wiping the product off the surface is very problematic; it will have to be cleaned immediately, before it hardens;
- In case of contact with skin, there is a risk of developing an allergy or getting a burn; you should only work with gloves.
Differences between epoxy resin and epoxy glue
Here we see the key differences between the materials described:
- Freezing time. Epoxy resin cures slowly, up to 24 hours, and goes through several conditions during this stage. They can be used to shape the epoxy into various shapes. The glue sets in a few minutes, and no more than 3 hours pass before final crystallization.
- Color. Even after hardening, the resin remains transparent for a long time, while the glue becomes cloudy and acquires a yellowish tint.
- Scope of use. Epoxy adhesive is used in construction work and in everyday life, to connect various elements, create self-leveling floors and mosaics. Resin can also be used for these purposes, but in addition it is used to create decorative items.
- Mixing. The resin needs to be mixed, which means that by improvising, you can get one or another result. In contrast, glue is a finished product that is suitable exclusively for its intended use.
Conductive Adhesive Brands
There are several manufacturers of conductive adhesive, both foreign and domestic, that guarantee high electrical conductivity.
- Contact. Probably the most famous composition among radio amateurs. Conductive adhesive contactol has high elasticity, sufficient strength, is made on a silver basis and dries quickly, which ensures quick and convenient installation. You can buy conductive glue of this brand in any amateur radio store, however, the professionals in this field themselves speak rather poorly about it. But there are also positive reviews.
Contactol - Elekont. Conductive adhesive that will be useful to every car owner. This is an epoxy compound. Reviews about it are also not encouraging.
Elekont - Done deal. This is a foreign representative of this type of glue. Conductive adhesive done deal has increased reliability and strength, which makes it better than domestic analogues.
Done Deal - Homakoll. A fairly popular brand of conductive adhesive that has long established itself in the market. It is used by large companies as an electrically conductive adhesive for floor coverings with an antistatic effect.
Homakoll - Mastix. This company introduces an electrically conductive adhesive for repairing heated rear windows. Mastix conductive adhesive is considered one of the best in this segment.
Mastix - TPK-E. The brand is distinguished by its technical characteristics. This adhesive will function in a wide range of temperatures. From -190 to +200 °C. Used in enterprises.
Scope of application of epoxy resin
The creator of the polymer material, Swiss chemist and inventor P. Kastan, could not even imagine that 90 years later his brainchild would not only not lose its relevance, but would also gain unprecedented popularity in a variety of fields:
1) Mechanical engineering - production of dies and equipment, springs, special containers and even bearings;
2) Shipbuilding – manufacturing of floating vessel hulls, fuel storage tanks and propellers;
3) Aviation and rocketry - covering helicopter blades and airplane wings. Manufacturing of tanks and gas containers;
4) Radio engineering - used for insulating electrical cables and wires, for filling transformers;
5) Construction - pouring self-leveling floors, which are popular these days, manufacturing pipelines, creating paints and varnishes, as well as applying markings to asphalt roads.
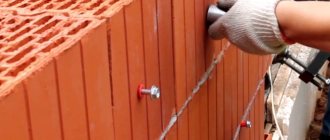
In addition, epoxy resin is included in tile adhesives, putties and other construction mixtures to increase adhesion (adhesion of mixtures to surfaces).
6) Use in everyday life - suitable for gluing broken pipes, leather and metal products, repairing equipment and furniture.
7) Decorative use - epoxy resin is widely used by those who like to make unusual products with their own hands, ranging from decorative ornaments to jewelry. Moreover, “epoxy” can be poured into various forms, resulting in unusual and incredibly beautiful products!
So, we can conclude that epoxy resin and epoxy glue are the same product. It’s just that when we need to glue certain objects or fill a floor, it’s easier to use a ready-made product - epoxy glue. If we decide to decorate a room or make beautiful jewelry, we will need epoxy resin, which is more versatile in this regard.
Important! Epoxy glue comes in three types: instantly hardening (no more than 2 minutes), hardening within 10 minutes, and regular, setting within half an hour.
Of the well-known brands of such glue, it is worth paying attention to the following: “Moment”, “EDP”, “Contact”, “Second”, as well as “Cold Welding” and “Class”.
If we talk about epoxy resins, the most popular polymer materials are the brands ED-16, ED-20, as well as “Ekovanna”, “Leonardo” and “EPS2106”.
The difference between conductive glue and regular glue
The main difference is that the composition of conductive adhesive requires the presence of certain components that provide the required level of electrical conductivity.
Among the differences we can also highlight:
- lower strength indicators than conventional ones;
- the composition usually contains graphite, metal or both components in a complex;
- the scope of application has its own specifics;
- the cost of such compositions is slightly higher.
How to use epoxy resin
To prepare “epoxy” you will need to combine the resin with a hardener. They are usually sold together, and on both bottles you can find the proportions in which the materials are mixed.
Depending on what kind of resin you want to get, the proportions can be: 10:1, 10:4 or 10:6 (the first is the resin, the second is the hardener). If the proportions are not indicated on the packaging, use measuring cups for calculations.
It is important to strictly observe the proportions of mixing the resin with the hardener. By increasing the amount of hardener, you make the composition less durable, and if there is a lack of this component, the resinous mass will be too sticky.
It is also convenient to use a syringe for mixing. They can take a certain amount of resin, fill a container with it, and then add a hardener there.
Remember! It is the hardener that must be poured into the resin, and not vice versa.
The hardener should be added slowly, otherwise it may splatter. After adding, start stirring. This also needs to be done slowly, because rapid mixing will lead to the formation of air bubbles inside the composition.
By the way, if the consistency of the resin is liquid, the bubbles will come to the surface on their own. If the consistency of the mixture is thick, bubbles may remain. The thick consistency is also bad because if certain forms are poured, the resin will not be able to penetrate into all the cracks and the relief will be unclear.
Next, you need to let the composition harden to a certain consistency and use it as intended.
Composition and properties
Epoxy adhesives from different manufacturers may contain different components, but the basic composition is always the same, it complies with GOST and the attached certificates. Two main substances in the composition are strictly required:
- epoxy resin itself;
- liquid or paste hardener.
Polyamines, carboxylic acids, and aminoamides are used as a curing composition. One-component adhesives always contain solvents (acetone, xylene, alcohols), which prevent the mass from hardening before contact with air and evaporation. The following can act as modifying additives and fillers for glue:
- synthetic rubber;
- formaldehyde resin;
- fiberglass;
- clay, chalk;
- aluminium oxide;
- vanadium, nickel, zinc powders;
- organosilicon resins.
The glue also includes plasticizers, which give it plasticity. Thanks to them, the mixture hardens and does not crumble and remains elastic. The percentage of the main mass and various fillers varies widely - from 5 to 50%.
All of the above binding components provide the epoxy adhesive with the desired properties:
- optimal density;
- seam strength;
- high curing speed;
- resistance to oils, gasoline, water, atmospheric factors;
- resistance to cracks and shrinkage.
It is also worth noting that glue does not conduct current - it is a dielectric, so it is often used to insulate electricity.
Stages of hardening of “epoxy”
— For the first 30 minutes, the mixture remains liquid and can easily penetrate into the smallest pores. If you are pouring a particular mold and want all the potholes and depressions to appear on its surface, fill the mold during this period while it has good fluidity.
— Over time, the resin thickens and becomes less fluid. During this period, it is easier to control, and therefore resin of this consistency is used to fill floors, countertops, or any other flat surfaces.
Important! When a layer of epoxy resin hardens, it attracts dust, and this can ruin the entire author's idea. Therefore, work with epoxy must be done in a clean room, having first removed all dust. If the product is small, think of a box in advance with which you can cover the product until it completely hardens.
— Having become even thicker, the composition is no longer suitable for creating relief forms. But at this stage, the adhesive properties of the material are more pronounced. This means that resin becomes an ideal material for gluing objects together.
— At a certain point, the thickened resin acquires properties similar to rubber. It stops sticking to your hands, but remains flexible enough for you to give it the desired shape. If you place this material in a certain mold and clamp it well for several hours, the epoxy resin will harden in the position you want.
— Once fully hardened, the resin turns into a durable plastic that is not easily scratched.
It must be said that it is impossible to indicate the exact time of each of the solidification stages. Each composition will have its own, and therefore it should be installed independently, in a practical way.
Important! If there is no special mold suitable for pouring epoxy resin, you can use a mold made of any material, after first lubricating its surface with vegetable oil. But be careful! Each epoxy composition reacts to oil differently.
Fast curing EDP adhesive
This product is produced in packages of 45/250 g and is two-component. The first bottle contains epoxy and a number of modifiers, the second bottle contains a hardener. Purpose of fast-curing adhesive:
- connection of composite and metal products, objects made of alloys, ceramics, glass, and other materials,
- repair and sealing of devices,
- sealing chips, defects, cracks.
Typically this type of EAF adhesive is used when fast curing is required. The product replaces cold welding.
Advantages of glue
The adhesive composition has the following advantages:
- ensuring the required level of strength 6 hours after application,
- work at a temperature of 10-30 degrees,
- low labor intensity of the process, the ability to process the adhesive seam even before the end of complete polymerization.
Application of fast-curing EAF
Before use, surfaces should be carefully prepared - cleaned, degreased, and dried. To improve adhesion, sandpaper is used. The bottle with resin is placed in water at a temperature of 60 degrees for 8 minutes. 1.5 parts of epoxy are mixed with 1 part of hardener, the resin lifetime is 30 minutes. You can use any fillers - cement, chalk, alabaster, fibers, graphite in a volume of up to 20%. The composition is applied in a thin layer to both surfaces, connected and pressed. Leave the product in the fixed position for 6 hours. Afterwards it is completely ready for use.
Temperature conditions when the epoxy hardens
The rate of crystallization, and therefore the hardening of epoxy resin, is affected by temperature. If you heat the composition by literally 10ºC, this process will speed up 3 times!
By the way, in the vast majority of cases, cold-type hardeners are used in everyday life, which do not need to be heated. However, in some cases there is a need to use hot hardeners. They make it possible to obtain the most durable products that can withstand high temperatures and heavy loads. Simply solidifying in a heated state leads to the formation of a denser network of molecules, resulting in a stronger product.
Epoxy resin consumption
Obviously, the consumption of this material is greatly influenced by the quality of the surface being poured, in particular, its roughness, porosity and tendency to absorb other substances.
Usually the issue of epoxy consumption is of concern to those who decide to pour a self-leveling floor. And here, again, the requirements for gender are of great importance. If you want your concrete floor to stop dusting, 100 g per 1 sq.m. is enough. surfaces. When it is necessary to obtain a perfectly smooth, durable and even reinforced coating, the consumption can increase to 3-3.5 kg of resin per square meter of floor.
The use of epoxy for the manufacture of self-leveling floors
This is one of the most popular ways to use the material in question. It's easy to use and produces a smooth, shiny, seamless polyurethane floor that will last for years.
Thin-layer and thick-layer poured flooring
It is important to understand that your floor can be either thin-layer or thick-layer.
1. Thin-layer flooring is a film on the surface, no more than 1 mm thick, which can be applied to the floor with a regular roller. Even a non-professional can handle this.
As a result, you will get a smooth matte or glossy, transparent or colored surface that will highlight the room. True, even taking into account the hardness of the hardened resin, such a floor is susceptible to scratches and is prone to abrasion, especially if it is used in frequently used areas - kitchen floors or hallway floors. And given that this layer is more likely to be a protective layer, if necessary, it can be used to cover brick, concrete or wooden walls.
2. Thick-layer poured floor is a film with a thickness of 3 to 10 mm. Due to the existing thickness, not only various dyes can be added to the material, but also fillers, incl. quartz chips, small river pebbles, copper or aluminum shavings, etc. This flooring is suitable for any high-traffic living space, such as a bathroom, bedroom, kitchen, living room or even garage.
This layer is quite difficult to damage; it does not scratch or crack. In addition, by choosing resin with quartz particles, you get a perfectly flat floor on which your feet will not slip!
It is only important to understand that pouring a two-component thick-layer floor without certain skills and suitable tools is problematic. You may ruin the material. This kind of work should be entrusted to professionals.
Types and characteristics of glue
Depending on the number of bottles included in the package, glue can be of the following types:
- One-component. This is a mixture of epoxy with solvents and plasticizers, ready for use. It begins to harden after opening the sealed package. Typically, such adhesives are used to perform a small amount of work; they can be used to seal minor defects, seal seams, and fill gaps. The products are widely used in everyday life and handicrafts.
- Two-component. Sold in packaging in the form of two containers. One contains epoxy in the form of a paste, plasticine, and the other contains a hardener. They need to be mixed in a certain proportion and quickly used for their intended purpose. Most epoxy adhesives are two-part and can be used to glue almost any object.
The consistency of adhesives can be liquid or in the form of a plastic, thick mass. Liquid materials are sold in tubes and do not require dilution. It is recommended to use a plasticine-like mass to repair chips, pits, and other defects. Before use, it must be kneaded in your hands and mixed.
Based on the curing method, materials are classified into those that require heat treatment and those that do not. The former are heated before introducing the hardener, the latter must be kept at room temperature.
Common brands
You can find a huge variety of epoxy adhesives on sale, including imported and domestic brands:
- "Contact". Well suited for rooms with high humidity, suitable for sealing pipes, bathtubs, toilets.
- "Moment" by Henkel. Sold in every hardware store, the most popular. Packaged in different packages - weighing from 5 g, convenient and reliable.
- "Super-Grip" epoxy equal component. The composition contains mineral fillers, which increases the adhesive strength. There are no restrictions on processed materials.
- "Bison". A two-component colorless gel, used to fill voids, cracks, chips, and helps restore the shape of the product.
- "Class". Analogous to the previous composition. Ideal for use on metal and various alloys, helps repair cars, sinks, pipes.
- "Second". The quick gluing effect is a distinctive feature of the product; it completely hardens in 3 minutes.
- "Novocolor epoxy universal glue." It is characterized by low shrinkage and high adhesion to various substrates, allowing you to seal products with large cracks and chips.
- Metal Bond. 5-minute glue for all types of metal, can also glue metal surfaces to wood, plastic, and other materials.
- "Compound K-153". The product is black in color and is used for metal structures exposed to water and petrochemicals.
- Ultima (“Ultima”). A two-component product used to join most known materials, including decorative cladding. Suitable for repairing cars, boats, household appliances, plumbing.
- Poxipol (“Poxipol”). Quick-drying composition, hardens within 10 minutes after preparation. You have to work with him very quickly.
- EDP. Ideal for all surfaces - from metal to glass. Optimal in terms of price-quality ratio.
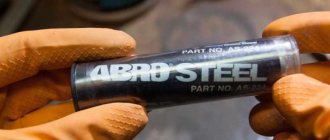
- Epoxy steel. Excellent for any type of metal, it is often classified as an auto chemical and recommended for car repair.
- DoneDeal "Epoxy Adhesive" in a syringe. A two-component adhesive that gives a completely water-tight connection.
- BisonEpoxy 5 min. It is characterized by fast polymerization and extremely reliable adhesion of surfaces.
- "Abro" The adhesive of this article is available in two colors - white, black, and is a “cold welding” for all types of surfaces.
- Novol Plus 710. This is a repair kit consisting of resin, hardener, glass mat (fiberglass). Suitable if the product being glued has significant defects or cracks.
- Uhu. It is used for joining different types of plastic and metals, and can act as a filling agent.
- "Defence - EC". Chemical-resistant epoxy adhesive, sold in large containers (10 kg each), used mainly in production.
- "Epoxy Titan". Material of increased strength, resistant to shock loads, equal components. Packaged in blisters of 20 and 200 ml, in buckets of 2 liters.
Self-leveling floor manufacturing technology
So let's take a closer look at the process of making a self-leveling floor.
Calculation of material quantity
Epoxy resin in large volumes may seem expensive to you, and therefore you need to calculate the exact amount of material so as not to overpay. To do this, simply calculate the surface area that you plan to fill, then multiply the resulting number by the layer thickness that you want to obtain. All that remains is to convert the resulting volume into liters and you can purchase the material.
Stage 1. Surface preparation
It is best to form such a floor on a concrete base. The wood will absorb the resin and you may need more material. In this case, it is necessary to remove the old paint from the floor and seal all the cracks. In order for the resin to adhere better, it is advisable to treat the floor surface with sandpaper or a vibrating sander.
Before you start pouring, the surface should be degreased by washing it with soapy water and leaving to dry for a day.
Important! If you just recently poured a concrete floor, at least a month must pass before you can apply self-leveling floors. Increased surface humidity risks ruining all your efforts.
Before applying the resin, the floor should be primed with a special epoxy primer. It can be applied in one or two layers, but with the obligatory drying of each layer for at least 12 hours.
Step 2: Mixing Epoxy Resin
Pour the resin into the bucket and then add the hardener. Taking a construction mixer, the components need to be mixed slowly for 5-7 minutes. It is important not to rush so that the composition does not splatter and bubbles appear in it. If desired, you can add a dye of a suitable color to the composition.
Stage 3. Filling the first layer
Once the compound is ready, use a brush to apply the resin to the corners and edges of the floor. After this, pour the liquid mass into the center and, using a roller, spread over the entire surface. You should end up with a layer approximately 5mm thick.
Stage 4. Drawing (if necessary)
Once 72 hours have passed and the first layer has dried, you can apply the design.
Stage 5. Filling the second layer
Afterwards you can apply a finishing layer of epoxy resin. By the way, to create a special self-leveling floor with various decorative elements, you can use several layers.
Instructions for use
The prepared composition hardens quickly, so it is recommended to use small portions for mixing. All products that need to be glued should be prepared in advance. To enhance effectiveness, you can use fabric - soaking it will improve adhesion. The fabric is usually gauze, other thin material or fiberglass.
Preparation for gluing
The surface must be washed, cleaned, and degreased with alcohol and acetone. For cleaning, you can use a fine-grain sandpaper. As a result, the base should become dry, free of dirt and dust. If fabric will be used for impregnation, it also needs to be prepared and air dried.
Preparation of the adhesive composition
The instructions for use state that EDP glue must be prepared immediately before use. The proportion is 10 parts of epoxy resin from the first package to 1 part of hardener from the second. How to dilute the adhesive composition? Here is a description of the technique:
- place the bottle with epoxy in water at a temperature of 50-70 degrees,
- hold for 10 minutes,
- take all components in small volumes, based on the indicated proportions (for one division of hardener in the measuring cup there will be 10 divisions of resin on the paper label on the jar),
- mix the resin and hardener well (for 3-5 minutes),
- leave for 10 minutes for air bubbles to escape,
- apply within 2 hours, later gelatinization will begin, and the application of EAF glue will be ineffective, the quality of the seam will deteriorate.
Fillers
Various fillers are introduced into the composition to correct and improve its properties; they will have to be purchased separately. These can be plasticizers, pigments, and all of them are introduced only in dry form. Even a drop of water can ruin the glue. You should carefully read the characteristics of fillers in the instructions for them and add only in the permitted volume. Typically, no more than 10-20% fillers are added to maintain fluidity levels.
Applying glue
The technique of applying glue to fabric is as follows. A suitable cut is placed on top of the product, which will act as a reinforcing layer, and then glue is applied. If necessary, after 12-20 minutes you can lay another row of mass.
Without fabric or gauze, the product is applied in a thin layer to both surfaces to be glued. Afterwards they need to be connected and pressed tightly. It is better to use a vice or heavy objects. Excess glue must be removed immediately after hardening - this will be very problematic. The product should be left pressed until it hardens completely.
Curing time
Curing of EDP glue lasts 24 hours, the time is indicated for operation at room temperature 20-25 degrees. When it increases, the indicator decreases; when it decreases, it increases.
Harm to health
You need to work with epoxy carefully. This is especially true for resin, because during the dilution process, drops can fall on the skin, causing burns. To work with this composition you need to use gloves.
Important! If drops of epoxy resin get on your skin, remove them with alcohol and then wash your hands with soap. If the epoxy gets into your eyes or mucous membranes, consult a doctor immediately!
Moreover, from the mixing process until the resin completely hardens, toxic compounds are released from the composition that can cause poisoning. Therefore, you need to work with the resin in question in a room that is well ventilated or has an exhaust hood. If work takes place in a garage or other room that is poorly ventilated, it is advisable to wear a respirator. But after hardening, this resin becomes absolutely safe!
Tips for using epoxy resin
- Use polyethylene in your work. Considering that “epoxy” does not bond to polyethylene, before starting work, cover all critical surfaces with plastic film. This will prevent you from getting drops of varnish on them. Otherwise, removing dirt will be problematic.
- Do not use paper when working with epoxy resin. Using paper to protect surfaces is not the best option. The resin saturates the paper and penetrates through it.
- Work in a dry environment. The normal hardening of the epoxy can be prevented by water entering the composition. Even working in a humid environment can result in poor curing.
- When working with resin, the temperature should be above 22ºC. Low room temperature can also prevent freezing. For a normal process, the air temperature must be more than 22ºC.
- To speed up the curing process, use a battery. To make the applied composition harden faster, a small product can be placed on a warm radiator. It is only important that the resin does not heat up too much and bubbles do not begin to form in it.
- To remove the resulting bubble, use a straw. An air bubble that is close to the surface can be removed by blowing on it through a straw.
- To add different colors, you can use paint from a felt-tip pen or ink from gel pens. Epoxy resins of different colors and shades are used to decorate surfaces. This is achieved by adding special toners to the composition. True, their cost is quite high, so resourceful people came up with the idea of adding paint from felt-tip pens or ink from gel pens to the “epoxy.”
- If you find grains and flakes, place the jar on the battery. If, after storing epoxy resin in a cold room, you notice the appearance of grains and flakes in the composition, just place a jar of varnish on the radiator. Heat the composition to 50-60ºC, it will become homogeneous.
- For work in the sun, use material that has an ultraviolet filter. When making decorative products, it is important that the epoxy resin does not yellow when exposed to sunlight. To do this, initially buy material that has an ultraviolet filter.
Now you know how you can use epoxy resin in construction and interior decoration. Dare, show your imagination and surprise others with products made from epoxy!
Glass blocks: which are better and what types of glass blocks are there?
Self-production
Conductive grease can not only be purchased ready-made, but also made with your own hands. However, before giving manufacturing instructions, it is necessary to answer a number of the most common questions among beginners:
- Is Moment glue capable of conducting electricity? No, none of the many variations of this adhesive are capable of conducting current.
- Is Superglue electrically conductive? To answer the question you need to understand the nature of conductivity. This type of substance does not contain components (metals, graphite) that conduct electricity. Thus, in terms of its capabilities, “Superglue” is almost identical to plastic.
- What about epoxy compounds? Epoxy resin does not transmit electricity for the reason stated above.
- Are high-voltage repairs using specialized glue allowed? No, such work is prohibited in accordance with safety regulations.
- I bought Kontaktol, but it does not give the desired effect. The reason is most likely that the product is counterfeit. The popularity of this brand has led to a large number of counterfeits.
- What is needed for the electrical conductivity of the composition? The adhesive must necessarily contain conductive components. Moreover, their specific gravity must be sufficient to ensure electrical conductivity.
Manufacturing instructions
This part of the article will talk about how to make conductive glue with your own hands. The desire to make the composition yourself is often dictated by the unsatisfactory quality of store purchases. In addition, sometimes an adhesive composition is needed urgently, and there is simply no time to find it on sale. In this case, you can make glue with your own hands according to the instructions below. To make it you will need:
- First of all, you need to prepare a base on which homemade conductive glue will be made. We will use a graphite pencil lead as such a base. This rod will become a conductive element.
- Stationery knife.
- Hammer.
- A piece of paper on which we will collect graphite dust.
- A glass or other container for graphite dust.
- Nail polish.
Before making conductive glue, you need to remove the graphite from the pencil. To do this we use a stationery knife. Next, place the rod on the paper, cover it on all sides so that dust does not scatter to the sides. Using a hammer, grind the graphite until it turns into dust.
We collect dust in a clean and dry container prepared in advance. Pour nail polish into a glass and stir the mixture with a wooden stick (you can use, for example, an unnecessary pencil). That's it - the conductive composition is ready.
other methods
Conductive gel or varnish can also be made from metal chips or dust. The fact is that graphite is carbon with a special crystal lattice. Carbon is found in combustion products, for example, in soot.
Silver can also be used as conductive elements, although the method is quite labor-intensive. First you need to purchase silver nitrate or regular nitric acid. You will also need 1% formalin solution and ammonia.
After combining silver with formaldehyde in equal parts and a few drops of ammonia, a characteristic black precipitate will appear - this is silver. The metal is extracted by filtration in distilled water. We dry the metal at high temperature - from 100 to 150 degrees above zero. The resulting powder will become the basis of the adhesive. To make the composition more liquid (then it will dry more slowly), the glue can be diluted with a small amount of alcohol.
There is another way to make conductive glue with your own hands. Silver powder can be obtained by evaporation: the process is carried out until crystals appear. Next, heat the substance at 400 degrees for 30 minutes. As a result, bubbles will appear, which will indicate the readiness of the substance. The method is considered very effective, but not readily available at home. In addition, certain skills in working with chemicals are required.
Features of self-production
There are a number of important points when obtaining adhesive compositions yourself:
- Wrong decisions are quite possible. The consequence of such errors can be damage to expensive equipment. Therefore, if you lack confidence in your own knowledge and skills, it is better to trust professional compositions from manufacturing companies.
- Conductive varnish made from nail polish, by definition, cannot be as durable as the factory compound.
- With a correctly set up workflow, the production of the composition will take no more than 3-5 minutes.
Thus, everyone decides for themselves whether to make glue themselves or simply buy it in a store, based on existing knowledge, financial resources, availability of goods at a particular moment and other considerations.