Setting the parameters of a semi-automatic welding machine
The semi-automatic welding machine is a very convenient device for working at home and in small workshops.
You can work with it in any conditions, no special preparation of the workplace is required, it is compact almost like a regular inverter. Unlike manual arc welding, it does not require a highly qualified welder to work with it. Correct setting of a semi-automatic welding machine allows even a low-skilled welder to perform high-quality work.
Depending on the type of material being welded and its thickness, it is necessary to correctly set the wire feed speed and shielding gas. Next, the welder needs to move the torch evenly along the seam, and a high-quality weld will be obtained. The whole difficulty lies in the correct selection of welding parameters for a specific material.
Semi-automatic welding machine. What it is?
This is a special device for welding with a molten electrode. The electrode is a welding wire fed automatically.
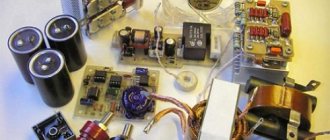
The main design elements of a semi-automatic welding machine:
During welding, a cylinder filled with gas under pressure is used.
The electrode wire, supplied in coils and installed in the device, is fed automatically by a special feeding mechanism included in the device.
The choice of speed for welding surfaces, voltage for a semi-automatic machine, and moving the electrode wire at the joining site is done manually.
Equipment capabilities
To properly configure a semi-automatic welding machine, an understanding of the welding characteristics is required; it is also necessary to understand the features of the semi-automatic machine.
Semi-automatic welding machines allow you to work with almost any metals and their alloys. They can weld non-ferrous and ferrous metals, low-carbon and alloy steel, aluminum and coated materials, are capable of welding thin metals up to 0.5 mm thick, and can even weld galvanized steel without damaging the coating.
This is achieved due to the fact that flux, flux-cored wire or shielding gas, as well as welding wire can be supplied to the welding area, and the supply occurs automatically, everything else is done as in manual arc welding.
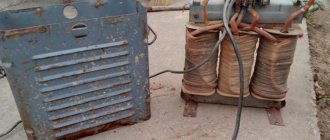
Semi-automatic welding machines are produced in different classes, but they all consist of:
- control unit;
- power supply;
- welding wire feed mechanism with reel;
- welding torch;
- power cables.
In addition, there must be a cylinder with a reducer and inert gas (carbon dioxide, argon or mixtures thereof), and a funnel for flux.
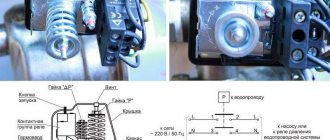
The wire feed mechanism consists of an electric motor, a gearbox and feed or pull rollers.
But how to buy a semi-automatic welding machine with optimal parameters?
World leaders producing welding equipment produce semi-automatic machines with the ability to adjust inductive resistance.
These welding machines cost a lot of money, but they greatly facilitate the welding process, bringing quality welding to it. The first semi-automatic welding machine produced in Ukraine was developed in Zaporozhye. The semi-automatic welding inverter Atom I-180 MIG/MAG has a unique ability to adjust the rate of increase of the welding current. Engineers have achieved excellent welding results through the use of advanced digital technology solutions. The semi-automatic welding machine Atom-180 is a very light and reliable (at the same time quite powerful) device. There is no need to use a huge inductor to adjust the inductance; all this happens at the electronic level through the use of modern microprocessors and appropriate software. The semi-automatic Atom is easy to operate and has the functionality of branded European welders. In addition to the semi-automatic welding function, this welding inverter has modes of manual arc welding RDS (MMA) and welding with a refractory electrode in an argon environment TIG (TIG).
You can buy a semi-automatic welding machine Atom I-180 MIG/MAG in our store by calling one of the numbers on the website.
Source
Recommendations in the instructions
Before starting work, it is necessary to reliably ground the welding machine and only then begin setting up. The semi-automatic welding machine must be connected to a gas cylinder system with protective gas.
It is necessary to check the presence of welding wire in the spool, if you need to reload it and stretch it to the torch handle. The gas supply speed is of great importance in the welding process.
Therefore, it also needs to be installed. Gas equipment has gearboxes indicating gas consumption in liters. This is very convenient; you just need to set the required flow rate within 6-16 liters.
The operating instructions for the device provide recommendations on how to properly set up a semi-automatic welding machine, what current to use to weld a specific metal, and at what speed to feed the wire.
The instructions should contain special tables in which everything is described. If you set all the parameters in accordance with them, then everything should work out.
In practice there may be difficulties. The quality of semi-automatic welding is influenced by many parameters. If the supply network does not meet the standards, then the power source will produce voltage and current that is not what is needed, the parameters will be unstable.
The temperature of the medium, the thickness of the metal, its type, the condition of the surfaces being welded, the type of seam, the diameter of the wire, the volume of gas supply and many other factors affect the quality of semi-automatic welding.
Tables of recommended welding conditions are given for certain conditions, which cannot always be achieved. Therefore, when welding semi-automatically, many adjustments are made experimentally.
Of course, the recommended values are initially set, then the welding parameters are fine-tuned.
How to properly perform semi-automatic welding.
Let's check if everything is ready.
We check the size of the welding wire overhang. If the wire end sticks out too much, the tip can be trimmed with a special tool. It is important to monitor the sharpness of the tip of the electrode wire. The pointed end ignites faster and easier. Before each work cycle and suture, the wire is bitten off. This makes it easier to get started.
We check whether shielding gas is supplied when the button is pressed. If welding is carried out in the cold season, then it is necessary to use gas heating. For this, a special heating device is used.
Arc ignition.
We light the arc. To do this, you need to touch the end of the welding wire to the workpiece in the lower corner of the edges, press the button located on the torch body.
Immediately after startup, two processes occur simultaneously - gas and electrode wire are supplied to the process zone. During the welding process, the torch must be held in such a way that it is possible to control the weld pool. This will ensure the correct location of the weld seam.
Main stage.
During operation, it is necessary to control the sound of the welding arc. A loud crackling sound indicates that the welding wire feed speed is incorrectly set. In this case, it is necessary to either increase the feed speed.
It is important to monitor the geometry of the resulting weld joint. If little penetration of the base metal is obtained, and the bead is narrow, it is necessary to increase the welding current voltage. Welding is performed with a ignited arc.
During operation, it is necessary to guide the burner not only along the joint, but also to move it, making oscillatory horizontal movements shown in the figure. This can improve the structure of the weld seam, significantly reducing the structure of the welded joint.
I – welding the root pass, II – filling the edges (second layer), III – filling and facing the seam (3 and subsequent layers)
It is imperative to protect the body from metal splashes.
To stop the welding process, you just need to stop pressing the button and remove the torch from the place where metal surfaces are welded.
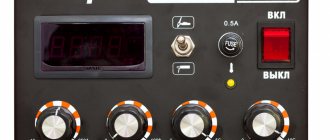
Setting current and wire feed speed
First of all, the strength of the welding current is set, which depends on the type of material being welded and the thickness of the workpieces. This can be found out from the instructions for the semi-automatic machine or found in the relevant literature.
Then the wire feed speed is set. It can be adjusted stepwise or smoothly. With stepwise adjustment, it is not always possible to select the optimal operating mode. If you have the opportunity to choose a device, buy a semi-automatic welding machine with continuously adjustable wire feed speed .
The control unit must have a forward/reverse wire feed mode switch. When all the settings have been made in accordance with the operating instructions for the semi-automatic machine, you need to try working on a draft sample with the same parameters. This must be done because the recommendations are average, and in each individual case the conditions are unique.
At a high wire feed speed, the electrode simply will not have time to melt, there will be large deposits or shifts on top, and at a low speed it will burn out without melting the metal being welded, the weld bead will sag, and depressions or breaks will appear.
Adjusting parameters
Adjustment of current or voltage depends on the thickness of the workpieces. The thicker the product being welded, the greater the welding current. In simple semi-automatic welding devices, the current adjustment is combined with the wire feed speed.
In professional semi-automatic machines, the adjustments are separate. The correct setting can only be determined experimentally by making an experimental seam on a test piece. The roller should be of normal shape, the arc should be stable, without splashes.
Some semi-automatic models have inductance adjustment (arc settings). With low inductance, the arc temperature drops, the depth of metal penetration decreases, and the seam becomes convex.
This is used when welding thin metals and alloys that are sensitive to overheating. With high inductance, the melting temperature rises, the weld pool becomes more liquid and deeper. The seam bead becomes flat. Welding in this mode is used for thick workpieces.
The welding wire feed speed switch in models capable of working with different diameters requires additional adjustment taking into account the specific thickness of the wire.
Even after fully studying the manufacturer’s recommendations, it is not always possible to obtain the desired operating mode of the semi-automatic machine.
Having set the optimal settings for welding a workpiece today, it may turn out that the next day they will become suboptimal because the quality of the network has changed or the position of the product on the workbench has changed.
That is, setting the modes is a constant and individual process because it also depends on the work style of the welder himself.
Setting up the semi-automatic machine before starting work.
In order to weld correctly, beginners working with semi-automatic or as it is also called mechanized welding must do the following:
Basic parameters of the mode for semi-automatic steel welding
After setting up the semi-automatic machine, you need to check how it works, whether the calculation of the modes for semi-automatic welding has been carried out correctly. Checking is carried out on test workpieces.
It will not be possible to set up a semi-automatic machine for welding without welding test parts, since the welding conditions are different. Also, each welder welds differently, some quickly at high current, others slowly. Test seams are inspected for welding defects, bead size, and penetration depth. If something does not meet regulatory standards, then you can change the parameters and make adjustments.
If the semi-automatic welding machine is configured correctly, the seam will be strong and even. The device produces a stable arc, the process proceeds without crackling or splashing.
Common mistakes
An error in the settings of the semi-automatic welding machine is indicated by a distinct crackling sound. Loud clicks indicate that the solder feed rate is low. It is necessary to increase the feed speed until the cracking noise disappears.
Heavy spattering of metal is often observed. This is due to an insufficient amount of insulating gas in the weld pool area. It is necessary to increase the gas supply and adjust the semi-automatic gearbox.
There are lacks of penetration or burns in the seam. This is due to the arc voltage being too low or too high and can be adjusted by setting the voltage or inductance.
Features of semi-automatic welding
The advantages of semi-automatic welding are obvious:
The disadvantages include:
That when welding parts with a semi-automatic machine, the level of arc radiation is stronger than when using other methods.
Also during operation there is a strong splashing of metal. This leads to significant losses of electrode wire, as well as the need for stripping. Which gas is best for semi-automatic welding? In the vast majority of situations, carbon dioxide is used for welding.
Helium and argon are also suitable. These gases are used both in pure form and in mixtures. The semi-automatic machine is supplied with direct current with a reverse polarity connection: plus is supplied to the wire, minus is supplied to the workpiece.
Semi-automatic welding - tips from the master
Every year, mechanized arc (“semi-automatic”) welding with consumable electrode MIG/MAG is becoming increasingly popular, slowly but surely replacing manual arc welding with coated electrodes. This is facilitated by the emergence of affordable semi-automatic welding machines that provide high-quality, productive welding with both copper-plated solid wires and self-shielding flux-cored welding wires. A modern inverter-type semi-automatic welding machine allows you to fully realize all the advantages of mechanized welding with a consumable electrode:
- the ability to weld both thin-walled and thick-walled products;
- increasing labor productivity;
- “long” seams;
- reducing the cost of welding work;
- high deposition rate, low losses due to waste and spattering;
- welding of complex joints by low-skilled and novice welders;
- safe operation - no current flows until ignition;
- absence of significant deformations of welded parts due to lower heat input;
An important feature of many inverter-type semi-automatic welding machines is the ability to perform manual arc welding with a stick electrode (MMA). By purchasing equipment of this type, you have at your disposal a universal tool that allows you to perform a wide range of welding work.
Of particular interest for private households, small industries, and auto repair shops is the use of self-shielding flux-cored welding wires, due to the fact that their use eliminates the use of heavy protective gas cylinders, gearboxes and hoses. Flux-cored wire is a tubular electrode with a powdery filler - a core. When heated in a welding arc, the components included in the wire core create the necessary slag and gas protection for the molten metal. Flux-cored wires allow you to vary their composition and properties over a wide range, which is why their scope of application has virtually no restrictions. As a rule, the shell of flux-cored wire is carbon steel, and the core is a mixture of metals, alloys, as well as slag-forming, gas-forming materials, arc stabilizers and special additives. Many people, when using self-shielding flux-cored welding wire for the first time, complain about increased spattering and difficulties in forming a high-quality weld. All this can be done with experience or in a shorter time thanks to the ability to fine-tune the welding machine using the parameters of inductance, welding current, and arc voltage. For a stable welding process, the wire feed speed should be approximately equal to its melting speed.
Let us dwell in more detail on such an extremely useful function as inductance adjustment. To reduce metal spatter during welding, it is necessary to smooth the compressive force that occurs during a short circuit. This is achieved by introducing adjustable inductance into the welding current source. The maximum magnitude of the compressive force is determined by the level of the short circuit current, which depends on the design of the power supply. The amount of inductance controls the rate of increase of the compressive force. With low inductance, a drop of metal will be quickly and strongly compressed - the electrode begins to splash (drip transfer). With a high inductance, the separation time of the drop increases, and it smoothly passes into the weld pool (jet transfer). The weld is smoother and cleaner.
“Classical” mechanized welding with a consumable electrode in a shielding gas environment is also used quite often. The consumable electrode in this case is the welding wire. In this case, you will need a cylinder with a protective gas (carbon dioxide CO2 or its mixture with argon Ar+CO2), a reducer with a flow meter and a gas hose. Additionally, for work in the cold season, you will need a gas heater to avoid freezing of gas welding equipment. Carbon dioxide when welding low-carbon and low-alloy steels helps eliminate porosity in welds. When added in an amount of 15-25% to argon, it increases arc stability and improves weld formation during welding, which is especially important when welding thin-sheet steels. Therefore, we recommend that you use a gas mixture - Korgon, Fogon. An important disadvantage when using the mixture is its increased consumption compared to pure carbon dioxide. The shielding gas consumption is usually 8-12 l/min, but it may differ from these figures either up or down due to different designs of gas burner nozzles, weather conditions, etc. The best protection of the molten metal is provided with a laminar flow of the gas flow formed at the exit from the burner nozzle. After finishing welding, on most budget semi-automatic welding machines, shielding gas enters the welding zone for another 1 second (post gas) for better protection.
It is impossible not to mention that the use of a more advanced welding machine, which is a semi-automatic machine compared to a conventional welding source for manual arc welding, imposes increased requirements for the care of the equipment. It is imperative to keep the welding machine clean and regularly blow out the wire feed mechanism and the internal guide channel of the torch. Monitor the condition of the contact tip and nozzle, and do not allow the burner hose to bend. Use a file to blunt the sharp edge of the wire and remove the current-carrying tip before threading it into the torch (especially for solid wire) to avoid damaging the internal guide channel. It is recommended to remove the flux-cored wire after welding and store it in polyethylene due to the possible formation of corrosion. Under the flux-cored wire, it is necessary to set a lower degree of compression with the pressure roller (usually 1-2 divisions), otherwise there is a possibility of “biting” the wire.
Be careful when inserting wire into the wire feeder and welding torch. Accidentally pressing the wire feed button on the wire feeder or torch may result in personal injury. Due to the powerful feed mechanism, the solid wire easily pierces fingers and hands. Do not point the torch at yourself when pulling the wire!
We recommend purchasing welding equipment and consumables from the Doka Trade House, as we offer products of very good quality at low prices.
Trade house "Doka" offers for sale high-quality welding cored self-shielding wire E71T-GS with a diameter of 0.8 mm in coils of 0.45; 0.8; 1 and 5 kg, allowing welding in all spatial positions, ensuring high quality welds with minimal spatter.
Semi-automatic for mechanized welding, what is it and how to set it up. Modes, inductance, gases.
Semi-automatic welding is used in many industries, as well as in everyday life. This is a simple and effective way to join metal surfaces using semi-automatic equipment.
In various sources, this method is called differently: mig, mag welding, sometimes even written as mig mag. The correct name is a method mechanized in a protective gas environment with a consumable electrode.
Depending on the protective gas, this method is called mig if an inert gas is used for the protective atmosphere, or mag if the gas is active. Carbon dioxide CO2 is often used as the active gas.
When welding metal surfaces semi-automatically, the wire is fed to the joining point of the parts automatically using a feed mechanism.
Together with the wire, shielding gas is supplied to the welding zone through a nozzle located on the torch of the semi-automatic welding machine. The gas protects the molten metal of the wire and products from atmospheric gases. The weld is formed by melting both the metal of the welding wire and the metal of the product and mixing them in the weld pool.
Metal transfer.
Melting metal can be transferred either by droplet or jet. Drip is divided into large-drop and small-drop.
The latter, in turn, is more preferable since it minimizes metal spattering. This will depend on the welding machine, the filler wire used, as well as the protective gas environment. All other manipulations, as in the case of welding with a stick electrode, are performed by the master manually.
The electrode is a wire made of aluminum, copper alloy, or steel. Using this method, you can do many operations, for example, perform car body repairs, connect parts made of aluminum, ferrous metal, non-ferrous alloys, repair jewelry, etc.
How to set up a semi-automatic welding machine
Welding technologies are becoming more and more accessible, so everyone can now buy a simple inverter, and more practical buyers choose semi-automatic welding machines. It would take a very long time to list the advantages of this technology, but in practice, owners are not always happy with their purchase. This is due to the fact that people simply do not know how to set up a semi-automatic welding machine. We have analyzed the main functions of budget and middle-class devices in order to use an example of their capabilities to explain how a semi-automatic device is adjusted.
Adjusting inductance on a semi-automatic welding machine - Metalworker's Handbook
Purchasing a welding machine (inverter) is always associated with a dilemma: quality or price. And, as often happens, the price wins. By purchasing an inexpensive welding inverter, its owner receives a slight reduction in the quality of work with the unit. More precisely: difficulty with igniting the electrode and the rigidity of the welding process. But a small modification (and inexpensive) makes it possible to change the characteristics of the device. The easiest option is to install a throttle. What is it and what is the throttle for?
Its main purpose is current stabilization. The thing is that in an alternating current device, the consumables must be ignited at a certain voltage, which must correspond to the sinusoid of the electric current.
The welding choke included in the inverter circuit allows you to shift the phases between voltage and electric current. And this, in turn, affects the ease of ignition of the electrode, plus a more even burning of the electric arc.
In the compartment, the final result is an even and high-quality weld. This is what is required to confirm the quality of the final result.
Chokes can be installed in welding transformers, inverters, and semi-automatic machines. When using the device in semi-automatic welding machines, one can note a decrease in metal spattering, the seam is welded deeper, and the welding process is smoother.
Before setting up
Adjustment of current, voltage, wire feed speed and other parameters is carried out immediately before welding; during the work, the welder makes additional adjustments to the work. However, there are a number of requirements and settings that must be completed before starting work, these are
- preparing the welding machine;
- as well as the conditions of the work performed.
Thus, the device must be connected to a protective gas supply system (carbon dioxide, argon or mixtures of gases). It is imperative to make sure that there is a sufficient amount of welding wire in the drum, and if necessary, insert a new one and stretch it to the working handle.
To correctly set the primary welding parameters you need to know:
- the thickness of the parts being welded and their composition (stainless steel, steel, etc.);
- spatial position of the work (horizontal, vertical and others);
- wire thickness.
Knowing these parameters and starting from the recommended values, you can set the recommended welding parameters, and then, based on your own feelings and quality of work, make adjustments.
Basic mistakes when setting up.
If, when welding, there are splashes and a loud crackling sound from the arc, then most likely you do not have enough welding current. It is necessary to add amperage and increase the wire feed speed.
On most welding machines, the current setting is combined with the wire feed speed setting. But there is also a separate setting.
If the welding process produces sagging. There is a lot of molten metal or the welding bead is wide. If such metal is welded, it burns out, then it is necessary to reduce the voltage or increase the welding speed. Run the burner faster.
In general, the voltage setting affects the depth and width of the weld. If the voltage is high, spatter appears and the seam width increases. The penetration depth decreases.
Also, after completing the welding process, look to see if there are any pores on the seam. If there is, you most likely have low gas supply. This will also be noticeable during welding as the process will be unstable. Metal splashes can also be caused by a lack of gas protection.
In general, gas consumption depends on how quickly the welding proceeds and where it occurs. Because on the street, where there is wind or in a drafty room, the protective gas blows away. This makes the welding process unstable, as already mentioned, and the result will be unsatisfactory.
Semi-automatic setup diagram
Before welding, metal surfaces must be prepared. Using special tools and substances, the metal is cleaned and degreased. The diameter of the welding wire must be carefully selected to match the thickness of the parts being welded. The brand must be selected based on the material to be boiled. Otherwise we will get a marriage. As a rule, wire from 1.0 to 2.4 mm is used. We connect the ground cable to the welding machine.
Inductance.
Inductance is a useful setting in a semi-automatic welding machine. On a semi-automatic welding machine, if there is an adjustable inductance value, it must be used correctly so that it improves the welding process. It ensures a smoother welding process by controlling metal transfer. We adjust the inductance based on the task at hand; for example, for welding in a ceiling position, you can make the arc softer, and when welding into a narrow gap, it can be made harder.
In practice, inductance affects the arc stiffness. Increasing the rigidity of the arc increases the depth of penetration. With a decrease, the width of the seam increases, but the penetration depth decreases. Adjusting the choke (inductance) makes the process more comfortable. The welder selects the values depending on his individual welding habits.
You need to know that the inductance needs to be increased as the current increases. Because at low currents up to 140A, metal transfer occurs in small droplets and an increase in inductance will only disrupt the process. The seam will be rough and there will be a lot of splashes. In modes up to 140-160, the inductance should be minimal.
As the current increases, it is necessary to add inductance for smoother weld formation. In general, the presence of inductance adjustment in a semiautomatic device noticeably improves the process and reduces the amount of splashes.
Gases. Inert, active, mixtures.
Most often, a semi-automatic device with gas protection is used in the form of inert (argon, helium), active (CO2) or mixtures of gases in various ratios. The most commonly used mixtures are a mixture of Ar and CO2 in a ratio of 5-15% and 85-95%, respectively.
When using this mixture, fine-droplet and jet transfer of metal becomes possible. The process proceeds smoothly due to stable arc burning. Another gas mixture often used in industry is helium argon in a ratio of 25-30% Ar and 70-75% He. Adding helium will increase the arc temperature and make welding thick metal much easier.
This mixture provides very high levels of protection resulting in a minimum of weld defects. To reduce the cost of welding work, a mixture of helium and argon is also used in a one-to-one ratio. This mixture is universal for thin and thick products, ensuring high quality.
Cored wire.
Semi-automatic welding in some cases is carried out without gas protection, but using flux-cored wire. These methods are rarely used due to the high cost of cored wire, and working with flux limits the scope of application of this method in ceiling and vertical positions.
Which is not applicable in installation conditions. Their obvious advantage is the ability to weld in the wind, since the gas protection is blown away and this leads to welding defects in the form of pores, lack of fusion and craters.
Device settings
When everything is ready, you can begin the actual settings. Despite the fact that experienced welders can set the modes at their own discretion, we will build on the recommended parameters. The values presented in the table below are averaged and in each individual case, for better quality of work, it is worth making a small adjustment. How to do this, why this or that parameter is needed, we will consider further.
Gas flow rate
Although this parameter does not relate to setting up a semi-automatic welding machine, it plays an important role in the welding process. Modern gas cylinder equipment is equipped with convenient gearboxes, where the flow rate is indicated in liters. Just set the value to 6 - 16 liters, depending on the thickness of the metal and that's it.
Voltage
This parameter conditionally shows how much heat we will give to work at the moment. As can be seen from the table, the thicker the metal, the greater the Voltage, which means heating and melting occurs faster and easier. The difficulty in selecting voltage arises when we are dealing with non-standard metal or a special welding design. If we are talking about working with non-ferrous or high-alloy metals, then the optimal Voltage values can be found on the Internet.
On the other hand, some manufacturers do not indicate the exact value of this adjustment, but limit themselves to conditional indications, for example, numbers 1-10. In this case, you should carefully study the accompanying documentation, which should indicate the correspondence of the current position to the current voltage.
Thus, this parameter should be set according to the table “setting up a semi-automatic welding machine” or the manufacturer’s recommendations.
Wire feed speed/current
The second setting parameter for any semi-automatic machine is speed combined with current strength. This is due to the fact that both parameters are interrelated and by increasing the feed rate, the current strength increases. Some advanced machines have separate semi-automatic current controls, but they are of a professional level.
As before, to begin with, we set the recommended values, however, during the process of work, this setting can and should be adjusted to suit your needs. The discrepancy is easy to spot. If the seam leads, strong deposits or shears are formed, then the speed is too high. If the roller “sags”, wavy depressions or tears appear, then the speed is too low.
By adding or decreasing the feed speed, you should achieve the ideal bead shape without bulges or seam sagging.
Most of the simplest devices have exactly two settings - voltage and feed speed, combined with current strength. By skillfully managing them, you can fully evaluate the quality of welding parts with a semi-automatic machine.
Setting up induction on a semi-automatic machine
The saturation of home workshops with complex professional-level power tools is impressive. But not all of the equipment's rated capabilities are used. How to set up a semi-automatic welding machine for metal of different sections, change it to aluminum, stainless steel - dry information in the instructions is not enough. Let's turn to the knowledge of production workers.
External influence on settings
Changing the spatial position of the seam, strengthening the leg, thickness, and configuration of the joints of one metal will require different settings. Basic settings of a semi-automatic machine (PA):
- Arc voltage; the adjustment is reflected in the change in current value.
- Current – wire feed; An increase in wire feed speed is responded to by a proportional increase in the current value and vice versa.
- Gas consumption is set based on the main parameters and is regulated by assessing the quality of the seam while excluding pore formation.
Further, based on the results of the test pass, the modes of electric arc welding in a shielding gas environment are adjusted.
For an experienced practitioner, even the sound of a lit arc is informative. Once you purchase a semi-automatic machine, you will have to get used to its features and the need to adjust to changes:
- The configuration and assembly of PAs with equivalent characteristics differ in their filling; differences in configuration are found among the same manufacturer.
- Voltage fluctuations disrupt settings; the transformer PA will turn off, and the inverter may burn out.
- Changing the composition of the shielding gas.
- Changing the brand and diameter of the wire.
- Even minor repairs or replacement of components will have an impact.
Gas protection
Gas flow also refers to calculated tabular values . Does not directly affect the settings of the semi-automatic welding machine. Control is simplified if the gearbox is equipped with 2 scales. Registration of the reduced flow value is perceived more objectively with the installation of a rotameter.
The rotametric flow meter shows the supply of carbon dioxide (argon) working pressure in constant values. The static pressure reading will drop when the burner trigger is triggered, creating a protective cloud. The initial range for the rotameter is 6–10 l/min, for a gearbox with pressure gauges – 1–2 atm.
Economical consumption is selected according to the porosity of the seam: the gas flow increases until the pores disappear . In a room with forced exhaust and in the wind, in order to save money, it is preferable to use cored self-protecting wire.
Selection of gas mixture
The choice of mixture is determined by the quality requirements and material properties:
- CO2 is an ideal protection for the weld pool of structural steels, deep penetration, but the spattering and roughness of the weld are not suitable for fine work.
- A mixture of argon and carbon dioxide C25 (75% Ar; 25% CO2) - the combination is suitable for welding thin-sheet structures, creating a uniform seam with a minimum of splashes.
- Composition of 98% Ar; 2% CO2 – for stainless steels.
- For aluminum – argon in its pure form.
Voltage setting
The power consumption for burning the arc and melting the metal is determined by the voltage setting. Energy consumption increases with increasing penetration depth (material thickness) and wire diameter.
The settings of household PAs are stepped. Coarsening with min/max modes or multi-mode, with soft adjustment as an extended range of adjustment of the welding voltage of the Wester MIG-110i semi-automatic machine for 10 settings.
On the inside of the casing cover there is a table of regulations for voltage settings . This is the manufacturer’s main hint; it is printed on models that differ in power and technical equipment.
The final solution is how to set up a semi-automatic welding machine for the operator. Vague recommendations are not dogma, the main criterion is the depth of penetration and the strength of the connection.
Wire feed speed
The wire feed speed controller controls the current intensity . The feed amount is one of the main variable characteristics. Set after voltage selection: the melting speed determines the movement of the electrode in the burner.
This value is subject to adjustment after changing the brand and diameter of the wire, changing the voltage. There are PAs with automatic mode adjustment, but they are in the segment of expensive equipment.
Fine-tuning the movement of consumables to optimize adjustments is desirable . Excessive acceleration will lead to sagging, deceleration will lead to subsidence, waviness, and seam breaks. The balance of current and voltage, controlled by the feed rate, adds up to an optimal roller.
The first indicator of a mode discrepancy is revealed in action - the feed speed with the ignited arc decreases, but the wire does not have time to melt, bends, sticks to the workpiece, and active spatter occurs.
Insufficient supply - the inverter electrode burns out before touching, the tip becomes clogged. Selecting the speed/current mode for the set voltage is the first step towards professionalism .
Wire feed speeds in a semi-automatic machine, a table of the direct relationship of the effect of changing settings on the final result:
Polarity
The procedure for changing polarity is simple. Under the cover there is a sign indicating which type of metal and wire require direct or reverse polarity. Direct - the burner is connected to the minus terminal. With straight polarity, the melting of the wire is accelerated by 50%, but the stability of the arc decreases.
Welding with self-shielding flux-cored wire is carried out with straight polarity . The maximum heat generation energy is spent on protecting the seam. The flux will react without any residue. The tendency to splash is compensated by indifference to under-cleaning of work areas and gusts of wind. Costs in the form of splashes and slag crusts are a necessary evil.
Extra options
In addition to the simplest devices, there are also more advanced models with advanced functionality on the market. Let's look at their capabilities and why additional settings are needed.
Inductance (arc setting)
The most popular function, which is actively being implemented even in budget-class welding, is inductance adjustment. The parameter allows you to control the rigidity of the arc and change the characteristics of the weld. Thus, with minimal inductance, the arc temperature and penetration depth are noticeably reduced, and the weld is more convex. This setting helps to weld thin parts, as well as metals that are sensitive to overheating. At maximum inductance, the melting temperature increases, the bath becomes more liquid, and the penetration depth is maximum. The bead of such a seam is smooth, without bulges. This mode is used for melting thick metal and working in corner joints.
Knowing how the arc reacts to changes in inductance, the welder can independently control the penetration depth and bath temperature to improve the quality of work and create more reliable critical connections.
High/low speed
The switch, which is marked as High/Low, in most models is responsible for more precise adjustment of the wire feed speed. We already know that every semi-automatic machine contains a similar regulator, but if your device can work with 0.6 and 1.4 mm wire, the boundary marks will be very different. That is why, when working with thin material, the toggle switch is set to the High position and the wire generally feeds faster, while the Low position is suitable for thick solder.
Note! Now there are hundreds of products on the market from dozens of different manufacturers, so in order to be sure what functionality a given model has, what this or that regulator and switch is responsible for, you should carefully study the operating instructions.
Positions and differences of semi-automatic welding seams
In order to quickly master semi-automatic welding, you need to understand the positions in which the process has to be carried out.
The positions of the welding seams in space are different. They are divided into seams, which are performed by the welder in the lower position, hence the name - lower. Cooking in this position can be done both from right to left and from left to right. You can use the technique of applying narrow rolls or cook with transverse oscillatory movements.
Vertical position.
The next position is vertical. It is more convenient to make welding seams downhill when the torch is positioned at an angle to the bottom. This ensures that the metal of the weld pool is kept from flowing out due to the pressure of the welding arc.
This method is good for thin metal when deep penetration is not required. In cases where this is required, the lift welding method is used. It is performed at an inclination angle of the weld ranging from 60 to 120 degrees.
Ceiling position.
More than 120 to 180 degrees is the so-called ceiling position of the weld. It is the most difficult to perform. Since the metal of the weld pool flows out, creating a defect in the form of an overflow, and the process is carried out in an extremely inconvenient position almost above the welder’s head. To weld it, place the torch perpendicular to the product or tilted backwards. It is also necessary to make oscillatory movements with the torch during the welding process.
Let's consider another position of the welding seam - horizontal. Its implementation is more difficult than the lower one due to the same leakage of metal. When welding horizontal seams, it is most convenient to oscillate the transverse torch starting from the bottom of the edges of the product.
Horizontal seams must be made with oscillations of the burner, starting to cook from the scorching edges.
To make vertical seams of thin sheets, the downhill welding method (from top to bottom) is used, since using the uphill method results in a large input of heat, which negatively affects the structure through burns and deformation. Electrode tilt 20-35º
There are many types of welded joints. For mechanized welding they are determined by GOST 14771-76. According to which the types of seams are determined: butt, lap, corner, tee. Used both for welding pipes and profile structures, and for sheet structures.
This is what the main butt joints C4, C5, C7 and C18 look like
This is what the main butt joints C4, C5, C7 and C18 look like
Fillet weld U1
Knowledge of what semi-automatic welding machines are and how to use them allows you to join metals as efficiently and efficiently as possible.
The burner can be controlled with one or two hands. In the second case, the welding seam will be much smoother and of better quality, because the welder works more confidently and holds the device in his hand more firmly.
One hand clasps the burner so that the index finger can rest on the start button. The other hand is placed on top of the leading hand, directing and controlling the movements of the first.
Common mistakes and ways to solve them
- Loud “crackling” noise during operation. Distinct clicks indicate a low solder feed rate. Increase this parameter until the operating sound becomes normal.
- Heavy splashing. Spattering often occurs when there is insufficient insulating gas. Check the reducer, if necessary, increase the gas supply.
- Lack of penetration and burns are eliminated by adjusting the Voltage, as well as adjusting the inductance (if any).
- Sharp peaks or uneven bead width. Both problems are related to the position and speed of the torch. In addition to welding settings, pay attention to your own work technique.
Advanced semi-automatic machines. Share your work experience.
There is information about various variants of semi-automatic machines. Processor control (apparently wire drawing), soft start, arc stretching and something else. Maybe someone can share information about what kind of lotions these are, if they have real benefits. For example, inverter p/a are very expensive (min. 50 thousand), who has seen anything, heard anything about them, how do they work? For example MIX 180 TIG-MIG-MMA or ALUSTAR 200 cm.
The main feature of processor control is that the mode parameters can be set very precisely and you can enter a bunch of presets, this is very good. convenient and valuable in production, for example, welding only knows which operation to turn on which number, and the corresponding modes are set themselves. Those. This somehow additionally guarantees compliance with the technology. Well, from the “bells and whistles”, these are: 1) two or four stroke operation - two, this is if you press and cook while pressed, and stop when you release, and four, this is briefly pressed and released, the process begins, stop when you press and release again ; It seems like a small thing, but it’s nice. 2) point mode - press the button, cook for the specified time from a fraction of a second to about 3-4 seconds, then it stops itself, the next point is the next press. 3) pulsating mode - the duration/mode is set for the pulse and for the pause between the pulses and go, the seam turns out like nickels with overlap, beautiful. Moreover, during the pause, the feed may even stop altogether (MAG/MIG), and during the takeoff the arc burns very strongly. low current, the wire almost does not melt, such as illumination. 4) all sorts of internal bells and whistles to control the transfer of metal droplets, incl. receiving the so-called “jet” transfer. The essence of the trick is that at the right moments, the current/voltage changes very quickly in a cunning way (it will reduce it, then it will apply an impulse, all this in an interval of fractions to a few milliseconds), and this greatly improves the process. What these “necessary moments” are and how exactly all this changes - this is a great mystery, a terrible secret. All these nuances are not available to a welder, you just need to enable this feature, the machine itself is determined by the thickness of the wire and the metal being welded, depending on the specified mode, the spatial position of the ceiling/vertical/bottom, something else, for example, the composition of the gas (all this must be entered ). Particularly important and valuable for MIG.
All this in one form or another can be in a regular “classic” or in an inverter semi-automatic machine. Point 4 can be especially clearly and most fully implemented only in an inverter, because high speed control is required, which is fundamentally unattainable in conventional ones, therefore in conventional ones only in some truncated simplified form. By conventional we mean, of course, with three-phase power supply, because Only in them can the modes be clearly defined and stabilized from network fluctuations.
Conventional ones with single-phase power supply are always something extremely primitive and the cheapest, like all sorts of bimaxes, tritons, pythons, etc. rubbish. They cook much worse than three-phase ones; they fundamentally cannot stabilize the modes (well, maybe just the supply), i.e. This is an option for at least something where there is no three-phase input. For example, the output voltage there is set by switching the taps of the primary winding of the transformer, usually 4-5 positions from the lamp. The voltage, of course, changes, but it fluctuates along with all the network sags and fluctuations. Therefore, special bells and whistles in them do not make any sense.
Inverters with single-phase power supply are a completely different matter and somewhat different. These cook no worse than three-phase ones, they can stabilize and monitor everything, and therefore have a full load of bells and whistles. For example, Telvin’s Technomig 200, although it’s not sold in Russia yet, but an expensive toy will cost around 60 when it appears. I tried to find simpler inverters with single-phase power, but I didn’t come across anything, if anyone can tell me, respect. Well, single-phase inverters sometimes have a very valuable feature - an active power factor correction, or PFC. The essence of the feature is that inverters have a very poor power factor, usually 0.6-0.7, and pefek raises it to almost 1.0. This means that with the same welding current, the inverter with a pefek at the input will load the network by about 30% less, and in general can tolerate much larger fluctuations in the network, for example 170-270V lightly. This has no direct relation to the quality of welding, but for our realities it can be very useful. But the truth is the same Technomig 200, for example, without pefek, and I can’t even imagine its price if they add this too.
Comparison of semi-automatic SOLARIS MULTIMIG
Comparison of semi-automatic welding machines SOLARIS MULTIMIG (February 2021) Good day, Dear welders!
In this short article I will try to tell and describe as much as possible the technical characteristics and differences of semi-automatic welding SOLARIS MULTIMIG
1) Solaris Multimig 226 semi-automatic welding machine. In March 2022, it replaced the Multimig 225 semi-automatic welding machine. In 226, the network cable was extended to 2 meters. They installed a noise suppression filter (so that it would not interfere with the operation of nearby electronics and would not cause interference) and provided a 3-year warranty on the device. The performance characteristics remained the same as the 225, namely: MIG/MAG current from 20–220 Amperes, SPOT mode, etc. Included in the package: semi-automatic welding machine, MIG-15 torch 3 meters, electrode holder, ground cable and gas hose - 2 meters. Powered by 4 IGBT transistors.
2) Semi-automatic welding machine Solaris Multimig 227. Appeared in the spring of 2019. The consumer wanted MIG/MAG welding to be from 20, A, like 225–226, but to be 3 in 1, like multimig 228. Due to numerous requests, the manufacturer created multimig 227. Brief performance characteristics: MIG/MAG welding 20– 220 Amps, SPOT mode (adjustable points), MMA welding and TIG welding. I would like to note right away that TIG welding occurs only on DC (direct current and NO alternating current). A valve-type TIG welding torch is purchased separately. Ignition on the burner occurs by touching the material, that is, by “striking” the Lift Tig. Included in the package: MIG 15 welding torch - 3 meters, holder, ground cable and gas hose - 2 meters, TIG welding torch 4 meters not included. It can be purchased separately and currently costs 4,000–4,300 rubles on the market. Multimig 227 operates on 6 IGBT transistors.
3) Semi-automatic welding machine Solaris Multimig 245. This is the “freshest” semi-automatic welding machine from the multi-mig line because it came to the Russian market in October 2022. Essentially it is the same 3-in-1 device as 227 and 228, but: Mig 15 welding torch - 3 meters, electrode holder, ground clamp and gas hose are already 3 meters. There is also no TIG torch included. And the package also includes an additional broach roller with notches and tips for MIG torches of different “calibers”)) According to the performance characteristics: on MIG/MAG it works from 30–240 Amps (the lower welding threshold is already higher), there is no SPOT welding mode (programmable points) . But there is an adjustment of the inductance of the welding arc, and this is a huge plus in some cases. Multimig 245 operates on 6 IGBT transistors. MORE! Multi-migs 227 and 245 have different TIG welding torches. The 227 should have WGT-17V, and the 245 multimiga should have WGT-26V. The burners have different operating amperages (the 245 has a higher amperage). Both burners are valve type with Lift DC arc ignition.
4) Semi-automatic welding machine Solaris Multimig 228. This semi-automatic machine was supplied (why was it supplied? You ask) in two configurations: Multimig 228 and Multimig 228W2. The multimiga simply 228 included a 4-meter TIG torch and a holder, a ground cable and a gas hose of 3 meters each. And in the 228W2 configuration there was no Tig burner at all and the attachment was 2 meters long. According to TTX 228: welding MIG/MAG 40–200, A, MMA and TIG. As you can see, the lower mode of semi-automatic welding is the highest of all multi-migs. What is not unimportant in the multi-mig 228 is the adjustment of the arc inductance and until 2018 (in my opinion) high-voltage ignition of the TIG torch was in effect. But then for some reason the manufacturer turned it off and ignited the TIG torch by striking, that is, by touching, like with 227 and 245. For what reasons is not clear ((
Multimigas 228 are currently not available (let me remind you that it is February 2021) and are not scheduled to arrive at the central warehouse in May 2022. What will be changed or added to them is not yet known.
I tried to describe all the most basic characteristics and differences. You can always ask any questions to the “Master 5 points.ru” store
Best regards, Mikhail Maslennikov!
online store Master 5 points.ru