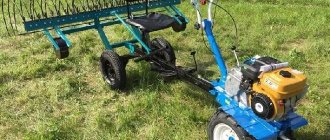
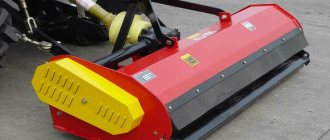
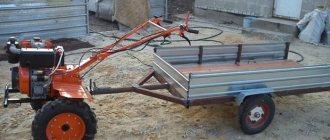
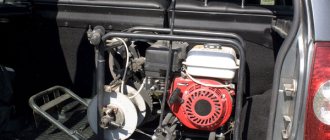
A walk-behind tractor is an extremely necessary thing in any homestead or farm. This technique is classified as lightweight, which does not in any way affect its effectiveness and functionality. Like heavier and larger tractors or mini tractors, walk-behind tractors are compatible with a variety of attachments that allow not only cultivating the soil, but also hilling beds, harvesting root crops, etc.
The list of the most popular adapters for walk-behind tractors includes lugs. Not all walk-behind tractors are equipped with them, which forces users to purchase them themselves. How not to make a mistake with the choice and whether these mechanisms can be made independently will be discussed further.
How to choose?
When choosing a suitable model, first of all you should pay attention to the brand of the walk-behind tractor.
For the Neva and Neva MB model range, variations with a 43-centimeter diameter, the depth of immersion of the spikes into the ground is 15 cm, are excellent. For Salyut brand walk-behind tractors, lugs with a half-meter diameter are needed, for which the depth of immersion in the soil will be at least 20 cm. For "Bison" you need tall products - 70 cm in diameter.
Only heavy walk-behind tractors do not require lugs; their mass guarantees them stable movement on almost any surface. But if you decide to improve the maneuverability of your heavy model of walk-behind tractor (weighing more than 0.2 tons), choose wide lug devices - 70 cm in diameter.
The choice of a suitable lug model also depends on the type of soil and the nature of the outer side of the products. Their surface can be designed in the form of spikes or arrows. When purchasing products, keep in mind that the low height of the spikes is not suitable for wet and loose soils - they are ineffective and are easily clogged with soil. Arrow-shaped hooks are the most popular and are considered universal.
When purchasing additional equipment for your unit, first consider options from the same manufacturer.
Pay attention to the cost - it depends on the manufacturer and modification
Universal wheels KUM 540 for hilling
These wheels differ from the 680 model in that the rim is not solid, but has only sides, and is hollow inside.
Plus, the spikes are not tilted to one side, but have a V-shape.
When the wheel moves, not only the spikes go deeper into the soil, but also the rim itself, due to this, deeper immersion into the ground occurs and traction properties improve.
- The diameter of the wheel at the outer studs is 54 cm, and at the hoop 46 cm.
- The width of KUM 540 is 9 cm.
Extensions must be purchased separately for them, since no fastenings are provided in the standard form, only holes for connection with a standard diameter of 10.5 mm. It leaves a rut with a diameter of 60 to 65 cm.
The weight of two lugs is approximately 13 kg.
Lugs for walk-behind tractors: what to look for?
The main factor influencing the choice of a universal object is size. If a person wants to purchase lugs for a specific unit model, he should familiarize himself with the wishes of the manufacturer and follow them.
Since the Neva and Neva MB walk-behind tractors are especially popular among farmers and agronomists, we should use their example to outline the features of universal lug wheels. For the products of these manufacturers, options with a diameter of 43 cm are suitable, because they are laid in the soil to a depth of 15 cm. These dimensions will ensure maximum traction with the ground and trouble-free movement.
For absolutely all Salyut walk-behind tractors, wheels with a diameter of 50 cm will be relevant, the spikes of which sink into the ground at least 20 cm. Naturally, each manufacturer has its own requirements for lugs, so you should carefully study the operating instructions for the walk-behind tractor you have and not ignore the wishes of the manufacturers.
An important point: heavy-duty equipment does not need such additions, because its weight is already a guarantee of stability on almost any ground.
Why are lugs needed for a walk-behind tractor?
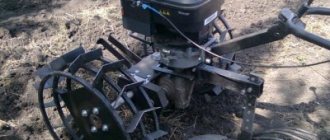
Walk-behind tractor lugs are special devices that look like ordinary metal wheels, complemented by studded linings. The name itself indicates their main functional purpose - to guarantee perfect adhesion between the cultivator and the underlying surface - the soil. Thanks to these devices, the walk-behind tractor can move freely across any terrain, regardless of weather conditions.
In addition, the lugs for the walk-behind tractor perform other functions:
- contribute to better tillage of the soil;
- simplify the transportation of both the walk-behind tractor itself and the loaded trailer connected to it off-road or on loose soils;
- by increasing the mass of the unit, they provide it with good balancing and stability in space;
- allow the use of other mounted adapters, for example, for pre-sowing cultivation of land.
Functions
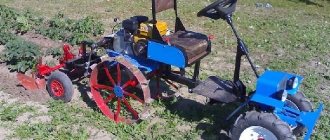
The lug lugs are produced both as universal ones, suitable for all brands of walk-behind tractors, and as specially tailored for a specific model. Some manage to make such attachments on their own, using old disks from a car as a basis, however, the cost of such a unit turns out to be more expensive than if it were purchased ready-made. Lugs are necessary, first of all, to:
- improve the quality of traction of the walk-behind tractor with the soil on which you have to move;
- increasing the weight of the equipment, due to which it becomes more stable and can be used without fear on uneven surfaces, even when using other heavy attachments;
- The lug provides additional soil treatment;
- The walk-behind tractor can easily move uphill on soft soil.
It becomes clear that without such attachments, most standard tasks would become inaccessible to the walk-behind tractor. It is impossible to talk about the versatility of such equipment without lugs.
To make the walk-behind tractor as functional as possible, you need to purchase a model of attachment specifically for it. In this case, the unit becomes more productive and economical. Sometimes lugs that are made of light alloy are supplied for sale; their use on a light-weight walk-behind tractor is impractical, since the total weight should be above average. Higher quality, heavier ones cost the consumer more, but they fully perform the assigned tasks.
Purpose and varieties
The lugs are designed to increase the weight of the walk-behind tractor and improve the contact of the equipment with the ground, especially in areas with overly wet and/or loose soil. They are a studded design that fits onto the axle instead of/on top of pneumatic wheels with soft tires.
There are several configurations of lug devices available on the market today. There are universal and special lugs. The former can be used on any walk-behind tractor, the main thing is to choose the right size. The latter are made for a specific brand (model) of the unit.
According to their design features, lug devices are divided into those requiring the removal of wheels with pneumatic tires and those that are put on over the tires. The first type requires fixation on the wheel axle.
The use of lugs allows:
- better treatment of the soil layer;
- improve the cross-country ability of both the walk-behind tractor itself and the attached trailer with cargo;
- increase the stability of equipment due to an increase in its weight;
- hang other additional equipment.
Complex lugs
The following design is a complex one, since it is not inferior to its factory counterparts in quality. We make such lugs with our own hands and they fit like a neva, fireworks, or even a motor cultivator. To make them we need: half a wheel from a Zhiguli (you can cut the wheel yourself), tractor tires, with a developed projector. Then you should choose tires with the same developed projector as the tractor. If we cut off the sidewalls we get a closed ring.
The lugs we received will be able to move along a dirt road without loosening it. On soft ground the wheels will feel comfortable, but at the same time they will not move as boldly as the metal version.
Optimal sizes
It's no secret that heavy equipment cultivates the land better than light equipment. This is evidenced by the fact that people began to become interested in the question of how to make lugs for a car with their own hands. Such equipment can even handle hard soil, which a light tractor cannot handle very effectively. Such units require large lugs. To generalize, the design parameters will depend on the size of the walk-behind tractor.
Thus, the following popular walk-behind tractors can be distinguished:
"Neva". Walk-behind tractors that adapt to any conditions are common. But in the case when the farm already has a Neva tractor, which due to its characteristics is not considered universal, you can make soil cutters yourself. It is necessary to take into account that the diameter of the device should not be more than 36 centimeters, and the width should not be more than 11. MTZ. Even though such units are Belarusian, the price for them is considerable due to the highest quality. You can focus on a price of 5,000 rubles or more. The bottom line is that the wheels of these walk-behind tractor models are quite large. To make high-quality lugs, a lot of labor is required
It is important that the dimensions are selected correctly and that the triangular plates that engage the ground are carefully welded to the main lug wheel. "Firework". This device is assembled according to the Neva scheme. "Centaur"
The wheels in such a device are somewhat similar to the Neva. But the first car has 11 centimeters longer wheels. If a lug is made for the Centaur, its length should be 450 millimeters and width 110. It can also fit other models of walk-behind tractors, including those from other manufacturers.
It will also be useful to make an extension for the lugs. They are designed to increase the angle of rotation of the structure and the width of the potassium and counterweight. To do this, you need to attach a sleeve with a slot to the hub. An additional axle is inserted into such a sleeve, which is secured with a bolt. Finally, you need to secure the soil cutter wheel to the axle.
Thus, there are many options for making soil cutters with your own hands without much labor and emptying your pocket on expensive factory models.
Originally posted 2018-03-28 15:28:41.
Making your own hooks
- The easiest way, perhaps, is to make lugs from unnecessary rims from car wheels. Using a welding machine, an axle shaft is attached to the disks, onto which bearings are then placed. Square metal plates are welded to car rims so that they touch the edges of the rim.
- Then the plates are bolted to the rim. Next, teeth are made - steel hooks that will go into the ground. For this purpose, you will need a steel plate, for example, a corner, which is cut into pieces by a grinder, and from these parts the same teeth are welded, which are made in the factory. The resulting hooks are placed on the wheel rim 15 cm from each other.
- Homemade hooks can be made from an old gas cylinder. Two disks are cut out of it for wheel rims, 5-7 cm wide and 30 cm high. Next, the same operations are performed as with car disks.
- To improve the performance of wheels with hooks, you can weld another tooth on top of each hook and lengthen the teeth to 60 cm. An axle is made: a metal plate is attached to one rim on which this axle will be placed.
- The lugs can be made from any round-shaped blank. The main thing is to choose the right width and diameter of the future wheel with hooks. The dimensions of the wheel are determined functionally, that is, based on the purpose of use on the walk-behind tractor.
For "Neva"
Each brand of walk-behind tractor has attachment options that are more suitable to its design than others. It is better, of course, to purchase a universal walk-behind tractor, for which almost all awnings are suitable. Wheels with lugs Ø 340×110 are produced for the Neva.
In design, these lugs are slightly larger than the homemade ones we described. You must follow the instructions above, but choose different rim sizes. The height of the wheel to hook the Neva should be 340 mm, the width of the homemade device should be 110 mm.
For "Centaur"
The lugs for walk-behind tractors of this brand differ only in size. The dimensions that needed to be taken into account when converting old wheels into lugs for the Neva were described above. The same scheme is used for the manufacture of wheels with large hooks. The wheel height is selected 450 mm. The wheel width should be 110 mm, as for the Neva. Such hooks are suitable for the Centaur 2060 and 2090 walk-behind tractor and units with similar parameters. The factory version will cost about $30.
For "Bison"
The walk-behind tractor of this brand is a heavy professional equipment, and it can be equipped with the best available attachments. In order for the “Bison” to penetrate the ground perfectly, it needs lugs. The standard devices that fit it have a 200 mm tire and a height of 700 mm. Wheels of this width are only suitable for heavy walk-behind tractors and, in addition to the Zubr JRQ78 and 79, are also suitable for the Centaur 1070D, Aurora 101 and Aurora 81, Zirka LX1080D and 1090. In the factory version, the distance between the hooks is 14.5 cm. The wheel hub has a diameter of 60 mm. They are attached to the walk-behind tractor using an additional hub.
Method 2: based on a used gas cylinder.
- We cut out 2 disks from the cylinder, 6–10 cm wide and 30 cm high, they will also be the rims.
- We install metal plates on the resulting rims.
- We attach the teeth to the plate (they must be at least 15 cm).
In principle, these are not the only ways to create such a canopy. This equipment can be made from absolutely any round-shaped metal. It is important to simply choose the correct width and diameter, stick to the diagram, and be able to use welding and a grinder.
Thanks to such attachments, your walk-behind tractor will become a full-fledged agricultural machine. It will cope with work on sites even more efficiently and will significantly increase its cross-country ability and functionality. A motor unit with such equipment will make your work easier on sites and will delight you with quality work done.
Purpose
The most common uses of lugs (iron wheels) are walk-behind tractors, mini-tractors and motor-cultivators. Despite the fact that some modern mechanisms and devices have these attachments in their own basic configuration, more often they still need to be purchased separately from the unit or made with your own hands.
Iron wheels are used in situations where it is necessary to increase the coupling of equipment with the ground, thus increasing traction force and the ability to overcome obstacles. Thus, motor vehicles equipped with iron wheels behave much more stably on loose and loamy soils. This allows the unit to thoroughly till the soil without the danger of getting stuck or buried in it. The use of iron wheels for cars and mini-tractors significantly increases their maneuverability in muddy conditions.
However, the possibilities for using lugs with road and agricultural machinery do not end there. In a slightly different form, these devices are used to more firmly fix greenhouses on the soil, and also additionally to tie a wooden foundation to the ground. The design of construction lugs is somewhat different than that of wheeled lugs. They are rods of iron reinforcement up to a meter long with a plate welded at one end.
general information
- By design, these devices are wheels with spikes. Today there are many different device transformations, and you should choose them wisely. To a large extent, the quality of work is determined by the weight of the unit. The most functional awnings can only be hung on heavy walk-behind tractors or medium-weight units. If the unit is of high quality and does not give the desired result, you need to additionally purchase wheels with lugs for it.
- Standard devices are metal wheels with spikes that dig into the ground and engage the walk-behind tractor with it. To make devices yourself, you will need to know their structure, which drawings and diagrams will greatly help with. You will need to determine the diameter of the canopy, select the material of manufacture, and, of course, select the necessary tools. The first thing you need is a welding machine and an angle grinder.
- First of all, we decide on the size of the devices. Their height and width depend on the tasks for which the hooks are mounted on the walk-behind tractor. You also need to take into account the requirements for the weight of the devices, because the wheels are put on with them to improve the traction of the walk-behind tractor with the ground. This requires wheels of considerable weight, which a walk-behind tractor may lack. The minimum weight of wheels is 20 kg. If necessary, weights are hung on the soil hooks. This is necessary to achieve better results, or is used when the weight does not reach the norm.
Track tracks
Tracks are the main part of any track. Fortunately, you don't have to buy them in specialty stores. They are quite easy to make yourself from various materials. The main thing that needs to be taken into account is the level of load that is planned to be placed on the walk-behind tractor. Tracks can be made from:
- plastic pipes;
- wooden blocks;
- metal tracks.
To make tracks from plastic pipes, you will need water pipe No. 40. It is cut into pieces the length of which is equal to the width of the track. After this, each such segment is cut lengthwise into two halves. A circular saw with a wood cutting disc will help with this.
When all the tracks are ready, they can be attached to the main structure. For this, furniture bolts No. 6 and large hemispherical heads are used. With these bolts, each segment is attached to the structure itself.
Thus, we get an excellent relief track for a walk-behind tractor, allowing it to pass through difficult places even in winter.
A caterpillar made of wooden blocks is suitable for light loads, since the structural strength is not so great. To make a track from this material, you will need birch blocks of the same size and length equal to the width of the tracks.
It is not surprising that the most common and reliable are metal tracks for tracks, because their level of strength is quite high. Most often, metal pipes or a profile are used, which is cut into pieces of suitable length and attached to the track in the same way as was done in previous methods.
The main disadvantage of this design is the large mass and difficulty of repair. If one of the tracks bends during operation, you will have to spend a lot of effort to replace it.
It is recommended to make tracks from iron only in cases where the walk-behind tractor operates under heavy loads. In other cases, it is better to resort to other methods.
It is not so difficult to make a caterpillar for a walk-behind tractor with your own hands, although it takes quite a lot of time. It is important to treat the process with the utmost care and perform all calculations correctly. Also, it is necessary to assess the degree of load with which the walk-behind tractor operates and select the most suitable materials for the product.
Independent production of the simplest elements
There are several technologies for creating homemade iron wheels. Let's talk about different options that differ in the degree of complexity and the scale of the necessary activities.
The simplest method to make something similar to industrial iron wheels is to modernize ready-made factory elements. For this purpose, “anti-slip strips” are made, which are put on the wheels.
Let's consider the process of their creation.
- A 2-3 mm sheet of iron is taken.
- Using an angle grinder, a rectangle is cut out, which should be several centimeters wider than the tire contour and coincide with the length of its circumference.
- The edges of the strips are bent inward to prevent them from slipping to the side and causing injury to the operator of the unit.
- They begin preparing the lug component (for this purpose, sheet iron with a thickness of at least 0.04 centimeters is required, which is bent at an angle of 120° and cut into identical pieces).
- Using a welding installation, the resulting elements are welded to the strips, maintaining the same distance between them.
The same operations are performed for the second wheel. To tighten the structure you will need bolt ties, which are also welded. A violation of the dimensional relationships between the spikes (plates) on different wheels can cause the unit to skew to the right or left when moving forward.
Production of lugs with a more complex design
In addition to methods that allow you to make the simplest lugs, there are also ways to make more complex structures. To work on the manufacture of the latter you need to prepare:
- Steel sheet, thickness from 3 to 5 mm - you need to make a central disk from it;
- A steel strip, 5 mm thick and 50 mm wide - it will be needed to make the outer hoop. You will need 6 hoops - they will weigh the wheel down and make it more durable;
- Another steel plate, 8 to 10 mm thick - you need to make a hook from it;
- Bulgarian;
- Drilling machine or drill;
- Welding machine.
All parts should be connected to each other using arc welding, since a gas torch will not be able to heat metal of this thickness. The manufacturing algorithm is as follows:
- First, lengthen the axles of the walk-behind tractor - this is required due to the fact that the width and diameter of the lugs are larger than the mounting location of the standard wheels;
- Be sure to provide the ability to adjust the position of the track, since in the future you will cultivate the garden with rows of different widths. When moving the lug wheels, you will be able to adjust the position of the attachment used and the width at which the lugs will be located. Since the mass of each wheel is about 10 kg, reliable grip and high stability of the walk-behind tractor on the ground will be ensured;
- Next, proceed to making the lugs themselves. To do this, make 2 spoke-shaped central disks from profiled steel sheet;
- After this, weld 3 external hoops and hooks to the end parts of the structures;
- Weld steel plates to the hoops. They should be placed diagonally on the hoops in the form of a snake;
- Sharpen each plate for better traction.
The lugs made will ensure maximum adhesion to the ground and will help you easily remove even the thickest weeds.
When using lugs, never forget that they are intended only for work in the garden. Do not use devices to move the walk-behind tractor on concrete or asphalt, as the teeth of the product will bend and quickly become unusable.
Both the simplest and more complex designs are suitable for use on walk-behind tractors Salyut, Agat, as well as Neva MB-1 and MB-2.
What we call wheels are lugs in the case of a walk-behind tractor. In the vast majority of factory designs, the equipment is equipped with conventional wheels with textured off-road tires.
This is done so that traction power can be used to transport goods along ordinary dirt roads.
Important! The use of a walk-behind tractor (even a factory-made one) on public roads is prohibited. Even if it has high-quality factory wheels installed
Therefore, many owners of small agricultural machinery make lugs for walk-behind tractors with their own hands. In this case, you only need to adjust the mounting socket to the hubs of the factory motor plow. When changing the mode of use, simply mount the necessary wheels.
If the walk-behind tractor is used only in the field, ordinary rubber tires are not needed. And for a mini-tractor of your own production, you don’t have to make ordinary wheels at all. In this case, homemade lugs for a walk-behind tractor will be the only set.
The design is not new; the first tractors were produced without rubber tires. The wheels were metal, and powerful transverse or diagonal plates made of thick steel were installed on the driving rollers.
Alternative options
Automotive stores sell traction control bracelets - a worthy alternative to chain equipment. They are distinguished by the possibility of quick installation and low price. But even here the engineering thought of our motorists does not stand still; they have skillfully learned to copy factory copies.
Bracelets are the same homemade snow chains , but without longitudinal elements, their advantages are as follows:
- Ease of manufacture.
- Quick installation.
- High efficiency and reliability.
To make it you will need a modest kit:
- VAZ muffler mounting element made of rubber;
- bolts 40-60 mm long, washers and nuts;
- a tube with a diameter equal to the diameter of the bolt;
- steel chain with a diameter of at least 5-6 mm.
To equip wheels with standard sizes 195 and 205 mm, 4-5 meters of hardware products will be required. Stores also sell ready-made kits for self-assembly of bracelets, with the exception of Chinese kits, they are of fairly decent quality and inexpensive. It consists of:
- blanks;
- fastening accessories;
- sling;
- clamp lock.
The kit is easy to use, transported in a special case and does not take up much extra space. An important advantage of metal bracelets is the possibility of installation on wheels with disc brakes. And if you take into account the reviews, then owners of expensive foreign cars do not hesitate to use such devices, which also says a lot.
Combined design
If the equipment is homemade and the soil is not too difficult, the wheels should be appropriate. You can make hooks using tractor protectors.
We take halves of wheel rims from a Zhiguli car. We choose tires with good tread from the tractor. We cut off the sides, we get a rubber closed ring with a good protector. We open the halves of the wheel rims and, after laying the tires, twist them firmly. With such lugs, you will be able to move along a compacted dirt road without fear of loosening it. On the soft soil of a plowed field, the wheels will not fail, but the traction force will be less than in the case of the metal version.
If it is necessary not only for the wheels to be grippy, but also to additionally loosen the soil in the rut, knife-type hooks are made. You can create a homemade rim to mount them or weld them to the rims. The only drawback of the blade design is that it does not allow you to move the walk-behind tractor in the usual way.
When loosening in spring together with traditional attachments, the width of the soil processed per pass will double, which will save a lot of time.
Important to remember
Any traction control equipment adversely affects the safety of tires, as well as the condition of the chassis. You need to be especially careful when choosing locks for homemade chains on car wheels , since the trouble-free operation of the car depends on them.
Moving on hard surfaces is unacceptable. When driving on loose snow or mud, you should maintain a driving speed of 20-30 km/h; it is not recommended to allow wheels to slip. Experienced drivers advise periodically checking the tension of the equipment along the entire inner and outer perimeter of the tire while driving.
Source: autobann.su
How to make from Zhiguli wheels?
1 way
You can create more complex elements based on metal sheets or car wheels. Precise fixtures can only be made in accordance with the drawing. Some make the drawing themselves, others use a ready-made version.
To create such products take:
- 4 mm steel, which will serve as the disks of future iron wheels;
- 8 mm metal sheet, which is necessary for the area immersed in the ground;
- electrical tools (welding machine, angle grinder, electric drill).
The manufacturing process is quite simple:
- Using an angle grinder, 2 pieces of equal size are cut out in the shape of a circle, in the center of which holes are drilled for the studs and the hub.
- A jagged frame is made along the outer edge (no more than 100 millimeters in height).
- The second sheet of metal unfolds into triangles with rounded corners.
- The triangles are welded to the gear frame.
Method 2
In this case, you will need a full set of disks. You can install tires on one pair and use it for driving on asphalt, while the other can be made like classic lugs.
Let's look at the order of operations.
- We dissolve a metal corner with a 5-6 cm shelf into pieces wider than the available disks.
- In the middle of one side, use an angle grinder to cut out a triangle-shaped area. It is this part that they will touch on iron wheels. Using a gas burner, heat the corner and bend it slightly. We “grab” it with electric welding to strengthen the workpiece.
- Along the outer rim of the car rim, we weld the spikes from the corners at regular intervals (a step of 15 centimeters would be ideal), directing the pointed part in the direction of movement of the motorcycle.
- Similar actions are repeated for the other disk.
How to make lugs with existing factory wheels
The easiest way is to put the structure on the tire, like snow chains.
It is enough to take sheet iron 2-3 mm thick and cut a strip that will be slightly wider than the tire profile. The tension is ensured by a simple tie rod made of bolts. The edges of the strip should be folded to prevent slipping under lateral loads.
The lugs themselves are cut from thicker sheet steel (4-5 mm). They must be bent in the middle at an angle of 120°. The blanks are then welded to the strips at regular intervals.
Important! The distance between the lugs should be the same on both wheels. Otherwise, the equipment will be pulled to the side during work. Therefore, before starting work, you should use ready-made drawings, or develop a layout yourself
Therefore, before starting work, you should use ready-made drawings, or develop a layout yourself.
You can make such lugs with your own hands in a couple of evenings. If you use a regular smooth tread on a homemade walk-behind tractor, the device will turn the equipment into a real SUV.
We will introduce small mechanization lovers to various types of structures and varying degrees of complexity.
How to install snow chains on a car with your own hands and video operation
Experts recommend installing traction control equipment on all wheels, and not just on the drive ones. Incorrect installation can lead to damage to ABS sensors, brake system components and wheel arch liners, as well as side tire cuts . On SUVs with a plug-in second axle, the device is installed primarily on the pair that is constantly in operation. The installation operation is performed in two ways:
- With jacking.
- On a stationary car.
The essence of the question is not only how to properly make snow chains on a car with your own hands using a video - you should think about installation work even before entering the problem area. This is the only way to enjoy the operation, save your time and avoid annoying mistakes.
There is no point in describing the first method using a jack - the procedure is elementary and will not cause any difficulties even for a novice driver. The only recommendation is to reduce the tire pressure to make the work easier.
Another question is when this device is not at hand. In this case, you can install chains on snow wheels with your own hands using the following technology:
- place the product in front of the wheel pair, avoiding twisting of the links;
- run over the product with wheels;
- apply the handbrake;
- put on the device so that the hook and carabiner are on the outside of the wheel;
- connect the hook and the last link of the longitudinal part to the inside of the wheel;
- put the carabiner coupling on the tension system from the outside and fix the knot;
- distribute the transverse elements along the entire perimeter of the tire and tighten it.
Important! To ensure uniform distribution of equipment components, drive 20-30 meters and then make final adjustments. This event will guarantee maximum adherence of the product to the rubber.