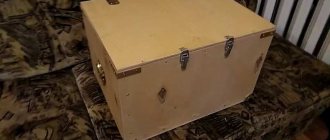
If the master’s tools are in order, then the work moves quickly and easily. No need to look for where the bolts, pliers or hammer are, everything is at hand. Factory-made organizers offer ready-made storage solutions, but they are not always convenient, and the cost of high-quality models is not the cheapest. If you have the desire and leftover materials after repairs, making a tool box with your own hands will not be difficult, and it will cost much less than the factory equivalent.
Varieties and materials
There are many types of organizers:
- The simplest designs where all the tools and small accessories available in the house are stored. If the work is performed periodically, this is a completely convenient option.
- For storing a certain tool, for example, an angle grinder or a drill, especially if the device is not included in the factory configuration.
- Spacious and versatile, with numerous compartments and even wheels for easy movement.
- With advanced features, including workplace organization. For example, the structure unfolds and transforms into a small table with equipment attached to its surface.
Each craftsman can make a tool box “for himself”. If you don’t have to do repairs too often, then limit yourself to a simple drawer with a handle. It is advisable to provide several compartments or external “pockets” in which all the necessary items would be placed.
When there is a lot of equipment and you have to use it regularly, you will need a professional organizer. The location of compartments, cells or containers in this case must be carefully thought out in order to quickly find what you need.
When making a tool box organizer, the following are used:
- Metal - sheet aluminum, stainless steel, galvanized steel. Structures made from them are resistant to mechanical stress and corrosion, reliable, and durable.
- Wood - plywood, chipboard, fiberboard, MDF, bars, boards. The material is easy to process; you can use any scraps remaining from the repair.
- Plastic - for storing and carrying heavy tools, it is better to use impact-resistant polypropylene. It is not as fragile as other types of polymers, can withstand fairly high loads and is not afraid of frost. To keep small items of light weight in order, you can use any sheet of plastic.
Devices are often made in combination - a body made of durable metal or plywood, plastic filling, fiberboard. Small containers, containers, and cuttings of polymer pipes are suitable for small items.
To make materials last longer, you need to use protective equipment. Wooden parts are painted or impregnated with linseed oil. Aluminum, stainless steel, galvanized steel or plastic are themselves resistant to moisture and corrosion, so they do not require additional processing.
Classification of tool boxes
There are several basic criteria due to which multifunctional products can be divided into several main groups.
According to the material from which the body is made:
- Wooden . Natural wood is considered the most affordable material for making tool boxes. For self-production, it is better to use durable plywood 10, 16 or 18 mm.
- Plastic . Such cases are lighter in weight, convenient and practical both in everyday life and for transportation over longer distances.
- Metal . These boxes are a little heavier than plastic ones, but at the same time more durable, stable and durable. They have a more rigid structure and cannot be large due to the heaviness of the metal.
- Galvanized metal . This type of tool box is more spacious and durable. They are suitable for storing and transporting household and professional tools. But, in addition to all the advantages, it is necessary to note their price - it can be $500 or even more.
By type of stored instruments:
- Non-professional tools . These products are presented in the form of boxes with many spacious compartments and niches. They are often made in the form of cases and bags of different sizes.
- Electrical tools . These are unique cases, the functionality of which is designed for storing and moving certain power tools. Most often, they have one main compartment for the main device and several small recesses for auxiliary equipment.
- Professional tools . Many specialists use this type of box, as they have special seats for certain types of equipment. They are resistant to falls and negative environmental influences.
- Universal organizers . These boxes were originally designed to store a large number of different tools. They have many compartments. Multifunctional models with modular partitions, which can be moved to the side depending on the user's needs, deserve special attention.
Design
For manual production, you can limit yourself to a simple design or “swing” at a more complex option. This will depend on the functions assigned to the organizer, as well as on the type of stored devices and materials:
- A simple box with a handle is often used for carpentry, construction or painting tools. It is easy to make, quite versatile and easy to carry.
- Case - a suitcase-type design, closed with a lid with a lock. In such an organizer you can keep small tools, fragile devices, and consumables.
- A container with a lid is a very popular option. The internal space is organized according to the needs of the user. Large tools are placed on the bottom, and containers for storing “small things” are installed on top. They can be either fixed or removable.
- Folding accordions. When folded they are very compact, and when unfolded they provide a complete overview of everything that is inside.
- With retractable compartments - they are a cabinet-type structure. Each compartment is separate, all items are neatly folded and do not come into contact with each other.
- On wheels - a convenient modification of any heavy organizer. The problem of carrying it over long distances disappears by itself. For professional craftsmen or teams performing a wide range of work, this is a significant help.
- A box stool is a functional option that can be used as a seating area or a small work surface.
Design of modern boxes
When talking about the design of such boxes, we do not mean their shape, but the method of opening and the presence of auxiliary sections. The following designs are considered standard today:
- Stationary . This concept is relative, since such a box is not usually carried to the place where repair work is carried out. It can only be carefully moved within the same workshop. The box does not provide mounts for tools, but they can be arranged in special compartments, which are divided into certain groups.
- Portable . This box holds a large number of tools, which are most often intended for a specific type of activity. The portable box must be equipped with a strong lock so that it does not accidentally open during transportation. While moving, the tools should not dangle; each device has its own niche with fastening.
- Specialized . Unlike the first two options, this box is designed for a specific group of tools. For example: for wrenches, drills, pliers. In addition to the basic tools, such boxes usually also contain maintenance material.
Operating principles and manufacturing requirements
Craftsmen quite often encounter the breakdown of a purchased organizer. Flimsy structures cannot withstand loads, accidental impacts, crack and become unusable.
The weak point of factory boxes is the handles and locks. As a rule, in inexpensive models they are made of plastic or very thin metal, which quickly fail under heavy operating conditions.
All these nuances can be provided for in a DIY toolbox. Durable material, reliable fastenings, and high-quality fittings will ensure not only comfortable use, but also an unlimited service life.
The organizer manufacturing process includes:
- development of a design drawing;
- preparation of materials;
- cutting parts to size;
- assembly;
- installation of accessories;
- protective and decorative treatment.
When preparing the drawing, the type of storage, the dimensions of the tool, the number of compartments, the method of opening and carrying are taken into account.
Working drawing with dimensions
Metal tool box
The metal is highly durable and durable, but working with it requires skill, as well as special processing tools.
Required:
- sheet of galvanized sheet or aluminum;
- metal scissors;
- riveter;
- handles, locks, hinges.
Most often, case structures or folding “accordions” are made from metal, where the ribs form a rigid frame. In this case, a sufficiently thin sheet does not deform under load.
Step-by-step production of a metal tool box:
- On the sheet mark the main elements of the organizer - side parts, bottom, lid, taking into account an allowance of 1-1.5 cm for connection.
- Cut out the elements using metal scissors.
- Fold in the seam allowances along the edges.
- Rivet the joints with a riveter.
- Connect the compartments together using strips or special springs.
- Install locks and handle.
If there is no riveter, you can connect the parts with bolts, nuts and washers. This is a more labor-intensive job, but is also used on thin-sheet structures. The fasteners are chosen to be stainless or galvanized so that when paired with the metal of the organizer, it does not quickly begin to corrode.
Plastic tool box
A modern plastic L-boxx can be made from foamed PVC or any other polymer sheet material with sufficient mechanical strength. You will need glue for the plastic and transparent plastic for the lid.
Making a plastic tool box is easy. The parts are cut out with a regular knife, the joints are glued, and cured until they gain strength.
The top of the device is closed with a transparent lid, through which all the contents are visible. Drills, screws, nuts, soldering supplies - everything will be in separate compartments in plain sight.
The procedure for making a plastic box:
- Mark the contours of the bottom, walls and partitions on the sheet.
- Cut out the elements with a knife.
- Carefully glue the parts together.
- Make a lid.
- Clean the edges with fine sandpaper.
Such a box is not intended for storing heavy equipment, but it is quite useful for organizing all the “little things” necessary for work.
Wooden tool box
The simplest and most affordable option is to make a tool box from plywood or thin planed boards. Surely there are scraps of suitable sizes in the house. Cutting and drilling wood materials is not difficult, so even a beginner can handle the job. You will need a jigsaw or hacksaw, a screwdriver, and wood fasteners.
Part connections can be made in various ways:
- half a tree;
- dovetail;
- with dowels;
- with tongues and grooves;
- on self-tapping screws.
To neatly connect the boards into half a tree, select half the thickness of the element on each of them. The parts are glued together at the sampling site. If you choose the dovetail method, you need to file a trapezoidal cutout at one end, and a protrusion of a similar shape at the other.
To connect dowels, blind holes are drilled in two adjacent structures, glue is applied around them, then dowels - pieces of wooden rod - are inserted. When tightly joined, the structures are held together. The joint with tongues and grooves is labor-intensive and requires precise cutting of parts in the form of a toothed comb at the joint.
Joints between wooden structures are strengthened by gluing. To perform this operation correctly, you need:
- Carefully sand the joint area.
- Remove dust and degrease.
- Apply glue to both surfaces.
- Let the composition stand for some time (the duration is indicated in the instructions).
- Press the elements together and secure with a clamp.
- Remove excess glue and leave until the composition is completely polymerized for about a day.
It is recommended to load the adhesive joint no earlier than after 24 hours. The junction is neat and invisible. If the toolbox does not have any decorative requirements, it is easier and faster to fasten the elements with ordinary self-tapping screws. Pre-drilling of holes is not required.
Tool box
Before you make a box for plumbing tools at home with your own hands, you should decide for yourself the question of the number of items to be carried and its structure.
For manufacturing, plywood sheets or wooden boards are most often used, and their thickness must correspond to the weight of the load.
For storing lightweight consumables and accessories, the wall thickness can be from 5 to 8 mm. For heavy tools and devices, their thickness should be at least 1.2 cm.
For ease of transportation and access to small fasteners, for example, nails, screws and others, it is necessary to provide removable or retractable compartments in the organizer design.
To make the best choice of model, you should familiarize yourself with photos posted on the Internet of various types of handmade tool boxes that you have made yourself, which do not require special equipment for manufacturing.
How to make an open box: step-by-step instructions with drawings, dimensions and photos
The simplest tool organizer is a box-shaped design with a handle. You can arrange several compartments inside, and attach “pockets” of various capacities to the outside.
For a medium sized box you will need:
- plywood, board, MDF or other wood sheet material that can be easily fastened with self-tapping screws;
- fasteners;
- electric jigsaw;
- screwdriver;
- pencil, ruler;
- linseed oil for wood processing.
Mark the details:
- A - bottom of the box 35x20 cm;
- B - 2 side parts 22x22 cm;
- C - 2 long side elements 35x10 cm.
A handle 35 cm long is prepared from the block with a small margin. Then you can adjust the dimensions accordingly. You can use steel or aluminum tubes, scraps of smooth fittings.
Cut out the marked parts with a jigsaw. The bottom and sides are alternately connected using self-tapping screws, which are screwed through the part into the end of the other element. The approximate step for installing hardware is 7-10 cm. You can additionally glue all joints with wood glue.
To avoid misalignment during fastening or hardware breakage, self-tapping screws must be installed correctly:
- do not screw into places with knots and other wood defects;
- install fasteners perpendicular to the surface;
- the axes of the screwdriver and the self-tapping screw must strictly coincide;
- increase the twisting speed smoothly, without jerking.
Some craftsmen recommend pre-rubbing the screws with soap. After this they enter the wood very easily.
The handle block is sanded until smooth. When attaching it to the sidewalls, you first need to drill a hole through the part, and then screw in the self-tapping screw.
The handle can be made folding - cut holes in the sides, thread a strong cord and tie a block to it. The box is carried in the usual way, then the handle is placed to the side. In this form, it does not interfere with access to tools.
For small parts, side pockets are made of plywood or fiberboard. The plates are cut out to appropriate sizes and screwed to the sidewalls through narrow linings.
Partitions are cut out for internal compartments. They are secured using overlays or inserted into pre-cut grooves.
Under the containers to be removed, stops made of bars or scraps of plywood are installed inside the box. You can make removable containers yourself from sheet plastic, tin, wood, or take ready-made ones of a suitable size.
After assembly, the organizer is coated with linseed oil. You can paint the wood with acrylic varnish for external work or treat it with stain or antiseptic impregnation.
Classification and purpose
Organizers for tools differ in design, purpose, and mobility (they can be portable or stationary). Experienced professionals recommend combining different types of organizers when organizing your workspace. Highlight:
- Portable organizers;
- Compact stands;
- Cabinets with drawers-containers, including mobile ones (on wheels);
- Hanging organizers;
- Wall panels.
All of them are used to accommodate cutters, drills, attachments, hand tools, as well as electrical, hydraulic and electro-hydraulic equipment. They are made of fabric (for bags), wood, metal, plastic, fiberglass, textolite. The designs allow for the presence of magnets, rollers, and moving elements. The use of organizers pursues three main goals:
- Workspace optimization;
- Facilitation (acceleration) of work;
- Simplification of transportation.
Stool box: drawings and description
This is a carpentry product of a more complex level of manufacture than a simple box. For a stool on which you can sit or stand, a durable frame is built from a bar. The interior space is used to store tools.
You will need:
- board 20 mm thick;
- block 50x50;
- plywood 8-10 mm;
- wood glue;
- cutting tool;
- screwdriver or drill;
- block, fine sandpaper or sander;
- hinges, handles, lock.
First prepare a drawing with dimensions
Now you need to assemble the stool:
- Trim the blanks to size.
- Connect the bars with tongue-and-groove fastenings and dowels.
- Cut out the bottom and sides from plywood.
- Sand all the details.
- Lubricate the contacting surfaces with glue.
- Insert dowels and connect the elements, remove excess lei
- Tighten with clamps for 24 hours.
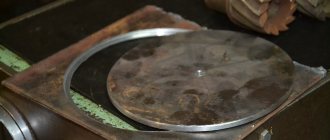
Aging in clamps
While the glue is setting, a seat is made from the board. The parts are polished and the edges are rounded. Glued to the frame and connected with an “oblique” screw.
The sides and bottom are fixed to the stool. The opening part is secured with overhead hinges. To prevent the lid from opening spontaneously, install a latch. The functional box-stool is ready.
Manufacturing of internal and external doors
Internal and external doors have the same design and differ only in length: the height of the internal doors is 620 mm, the external doors are 780 mm.
- The sides of the internal (J) and external (I) doors are cut according to the dimensions indicated in the drawing.
All doors must fit into the body with a gap of 3 mm at the top and bottom (see the diagram “Detailing the body”, side view). This is taken into account in the drawing, but if you are making a cabinet with a deviation from the proposed dimensions, do not forget to check this point before assembling the doors. Parts J and I should fit into the body with a 6mm gap, resulting in a 3mm clearance at the top and bottom.
- The lids and bottoms of the doors (K) are cut according to the specified dimensions in the amount of 8 pieces.
- On the inner surface of the sidewalls J and I, a quarter 20 mm wide and 10 mm deep is milled at the top and bottom.
- On the side walls (J and I), covers (K) and bottom (K), grooves 6 mm wide and 10 mm deep are selected in which panels L and M will be fixed.
- According to the dimensions, panels L and M are cut from the diagram from 6 mm hardboard - 4 pieces for the inner door and 4 pieces for the outer door.
- After carrying out the “dry” assembly and checking with a square that all internal angles correspond to 90 degrees, they begin the final assembly of the doors using screws or self-tapping screws. The fasteners are screwed into pre-drilled holes.
Plywood tool storage box with lid
The lid design is very practical. Tools become less dirty and are not subject to accidental exposure to snow or rain outdoors.
The lid can be hinged or removable. If the handle is attached directly to it, the hinge and lock mechanisms must be as reliable as possible. The entire load will be taken by these parts; how long the organizer will last depends on their quality.
Before starting work, you need to prepare a drawing of a tool box, where you indicate the dimensions and numbering of parts. Such a simple operation will help during assembly, you will quickly find them and dock them correctly.
For an organizer with a lid you will need:
- plywood 12-18 mm thick for the frame, 6-10 for non-load-bearing parts;
- self-tapping screws;
- wood glue;
- overhead hinges (mortise, hinged or other type as desired);
- a pen (buy ready-made in a store or take from an old suitcase);
- ruler, pencil;
- hacksaw or jigsaw;
- screwdriver;
- clamps;
- a block for sanding edges.
Step by step execution:
- Transfer the markings from the drawing to the plywood and number them.
- Use a jigsaw or hacksaw to prepare the parts.
- Using glue and self-tapping screws, assemble the body. Tighten the structure with clamps until it dries completely.
- In a similar way, make internal removable trays.
- Secure the bars for stops parallel to each other in the box.
- Assemble the cover and secure it to the body with hinges.
- Install locks.
- Attach the handle to the lid.
- Sand and treat with a protective and decorative agent.
After installing the removable containers, the organizer is ready for use. This box is not only durable and convenient, but also looks quite solid.
Compact organizers
Ideal for placing small tools, drills, screwdriver bits, and attachments. They can be open (slats, stands) or closed (boxes, suitcases), portable or stationary. These devices are used separately or in conjunction with cabinets or wall organizers.
The most widely available in stores are sliding plastic boxes with special compartments for fasteners. It is possible to make an analogue of such containers yourself, but the product will be larger and heavier. Stands, stands, and cases for drills and attachments are easier to make yourself.
Screwdriver stand
It is convenient to store a large number of screwdrivers on a specialized stand. You can assemble such a device yourself. The cork wood stand is light and neat in appearance. You won't need a single nail; all connections are made with glue. To work you will need:
Two sheets of balsa wood 6 millimeters thick;
- Carpenter's glue;
- Carpenter's varnish (best matte);
- Brush;
- Sandpaper (grain 220);
- Pencil;
- Cutting knife;
- Cutting mat;
- Screwdrivers.
Wall templates are drawn on a computer at a scale of 1:1, printed on paper, cut out and applied to sheets of wood. Mark the outline on the parts, mark the locations of the grooves. Cut with a knife, and the pressing force should not be too strong, otherwise the material will collapse. Holes are marked on the upper edge, pressing them with a small screwdriver or an awl. The diameter of the hole must match the diameter of the tool.
Before gluing, the parts are treated with sandpaper, removing pencil marks, irregularities, and nicks. Clean surfaces from dust. Glue is applied to all contact surfaces, excess is removed immediately. The workpiece is fixed in the correct position with adhesive tape and left for 24 hours. After the glue has dried, the surfaces are leveled again and then varnished. If necessary, signatures for each instrument are applied to the dried varnish.
Where to store drill bits
The easiest way to make an organizer for drills is from an ordinary board. It is enough to drill holes of the appropriate diameter and depth. An impromptu stand can be complicated by making it multi-level , adding signatures or fastenings on entire areas.
If you don’t want to place the drills vertically, then grooves are made instead of holes. The thickness of the grooves is selected according to the diameter of the cutters being placed. This storage method is better suited for small drawers. Organizers for drills are easy to make portable; just find a suitable case: a box from an old first aid kit, a case from a video cassette. You just need to securely fasten the holder inside the box so that nothing falls out or rattles.
Separately, it is worth mentioning fabric (leather) organizers and pencil cases. They are suitable not only for storing drills, but also for full-fledged hand tools. The cheapest ones on the market are mobile and universal, but their durability leaves much to be desired. Suitable for cars and hiking conditions.
Portable box with drawer
This is almost a mini-version of a workshop. The top panel can be used to work with various equipment; inside is an excellent place to store tools, accessories and consumables. If you put the organizer on wheels, you get a mobile Toolbox.
The interior of the box has a compartment for large tools and pull-out compartments for small items. Additionally, you can install a panel for rulers, screwdrivers, knives, etc.
The structure is made of plywood, connecting the parts with glue and self-tapping screws. For strength, you can fasten the organizer with stiffening ribs from a 50x50 mm bar.
There is nothing complicated about assembling the box itself. The drawer design requires the most attention. It is expected to be loaded, so if it is not positioned correctly it can bind when moving and slip out of its mounts.
To install a retractable compartment, you will need guides, which can be roller or ball. The sliding of the runner occurs due to the torsion of the rollers in the grooves or the movement of the guide parts themselves relative to each other in special tracks.
Roller mechanisms are inexpensive, but less reliable. Ball ones are stronger and more durable, they move silently and allow you to open the drawer all the way. You can use reinforced versions of products that can withstand heavy loads.
To install a drawer, mark the fastening line of the guide on the wall, and the mating part on the side element of the compartment. Here it is important not to make a mistake and to connect the structures correctly in height so that the box fits tightly, but there is a small gap left for free movement. Even the slightest misalignment between parallel sides should not be allowed.
Assembly sequence:
- Cut out parts from plywood and sand.
- Assemble the frame and box using self-tapping screws and glue.
- Let it stand until it gains strength.
- Mark the guide lines on the internal side posts and sides of the drawer.
- Secure the runners with self-tapping screws.
- Insert the compartment until it clicks, slightly lifting the edge. After this, the box should move freely along the guides.
- Arrange the organizer space as you wish.
- Attach carrying handles.
- Carry out final protective and decorative treatment.
If desired, you can make several drawers of the same or different sizes. This will allow you to make maximum use of the organizer’s space.
Option with shoulder strap
Interior items made of plywood
Perhaps you have not paid attention to the fact that a significant part of the products present in your home are made of plywood. So, they often collect from it:
- cabinets;
- frame for upholstered furniture;
- tables;
- chairs;
- even kitchen sets.
As you can see, the material is suitable for making any furniture, therefore, a box from it can be assembled with almost any parameters. The result is a very practical device that will add a certain comfort to life and functionality to the furnishings of the apartment.
Plywood is a very flexible material, so you don’t have to worry about damaging the sheet with careless movements while processing it.
As for how such boxes can be used, there are also a lot of ideas. By making a “box” out of plywood, you can:
- fill the shelves of the closets and put things inside that were previously thrown there in a shapeless pile;
- turn it over, attach the legs on casters and turn it into a coffee table;
- use as a book stand;
- stack several identical boxes on top of each other, making a multi-story organizer, etc.
Particularly experienced craftsmen can turn a piece of plywood into a work of art, such as a jewelry box
Tool Chest Ideas
In the hands of a true craftsman, any thing that has outlived its useful life can become a useful and functional device. Various ideas that are implemented from improvised means arouse interest and become an impetus for one’s own creativity:
- A tool box made from cable ducts and sofa springs is an economical lightweight device for storing small accessories.
- Plastic canisters are record holders for generating various ideas. If you cut out a window in the upper part, such a container can be used to store screws, nails, drills and anything else that may be useful in your work.
- A shopping cart, if obtained legally, can be transformed into a convenient Tool-box through some transformations. It is enough to arrange compartments or shelves, and the handle and wheels are already there.
- Old "diplomacy" bags are strong and durable, and reliable locks have worked properly for more than 20 years. Inside the case you can arrange small pockets for storing small items, and the suitcase itself can easily withstand the weight of a drill or screwdriver.
Tool cabinet
Service cabinets take up more space than wall panels. Externally, they are not much different from ordinary furniture: cabinets or drawers. The opening principle, the organization of the internal space, as well as the materials used may differ radically between different models. They can be stationary, mobile (on wheels) or hanging.
This is interesting: Sulfur Baths in Tbilisi
Such organizers are safer than wall-mounted ones, since all sharp and heavy objects are kept behind closed doors. In service cabinets you can store anything: small parts to heavy electrical equipment, as well as completely foreign things (dishes, clothes, medicines). The internal space allows for additional containers, retractable elements, and magnetic fastenings.
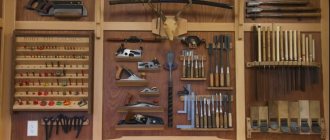
Petrovich35 › Blog › Wall organizer for tools.
I really love order, but for some reason I’m much better at creating chaos.
During my conscious automotive life, I acquired a garage and collected some tools for car repairs.
But at some point, the number of tools and its clutter reached a critical mass, which negated all the pleasure of working with the machine. It began to take too much time to search around the garage for the right key or screwdriver.
After a rather long struggle between laziness and the desire to put things in order, I ended up making two homemade organizers for the bulk of hand tools - keys, screwdrivers, sockets, pliers, hammers, etc.
The organizers were made in the form of wall-mounted folding boxes with hinges, like a book. The boxes were made from wooden furniture panels and bars. To place the tools I used metal hooks and rings, magnetic holders, and homemade shelves made of aluminum profiles. All materials were purchased from a home improvement store.
I appreciated the benefits of organized tool storage almost immediately.
Now everything is in sight and at hand; it only takes seconds to find the right tool. Since the organizers are folding, you can fold them when you are not doing repairs and thereby hide the tool from prying eyes.
Photos of the organizers and their manufacturing process are presented below.