Main settings
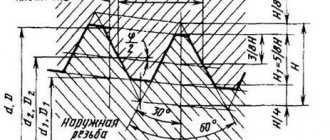
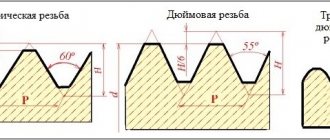
Each thread has precise geometric parameters. Metric is characterized by a triangular thread profile, which is also called fastening. It is used for parts connected to each other by screwing. The profile size is determined by its height.
The profile height (H) is the segment from the base to the top of an equilateral triangle, which is formed by a transverse section of the coil. The protrusions and depressions are made in the form of triangles with cut off vertices. In some cases, the depressions are rounded.
If the sides of each turn are mentally extended to the point of their intersection, then they will form a profile angle (α).
Thread profile
The main parameters indicated in the designation of a metric thread characterize its size. These include diameter and pitch. Metric thread designations indicate the main parameters.
Thread diameter is divided into 4 types:
- outer;
- interior;
- average;
- nominal.
Thread parameters such as stroke (Ph) and pitch (P) are interdependent and equal for a single-start system.
Thread stroke and pitch
The section separating the points of the same name on two turns is the thread pitch. There are main steps (large) and small steps.
Thread lead is a segment connecting two identical points on adjacent turns of the same thread. In the case where there are several entries, the move is expressed through the product of the number of steps and the number of entries.
The main thread elements also include:
- A surface inclined 45º in front of the inner or behind the outer is called a chamfer. It plays a role in connecting elements.
- Run-off is the place of transition to the uncut surface of the part. These two indicators are united by length, that is, a segment with turns, chamfer and runoff.
For metric threads, the main dimensions are summarized in tables of the relevant standards: GOST 9150-2002, GOST 8724-2002, GOST 24705-2004.
Possible structural deviations caused by the properties of materials are reported by tolerance fields, with values not exceeding the nominal profile formed by the maximum of the material. These indicators affect the accuracy of the thread fit - the density of penetration of the protrusions into the gaps.
Thread tolerance fields are divided into three accuracy classes. And also 4 types according to your preference.
Designation rules
To indicate the tolerance range of an individual metric thread diameter, a combination of a number is used, which indicates the accuracy class of the thread, and a letter, which determines the main deviation. The thread tolerance field should also be indicated by two alphanumeric elements: in the first place - tolerance field d2 (middle diameter), in the second place - tolerance field d (outer diameter). If the tolerance fields of the outer and middle diameters coincide, then they are not repeated in the designation.
Metric thread designation
According to the rules, the thread designation is affixed first, followed by the tolerance zone designation. It should be borne in mind that the thread pitch is not indicated in the markings. You can find out this parameter from special tables.
The thread designation also indicates which screw length group it belongs to. There are three such groups:
- N – normal, which is not indicated in the designation;
- S – short;
- L – long.
The letters S and L, if necessary, follow the tolerance zone designation and are separated from it by a long horizontal line.
Example designation of 24 mm threads of various types (according to GOST 8724)
It is also necessary to indicate such an important parameter as the fit of the threaded connection. This is a fraction formed as follows: the numerator contains the designation of the internal thread related to its tolerance field, and the denominator contains the designation of the tolerance field for external threads.
An example of a threaded connection fit designation in the drawings
Thread diameter
The conditional parameter used to designate threads in drawings and reference tables is called the nominal diameter.
If we describe an imaginary cylinder around the protrusions of the external thread and the cavities of the internal thread, then its diameter will be called external. And the designation on the drawings: D – for internal; d – for external.
The internal diameter is the size of the inscribed cylinder in the recesses of the external thread and at the points of the vertices of the internal thread, denoted by: D1 and d1 for internal and external, respectively.
The average diameter is a parameter of an imaginary cylinder whose segments are equal to ½ thread pitch. Designated: D2 and d2.
The internal diameter of the bolt is used to calculate the stress in the fastener. Its value can be taken from the table with diameters, or calculated independently based on the nominal value.
How to use a thread gauge correctly - step-by-step instructions
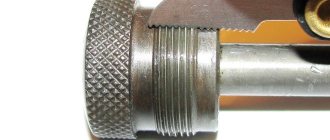
Before determining the thread pitch, you must first measure its diameter. This is done because not all cutting diameters can have a full range of pitches. This is true for small cuts less than 5 mm, as well as for large ones - over 120 mm. To determine the outer diameter of the thread, you will need to use a caliper. After determining the diameter, you can begin to measure the thread pitch. A thread gauge is used for this. If there is no device, then there is another way to determine the thread pitch, which many people still use today. Detailed instructions on how to use a thread gauge are as follows:
- On the device, you need to select a suitable plate with teeth, and attach it to the threads on the nut, screw or bolt
- The selection of plates to the cutting shape is carried out until a complete and exact match is achieved
- When the edges of the comb coincide with the cutting on the workpiece, the step size is determined
- The value is indicated on the side of the comb
This completes the process of determining the thread pitch. The easiest way to measure is the external thread. If the pitch of the internal thread is measured, then it is necessary to additionally highlight the location of the measurement. In a similar way, measurements of metric and inch threads on workpieces are carried out. If metric cutting measurements are taken, then we obtain the corresponding value, for example, 1.75 mm. This means that the distance between the vertices of the spiral is 1.75 mm. If measurements are taken of inch cutting, then we get a value, for example, 28. This means that there are 28 turns in one inch.
This is interesting!
After using the device, it is necessary to clean its edges from any dirt that remains after the measurements.
More details about how to use a thread gauge are described in the video clip.
Thread pitch
The pitch can also be found from the thread table or from the markings. Threads can have a main pitch, also called coarse, and fine. Depends on the diameter of the product.
If it is more than 68 mm, then only small, different values are used for such a surface. Having a diameter up to the specified value makes it possible to produce threads with both large and fine pitches.
Each diameter has its own coarse pitch, which is not indicated in the marking.
When attaching parts, it is important to know the pitch, otherwise it will lose strength. The step can be determined by instrumental or comparative methods, such as:
- measure with a thread gauge;
- compare by comparing the threads of different parts with each other;
- try to screw the external thread into the internal thread; there should be no resistance;
- Measure the stroke in millimeters with a caliper and divide the resulting value by the number of strokes.
Geometric dimensions
The performance characteristics depend on the parameters listed above. All three diameters determine which hole needs to be made with a drill when working with a tap. From the pitch and stroke - how firmly the screwing will occur, the more turns, and the more often they are, the better. This kind of work is more delicate, so it is virtually impossible to do it at home, only with special equipment. The strength of the connection depends on how deep the grooves are. There are limitations here too. If the bolt is made in miniature, then there should not be too much of a difference between the recesses and ridges, as this increases fragility. The profile angle, height and depth of the metric thread determines how well the front of the tap will fit into the material. It’s not so easy to start rotations, and besides, to do it quite smoothly, without distortions. The softer the material (for example, copper or aluminum), the better the screwing. The proportionality of the two elements that come into interaction is very important.
Tolerance fields
The fit of the outer profile into the inner one depends on the working height - the maximum amount of contact between the sides of the profiles of the connecting elements. It is expressed through thread tolerance fields.
The reliability of the connection, where fluctuations within it are minimized, is indicated by the first or exact tolerance class. The most common is the second (middle) class. The third (rough) class indicates a large deviation.
Tolerances on the dimensions of metric threads are indicated through the values of two diameters: the average and the diameter of the protrusions.
When forming a metric thread, data is taken from the corresponding tables (GOST 16093-2004). The selection of tolerance fields is carried out according to the rules of priority:
- first priority – values indicated in bold;
- the second - in regular font;
- third – values taken in parentheses;
- extraordinary – values in square brackets (for special products).
It is possible to use tolerances that are not indicated in the tables, but are formed from the ratios of existing standard diameters.
External thread tolerance fields
Internal thread tolerance fields
It is important that the protective coatings of parts in their geometric parameters do not exceed the value of the nominal profile, therefore in such cases tolerances are used even before applying the protective layer.
Types of thread gauges and their features
Due to the fact that there are two main types of threads - inch and metric, it is not difficult to guess that the tools for determining them are of two types:
- Metric - designed exclusively for working with workpieces with metric threads. The device measures the pitch and profile of cutting, the diameter of which ranges from 1 to 600 millimeters. The design of the tool contains up to 20 combs, which are steel plates with teeth. Using these plates, you can determine the cutting pitch from 0.4 to 7 mm. Such a device is called a metric thread gauge, since it is used to determine the pitch and profile of the metric thread already existing on the workpiece. The devices allow you to evaluate the correct manufacturing of fasteners such as nuts, bolts, studs, etc. Metric instruments are distinguished by their simple manufacturing design, high strength, and corresponding markings on the body in the form of “M60”. The scope of application of the tool is mechanical engineering, instrument making, etc.
- Inch - designed only for working with inch types of cuts. The device is used in the field of radio electronics, aircraft manufacturing, plumbing, as well as in the production of various machine tools. The set of inch thread gauge contains 17 plates with corresponding teeth, which differ from the metric device in angle of location. The smallest comb has 28 turns, and the largest has 4 edges. The pitch is determined by the number of threads per 1 inch. A distinctive feature of the inch tool is that there is a marking in the form “D55” on the body. In the household, inch thread gauges are used when working with plumbing fixtures
- Trapezoidal - a special device designed to work with trapezoidal types of cuts. Another name for this device is T-thread gauge
- Universal - devices that have plates for calibrating inch and metric threads. Such devices allow you to simultaneously work with different types of cuts, which is especially important in plumbing
When you know what types of thread gauges there are, it remains to understand the issue of their correct use. If you don’t know how to use a thread gauge, then we’ll look at the procedure for determining the thread pitch in detail.
How to measure the thread pitch yourself?
Sometimes it becomes necessary to measure the thread pitch of existing threaded connections. You have to use a variety of devices to perform such an operation with a special device and without a thread gauge. There are several ways to find out the value of a step; they are not difficult to master. Here are ways to measure thread pitch:
Using a ruler
- You need to take a ruler.
- Place the bolt (screw).
- Measure the distance between five (ten) turns.
- Divide by the number of grooves.
- The result must be rounded to the nearest standard.
While this method is suitable for external threads, for internal threads it may be difficult to insert a ruler into the hole. Therefore, additional actions have to be taken.
Plasticine cast
- From plasticine (wax, paraffin, stearin) you need to roll a sausage that will fit the hole.
- Cool the workpiece. If you have a refrigerator, the task becomes easier. If not, then leave it in the shade for a while so that the workpiece becomes hard.
- Screw the sausage into the thread. Try not to warm too much with your breath and fingers.
- Turn out. Now a “mirror” reflection of the carving has appeared on the hands. All that remains is to measure the rod as described above.
Using paper
It happens that the thread itself is quite dirty. Therefore, it is difficult to see how many turns there are. Therefore, they use the “paper” method.
- A small piece of paper is picked up.
- The thread is carried out as if an object is being wrapped or turned away.
- An imprint remains on the sheet.
- You need to count the number of turns and measure the distance with a caliper or ruler.
Using a thread gauge
You can purchase a thread gauge in specialized stores. The number of measuring plates for this device may vary. The more, the more convenient it is to use a thread gauge.
All that remains is to lean different plates against each other, selecting the most suitable sample.
An example of determining the thread pitch size using a thread gauge
When the question arises about what kind of thread is needed or available, it is advisable to start with the manufacturer. If the USA and Great Britain, then we can assume the presence of inch threads. For domestic European and Chinese products, metric threads are used.
Types of metric threads
Metric threads also mean all types with different profiles, measured in millimeters. These include:
- triangular thread;
- trapezoidal;
- rectangular;
- round.
In addition to the metric system for measuring parameters, the following are used:
- inch;
- modular, where the module is the ratio of the length, expressed in millimeters, to the number π;
- pitch, basic unit - pitch - the ratio of the number π to the length, expressed in inches.
Modular threads are used for worm gears in mechanical engineering, just like pitch threads. Inch and metric are fastening thread types, but can be used for transmission.
By location they are distinguished:
- internal;
- external
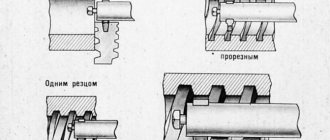
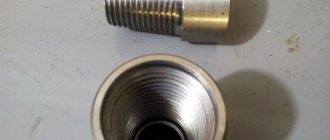
The internal thread is located in the hole, it is obtained with a tap, a specialized tool that is a rod with cutting edges.
Internal metric thread
External threads are made with a cutter or die on a rod. They can also be obtained by coasting on appropriate equipment.
External metric thread
The shape of the surface can be cylindrical or conical.
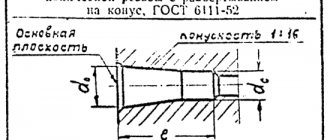
Metric conical thread is used for installation of pipelines. It is performed on surfaces where the larger diameter exceeds the small one by 16 times. Diameters vary from 6 to 60 mm.
They are also divided according to the direction of the turns into right and left. To determine the direction of the thread, it is necessary to position the part so that its axis is located away from the observer. Then, the right-hand thread is formed by a circle rotating from left to right with translational motion along the axis, and the left-hand thread, accordingly, counterclockwise.
There are different types of step sizes:
- large (with a main, large step);
- small (with small);
- special.
A large pitch is considered normal and is suitable for any materials, including fragile ones. Small allows you to withstand heavy loads, but the materials must have certain strength characteristics. Small and special ones are rarely used.
Large and fine thread pitch
The place of transition from a smooth surface to a helical one is called the approach. Based on their number, they are divided into: single- and multi-pass. The latter are also subdivided by the number of passes: two-, three- and multi-pass.
Another classification is by application. They are:
- fastening and thrust-fastening;
- kinematic or chassis;
- special purpose.
Below are the main types of metric threads and their letter designations:
- the capital letter "M" symbolizes the metric type,
- if it is made on the surface in the form of a cone, then “MK”;
- for conditions where heat resistance and strength are required, use the metric cylindrical “MJ”;
- according to ISO – “EG-M”;
- trapezoidal – “Tr”;
- persistent with an angle of inclination of one side of 30º – “S”;
- persistent reinforced - “S45”, where the number is the angle of inclination of one of the sides.
How to distinguish between inch and metric fasteners
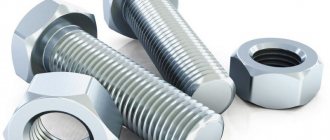
Threaded fasteners are one of the most popular for attaching parts, assembling products, equipment, and structures. There is no industry where it is not used. There are many thread characteristics: pitch, tolerance range, number of starts, nominal diameter, profile type and others. One of these is units of measurement, inches or millimeters.
There is often a situation when it is necessary to replace a bolt, pin or screw, but the fastener purchased for maximum similarity “by eye” is not screwed into the mounting hole. One of the reasons is an attempt to screw a fastener with an external inch thread into a hole with a metric thread. Or vice versa. This situation often arises when replacing fasteners on products or equipment manufactured in the UK, USA, Japan, or Australia. There, inch threads have priority.
How to distinguish an inch thread from a metric thread? There are two main ways - by measuring the pitch and diameter or using a special tool.
Measurement
Fastener thread markings are done differently in metric and inch systems. In metric, this is an indication of the thread pitch (the distance between adjacent threads) in millimeters, while in inch it is the number of turns per inch.
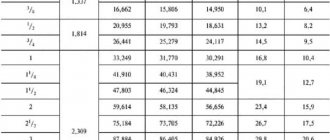
Determining the type and size of fastener thread comes down to the following operations. Use a caliper to measure the diameter. Then, using an inch ruler or caliper, measure the number of threads in one inch and the thread pitch. You can also use a regular ruler with measured 2.54 mm (1 inch = 2.54 mm). The metric thread pitch on small fasteners can be found by measuring the distance between 10 turns and dividing the resulting value by 10. The resulting values should be compared with the table below. The maximum match in diameter, number of turns, pitch indicates the size and type of thread. It should be noted that there are many different types of inch threads. The table shows the most common ones in the diameter range from 8 mm to 64 mm.
You can also use a thread gauge to measure threads. This is its direct purpose. A thread gauge is a set of plates with protruding teeth for a specific thread, united on a single axis. The thread size is engraved or permanently inked on the plate itself. Checking the thread is done by applying plates that are closest in size to the thread. If there is a complete match, without gaps, the thread can be considered defined, and its size can be viewed on the thread gauge plate. Thread gauges are produced separately for metric, inch threads or both types.
Research and Production Enterprise "Machine Building"
Application
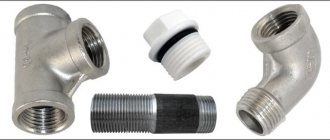
Metric threads are widespread in the countries of the former Soviet Union. Used for application to both internal and external planes of fasteners. Typically used for fastening metal structures of various types. For these purposes, a variety of bolts (anchor and conventional) and other types of fasteners are manufactured. She found a particular purpose in mechanical engineering, construction of engineering communications, especially in the plumbing sector. Most pipe and container fittings are manufactured with this type of thread.
Most often, this type of carving is applied to cylindrical objects. But in some cases, when it is necessary to achieve tightness, a conical shape is used. This form, with a metric thread applied, allows you to achieve maximum tightness, even without the use of additional sealing agents. Most often used for installation of pipelines.
State standards
GOST 8724-2002
State standard containing standards defining the required parameters of metric threads, including pitch and diameter. Adopted in 2002, with subsequent editions, as an analogue of the international standard ISO 261-98. The GOST text practically repeats the international text, with one difference: the ISO range ranges from 1 to 300 mm, this standard has been expanded to the range from 0.25 to 600 mm. The last revision of the text was made in 2004 and is valid today.
The standard contains individual parameters that can also be found in other standards. The structure of the document is similar to other standards of this type. All information is structured in the form of tables containing requirements for thread pitch and diameter. This test structure is as convenient as possible for understanding and use.
Download GOST 8724-2002
It should be noted that the regulatory information applies to threads of all types, be it left-handed or right-handed. The standard establishes the standard value of metric thread steps in the range from 0.075 to 8 mm.
The document consists of:
- Prefaces. Which contains general information about GOST, by whom and when it was adopted, when changes were made.
- Scope of application. Information is provided on the range of regulatory requirements for size and pitch.
- Links to standards.
- Definitions.
- Table of diameters and pitch. The section contains a table of standard indicators.
- Thread designation. Labeling standards are indicated.
GOST 24705-2004
The standard was adopted in 2004. Its standards apply to all types of threads in accordance with GOST 8724. The text information is also structured in the form of a table. Complies with the international standard ISO 724:1993 with additions in accordance with the exclusive requirements of each member country of the Interstate Council for Standardization.
Download GOST 24705-2004
GOST 9150-2002
A standard regulating the requirements for the profile, namely the geometric parameters. Adopted in 2002 and covering all types of threads. The text of GOST is closely related to the above standards.
Download GOST 9150-2002
GOST 16093-2004
Adopted in 2004. Regulates the standard tolerance of threads and markings, applies to different types. The latest version contains the provisions of the international standard.
The above standards are applied in combination, as they complement and refer to each other.
Metric spiral diameter table
Here we present not only the standard indicator, but all three.
| Pitch, mm | External d, mm | Average d, mm | Internal d, mm |
| 0,4 | 2 | 1,74 | 1,567 |
| 0,45 | 2,5 | 2,201 | 2,013 |
| 0,5 | 3 | 2,675 | 2,459 |
| 0,6 | 3,5 | 3,11 | 3,85 |
| 0,7 | 4 | 3,546 | 3,242 |
| 0,75 | 4,5 | 4,013 | 3,688 |
| 0,8 | 5 | 4,48 | 4,134 |
| 1 | 6 | 5,35 | 4,819 |
| 0,25 | 2 | 1,838 | 1,729 |
| 0,35 | 2,5 | 2,273 | 2,121 |
| 1,25 | 10 | 9,188 | 8,647 |
| 1,5 | 12 | 11,026 | 10,376 |
| 2 | 18 | 16,701 | 15,835 |
| 3 | 30 | 28,051 | 26,752 |
| 4 | 42 | 39,402 | 37,67 |
This is not all information; full information can be found in GOST. For example, for a step of 2 mm there is not one, but as many as 37 values. This is due to the fact that this is exactly the number of different cross-sections of the nuts that can have turns, which are spaced apart from each other at a distance of 2 mm. Only the minimum diameters are listed in the above summary.
