Basic moments
A little historical background to understand why standards are so important and why the whole world produces products that comply with them. Until the second half of the 16th century, thread-cutting machine equipment had not yet been invented, so all the screws that were used in rare designs were created by hand. Accordingly, the manufacturer himself chose a convenient indentation along the turns, since he achieved compliance with the cutting parameters for the part. He didn’t need this fastener to fit anything else. But in 1568, the first machine was created, which modernized the entire process and made it possible to introduce threaded fastening pairs into production. The coordination of translational motion was fixed, so initially there was only one standard size, therefore, marking is not required. With the development of technology, there is a need for different versions of bolt + nut pairs so that they can fasten smaller or, on the contrary, large connections. Then the machines were gradually improved - the drive was improved (initially it was a foot drive, but with the passage of time it became electric), and it also became possible to adjust threading modes, namely: insertion depth, distance between turns.
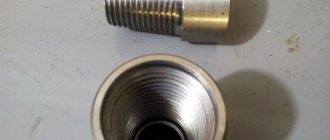
| Cylindrical |
| Conical |
And only in the 18th century, which is called industrial, fastening tools became so widespread and diverse that it was impossible to allow production of different sizes, everything had to be unified. The need came precisely from the needs of construction, so manufacturers gradually agreed on the same accepted standards. But despite the differences in the two calculation systems, there are standard parameters by which standard sizes and markings are compared. Specifically this:
- The length of the bolt (screw, etc.) and the distance of the turns.
- Number of spirals - the device can be single-threaded or multi-threaded.
- Inner diameter for inch thread. The two deepest points are taken (this is the bottom of the grooves), which are located opposite, for example, in a nut or in a pipe, or other parts for connection. This will be d (standard notation in formulas).
- External, or D. It is also external. To measure it, you need to fix the segment that is formed between the two most protruding steps, which are located parallel.
- Direction - everything is simple here, there is a right-handed and left-handed cutting. The right option is common and is used much more often both in mechanical engineering and in everyday life, for example, when screwing a cap onto the neck of a bottle. By the way, this example can also be used to consider and study the application of threads. The left one is also used, but less often, mainly in cases where the rotation of the element itself is designed in the same direction (to prevent unscrewing). These fasteners are marked with special signs and are used in the chassis of a car, when attaching bicycle pedals, in various tools and machines.
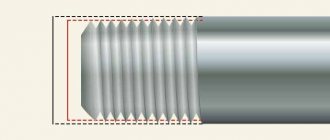
- Profile. This is the geometric shape that the cutting has. The ends of the ridges can be sharp, then the result is a triangle in cross-section, or with a truncated cone, a rectangle. To see this most clearly, if you wish, you can take the bolt and cut it lengthwise, then look at the cut or make an imprint of it. But since the standards for inch threads are presented in markings, it is enough to find the designation in inches in the accompanying documentation. And we will show this in a schematic diagram.
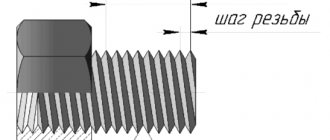
- Step. One of the frequently used characteristics explains the distance at which the nearest points equally distant from the center are located. It is convenient to detect by two adjacent ridges. There are (indicated as P) small and large.
- Move. This is how one turn will go when turning 360 degrees. It is represented in formulas as Ph. It completely depends on two parameters: the intervals and the number of visits. Most often, two-thread bolts are found, so they have a stroke of two. Formula for calculation: Ph = Р*n, where n is the number of visits.
Let's look at the schematic diagram for clarity:
In the diagram we see the axis. This is the visual median line, representing the center and located at the same distance from all the upper points of the ridges and the inner ones from the bottom of the grooves. We have given the main arguments and talked about the origin of the entire measurement system. But when marking, additional characteristics are used. Here's another way to determine an inch thread:
- According to the angle of elevation. This is how cool the cut-in is. Typically, the larger the step and the number of passes, the sharper the angle. This indicator also affects performance, including how difficult it is to knock down or cut the spiral.
- The make-up length is the distance where the internal and external threads of a pair of fasteners touch.
- On the run. This is a gap with an incomplete shallow profile, since in this small area there is a smooth, gradual transition to the smooth part of the hardware.
Size tables for inch and metric small and large threads
We will now present comparative tabular data. Let us point out right away that it is impossible and impractical to provide all regulatory documents within the framework of one article, since you can find out comprehensive information on all standard sizes in the relevant GOSTs. We will present the most common ones. First, let's note that the step happens:
- more than 68 mm;
- up to 68 mm inclusive.
From here we present two lists with the markings in question and an indication in millimeters:
| Designation | Enlarged spiral, mm |
| M1 | 0.25 |
| M1.2 | 0.25 |
| M1.4 | 0.3 |
| M1.6 | 0.35 |
| m1.8 | 0.35 |
| m2 | 0.4 |
| M2.2 | 0.45 |
| M2.5 | 0.45 |
| M3 | 0.5 |
| M3.5 | 0.6 |
| M4 | 0.7 |
| M5 | 0.8 |
| M6 | 1.0 |
| M8 | 1.25 |
| M10 | 1.5 |
| M12 | 1.75 |
| M14, 16 | 2.0 |
| M18, 20, 22 | 2.5 |
| M24, 27 | 3.0 |
| M30, 33 | 3.5 |
| M36, 39 | 4.0 |
| M42, 45 | 4.5 |
| M48, 52 | 5.0 |
| M56, 60 | 5.5 |
| M64, 68 | 6.0 |
Differences from metric
And since the entire development of threaded tools took place mainly in Great Britain and its colonies, the inch system was used. Interestingly, the word itself comes from the Dutch language and means thumb, because in England everything was measured taking into account parts of the human body. Therefore, an English inch is nothing more than the width of the thumb or 1/12 of a foot, that is, a man's foot. Calculus is very interesting, especially considering that all people are, to put it mildly, different. History is silent about which “standard” Englishman’s legs and arms were measured. Now, of course, all correspondences between length measures have long been documented, and mathematicians of all countries have agreed that 1 unit contains exactly 2 centimeters and 54 millimeters. You can even calculate the pitch for an inch thread without a table. But you don’t have to do this manually, because all the conversion from one measure to another has already been done. This is how the scale we indicated in the title appeared. But why change it to metric? In 1801, E. Whitney made a fascinating presentation, the purpose of which was to prove that the whole world needed complete interchangeability of parts - both within one country and between states. So he put on the table several complete kits for assembling identical weapons, but of different production. And then he assembled 1 finished musket from various spare parts - one from each pile. From that moment on, the idea of unification appeared and was then implemented, which was embodied in today's regulatory documents: GOST, DSTU, DIN, ISO and others. An interesting fact is that due to the constant rivalry between Great Britain and France, the former “threw a spoke in the wheels” of industrial development. They gave incorrect information and made it so that the French could assemble English equipment and machines only with tools brought from England. But after the revolution, the system was adopted and transferred to the metric system familiar to France. And in Russia, by the way, Mendeleev himself was an opponent of ancient Russian measurements with elbows, fathoms, arshins and other units. It was the French who spread meters throughout Europe during Napoleon's conquests. But since he did not enter England and did not conquer it, the usual inch remained there, as in all colonial countries - America, Japan, Canada, Australia. By the way, the Americans and the British themselves call it imperial. It seems clear that the difference is only in the calculation method, but there are also distinctive features in the application of threaded connections, namely:
- profile;
- order of calculation of step and stroke.
The cutting angle can also change - it is usually 55 degrees, and in the more familiar metric one it is all 60. In fact, at the level of small nuts and bolts, this inclination is actually insignificant, but for a strong joint it is still recommended to select a fastening pair of appropriate coordinates.
We said above that mathematicians have already decided on the conversion from one calculus to another, the ratio is 1 to 2.54 centimeters. Again, we will not go into the history of the production of hardware, but will simply mention as a fact that when converting markings from English to French style, it is not a standard parameter that is used, but a special one - a pipe one. One such inch (the international abbreviation and how an inch thread is designated is a double apostrophe - ?) is equal to 3.324 cm. Hence we conclude that the calculation procedure is special. So, for example, the diameter is 3/4? = 25 mm. Here is a brief table of their relationships in the two systems:
| meaning | external d, mm | internal d, mm |
| 3/16 | 4,762 | 3,408 |
| 1/4 | 6,35 | 4,724 |
| 3/8 | 9,525 | 7,492 |
| 1/2 | 12,7 | 9,989 |
| 3/5 | 19,05 | 15,798 |
| 1 | 22,225 | 21,334 |
| 1; 1/2 | 38,1 | 32,679 |
I would like to note that this marking looks more concise.
Correspondence of two notation systems
Metric and inch threads have a relatively small number of differences. Let's take the following signs as an example:
- Shape of the threaded flange profile.
- The procedure for determining the diameter and pitch of the coils.
Various units of measurement are used to indicate the main parameters. When considering a pipe inch in millimeters, it should be taken into account that the indicator is not standard, it is 3.324 cm. Therefore, inch threads in millimeters with a non-standard designation ¾ in terms of the metric designation is 25 mm. The translation is carried out quite often, since the diametrical size is important when choosing fittings and other elements. A table of inch and metric threads can be found in special reference books.
Differences between inch and metric threads
It is worth considering the fact that not many versions of metric and inch coils are compatible. That is why, in most cases, translation is performed to determine the diametrical size of the product on which the connecting surface is cut.
Slicing technologies
There are two common ways:
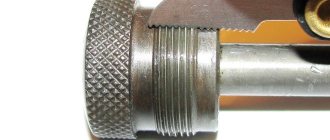
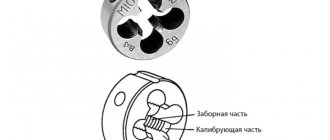
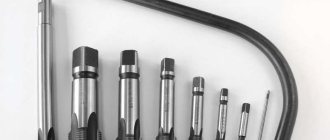
- Manually. For this, a tap and a die are used. The first tool makes a thread in a pre-prepared hole, being installed in a special handle. The second mechanism is designed for external cutting. This is a round device with internal sharp petals, which is screwed onto the workpiece using a holder.
- Using a lathe or drilling machine. For this you need special thread cutting tools. First, a hole is selected. Several passes should be made - from the rough to the finishing stage. To avoid overheating the alloy, machine oil is applied to the screw-in area.
How to determine the pitch
More often, the inch thread pitch is determined using tables and specialized tools, but if there is no access to such equipment and tabular parameters, you can use other methods:
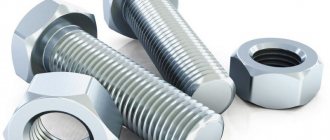
- Using a nut and bolt. You need to select a bolt for the nut that will screw in as freely as possible. Carry out calculations using a ruler and calipers.
- Using dye and paper. Cut a strip from a sheet of thick paper that, when folded, will fit inside the threaded connection without any problems. Apply dye to the internal threads. Place a strip of paper inside and press it against the applied dye with any thin object. There should be an imprint on the paper, by which you can determine the pitch between the turns.
Interesting: What is a coupling, what does it look like and where is it used?
Inch threaded connections are used in the assembly of pipelines for various purposes. They provide high strength to the entire structure and can withstand high pressure and water hammer. Recently, such compounds have begun to gain increasing popularity in the production of household appliances and electronics.
Types of inch threads
There are mainly two types:
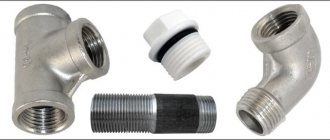
- Cylindrical. More common. It is regulated in Russia by the regulatory document GOST 6357-81. Their difference is that they have smaller and, accordingly, more frequent turns. They are close. They are also more rounded, which has a positive effect on adhesion, making the connection more airtight for liquids and gases.
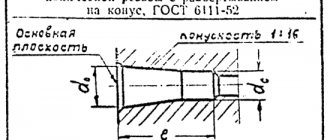
- Conical. It has two subtypes of profile angles - 55 and 60 degrees, so there are twice as many varieties. In addition, it resembles a cone, which makes the pair self-sealing. This results in the fastening area not requiring the use of sealing agents.
Thread according to OST-266
- The main thread dimensions of GOST 6357-81 (BSP) are shown in the table below.
- Comment on the table below.
- d is the outer diameter of the external thread (pipe);
- D—outer diameter of the internal thread (coupling);
- D1 - internal diameter of the internal thread;
- d1 - internal diameter of the external thread;
- D2 - average diameter of internal thread;
- d2 is the average diameter of the external thread.
- When choosing a pipe thread size, the first row should be preferred to the second.
| table 2 | |||||
| Designation of the size of a cylindrical pipe thread (G), steps and nominal values of the outer, middle and inner diameters of the thread (according to GOST 6357-81), dimensions in mm, table: | |||||
| Second row (row 2) | d=D | d2=D2 | d1=D1 | ||
| Thread BSP (BSPP) 1/16″ Thread G1/16″ | 0,907 | 28 TPI | 7,723 | 7,142 | 6,561 |
| Thread BSP (BSPP) 1/8″ Thread G1/8″ | 9,728 | 9,147 | 8,566 | ||
| Thread BSP (BSPP) 1/4″ Thread G1/4″ | 1,337 | 19 TPI | 13,157 | 12,301 | 11,445 |
| Thread BSP (BSPP) 3/8″ Thread G3/8″ | 16,662 | 15,806 | 14,950 | ||
| Thread BSP (BSPP) 1/2″ Thread G1/2″ | 1,814 | 14 TPI | 20,955 | 19,793 | 18,631 |
| Thread BSP (BSPP) 5/8″ Thread G5/8″ | 22,911 | 20,749 | 20,587 | ||
| Thread BSP (BSPP) 3/4″ Thread G3/4″ | 26,441 | 25,279 | 24,117 | ||
| Thread BSP (BSPP) 7/8″ Thread G7/8″ | 30,201 | 29.0З9 | 27,877 | ||
| Thread BSP (BSPP) 1″ Thread G1″ | 2,309 | 11 TPI | 33,249 | 31,770 | 30,291 |
| Thread BSP (BSPP) 1.1/8″ Thread G1.1/8″ | 33,891 | 36,418 | 34,939 | ||
| Thread BSP (BSPP) 1.1/4″ Thread G1.1/4″ | 41,910 | 40,431 | 38,952 | ||
| Thread BSP (BSPP) 1.3/8″ Thread G1.3/8″ | 44,323 | 42,844 | 41,365 | ||
| Thread BSP (BSPP) 1.1/2″ Thread G1.1/2″ | 47,803 | 46,324 | 44,845 | ||
| Thread BSP (BSPP) 1.3/4″ Thread G1.3/4″ | 53,746 | 52,267 | 50,788 | ||
| Thread BSP (BSPP) 2″ Thread G2″ | 59,614 | 58,135 | 56,656 | ||
| Thread BSP (BSPP) 2.1/4″ Thread G2.1/4″ | 65,710 | 64,231 | 62,762 | ||
| Thread BSP (BSPP) 2.1/2″ Thread G2.1/2″ | 75,184 | 73,705 | 72,226 | ||
| Thread BSP (BSPP) 2.3/4″ Thread G2.3/4″ | 81,534 | 80,055 | 78,576 | ||
| Thread BSP (BSPP) 3″ Thread G3″ | 87,884 | 86,405 | 84,926 | ||
| Thread BSP (BSPP) 3.1/4″ Thread G | 93,980 | 92,501 | 91,022 | ||
| Thread BSP (BSPP) 3.1/2″ Thread G3.1/2″ | 100,330 | 98,851 | 97,372 | ||
| Thread BSP (BSPP) 3.3/4″ Thread G3.3/4″ | 106,680 | 105,201 | 103,722 | ||
| Thread BSP (BSPP) 4″ Thread G4″ | 113,030 | 111,551 | 110,072 | ||
| Thread BSP (BSPP) 4.1/2″ Thread G4.1/2″ | 125,730 | 124,251 | 122,772 | ||
| Thread BSP (BSPP) 5″ Thread G5″ | 138,430 | 136,951 | 135,472 | ||
| Thread BSP (BSPP) 5.1/2″ Thread G5.1/2″ | 151,130 | 148,651 | 148,172 | ||
| Thread BSP (BSPP) 6″ Thread G6″ | 163,830 | 162,351 | 160,872 |
Tightening torques for fastening inch threads
This indicator is recommended when working with threaded connections. It indicates the maximum force that can be applied to a part. If it is exceeded, the turns may be cut off (screwed together), the element will deteriorate and lose its functional value. And if, on the contrary, minimal, insufficient force is applied, then during operation under the influence of vibration and other factors spontaneous unwinding will occur, which is also fraught with breakdown or accident. Let's give a small table with recommendations; according to the standard, force will be measured in Nm, that is, in Newton meters. By the way, 1 Nm is approximately equal to 0.1 kgm.
| diameter, inches | tightening torque, in nm |
| 1/4 | 12± 3 |
| 3/8 | 47± 9 |
| 7/16 | 70± 15 |
| 1/2 | 105± 20 |
| 5/8 | 215± 40 |
| 3/4 | 370 ± 50 |
| 7/8 | 620± 80 |
| 1 | 900 ± 100 |
| 1; 1/2 | 3100 ± 350 |
Accuracy classes and marking rules
A thread belonging to the inch type, as indicated by GOST, can correspond to one of three accuracy classes - 1, 2 and 3. Next to the number indicating the accuracy class, put the letters “A” (external) or “B” (internal). The full designations of thread accuracy classes, depending on its type, look like 1A, 2A and 3A (for external) and 1B, 2B and 3B (for internal). It should be borne in mind that class 1 corresponds to the coarsest threads, and class 3 corresponds to the most precise threads, the dimensions of which are subject to very stringent requirements.
Maximum size deviations according to GOST
To understand what parameters a specific threaded element corresponds to, it is enough to understand the designation of the thread that is applied to it. The designation in question is used by many foreign manufacturers who work according to American standards relating to elements of threaded connections.
An example of a symbol for an inch thread
This marking contains the following information about the thread:
- nominal size (outer diameter) – first digits;
- number of turns per inch of length;
- group;
- accuracy class.
The designation of an inch thread may also contain the letters LH, which indicate that its turns are not right-handed, but left-handed.
Source: met-all.org
Production: video
We have already talked about two cutting methods. Now let’s take a look at one of them, which you can do yourself at home:
In the article, we wrote about conical and cylindrical inch threads, analyzed their dimensions, provided tables of diameters in inches and millimeters (mm), and also looked at the translation of the metric system. We provided tables, as well as calculation methods, talked about the features (parameters) of choice, and even gave a short historical summary. We hope this information was useful to you. To conclude, there is a video:
After you read the article, you can read about our products. We have been on the Russian market for 15 years – we have been selling bandsaw machines. During this time, we covered almost all cities of the country.
