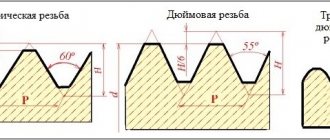
Metric thread is a screw thread on the external or internal surfaces of products. The shape of the protrusions and depressions that form it is an isosceles triangle. This thread is called metric because all its geometric parameters are measured in millimeters. It can be applied to surfaces of both cylindrical and conical shapes and used for the manufacture of fasteners for various purposes. In addition, depending on the direction of rise of the turns, metric threads can be right-handed or left-handed. In addition to metric, as is known, there are other types of threads - inch, pitch, etc. A separate category is made up of modular threads, which are used for the manufacture of worm gear elements.
The reliability of the detachable connection depends on the accuracy of the metric thread.
Main parameters and areas of application
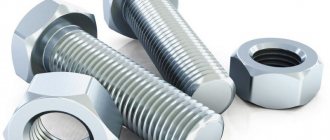
The most common is metric thread, applied to the external and internal surfaces of a cylindrical shape. This is what is most often used in the manufacture of various types of fasteners:
- anchor and regular bolts;
- nuts;
- hairpins;
- screws, etc.
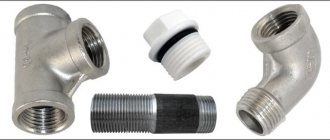
Conical-shaped parts, on the surface of which a metric type thread is applied, are required in cases where the created connection must be given high tightness. The metric thread profile applied to the conical surfaces allows the formation of tight connections even without the use of additional sealing elements. That is why it is successfully used in the installation of pipelines through which various media are transported, as well as in the manufacture of plugs for containers containing liquid and gaseous substances. It should be kept in mind that the metric thread profile is the same on cylindrical and conical surfaces.
Parameters of tapered metric thread
Types of threads belonging to the metric type are distinguished according to a number of parameters, which include:
- dimensions (diameter and thread pitch);
- direction of rise of turns (left or right thread);
- location on the product (internal or external thread).
There are also additional parameters, depending on which metric threads are divided into different types.
Internal metric thread
External metric thread
Measuring the outer diameter of a thread
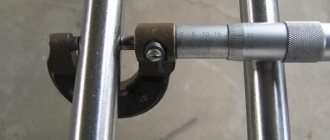
To measure external threads, micrometric instruments are used, the basis of which are microscrews. Control is carried out according to this scheme.
- Microscrews are applied to the thread profile. The position of the instrument is adjusted by rotating the micrometer several times.
- Record the size of the cutting profile for one side. The value is calculated based on the division value on the microscrew scale.
- The micrometer is applied to the opposite end of the profile and its size is calculated.
- The result of measuring the outer diameter of the thread is determined by subtracting the result of the second from the result of the first calculation.
Geometric parameters
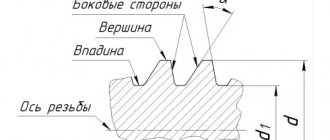
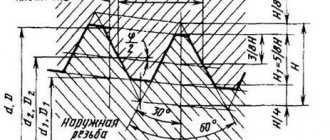
Let's consider the geometric parameters that characterize the main elements of metric threads.
- The nominal thread diameter is designated by the letters D and d. In this case, the letter D refers to the nominal diameter of the external thread, and the letter d refers to a similar parameter of the internal thread.
- The average diameter of the thread, depending on its external or internal location, is designated by the letters D2 and d2.
- The internal diameter of the thread, depending on its external or internal location, is designated D1 and d1.
- The inside diameter of the bolt is used to calculate the stresses created in the structure of such a fastener.
- The thread pitch characterizes the distance between the crests or valleys of adjacent threaded turns. For a threaded element of the same diameter, a basic pitch is distinguished, as well as a thread pitch with reduced geometric parameters. The letter P is used to denote this important characteristic.
- The thread lead is the distance between the crests or valleys of adjacent threads formed by the same helical surface. The progress of the thread, which is created by one screw surface (single-start), is equal to its pitch. In addition, the value to which the thread stroke corresponds characterizes the amount of linear movement of the threaded element performed by it per revolution.
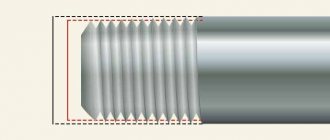
- A parameter such as the height of the triangle that forms the profile of the threaded elements is designated by the letter H.
Geometric parameters of the main metric thread profile
Table of metric thread diameter values (all parameters are indicated in millimeters)
Metric thread diameters (mm)
Complete table of metric threads according to GOST 24705-2004 (all parameters are indicated in millimeters)
Complete table of metric threads according to GOST 24705-2004
The main parameters of metric threads are specified in several regulatory documents.
GOST 8724
This standard contains requirements for the parameters of the thread pitch and its diameter. GOST 8724, the current version of which came into force in 2004, is an analogue of the international standard ISO 261-98. The requirements of the latter apply to metric threads with a diameter of 1 to 300 mm. Compared to this document, GOST 8724 is valid for a wider range of diameters (0.25–600 mm). At the moment, the current edition of GOST 8724 2002, which came into force in 2004 instead of GOST 8724 81. It should be borne in mind that GOST 8724 regulates certain parameters of metric threads, the requirements for which are also specified by other thread standards. The convenience of using GOST 8724 2002 (as well as other similar documents) is that all the information in it is contained in tables, which include metric threads with diameters within the above range. Both left-handed and right-handed metric threads must meet the requirements of this standard.
GOST 24705 2004
This standard stipulates what basic dimensions a metric thread should have. GOST 24705 2004 applies to all threads, the requirements for which are regulated by GOST 8724 2002, as well as GOST 9150 2002.
GOST 9150
This is a regulatory document that specifies the requirements for the metric thread profile. GOST 9150, in particular, contains data on what geometric parameters the main threaded profile of various standard sizes must correspond to. The requirements of GOST 9150, developed in 2002, as well as the two previous standards, apply to metric threads, the turns of which rise from the left upward (right-handed type), and to those whose helical line rises to the left (left-handed type). The provisions of this regulatory document closely echo the requirements given by GOST 16093 (as well as GOSTs 24705 and 8724).
GOST 16093
This standard specifies the tolerance requirements for metric threads. In addition, GOST 16093 prescribes how metric type threads should be designated. GOST 16093 in its latest edition, which came into force in 2005, includes the provisions of the international standards ISO 965-1 and ISO 965-3. Both left-hand and right-hand threads fall under the requirements of such a regulatory document as GOST 16093.
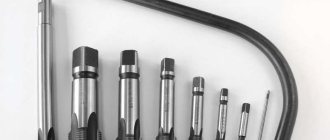
The standardized parameters specified in the metric thread tables must correspond to the thread dimensions in the drawing of the future product. The choice of the tool with which it will be cut should be determined by these parameters.
Important nuances
For a fitter at an industrial enterprise and for a home craftsman, it is equally important to choose a nut for each bolt not only with the same nominal diameter, but also with the same basic thread pitch.
In addition, it will not be superfluous to make sure that both elements of the threaded connection have the same direction of rotation and an equal number of starts.
An attempt to screw on an unsuitable nut, even if it seems successful at first, will lead to damage to the threads or complete failure of the thread.
Designation rules
To indicate the tolerance range of an individual metric thread diameter, a combination of a number is used, which indicates the accuracy class of the thread, and a letter, which determines the main deviation. The thread tolerance field should also be indicated by two alphanumeric elements: in the first place - tolerance field d2 (middle diameter), in the second place - tolerance field d (outer diameter). If the tolerance fields of the outer and middle diameters coincide, then they are not repeated in the designation.
Metric thread designation
According to the rules, the thread designation is affixed first, followed by the tolerance zone designation. It should be borne in mind that the thread pitch is not indicated in the markings. You can find out this parameter from special tables.
The thread designation also indicates which screw length group it belongs to. There are three such groups:
- N – normal, which is not indicated in the designation;
- S – short;
- L – long.
The letters S and L, if necessary, follow the tolerance zone designation and are separated from it by a long horizontal line.
Example designation of 24 mm threads of various types (according to GOST 8724)
It is also necessary to indicate such an important parameter as the fit of the threaded connection. This is a fraction formed as follows: the numerator contains the designation of the internal thread related to its tolerance field, and the denominator contains the designation of the tolerance field for external threads.
An example of a threaded connection fit designation in the drawings
Technical term
Thread pitch is the distance that is measured between the pair of top points of two adjacent turns. This distance is measured parallel to the axis of the thread itself. For this purpose, tools such as a thread gauge, a tap with a similar pitch, and a caliper are used. Remember that their use requires certain specific knowledge and skills, but the measurement results obtained with their help will be highly accurate and most correct.
Definition of thread pitch
To determine the thread pitch of a specific hardware, it is best to use a special tool - a thread gauge. By applying its templates to threads on a stud, you can quickly and accurately determine the thread pitch.
If you don’t have such a tool, you can use a ruler with millimeter divisions. To do this, the length of a certain number of notches is measured, and its value in millimeters is divided by the number. For example, if 20 notches are 30 mm long, then the thread pitch will be 30/20 = 1.5 mm.
Another popular method is to find a matching thread with known parameters that matches the unknown one. For a bolt, this is a suitable nut, and for a nut, a bolt.
The online store offers favorable prices for fasteners with different thread pitches. Customers are offered discounts and promotions, additional information is provided, it is possible to work on individual orders, and prompt delivery of goods to regions is organized.
Notes[ | ]
- In a ball screw, the balls roll along helical grooves (threads).
- Chekmarev A. A. et al. Handbook of mechanical engineering drawing. 3rd ed. erased - M.: Higher School, 2002. - P. 98. - ISBN 5-06-003659-6.
- Thread EG-M
- Thread EG-M
- Thread UTS, UNF (undefined)
(unavailable link). Retrieved October 31, 2011. Archived September 3, 2011. - Link on topic
- T. van de Kamp, P. Vagovic, T. Baumbach, A. Riedel. A Biological Screw in a Beetle's Leg // Science. - 2011. - 333 (6038): 52. - doi:10.1126/science.1204245. - PMID 21719669.
Content
- 1 Classification and main features of threads 1.1 Basic parameters of threads
- 1.2 Additional parameters of tapered thread
- 2.1 Metric (M)
Literature[ | ]
- Gulia N.V., Klokov V.G., Yurkov S.A.
Machine parts. - M.: Academy, 2004. - P. 416. - ISBN 5-7695-1384-5. - Anuriev V.I.
Handbook of mechanical engineering designer: in 3 volumes / ed. I. N. Zhestkova. — 8th ed., revised. and additional - M.: Mashinostroenie, 2001. - T. 2. - 912 p. - BBK 34.42ya2. — UDC 621.001.66 (035)(G). — ISBN 5-217-02964-1. - Ed.
Ishlinsky A. Yu. New polytechnic dictionary. - M.: Great Russian Encyclopedia, 2003. - P. 671. - ISBN 5-7107-7316-6. - Yakukhin V. G., Stavrov V. A.
Manufacturing of threads. Directory. - M.: Mechanical Engineering, 1989. - P. 192.
