Various welding works are carried out at work and at home. The same car is mostly made of metal. Rust, deformation and defects may also require welding.
That’s why many car owners have such a device at home or in the garage. And probably someone has heard that a welding machine, that is, an inverter, is suitable as an alternative to a charger. Supposedly you can use it to charge the battery in your car.
One part of the audience is skeptical. They doubt the effectiveness and safety of this method. Others have tested everything in practice and have no doubt that the inverter is really capable of replenishing the charge in the battery. We need to figure out who is right here.
Where to begin
To begin with, it is worth asking whether it is possible in practice to effectively and safely charge the battery from your car, armed with a welding machine. Ask any experienced welder. He will say that yes, this can be done.
This looks logical and natural. But it is important to comply with the conditions.
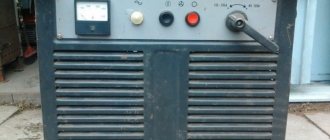
The battery can be charged only if the inverter has a start-charging function, as well as with the ability to configure current and voltage parameters.
All other welding methods will not charge the power source.
A large number of devices with such capabilities are now sold. Therefore, the inverter actually turns into a start-charger.
Based on one device, you get a device with 3 functions:
- welding;
- start;
- charger.
Under these conditions, you can charge a lead-acid battery using a welding inverter.
But not all devices have this mode. Therefore, it is worth looking at the instructions and operating instructions before attempting to charge the battery.
How to spot weld a battery yourself
Batteries are used in many household appliances and tools. Sometimes, it is necessary to replace one or more elements. They are connected into a block of a certain voltage, and the poles are welded together with a metal strip using spot welding.
The soldering method is not suitable here, since this connection method causes strong heating of the internal part of the battery, which leads to its failure. Therefore, if you need to repair lithium-ion batteries yourself, you need to purchase a spot welding machine (spotter) or make it yourself.
Comparison of inverters and chargers
You already know whether welding can be used as charging. In some situations, welding equipment works no worse than a special charger.
But it will be natural to compare them with each other.
- Purpose. Chargers are specially designed to charge car batteries. To achieve this, appropriate design, components and parts are used. The welding machine (SA) is already a multi-functional device. Its main task is metal welding.
- Price. For a regular charger you will have to pay significantly less money than for a CA with the necessary functions. A decent device is expensive. It is not advisable to buy it just for the charging function.
- Functional. The memory's number of functions is limited by the manufacturer. This is only charging, or charging, power supply, starting device, etc. The more functions, the usually higher the price. Good chargers are those that can charge batteries and also carry out desulfation. Welding inverters are more versatile. This is equipment for working with metal and servicing batteries at the same time. You can even start the engine if necessary.
What's the result?
The bottom line is that the functionality of a number of welding inverters is much higher than users assume. One device provides equipment for metalworking and maintenance of car batteries.
Car battery diagnostics
Yes, no one in their right mind would buy an inverter instead of a standard charger if there is no need to perform welding operations. It's a waste of money. If you need a device for full battery maintenance, charging, desulfation, starting or powering consumers, it is better to take a multifunctional charger.
But there are other situations. The man is a welder. Or someone in the family does similar work. He has a corresponding inverter at his disposal. And recently the family bought a car. Sooner or later you will have to charge the battery. But if you already have an inverter, then there is no urgent need to purchase a charger.
It will be objective to recognize that an inverter is a temporary replacement or alternative to a charger in certain situations. It’s still better when welding is performed with a welding device, and the charger is responsible for charging the battery.
Have you ever charged a battery from an inverter? Why was there such a need? How scary was it to carry out such a procedure for the first time? How did the result live up to expectations? Does it make sense to abandon the charger in favor of a welding inverter?
Charging instructions
Now let’s talk about how to charge batteries using a welding machine correctly.
First, make sure that the CA model you are using has the required features. Otherwise, the consequences of connecting the power source to the inverter will be unpredictable. But certainly dangerous.
The danger with conventional welding is that it has a very high voltage output. It is several times higher than the recommended parameters for charging car batteries.
A standard inverter outputs about 50 Volts. If you connect it to a battery, the battery will burn out instantly.
There is a risk of the casing rupturing. And since there are not only lead plates inside, but also electrolyte, this is a direct threat to human health and life. After all, an electrolyte is a mixture of water and sulfuric acid.
Those who decide to use a welding machine to charge a dead car battery with their own hands must act strictly according to the instructions.
The sequence of actions will be as follows:
- First, read the owner's manual as well as the manufacturer's instructions. Check where and how the welding machine is turned on and how the start-charging mode is activated. Only with its help will it be possible to charge the car's power supply.
- Make the necessary settings. The desired voltage is selected first. Most multifunctional inverters have 12 and 24 V modes. Everything is simple here. If you have a passenger car, then its on-board network runs at 12 Volts. The mains voltage on trucks and buses is 24 V. And the batteries are appropriate.
- Now select the charging current options. This is easier and more correct to do based on the nominal capacity of the battery. You should take 5% of these values.
- An important nuance is that when using conventional chargers, a charging current of 10% of the battery capacity is used. In the case of an inverter, it is important to take 2 times less. Hence 5%, not 10%.
- Connect the welding machine to the car battery. Observe polarity strictly. The minus is connected first, and then the plus comes. When removed, the opposite is true. The minus must be removed first, and only after it can the positive terminal and wire be disconnected.
- Finally, the connected components are connected to a power source in the form of a 220 V household outlet. You just need to make sure in advance that the voltage does not jump and that the outlet itself is in good condition.
Charging the battery with a welding inverter - respect-koa.com
Batteries are used in many household appliances and tools. Sometimes, it is necessary to replace one or more elements. They are connected into a block of a certain voltage, and the poles are welded together with a metal strip using spot welding.
The soldering method is not suitable here, since this connection method causes strong heating of the internal part of the battery, which leads to its failure. Therefore, if you need to repair lithium-ion batteries yourself, you need to purchase a spot welding machine (spotter) or make it yourself.
The simplest way
The easiest way is to weld the batteries with the battery itself. To do this you will need:
- any car battery, suitable for a drill or screwdriver;
- two soldering iron tips or a piece of thick single-core copper wire;
- relay 500-1000 A;
- capacitor;
- variable resistor;
- stranded copper wire with a cross section of 30-40 mm2;
- switch.
In the field, to weld a nickel plate to a battery, all you need is a battery, charging wires, a piece of solid wire and electrical tape.
Two electrodes are made from the wire. Their ends are cleaned, leveled and secured with electrical tape. There should be a distance of 2-3 mm between the ends of the wires, the ends are in the same plane.
The other ends of the monolithic wire are hooked using charging cable clamps. The pre-charging cable is connected to the terminals of the working battery. Polarity doesn't matter.
Spot welding is ready. The nickel strip is installed on the lithium battery. The ends of the electrodes, which are energized, are pressed to the tape.
A short circuit will occur and the metal at the point of contact will melt. The electrodes must be removed quickly to avoid burning the nickel plate.
At home
For convenience and to improve the quality of welding at home, additional elements are used.
The stranded power wire is connected to a working battery using clamps, and the other ends are connected to a normally open relay contact and to a soldering iron tip.
The second contact of the relay is connected to the second tip. The result is such a circuit that when the relay contacts are closed, the voltage of the working battery will be present at the ends of the tips (electrodes).
A large capacitor, a resistor and a switch are used to control the relay. The capacitor and resistor are connected in series. One terminal of the capacitor is connected to the battery. The common terminal of the switch is connected to a resistor.
In the initial state, the switch should be in the position where it is shorted to the working battery. The capacitor will charge. The relay control winding is connected with one contact to the terminal of the container connected to the battery, and the second is connected to the free terminal of the switch.
When switching, the voltage from the capacitor is supplied to the control winding. While the capacitance is discharging, the relay is closed, and current can flow through it in the event of a short circuit.
To weld, it is enough to place a nickel connecting tape on the lithium battery cell, two tips on it, press it and press the switch . The relay contacts will close and voltage will appear on the electrodes.
Since they are shorted through the plate, a short circuit current will flow through it, which will cause the metal to melt between the points of contact of the electrodes. The welding has been completed.
Using a resistor, you can adjust the duration of the control pulse. Adjustment can be done experimentally. It is necessary when the voltage of the working battery and the thickness of the material being welded change.
From a transformer
Spot welding for batteries can be done with your own hands from a transformer. It can be used to weld not only batteries, but also any thin metal products.
To weld batteries, a high-power transformer is not required; 300-500 W is sufficient. The main thing is to be able to rewind the secondary winding.
The primary winding should be 220V 50 Hz. As a winding wire for the secondary winding, you need to use an insulated copper wire of large diameter. It takes three to four turns.
The body of the spot welding machine can be made of plexiglass or plywood. Plexiglas is of course preferable. The base of the housing must be of such a size that it can accommodate a transformer with connecting wires, a button and a lever with electrodes .
The secondary winding of the transformer is connected to the electrodes using a stranded copper wire with a cross-section not less than the cross-section of the electrodes. The length of the wires from the secondary winding to the working part should be minimal. It is better to weld the connections to reduce the circuit resistance or connect them through screw terminal blocks.
The operating button is installed on one of the terminals of the secondary winding. Springs are installed on the lever and button. They are needed for their rapid return to their original state.
To set a specific welding pulse duration, instead of a button, you can use a thyristor or a power relay controlled by an RC circuit. The resistor must be variable, and the capacitor must be large enough to allow the pulse duration to be varied in the range from tens to hundreds of milliseconds.
There are a large number of circuit implementations of spot welding for batteries. Much depends on the materials available. Circuits may change to increase the functionality of the device and improve its consumer properties, but the essence remains the same.
Source: https://respect-kovka.com/zaryadka-akkumulyatora-svarochnym-invertorom/
Full battery charge
According to the previous algorithm, welding makes it possible to charge the battery only partially. Literally to the point where the car could start. Next, the charging functions will be taken over by the car generator.
Although in practice, using an inverter you can achieve almost 100% charging. Here the conditions will be somewhat different.
Charging continues for 2-3 hours. But the charging current is selected at a nominal value of 2.5-3% of the factory capacity. For example, if there is a 60 Ah battery under the hood of the car, then the charging current will be 1.5-2 Amperes, no more.