What can be made
What can you do at home with hand tools?
The router is universal and can help in the manufacture of furniture and in the construction of a house. In mass production, step-by-step production is used on a highly specialized milling machine. Hand tools are universal, easily reconfigured and replace an entire conveyor of machine tools. A hand router is used when installing doors. Using a template, grooves for locks are cut out in the canvas, and understatements are made to install the hinges.
Furniture cannot be manufactured without grooves for dowels or tenons on the corresponding parts. This operation is preceded by cutting the board. To make the shelf and large cabinet look beautiful, the edges should be processed with a moulder or figured cutter.
Wood crafts in the form of carved furniture, trim, and frames are popular among those who love to make things at home. During construction and renovation, you can make the panels and baseboards yourself. Recently, tables and window sills made of slabs have become popular. Craftsmen make devices with guides along the table. A transverse carriage runs along them. As a result, small hand-held equipment is used to level and polish huge planes of wooden saw cuts.
Table of main types of devices
The table below provides a description of the main types of devices and their intended purpose, as well as features.
| Vertical router | Edging | Rotary | Lamellar | Additive |
| It is also called submersible or rod. The router can be used in both home workshops and industrial use. It is the most common and functional type. | It has a second name - edge. Performs the following operations: cutting shallow recesses, making grooves and others. Given its narrow scope of application, it is recommended to purchase it only for regular use for its intended purpose. | Used for cutting holes and finishing edges. Performs operations not only with wood, but also with plastic and ceramics, tiles and other materials. | Is highly specialized. Purpose - selection of grooves. Its purchase is advisable only in industrial conditions, or in large home workshops. | The main purpose is to create paired holes. It is suitable for use in the manufacture of furniture, therefore it is quite often found in furniture workshops. |
Creativity without limits
Milling equipment is indispensable when processing wood. With its help, you can turn a wooden blank into an elegant decorative product. This equipment is most often used by professionals, but experienced amateurs can also master it. Using mechanisms is not an easy task, so before you start working with them, you need to ensure your comfort and safety. Organization of the workplace is very important. The home craftsman must remember that during work there is a possibility of damage not only to the cutter or mechanical device, but also to health.
Woodworking is not only about working at the machine, but also about preparing the workplace and planning the sequence of work to be performed. Before you start milling, you need to select the appropriate type of cutter for a specific task, taking into account its shape and size. You should select the speed of the machine and the cutting depth and do not forget that the material being processed must be securely attached to the table.
Depending on the specific type of milling device, the rules for their use are different in many aspects. Today, vertical milling machines in which the spindles are located above the work table are widely used. They have proven themselves to be excellent in operations such as wood milling, processing the edges of shelves and round tabletops, making a groove, and joining wooden parts. When processing round structures, an indispensable addition is a special compass with a support plate, which ensures precision processing.
When working with a router, you need to learn how to move it calmly and smoothly. The key is to move the material being processed correctly and safely. This should not be done too slowly, as burn marks may appear on the wood, which can lead to damage to the material.
Chips appear when milling woodworking against the direction of the wood grain. In one pass it is necessary to mill to a depth of up to 8 mm; some models allow adjustment with an accuracy of 0.1 mm. Deep grooves and quarters need to be milled in several passes.
Edge cutters
In most cases, edge cutters have a thrust bearing. Thanks to it, it becomes possible to guide the tool along the template, processing the edges and edges of the workpiece.
Half-rod
The tool creates semicircular protrusions on the edges of workpieces.
If you use a half-rod cutter in combination with a molding or fillet cutter, you can make hinged joints. Half-rod tools are also used to produce round rods. In this case, the workpiece is processed on both sides.
Curly
These shaped cutters are also called multi-profile cutters. Depending on the tasks, the master can use part of the equipment profile or use it completely. In the second case, you will need to install the tool in a unit that has a power of at least 1600 W.
Fillet
Designed to give the workpiece ribs an internal radius or to make grooves with a circular cross-section.
Fillet cutters are equipped with one or two bearings, eliminating tool distortion.
Conical
Using cone cutters you can:
- chamfer the edge of the workpiece;
- decorate the edge of the tabletop;
- create an angular cut on the edges of the workpiece before gluing them (polygonal-shaped products can be obtained).
Also included in this category is an edge cutter with a blade angle of 45 degrees.
Folded
Used for cutting quarters and grooves of rectangular section. Thanks to the thrust bearing, the rebate cutter can be used on both straight and curved workpieces.
To adjust the groove depth, thrust bearings of different diameters are used.
The slotted disc cutter also falls into this category. With its help, a groove is cut in the workpiece for installing a T-shaped PVC edge.
Mouldings
Moulder cutters allow you to obtain an arched, straight, or shaped edge on a workpiece. Working with any part of the same equipment, you can:
- round the edge of the part;
- get a rebated edge;
- make a semi-rod protrusion;
- get edge with sponge;
- make decorative processing of the ribs, for example, making window frames.
You can also use molding cutters to create complex shaped ornaments on the edges and ends of a wooden part.
The equipment in this series can also be double, as shown in the following figure.
On a double cutter, the distance between the elements can be changed in accordance with the thickness of the workpiece. Thanks to two elements, the workpiece is processed in one pass, simultaneously on both sides.
Direct
A straight edge (overrunning or end) cutter is used for finishing the ends of a workpiece or creating an ideal 90 angle between the face of a part and its edge (end). The bearing can be installed at the top or bottom of the tool.
With the lower position of the bearing, the template is fixed under the workpiece, and with the upper position - above the workpiece.
In addition to the facing function, the equipment with the upper bearing can be used as a groove tool and cut a rectangular groove on the workpiece face, of course, using a template of a certain height. The diameter of the bearing is usually equal to the diameter of the tool, meaning it is flush with the cutting edge. But in some cases it is changed to a smaller or larger diameter in order to expand the capabilities of the equipment.
Milling cutter “corn”
The corn cutter is also an edging cutter. Its main purpose is to grind and align the edges of the workpiece according to the template. Thanks to the special arrangement of the knives (in a spiral), easy chip removal and smooth operation of the tool are ensured.
Wood coating after milling
Wood easily absorbs moisture and dries, changing its geometry. Even after milling the product, it may warp, which is most often unacceptable. To prevent this from happening, wooden blanks and products must be stored at constant low humidity.
Another important process is coating, which serves several purposes at once:
1. Protects wood from moisture.
2. Gives the product a smooth surface and removes micro-irregularities.
3. Creates a layer that protects the part from external mechanical influences.
Different coatings can be used for different purposes: paints, varnishes, primers.
Wood milling on CNC machines ensures high manufacturing accuracy and is good for the production of serial products: parts are made according to the same program and have excellent repeatability. Often it is visually impossible to distinguish whether a product is produced on a CNC router or made by hand.
What is a router and why is it needed?
A router is a device for processing wood or metal. They process flat and shaped surfaces, and also form technological recesses - grooves, ridges, recesses for installing hinges, etc. According to the installation method, there are stationary machines (there are different types to perform different operations), and there are manual milling machines. Hand-held electric milling machines are a universal tool that allows you to carry out any operation. To change the operation, you just need to change the attachment - the cutter and/or its location on the part.
Machine tools are used mainly in mass production. In them, the cutter is installed motionless, and the workpiece moves along a certain trajectory. When working with a manual router, the situation is the opposite - the workpiece is fixed motionless and the router is moved. When processing large volumes of identical parts, it is more convenient to mount a hand router on a horizontal surface, making something similar to a milling machine.
Homemade milling machine - a horizontal plane with a hole in the middle, to which a manual router is attached from below
There are many different types of milling machines, but for the home craftsman or semi-professional use, universal ones are more suitable. They are equipped with various cutters and special devices, which allows you to perform any operation. They just require more time and skill to perform than on a specialized machine.
What can be done with a hand router:
- grooves and recesses of any shape (curly, rectangular, complex shapes);
- through and blind holes;
- process the edges and ends (can be made straight, or curly);
- cut out complex parts;
- apply inscriptions, patterns, drawings to the surface;
- copy details.
Copying parts is one of the capabilities of an electric milling machine
Similar operations are used in carpentry, in the production and assembly of furniture. A hand router can even cut into a lock or hinges on a door. Moreover, it will do this much faster and more elegantly than similar operations performed using hand tools.
Special kits
In the woodworking industry, kits designed for special applications are often found. These include, for example, the production of inserts for hinges. This kit is a manufactured, customizable template that is immediately equipped with fasteners for milling.
Craftsmen make most of these parts themselves. It is enough to install a second stop jig on the rods and then a router will be securely attached to the end of the door leaf, which can easily be used to cut holes for hinges or a door lock. This method is useful, but inconvenient, so it is more suitable for one-time use.
Milling work is a great way to earn extra income by processing wooden blanks or just to while away your free time. These works require minimal investment, and most of the devices can be done with your own hands.
A few words about the main thing
A router is a universal tool that is used for processing wood. Experts often use it during repairs. For example, drill holes, install locks on the door, etc. In carving, the tool is designed for processing the edges of products.
Not all craftsmen are able to work with a router. Very often in educational books you can find a quote: “Learn to work with a jigsaw and chisels. Try doing the work with your hands. Once you gain experience, it will be easier to handle the router.” When choosing, you should consult with specialists so as not to buy a low-quality tool.
To get started with the tool, you can sign up for courses. Unfortunately, they can be expensive or not everyone will want to attend them. Nowadays, it is quite easy to find tutorials. There are video tutorials that will help you learn the basics of working with a router. Examples of some of them are listed below.
A milling cutter is a difficult tool, so before watching the video you need to read the instructions on how to use the tool. Many sites and books offer the basics of assembly, settings, and tell you about the purpose of each cutter. In specialized stores you can find additional attachments for the router.
The router diagram for beginners is shown in the photo:
Carving with a manual wood router: areas of application of the tool
This device is a universal tool for performing a large number of technological operations when processing surfaces and parts. It should be noted that the milling machine can be used not only for wood. By practicing special attachments and devices, you can process plastic, glass, stone, and non-ferrous metals.
Using this equipment you can even perform figured wood carving
Before you buy a manual wood milling machine, you should determine the scope of its application for each specific case. Using a router, which comes with all the necessary attachments, any home craftsman or just an ordinary business person can perform the following technological operations:
- preparation of seats for placing door fittings, awnings, dowels;
- choice of quarter or fold;
- production of various holes, including figured ones;
- polishing or grinding the surface;
- profiling of product edges;
- patterning of blanks and their subsequent cutting in accordance with the required sizes;
- making grooves and making tenons;
- rough surface treatment;
- wood carving;
- engraving of any material;
- drilling straight or spiral grooves;
- creating various grooves on the surface.
The design features of the device, as well as the variety of sets of wood cutters for a manual router, significantly expand the functionality and quality of work.
Without a router it is difficult to smoothly process the edge of the workpiece
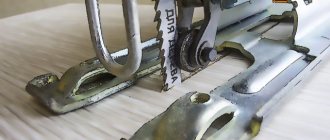
Rip fence
This device is used to create shaped or even slots. The parallel fence is considered a common item that is included in the standard kit for most devices. Its design includes the following parts:
- Guides in the form of rods. They are used for niches on the surface of the router.
- A locking screw that helps fix the required position of the device.
- Screw , which creates the necessary space between the blank and the axis of the tool.
- Contact lips. They help to obtain a stop for the router on the surface of the material.
The parallel fence is used to perform many tasks. To prepare it, proceed according to the following scheme:
- There are small holes on the body of the stop where a special rod should be fixed. When using a locking screw, it is securely secured.
- After fixing, the locking screw is slightly unscrewed, and using the adjustment screw, the position of the stop is changed to the required level.
If you know all the structural elements and the method of operation, then you can create a rip fence with your own hands. For its production, metal parts, bars, and several screws are useful. A huge number of types of rip fences are sold in stores. They are selected in accordance with the characteristics of the router used for milling wood.
Example of a stop drawing:
What can you do with a wood router depending on its power?
Using a conventional hand router, you can round the corners and ends of furniture panels made of wood and MDF, drill holes, make radii and align corners, mill and groove surfaces. However, the functionality and ease of use of a particular model directly depends on the power. Based on what you plan to do with a router, one or another tool option is selected.
- Low power manual milling machines (500-1200 W). This type of manual milling cutter is designed to work with cutters with a working diameter of about 32mm and shanks of 6-8mm. Suitable for those who make small household items from wood (dishes, hanging shelves, frames, boxes, etc.). Or plans to use it from time to time to solve certain problems.
- Medium power milling cutters (1200-1900 W). The power of a router ultimately determines its weight and size; a larger and heavier tool is more difficult to process small parts. The optimal length of the cutter shank for a medium-power device is 8-12mm.
- High power milling cutter (1900-2400 W). Designed for the manufacture of furniture facades, cutting, processing long edges and other work with dimensional parts. Most often it is fixed with the help of various devices on workbenches and work tables, manually, holding the tool in weight, it is difficult to achieve the required accuracy and precision in processing surfaces and ends.
With large volumes of work, it is not always rational to spend time on several approaches to process each workpiece. Therefore, in this case, it is better to purchase a high-power milling cutter.
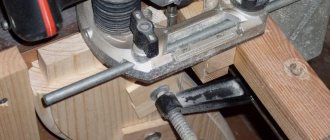
Guide rail for milling machines
This device for the router is needed to ensure straight movement of the cutting edge. The tire saves significant time by allowing you to guide the tool at any angle to the edge.
The user can create a unique version of the bus for his own needs. The simplest option is a ruler, fixed in any convenient way. To ensure stability, plywood is used by nailing a board or beam to it, against which the edge of the milling base will rest, while the base will provide the processing area. The board does not need to be nailed down, but rather attached with spring clips. This will make it possible to use cutters of different diameters and adjust the distance from the working area depending on the size of the cutter.
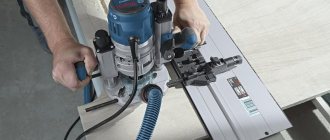
How to use a hand router
The easiest way to start learning is with a plunge router. Visually, such a tool is the most bulky and complex, but it is easier to work with, since the direction of the cutter is fixed by the design of the machine perpendicular to the surface being processed.
Step 1. Secure the cutter shank in the collet.
You need to insert the shank into the chuck and tighten it with the wrench provided for this purpose.
At this stage, it is important to correctly calculate the tightening force. Over-tightening is undesirable and insufficient fixation is also undesirable.
https://youtube.com/watch?v=vA4UZ-nf2XQ
Attention! If you are planning a deep recess, it is better to take a cutter with an extended shank. Step 2
Setting the excavation depth
Step 2. Establishing the excavation depth
If the work is carried out according to the drawings and the groove is shallow, you just need to set the appropriate depth on the limiter and set the fine adjustment (if the model has fine tuning). If milling is done “by eye”, you need to estimate the depth of the tool by placing the milling cutter against the end of the product. The depth can also be selected in stages - when producing more than 3-8 mm (depending on the diameter), precision work or at the training stage.
https://youtube.com/watch?v=-TxLEB_7NUY
Step 3. Testing the operation of the router
For those who have no milling experience, have purchased a new tool, or are working with an unfamiliar type of wood, it is advisable to use a “draft” - the same piece of wood as the future product. You need to test the operation of the cutter, changing the speed, direction (towards you, away from you, turning clockwise and counterclockwise) and the depth of the notch, and monitor the accuracy. Adjust settings.
Step 4. Determine the rotation speed
When operating a cutter, an important indicator is the peripheral speed - the rotation speed not of the shank, but of the surface of the cutting tool in its widest part. If the cutter rotates too quickly, it will tear out wood fibers and leave gaps; if it rotates too quickly, the material will get burnt. If the rotation is too slow, the surface of the product will be rough, as if covered with “ripples”.
When adjusting, the rule applies: the larger the diameter of the cutter, the lower the speed on the shank (shaft revolutions) should be. Some manufacturers provide tools with instructions: wood/diameter/speed. If there is no such data, you need to experiment.
1 — too low speed; 2 — too high speed; 3 - uneven movement of the cutter at high speeds; 4 - good result
Step 5. Fixing the product
The wood being processed should not wobble. The result of your work will be spoiled and you may injure yourself. The workpiece must be laid on a reliable base and secured, for example, with clamps. When using a template, it is also fixed.
Step 6. General rules for preparing for work
Markings must be applied to the workpiece (when working without a template). The milling operator's movements should not be sudden. A smooth start and smooth, uniform movement along the calculated trajectory, a correctly selected number of revolutions is a recipe for an ideal and beautiful result.
When working, you should not lean your whole body on the router or let it float freely. The pressure should be tight, confident, and uniform throughout the entire stage.
Attention! The instructions for the machine will indicate how to hold the router correctly. Each model has handles for safe operation
Step 7. Milling the finished product
The start of work can be from the edge of the product (open groove) or in its mass (blind groove). In the first case, you must first install the router and then turn it on. In the second, turn it on and then move the cutter to the desired point. Upon completion of milling, you need to turn off the tool after removing it from the wood.
When making deep grooves and step cuts, you should always turn off the tool for adjustment. The maximum single depth must correspond to the diameter and material of the cutter, and the density of the wood. To obtain a smooth surface, the last removal should be no thicker than 1.5 mm.
It is important to correctly determine the speed of movement of the router along the line being processed. Too slow will cause overheating and burns
If you move too quickly, sawdust will not be removed in time, the work will be difficult, and it may look sloppy.
The basic rule when choosing the direction of movement of the router is: in the direction of the approach of the cutter blades (cutting edges). This applies to both free milling and tooling.
To process edges and obtain a certain edge configuration, sometimes the router is fixed under the table, with the router rising above the tabletop, and woodworking is performed by moving the workpiece relative to the router. Thus, from the category of a hand tool, it moves into the category of a mini-machine.
Copy ring
Copy rings are devices used as edges.
During the milling process, the ring moves along the template, giving the required position to the tool. To fasten the rings, screws, threaded holes and antennae are used.
The diameter of the ring approximately corresponds to that of the router. The device is made from steel that can withstand heavy loads. Flexible metals are not used because they deform quickly.
To produce a similar device, an angle lever and copying probes will be useful. The angle lever has a scale, each division equals 0.1 mm. It helps center the stop ring under the cutter to create the desired shape of the holes on the blanks. For convenience, chip protection and a support plate are added to the device, which can improve the quality of edge processing.
During cutting, the router does not touch the edges of the ring. In the opposite situation, the cutting tool will be damaged and will soon fail.
Using copy templates and rings
Templates are designed for the production of specific types of products. They help make the shape of finished items more accurate and even. Ready-made templates, which can be purchased in the store, have the following characteristics:
- Some template models are used to create models along a rectilinear contour, while others involve circular or charcoal cutting. Often, for household purposes, a template is used to help round corners at different radii.
- Certain types of templates are supplemented with rings or bearings for manual processing. If the model has a ring, then during processing it does not touch the edges of the router.
- Templates are also used when milling blanks with grooves of unusual shape. For example, you can quickly make a template with your own hands to create grooves for door hinges.
To make templates at home, wooden blanks are used. This is done due to the fact that wood is easy to process, so any patterns can be made on it for future work. And when milling, the template fits perfectly with the processed objects due to its ability to accurately repeat the geometry of the object.
To make a template with your own hands, place a piece of wood under a router and, after marking, cut out fancy shapes. For use in work, the template is attached to the blanks with double-sided tape and pressed with clamps. It is especially convenient to use homemade templates to cut not the entire edge of the material, but only its corners.
Where to begin
In order to “make friends” with a router, you need to practice on simple products. Working according to the template will help you get better. Take a pre-prepared blank and apply a drawing, trying to maintain the proportions. Finding templates is easy. There are options on the Internet that are easy to transfer with a pencil.
Drawings for inspiration:
Patterns on products may vary. Everything depends on the imagination of the creator, because the one who creates sees the work in his own way. Beginners, having mastered the basic rules, proceed to complex ones. You can learn to adjust the depth of the cut by adding patterns with different cutters. To make the work unique, craftsmen add notched carvings to the products.
Effective work
Using a hand-held electric router is suitable for artistic carved furniture. Artistic carvings look especially beautiful on furniture. Cutters of different sizes and profiles easily perform various tasks. Unfortunately, it is impossible to make triangular-notched work with a router. This task is suitable for chisels or knives. Bas-relief, contour cutting on wood - all this can be done with a hand router.
We can say that the functionality of the tool depends on the configuration. Various devices can work wonders, improve the product and make the work of the master easier.
Stencils are suitable not only for conventional tools, but also for a hand router. Examples can be seen below:
What else can you use a hand router for? Craftsmen can transform the interior of a home using this tool.
Designer items and interesting objects often attract attention. If you want to change something in the house, then a router is especially for this! He is able to revive old things
A beautiful pattern has never detracted from the look of a tree!
To carry out this kind of task, there is a figured carving that embodies unusual solutions in interior design. It can be used to decorate furniture, parquet floors, and make new decorations. This carving predominates in the Slavic style. Nowadays, it is coming back into fashion and hand-milled products are highly valued on the goods market.
For inspiration, you can look at photographs of works that are most often found on the Internet:
Common Techniques
The most widely used techniques for routing wood are leveling the surface, making grooves, routing the edge and working from a template. More often than others, working according to a template is used. This technique involves precisely sliding the copy sleeve along the edge of the stencil. This method of work makes it much easier to make keyways, trims, figured cuts, cutting parts, and making decorative elements. The template is made from plywood 8-12 mm thick. A design is applied to it and cut out with a jigsaw. Using a template, you can make any intricate pattern, carve out small details, and copy the required number of identical fragments of a product. The router moves along a fixed template with high precision, which allows you to reflect the desired high-quality result on the wooden surface.
Edge milling can be done with or without a template. For this purpose, straight edge cutters are used. The template can be any flat board longer than the workpiece being processed. This is necessary to prevent the formation of irregularities along the edges of the edge.
To make a curved edge, you need to prepare the surface. First of all, you need to level the edge of the workpiece to be processed using a straight edge cutter. Otherwise, it will repeat the curvature of the edge along the edge of which the roller will move. After this, you need to make a template with the desired pattern. It is fixed on the working surface and cut along the contour. If you need to remove a large layer to obtain the required pattern, then use a jigsaw, and the finishing work is done with a milling cutter, otherwise it will quickly become dull.
Using a figured (fillet) cutter, you can make a longitudinal pattern on a wooden workpiece. This can be done using a template or a special stop.
By studying the milling device and learning how to use it correctly, you can greatly simplify and speed up carpentry work, while simultaneously increasing its quality. And wood carving, made by hand using a router, will decorate the interior and become an object of pride for the work done.
Is it possible to do it yourself?
Despite their apparent simplicity, the production of these products requires advanced, high-precision and high-tech equipment. The cutter should be:
- ideally balanced in weight so that there are no eccentric beats at high speeds;
- the profiles of the knives and their location must repeat each other with high accuracy, up to hundredths of a mm;
- cutting edges (knives) must be made of hard alloys, which can only be profiled and sharpened with an even more durable tool.
For these reasons, it is almost impossible to make a cutter yourself without equipment. The exception is simple straight knives on equipment with replaceable blades. In theory, you can cut the desired size from, for example, planer knives. But even here there are problems with balancing the weight and drilling holes for fastenings in solid metal.
In a home workshop you can sharpen some types of profiles. This is done from the back side of the cutting edge, since it is impossible to do this on a curved profile from the side of the tip, sharpened at an angle.
Sharpening is carried out with a flat diamond file. But it’s more effective on a sharpening machine, a thin or bowl-shaped wheel that fits into the niche of the cutter and reaches the surface to be sharpened.
Severe overheating during sharpening is unacceptable, as this will change the factory characteristics of hardening (heat treatment) of the metal. Sharpening is carried out until a small chamfer appears on the reverse side. Then the chamfer is carefully removed with zero-grit sandpaper, using light movements so as not to dull the tip.
Techniques for working with a wood router. Video tutorial.
Before starting work, you should make sure how well the screws and threaded parts are tightened. It is necessary to remove the safety nut and the collet and make a control cut.
Open groove
If the groove is formed at the very edge, then you need to install the tool in such a way that the cutting blade will be above the edge of the workpiece. Then the blade is lowered to a predetermined depth, and the basket is fixed. After processing the edge, lift the cutter and loosen the lock.
Deep groove
In this option, after drilling the area being processed, you have to re-adjust the new immersion depth of the cutter by turning off the router. The recommended depth should not exceed 5 mm, especially for hard workpiece materials.
Narrow groove
A flat base is attached to the router sole. There are guide rods attached to the sides, which are necessary for the straightness of the router's movement.
End surface
To obtain a clean edge, you must initially make a shallow cut, guiding the tool along the line of rotation of the knife. This way the material will be selected evenly, after which the end is cleaned in the usual way - the router must be driven in the opposite direction to the direction of rotation of the cutting element.
Curved edges
To mill edges, the craftsman needs templates with a thrust ring secured with ties on the base of the tool. The template is fixed to the workpiece using double-sided tape and tightened with clamps to the workbench. There should be no sudden movements when working with the tool. As they say, the first pancake is always lumpy, don’t be upset at the first failures. If you enjoy working with a router, this activity can turn from a hobby into a completely profitable business for the rest of your life.
Rotation speed selection
The quality of wood surface treatment depends on the speed of rotation of the router. An even and perfectly smooth surface is obtained at a higher speed of the milling cutter. A beginner should start with low speeds, because when milling wood, you need to apply a certain force, direct the router in the desired direction and hold it securely in your hands. Once you have mastered the tool, you can move on to higher speeds. The router speed setting depends on the wood being processed, the depth of processing and the diameter of the cutter. It can range from 7000 to 24000 rpm. There is a special knob in the milling cutter body for adjusting the speed. The minimum speed is used when milling large depths or engraving with a large diameter cutter.
If the carving is carried out along the grain of a wooden workpiece, the average speed of revolutions stops. Cross carving requires maximum speed to avoid chipping the edge of the wood piece. At the same time, it is necessary to reduce the speed of movement of the tool, since the speed of rotation is interdependent on the speed of movement. Different types of wood require different processing approaches. Hardwoods such as oak, walnut or beech should be milled at a minimum speed of movement of the router. Soft woods such as pine or birch are milled at a faster feed rate.