How to repair minor damage?
If there is a hole in the coating, do not put off repairing it, as it will increase in size over time. Depending on the size of the damage, a method for eliminating it is selected. There are various methods for eliminating holes that form in linoleum during operation.
The easiest way is to remove small flaws. Let's consider a technology that allows you to eliminate a small hole in linoleum, the dimensions of which do not exceed 1 square centimeter. To eliminate the flaw, you will need to prepare the following tools and materials:
- polymer mastic;
- solvent;
- pigment;
- putty knife.
Note! If desired, you can purchase a ready-made kit designed for repairing damaged coatings. It includes all the necessary tools and materials.
So, the initial stage of eliminating a hole is cleaning the damaged area. Within this area, it is necessary to remove any contamination, and also process the edges to remove burrs. Next, degrease the hole and begin preparing the repair mixture.
Mastic is the basis of the mixture. It is necessary to mix pigment into it. The color of the dye is selected depending on the type of coating. The damaged area is repaired using this mixture. To apply it, as a rule, a spatula is used. Next, you need to treat the surface around the hole with a solvent. This option is not suitable for fixing a large hole.
After treating the hole, you need to wait a while for the repair mixture to dry. Then it is processed using dense fabric for this purpose. If you don't have mastic, cold weld glue is an alternative.
Causes of defects
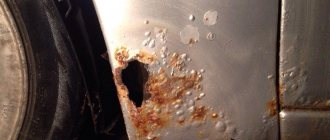
Many people mistakenly believe that due to its high elasticity, linoleum will fit perfectly even on an uneven base that has not been prepared beforehand. But the material will not lie on the holes. Of course, such depressions will be disguised, but linoleum will not be able to fill them. As a result, with minor mechanical stress, the material can be perforated.
Repair of linoleum is carried out depending on the nature of the damage
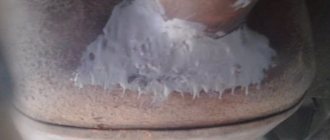
Laying PVC material on a damp base will cause it to swell. A similar result is also possible when using low-quality glue or a too thin layer of mastic. In such cases, some time after the glue dries, the linoleum will begin to peel off. Peeling can occur hours or months after installation.
Blistering of linoleum
Careless handling of the floor covering can also lead to various types of damage, such as cuts or tears. If the installation technology is incorrect, linoleum seams may delaminate. All possible defects negatively affect the appearance of the apartment and the floor in particular.
Green stains on linoleum
How can you seal a hole in linoleum?
To make repairs, an adhesive composition without chemically aggressive elements can be used. Otherwise, traces of chemical exposure will remain around the repaired area.
If you are not sure that the glue is suitable, you can check it. To do this, you can take an unnecessary piece of linoleum that is laid on the floor and apply a drop of glue to it. If after a few minutes of waiting there are no traces left, then it can be used for work.
The following types of glue can be used to repair linoleum:
- For linoleum with a base in the form of fabric or felt, you can use Bustilat glue, which has strong adhesion to various types of materials that are used to make subfloors: concrete, plywood and others.
- The use of PVA glue is popular. It is suitable when using linoleum with various types of base, as well as in its absence. Its use is productive where there is no high humidity. If there is liquid in the place where the patch is applied, the linoleum will come unstuck.
- Homakoll 208 glue has universal application. It has good adhesion to wood and concrete surfaces. It reliably glues the material with or without a fleecy, fabric backing to the subfloor.
- ADESILEX G19 is a polyurethane adhesive. It can be used in dry or damp areas.
- Khomakol carries out cold welding when gluing linoleum. Used to eliminate small defects. It is used in the presence of cracks, cuts or small holes.
In cases where the damage is small, it is convenient to use mastic to seal it.
These materials are supplied to almost any hardware store.
Types and characteristics of glue
The choice of adhesive depends on the surface on which the installation is being made and the type of coating itself. At the moment, linoleum adhesives are presented in dispersion and reaction compositions.
Dispersive
This type includes water-soluble compounds containing cellulose acid, acrylic, latex, rubber, chalk. They are the safest for health, do not emit a smell, and have good elasticity. They are used for natural and PVC linoleum on different types of bases - felt, fabric and foam.
Adhesive for commercial and semi-commercial linoleum, water-dispersion
The presence of water in the composition causes some restrictions: dispersion adhesive can only be applied to an absorbent base, in dry rooms where the temperature does not fall below 15°C and the humidity does not exceed 60%. The adhesive layer must not be allowed to freeze, as this will cause the material to lose its elasticity and begin to crumble.
Special water-dispersion adhesive for PVC coatings
The group of dispersion adhesives includes:
- acrylate glue – a mixture based on acrylic resin. It is characterized by high adhesion and viscosity, which ensures excellent adhesion of the coating to the floor. Can be used for homogeneous and heterogeneous linoleum with jute and synthetic base;
- Bustilate is a synthetic water-soluble composition with latex, chalk and cellulose thickener. It has high tear strength and elasticity, best suited for thick linoleum on a dense felt base;
- humilax – the composition is based on a mixture of rubber and latex, thanks to which the adhesive is easy to apply, has high elasticity and adhesion to various types of surfaces. Suitable for natural and synthetic linoleum with felt and fabric backing.
Dispersion adhesive for natural linoleum
Reactionary
This type combines two-component compositions containing polymers and epoxy resin. Bonding of surfaces occurs as a result of a chemical reaction, which is caused by mixing the components. This type of glue contains a solvent, therefore it has a pungent odor and is a flammable substance. The advantage of such compositions is the absence of shrinkage, plasticity and resistance to moisture, and they are used mainly for sealing joints between sheets and repairing damage.
Two-component epoxy-polyurethane adhesive for linoleum
Three types of two-component glue are available, differing in their consistency:
- type A is the most liquid, used for all types of linoleum on a rigid basis. It is used to seal joints when laying a new coating, as it forms an almost invisible, but very strong seam. It takes about an hour to fully cure;
- type C - a viscous transparent composition, used for sealing open seams on used flooring. Capable of closing gaps up to 4 mm;
- type T - paste-like composition for fastening seams on PVC linoleum with a polyester base. Intended for professional use, so it is rarely used by home craftsmen.
Popular brands of adhesives for linoleum
| Name | Main characteristics |
| EXPERT Glue Bustilat | Suitable for gluing artificial surfaces to concrete, wooden floors, chipboard, OSB. Used for PVC linoleum on a jute base and felt. Consumption per meter of area is 500-600 g with continuous application, dries within 24 hours at a temperature of 20 ° C |
| PVA glue “Universal” | Thick composition with the addition of latex. It has a wide range of applications, suitable for felt-based linoleum when laid on chipboard, OSB, wood, and concrete screed. Consumption per square meter is 200-500 g. Drying takes 24 hours at a temperature of 18-20°C |
| Clay Polynom 105 | Acrylic composition for all types of linoleum, regardless of the base. Can be used on any surface. Consumption for continuous application is about 300-400 g/m2, drying time is at least 12 hours |
| Homakoll 208 glue | Viscous polymer composition for roll coverings on fabric, pile and foam bases. Used only on moisture-absorbing surfaces - concrete and cement screed, plank floors, chipboard, OSB. Consumption for continuous application is 300-500 g/m2 |
| Thomsit L 240 D glue | Acrylic paste composition intended for gluing natural linoleum to absorbent substrates. Can be used on heated floors. When applied continuously, the consumption is 450 g/m2, complete drying time is 72 hours |
Frost-resistant adhesive for natural linoleum
If the joining seams come apart
Cold welding firmly bonds the material
You can seal the joints with your own hands using the “hot” and “cold” methods.
Cold welding is carried out using a special adhesive composition. Thanks to its active components, the surface at the edges dissolves a little and then sticks tightly together. The layers of material penetrate each other by 1-5 mm.
Step-by-step instructions for performing cold welding:
- We combine two adjacent strips with an overlap of 3-6 mm.
- We draw a straight line in the middle of the overlap.
- Using a sharp knife, cut both strips along the marked border along the entire length. We place a metal strip under them to make it easier to cut under a long metal ruler.
- We throw away the trimmings. We glue masking tape along the entire length of the joint and cut it at the joint. The tape will protect the material from contamination with glue.
- Using a thin tip or a glue gun, fill the joint with glue. After 15-30 minutes, remove the tape.
For hot welding you will need a special tool
Hot welding is performed using a polymer cord heated with a construction hair dryer with a special nozzle.
Repair sequence:
- We expand the joint to 5 mm.
- We heat the polymer cord, it becomes very plastic.
- Quickly, so that it does not have time to cool, we place it inside the seam. Bonding of surfaces is carried out by vulcanizing the edges of the material, while the strips are soldered into one whole.
Joint repair
Loose joints are one of the most pressing problems for floors covered with linoleum.
Broken joints
Sometimes the edges of the canvases only slightly move away from the base, in other cases they swell noticeably and diverge to the sides, exposing the subfloor to view. This kind of problem cannot be left unchecked: debris accumulates in the seams, water gets in during cleaning, mold starts to grow, and the protruding edges become frayed and torn, making it difficult to walk around the room. Let's look at how to connect joints with the greatest efficiency.
Fast way
Step 1. The edges of the canvases are folded outward and all the dust is thoroughly cleaned from under the coating.
The edges of the canvases are folded outward
Step 2. Prime the floor using a small brush and leave until completely dry.
Step 3. Place double-sided tape in the gap between the sheets so that the middle of the tape is located exactly along the seam.
Double-sided tape is placed in the gap between the sheets
Step 4. Remove the protective layer from the adhesive surface and press the edges to the floor.
Step 5. Carefully straighten the edges, press and smooth the seam with your hands. Next, it is advisable to roll this area with a roller to finally level the joint.
Smooth the seam
If the linoleum sheets have shifted during operation and the joint has separated by several millimeters, there is a simple and cheap way to eliminate the gap. To do this, you need to clean the seam from dust, degrease it, and dry it thoroughly. Next, you should take a wax candle, melt it and carefully pour the wax into the gap between the canvases. After this, the remaining wax is easily removed with a spatula blade or knife, and the surface of the seam is polished with a soft cloth.
Cold welding of joints
For high-quality sealing of separated seams, it is best to use C-type cold welding. This glue has a thick consistency and perfectly fills seams up to 3 mm wide. In addition, it melts the sections of the canvas and forms a monolithic surface, impermeable to moisture and dust. But for new linoleum they use A-type glue, which is more liquid and reacts faster with PVC. Let's look at how to do this in detail.
Set of tools
Step 1. The coating strips are laid on the prepared floor, overlapping by 5-6 cm.
Step 2. Mark the cutting line exactly in the center of the overlap, measuring the required distance with a ruler. A line is drawn with a pencil along the entire length of the joint.
Step 3. Apply a ruler or metal strip to the marking and cut through both sheets with a sharp knife.
Making markings
Apply a meter ruler
Cuts right through two sheets in one motion
Step 4. Remove the cut strips to the side and align the edges of the canvases.
Excess pieces are removed
Step 5. Apply masking tape to the joint along its entire length. This is necessary so as not to stain the front surface of the coating with glue.
Painting tape is applied to the joint
Step 6. Using the edge of a knife, carefully cut the tape along the joint line.
Cutting through the tape
Step 7. Take the glue, put a cap with a needle on the tube, and twist it tightly. Next, insert the tip of the needle into the gap and lightly press the tube until a spot of glue up to 4 mm wide forms on the tape. After this, you need to smoothly move the needle along the seam, evenly filling it with adhesive.
Put the cap on
Apply welding
Step 8
After about 15 minutes, when the glue has set, the tape is carefully removed from the linoleum
After 15 minutes, remove the tape
You can walk on the coating after the glue has completely cured. The manufacturer indicates the exact drying time in the instructions on the tube, so before work, carefully study all the information about the composition.
The seam after cold welding is invisible
Repairing large holes in the coating
If the hole area exceeds 1 cm2, sealing with mastic will not help. Depending on the type of damage, two methods of eliminating the defect are used - with and without a patch. Let's look at each of them in detail.
Patching with a patch
The method is used in cases where a piece of covering is completely torn out or there is a through burn through the linoleum. Depending on the size of the patch, it can be glued over the entire area or just around the perimeter.
Repairing holes without patches
This method is used if a piece of linoleum is not completely torn out and remains hanging as a flap.
Torn out flap
To repair such a hole without visible marks, you first need to straighten the torn flap. To do this, you can press it down with something heavy and leave it for a day, or, what is more effective, iron it with a hot iron through damp gauze. To avoid melting the protective layer, the gauze should be folded into 10-15 layers. After the material has straightened, you can begin sealing.
Step 1. The base under the gap is cleaned of dust and dirt.
Step 2. Using a gun, apply liquid nail glue along the perimeter of the damage in a continuous strip.
Applying glue
Step 3. The torn flap is placed in place and pressed tightly with your hand, after which it is rolled out well with a roller.
Rolling for better adhesion
Step 4. Wipe off any excess glue with a damp cloth.
Removing excess glue
It takes at least a day to dry, so protect the repaired area of the floor from any stress. Instead of liquid nails, you can use mastic or linoleum glue.
Linoleum after renovation
Thresholds
If you install a threshold in the doorway to connect the coverings between rooms, this will not require a large investment of effort and money. As a result, the edges of the coating will be secured, and seams and other installation defects that may arise during the process will be hidden.
Advantages:
- It is quite easily secured with the screws supplied with the threshold or with “Liquid Nails” glue;
- reusability;
- easy to replace;
- protects the floor well from water, dirt and dust;
- durability, which especially applies to metal products, and with the right choice of shade, almost complete invisibility;
- additional decorative effect, as the interior will look like it’s finished;
- the difference between coatings of different thicknesses on the floor of the same level can be smoothed out.
To hide the joints of linoleum, you can use special thresholds
Flaws:
slight protrusion above the floor; installation only under an arch or in a doorway, since such seams cannot be hidden in the middle of the room; It is important that the installed thresholds do not interfere with closing the door completely, and therefore you then need to either file the edge of the panel or install the door only after the floors are completely finished.
Types of thresholds
We have not listed all the overlays that are suitable for covering the joints of linoleum with each other or with some other coating.
Here are the types of thresholds, differing in design and installation method:
- straight - suitable for joining linoleum of the same thickness;
- multi-level - to compensate for height differences and join coatings of different thicknesses;
- finishing - they can be used to seal the edges of linoleum without connecting it to any other coating;
- corner - they are used to decorate the seams and edges of linoleum on stairs.
There are several types of thresholds for linoleum
Materials for planks:
- Aluminum and brass are the most commonly used materials due to their strength, durability and attractive appearance. Usually painted to resemble metals such as gold, silver, bronze;
- plastic is short-lived, but cheap. Among the products made from it there are those suitable for rounded joints. The requirements are regulated by GOST 19111-77, according to which door thresholds are semi-rigid products. A plastic strip zones the space and hides the difference in thickness of different coatings;
- rubber overlay on an aluminum base - feet do not slip on it;
- MDF is an unpopular material, very expensive, and it swells from moisture;
- cork is common because it is environmentally friendly, soft, and durable. It also cushions and performs a compensatory function.
Which threshold for joining linoleum is better to choose?
The process of attaching the linings
The planks can be secured with self-tapping screws or by gluing them. Each of these methods has its own differences from the other.
The use of self-tapping screws is much more reliable, and the use of a decorative plug hides the fasteners.
The connection with glue will not be so strong, but for a base that is loose and unsuitable for holding self-tapping screws, you will have to use this particular method.
Algorithm for installing thresholds on self-tapping screws.
| Sequencing | Description |
| Lay the linoleum, adjusting the joints as close to one another as possible. Measure the full length of the seam. The base and part of the linoleum at the joint should be completely cleaned of all types of contaminants. |
| Cut the threshold to the required dimensions and fit it to the joint. |
| Mark areas on the floor where you will then need to drill holes for dowels. Make holes according to the marks, insert plastic elements for fastening there. |
| Place a strip over the seam and secure it with self-tapping screws. Snap on the decorative cap. |
It is easy to join linoleum strips with thresholds to each other and to other coverings. They are not suitable for hiding seams in the middle of a room, but they are quite suitable for decorating a doorway or a joint on a staircase.
Thresholds for hiding linoleum joints can be easily secured using self-tapping screws
How to patch a small hole in linoleum
It is optimal to seal a punctured hole with an area of up to 1 cm2 with mastic. The special composition is usually produced in a neutral color. A colored pigment is added to it before use. It is optimal to buy a special repair kit. It contains a tube of mastic and a set of pigments for mixing.
A puncture with an area of less than 1 cm2 is sealed with mastic
To seal the hole, fill it with prepared mastic using a rubber spatula. The excess around the hole is wiped off with a rag soaked in solvent. After hardening, the mastic has a rough surface. Sand it with thick woolen cloth or felt.
It will not be possible to completely repair a hole in linoleum without a patch if it appears in the drawing. After adding pigments, the mastic acquires a uniform structure. To approximately restore the drawing, dilute a little mastic of a different, more suitable shade, and apply it with a cotton swab.
Advice! Instead of mastic, you can seal the puncture using cold welding, but it must be C-type. Dust-like crumbs scraped with a blade from the decorative layer of linoleum are used as a coloring pigment.
Features of polymer flooring material
Linoleum is a popular polymer roll covering for flooring in a private house, apartment or office. This material is also in great demand for laying floors in industrial premises, warehouses and workshops.
Positive traits
The popularity of using polymer flooring is due to a number of its advantages:
- sufficient density;
- good flexibility;
- waterproof;
- large selection of structures and colors;
- affordable price;
- ease of working with the material.
Coating characteristics
Variety of coating texture
Polymer roll flooring is produced in rolls that have a width from half a meter to 5.0 meters and a length from 6.0 to 45.0 meters. The thickness of such a coating is 1.50 – 5.0 mm, and for laying floors in industrial and sports facilities, the thickness increases to 9.0 mm.
Laying on the floor
The industry produces a coating that has a heat and sound insulating base, so it can be laid directly on a concrete screed without special surface preparation. The base must be level and dry. Laying of the coating is carried out using special glue or polymer mastic.
How to fix a hole in linoleum with a patch
First you need to select a piece of material with the same pattern as the one on the damaged area. If you don't have pieces available, you can cut it under furniture that usually doesn't move.
This piece is placed exactly according to the pattern on top of the damaged area, and glued to it with tape. A rectangle is drawn on it, along which the linoleum will then be cut; the cutting should cover both pieces of linoleum.
The bottom layer is removed, the patch is sealed, and a heavy weight is placed on top of it. After drying, the load is removed. The joints will need to be sealed, for this cold welding is used, glue is injected along the joints using a syringe, then the substance will reunite the parts of the linoleum.
This piece is placed exactly according to the pattern on top of the damaged area, and glued to it with tape.
How to remove holes in linoleum without patches
Cut and torn areas of linoleum can be repaired without patching. It's definitely not needed here. Especially when the joints of materials diverge.
How to repair a torn piece:
It is assumed that one edge of the linoleum is intact.
- If desired, the edges of the joints can be processed by “cold welding”.
- Press the torn piece to the floor and level it. Then cover with a heavy object;
- Clean the base of the floor from dust and debris, wipe dry;
- Fill the hole with acrylic-based floor adhesive, liquid nails, color-coded silicone sealant;
Repairing loose cuts and seams on linoleum:
- If the damage is small. Connect the edges and weld with cold glue. Then press with weights. The glue will melt the pieces together. After hardening they will become one;
- Loose cuts and loose seams. In this case, pieces of linoleum are pre-glued to the base of the floor. Floor glue, liquid nails, and double-sided tape are used. After the glue has hardened, the joints are covered with cold welding.
Required Tools
To carry out repairs, you need to prepare the following tools:
- In order to accurately cut the patch, you need to prepare a sharpened utility knife.
Utility knife
- Using a knife with a blade is a good way to put a patch on linoleum if it has a complex shape. This tool is often used to carry out work in hard-to-reach places.
With retractable blade
- A knife with a disc blade will allow you to make precise cuts in a straight or curved shape.
With disc blade
- To clean the edges of patches, burrs, and old glue residues, a knife with a month-shaped blade is useful.
With moon blade
- To fill small holes, you will need spatulas of varying thicknesses.
- To smooth the material you will need a roller.
- A marker and ruler are needed to determine the shape of the patch.
You may also need single-sided or double-sided tape.
Hot welding
The seams created in this way are durable
As is already clear from the name, the connection of two parts of the floor covering in this case occurs by heating them. This method is used mostly when laying linoleum in public buildings or rooms with high traffic.
Due to the fact that the connection occurs at high temperatures, the seams are strong enough and can withstand significant external loads.
Also in this case, the joints are sealed, which allows the floor covering to be used as a waterproofing material.
Among the disadvantages of this method, one can note the fact that only rigid modifications of linoleum that can withstand higher temperatures can be hot welded.
The table shows the classes of coatings recommended for hot welding and their brief description.
Before you start hot welding, you should practice well on unnecessary scraps of linoleum.
Tools and materials
To weld two pieces of decorative flooring, we will need the following materials and tools:
- hot air gun (soldering iron);
- sharp knife;
- cord (harness) for filling the seam.
If you don’t have a hot air gun on hand, you can use a regular soldering iron. However, in this case, it should be borne in mind that it is unlikely that it will be possible to achieve a high-quality joint using a soldering iron.
Instead of a knife for cutting linoleum, you can use scissors with curved blades. They can be useful when removing excess weld material. The cord is made of a material similar to that from which linoleum is made.
This technology allows you to firmly connect two pieces of linoleum, practically obtaining a monolithic structure.
Stages of work
We lay the two canvases not overlapping, as with the cold method, but butt to each other. Using a knife, remove the upper edges of the edges of the linoleum at the joints so that the connecting seam has the shape of the letter “V”. For a detailed description of the process, watch this video:
We clean the resulting groove from dust and debris, and place the welding tow in it. If the length of the harness is not enough for the entire joint, you can take several pieces, and their joint should be overlapped.
After the welding seam has cooled, use a knife to remove excess melt from the welding cord. Linoleum welded in this way is so durable that it can be regarded as a single, monolithic coating.
For greater effect, linoleum sheets should be placed across the illuminated window. In this case, the sun's rays falling along the joints will make them even more invisible.
Restoration of linoleum with minor damage
If there are minor scuffs, cracks or small holes on the flooring, you need to get rid of them using a specialized putty. It is usually sold in every hardware store. But it’s easy to prepare it yourself. If you want to prepare such a building product yourself, then you will need: rosin, castor oil, denatured alcohol and mineral pigment.
The preparation process is as follows: 500 g of rosin is melted in a porcelain bowl over boiling water. Then it is cooled to 50 degrees. During the cooling process, castor oil (100 g) and alcohol (150 g) are added to the rosin, then a pigment similar in color to the tone of linoleum is added to the mixture. When creating color, keep in mind that in the liquid state the mixture looks darker than it will be after drying on the linoleum. The putty is carefully applied to the damaged area with a rubber spatula. And when it dries, it is sanded with sandpaper or any other grinding tool.
Bonding with mastic
Mastic is one of the most popular adhesives. It makes it easy to glue linoleum at home. The method is reliable, it connects “tightly”, but if you need to remove the coating for a while, then the linoleum will tear in the place where the mastic was used. It is also easy to attach the raised piece this way.
Work order:
- Before gluing the joints, prime the base.
- The edges of the coating are degreased with any alcohol-containing product. Acetone or solvents cannot be used, as they can corrode the linoleum.
- As soon as the base has dried, you need to apply a small amount of mastic to it with a spatula.
- Then the edges of the linoleum are applied to the surface and pressed tightly. The joint must be carefully rolled with a hard roller.
The mastic dries for about a day, so during this time the area where the coating has been treated needs to be pressed firmly with something heavy. A board is placed on the joined edges, and a load is placed on it.
What to do with a hole in linoleum
If a hole somehow appears in the linoleum (coals are dropped or a piece is torn out while rearranging furniture), you will have to install a patch. You can do without a patch only if the hole is small. In this case, look for a composition called liquid skin. It comes in different colors. Select the closest shade, and then fill the damaged area in layers.
You will need a lot of layers, since only a small amount is poured at a time. It is not recommended to pour too much - it will not harden properly. Using this product, you can make scuffs on linoleum less noticeable. There is no point in using furniture repair compound on linoleum - it washes off very quickly, and liquid leather lasts much longer.
You can eliminate scuffs on linoleum and fill small holes with liquid leather
You can try to paint over the burnt areas with the same composition—liquid leather. If a dark stain remains from falling coal, but there is no hole, you can restore the protective film with a suitable composition (or several) of the same color. And color, if possible. But “making” a color on a non-uniform linoleum is not at all easy. Artistic skills required.
Where to get a patch for linoleum
A large hole in linoleum can only be sealed with a patch. The remnants of the laid coating are best suited for this. If there are no leftovers, you can try to find a piece of similar color and thickness. But this option is in the “not very” category, since even with the “native” patch, invisibility is very difficult to achieve.
It’s good if there are pieces left after laying the linoleum
Modern linoleum most often imitates some kind of coating. Evenly colored options are rare. Therefore, before filling a hole in the linoleum, you need to select a piece with a similar pattern. You need to select a fragment similar in color to the one on which the hole appeared. In general, this work is similar to selecting a pattern when gluing wallpaper. If you've done this at least once, it will be easier.
Procedure
So, find a piece that matches the color. Cut out a fragment with “spare”, i.e. in a larger format than required for restoration. Check if the drawing is correct. If everything is fine, we begin to repair the linoleum:
- Lay out the cut piece, matching the pattern on it and the main part.
- Take a metal ruler and a sharp knife.
Above the hole (so that it is completely under the patch) we cut out a patch of any shape. But usually they make a square, rectangle or triangle - depending on the shape of the hole. You need to cut through both layers at one time. Immediately cut off both the piece chosen for the patch and the linoleum on the floor. Only in this way will it be possible to make the joints as invisible as possible. How to cut and glue a patch to linoleum - We remove the excess.
- Use a knife or spatula to pry up and remove the cut linoleum.
- We clean the base from debris, glue residues, etc.
- Degrease the base in the cut and the back side of the piece cut out for the patch.
- Apply glue to the base and spread it in an even layer. If necessary, wait the allotted time. In general, we follow the instructions for the glue.
- We lay the patch, combine the pattern, smooth it from the middle to the edges, pressing it to the base and edges of the cutout.
- If the glue is squeezed out, remove it immediately.
- We wait until the glue dries, place the weight and leave it for several hours for final hardening.
If the color of the patch is chosen well enough, the place where the linoleum is repaired will be barely noticeable. At first, the gaze may “cling” to it, but then it will fade, be forgotten and become invisible.
On hard linoleum
You can cut through two layers of linoleum at once only if the coating is not very hard. With denser options, this is not possible even with a very good knife and strong muscles. In this case, we act a little differently.
First, lay out the piece selected for the patch, matching the pattern. Then we roughly outline the area of the hole in the linoleum. Next you need to cut out the patch on the selected piece. With hard linoleum it is better to do this on level ground, perhaps on a board. This will make it easier to cut through the coating.
The shape of the patch for such a case should be as simple as possible so that it can be easily repeated. For example, a square or rectangle.
- We take a metal ruler (preferably a stainless steel ruler, and not some other thing), running a knife along it, cut off a piece of the desired size and format. You need to make sure that the edges are smooth. To do this, hold the knife vertically and not at an angle.
- Place the cut patch over the hole and match the pattern on the patch and linoleum.
With hard linoleum, you cannot cut through two layers at once. - Now the trick is to cut through the bottom layer without moving the patch. You can trace it with a pencil or pen, then cut it out along the outline. Or apply a ruler to the edge of the patch and cut along it.
- We take out the cut piece with the hole, put the patch in place, checking the accuracy of the cut. If necessary, adjust the edges.
And then, we proceed as described above. Clean, degrease, apply glue to the base, lay the cut patch, press it over the entire surface.
If you can't choose the color
There are not always remaining pieces of laid linoleum. What to do in such cases? If you are not going to change the coating in the near future, try to play with the defects. A couple of examples for inspiration:
- Make patches from linoleum of a different color. You can choose a contrasting color or one that is in the decoration. Distribute stains of a different shade in a pattern or scatter them randomly.
Make an applique if the color cannot be chosen - Make a “frame” from linoleum of a different color.
- Close the holes with coins of the appropriate size and fill with transparent polymer.
In general, the idea is this: if you can’t hide it, you need to highlight it. Decide for yourself how to do this. Depends on the amount of damage, their location and shape.
Restoration of joining seams
It happens that the seams between layers of material diverge. If such a joint is located in the area of a door, near a wall or under furniture, it can be easily covered with a decorative strip (threshold). Sometimes this is not possible - for example, when the seam runs in the center of the room.
Sealing of seams is possible using hot and cold welding. The hot method can only be carried out by professionals; its implementation requires special equipment and skills. A special PVC cord is heated and applied to the joint. Even beginners use cold welding at home:
- pull one strip of material as far as possible so that it overlaps (at least 2 mm),
- attach a metal ruler or bar, draw a line with a pencil,
- make a cut along the strip,
- fill the seam with glue using a thin tip or syringe,
- After the cold weld has hardened, cut off the remaining glue.
Do-it-yourself ways to solve basic problems
There are many problems with linoleum, each of which has its own solution.
Went in waves
If a defect appears near the wall, one may suspect a lack of technical clearance during installation. To cope with the problem, it is recommended to remove the baseboard along 3 walls and trim the panel. It should sit for several hours - it all depends on the thickness of the material and temperature conditions. Once the linoleum has straightened out, the skirting boards can be installed again.
If a bubble appears in the center of the room, carefully make cuts along the swelling on both sides. Then it is recommended to release the air and seal it with masking tape. This will prevent glue residue from getting onto adjacent areas.
Glue is injected into the resulting holes with a syringe and the edges of the coating are joined. Then apply masking tape and apply a weight. Sometimes stretching of the coating leads to swelling. In such a situation, it is recommended to cut the canvas and remove the excess. It is necessary to fix linoleum in the same way as in other situations.
Joining seams
When fixing linoleum in large rooms and on thresholds, it is fixed by cold welding. There is a risk of seams coming apart when used. Anyone can glue such a coating on their own. It is recommended to overlap the fabrics by 5 millimeters. You should make a cut in the center of the mound and grab 2 edges. The procedure must be carried out using a level bar. Then remove the trimmed excess and degrease the edges. The surrounding areas are cleaned with masking tape.
To carry out the work, it is recommended to take PVC glue type C. To do this, you should process the edges, glue them and leave them under the load. After the glue has hardened, the excess must be carefully trimmed with a knife, remove the adhesive and treat the welding area with wax.
Elimination of burns
A patch will help cope with such damage. To do this, it is recommended to cut out the damaged area in the coating. It is best to give the hole the correct shape - round, square or rectangular. If there is scrap left after attaching the linoleum, this is considered an ideal option. Otherwise, it is worth choosing a coating of a suitable texture and color.
It is recommended to cut a patch from it that is the same size as the hole. It needs to be tried on. It is important that the pattern and size match. It is recommended to cover the edges of the hole with masking tape. Clean the floor from debris and treat it with a primer. Apply glue to the patch and glue it into the hole. To do this, it is permissible to use PVC or PVA glue. Oppression is placed at the repair site for 2 days.
Sealing torn holes
If the linoleum is torn, it can be repaired with a patch. It is also permissible to glue the torn surface back in place if the damage has smooth edges.
Modern substances help eliminate even large holes that occur during use.