The engine oil pan is a removable part located under the bottom of the engine. The pallet is made by stamping from soft elastic steel or casting from aluminum is used.
In shape, this part resembles a small-depth bathtub, the upper edge of which is made in the form of a plane for a tight fit to the lower part of the engine crankcase. There are special holes in the edge to connect the engine sump to the crankcase.
Cold welding for aluminum - varieties, tips for use
Cold welding for aluminum can be used in situations where it is not possible to use gas-shielded electric arc welding. This technique is also relevant for aluminum because workpieces made of this metal are very difficult to connect with bolts and nuts. The concept of “cold welding of aluminum” can mean both a method of joining parts made of this metal using deformation, and a technology that involves the use of special glue.
“Cold welding” most often means special glue, but there are also mechanical methods of cold welding - deformation welding
Review of common sealants
Today, most automakers also produce related components and materials for repairing their car brands. Therefore, you can purchase an original sealant personalized for your car brand.
If this is not possible, then analogues with similar properties will do.
Motor heat-resistant repair compound GOETZE (gray) made in Germany, Liqui Moli, Hi Gear and anaerobic Loctite have proven themselves to be quite good. The main advantages of these sealing pastes are:
- high adhesion strength;
- heat resistance (from -55 °C to +230 °C);
- fast curing;
- application using an auto-dispenser;
- no finishing of parts required; permissible surface roughness 8–40 µm (Ra).
The price of these products for the oil pan is 750–900 rubles.
Elring and REINZ (Germany) for the engine cost 350–500 rubles. They are not inferior in many respects to the previous ones. The only difference is that it takes longer to cure.
- High seam strength.
- Immunity to chemicals.
- Operating temperature range from -50 to + 200 ⁰С.
- Resistant to sudden temperature changes.
Abro sealant 5 years ago was a favorite among auto mechanics. Has high quality indicators. But over the past 3-4 years, many fakes have appeared. Therefore, buying Abro can be compared to a lottery. Its cost is 150–250 rubles.
Cold welding of aluminum parts using special glue
Cold welding of aluminum parts, performed using a special adhesive composition, is a technology that allows you to obtain a permanent connection very quickly and without special surface preparation. Very often, this technique is used in cases where it is necessary to eliminate an emergency situation and quickly connect aluminum parts. Naturally, the simplicity of this technology allows it to be used most often at home.
Adhesive for fastening aluminum parts by cold welding
The special composition that is used to perform such welding is a two-component glue, produced in the form of mastic or a thick liquid. This glue (it can be purchased at almost any hardware store) consists of epoxy resin and steel powder, which serves to strengthen the joint being formed.
To improve the characteristics of the adhesive composition for cold welding (adhesion to the surfaces being joined, resistance to high temperatures and aggressive environments), special additives are added to its composition. Thanks to their use, the properties of the hardened adhesive composition often exceed the characteristics of the parts being connected in terms of strength and reliability.
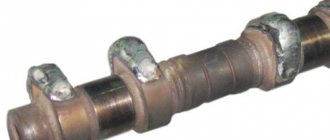
Using two-component adhesive to fix the fitting in an aluminum alloy pipe
Any adhesive for cold welding - both liquid and in the form of mastic - consists of two components that must be mixed immediately before use. It should be borne in mind that it is necessary to apply the mixed composition within 20–30 minutes (after half an hour it begins to actively harden). After applying the adhesive composition to the surfaces of aluminum parts, they must be pressed together and kept in this state for 40–45 minutes. Complete hardening of the composition occurs within 2–2.5 hours.
In order to obtain a reliable connection in industrial or home conditions when using cold welding glue, it is necessary to first clean and degrease the surfaces to be joined. Using this method, you can not only join flat aluminum workpieces, but also weld small holes and cracks, spending a minimum of time and effort. The parts connected using cold welding adhesive withstand any mechanical stress well, except for tensile loads.
Cold welding repair of a broken car oil pan
So, it is not recommended to use glue:
- in places characterized by high temperatures;
- in those places that are subject to increased environmental safety requirements;
- for connecting parts whose operating conditions often change;
- for sealing vessels and containers under high pressure;
- for connecting parts operated in aggressive environments;
- for sealing pipes and vessels in contact with liquid food media and food products.
It should also be noted the advantages of using cold welding adhesive, which make it a very popular means of joining aluminum parts:
- elimination of oxidation processes at the junction of workpieces, which gives durability to such a connection;
- ease of use;
- minimum time required to form a permanent connection;
- low price of the composition and no need to use special equipment and energy resources.
A short review of cold welding compounds common on the domestic market, based on reviews of people who have used them in practice.
- PERMATEX Cold Weld An effective and highly versatile adhesive that can be used with a variety of materials. Excellent resistance to pull-out and shear loads during testing.
- "WURTH Liquid" Excellent for working with metal parts.
- “Abro Steel” is well suited for repairing liquid storage tanks due to its high ability to ensure tightness.
- "Titan" Affordable price, excellent resistance to mechanical loads.
- “Cold Weld PERMATEX” Quite a popular composition that has earned a lot of positive reviews.
How to glue plastic to plastic tightly?
- Choosing glue Liquid
- Contact
- Reactionary
- Hot melt adhesive
- Examples of waterproof glue
- Methods for gluing plastic without glue
We use plastic products every day. It often happens that they break and need to be connected with something, but not every glue can help in this situation. Let's figure out how to repair things made from this material and tell you about the most popular means for gluing parts together. It is also important to pay attention to the types of plastic and glue markings. It is usually with the distinction between these concepts that problems arise for the average user of plastic items.
Choosing glue
Liquid
It is used to connect parts of small products that are not subject to heavy loads. It is created on a water basis or contains an organic solvent. Its main advantage is that it does not deform the plastic. It is mainly used at home for gluing plastic with a porous structure. It is very easy to use. You need to apply glue to the surface of one of the parts and press the other one against it for a while. The liquid will evaporate and the parts will be firmly connected.
Contact
A hardener is used together with the glue; they are mixed in proportional quantities. This glue is considered not only the strongest, but also quite toxic. Therefore, it should not be used when repairing children's toys and things. Before use, protect your hands with thick gloves and your face with goggles, a mask or a respirator. Its action is divided into two stages:
- applying a thin layer of glue, after which the surface of the plastic softens, this facilitates the gluing process;
- then you need to firmly connect the parts together, so the molecules of the softened layer will mix.
A little later, the solvent will evaporate and an even seam will appear at the gluing site.
Reactionary
This type is suitable for gluing those plastic products that are subject to prolonged and heavy loads. It is basically one component and can quickly dissolve the top layer of plastic and leave a strong seam. There are also two-component ones. They consist of a hardener and a fixer, which are stored separately. They need to be mixed only before use, then apply the resulting composition to the surface, it will harden and form a strong connection. This type has an important feature. Complete hardening takes quite a long time. Accordingly, the seam itself and its strength increase.
Hot melt adhesive
This high-temperature composition consists of solid rods. First they need to be heated, since this type exhibits its properties only at a temperature of 110-120 degrees Celsius, only after that you can start working with hot melt adhesive. It is tucked into a special gun, with which you can carefully and easily apply the composition to the surface of the object. This glue is used when repairing small parts, as it does not have high strength.
What type of plastic is there?
First you need to find out what type of plastic the product is made of. Only then can you understand how to repair it. There are always markings on plastic products so that the type of material is clear.
- PET - polyethylene terephthalate is used for packaging liquid and bulk food products. It comes in the form of bags, film, transparent containers.
- HDPE is pure high-density polyethylene, which is used to make bags, shrink film and other low-density products.
- V (PVC) polyvinyl chloride is a non-food plastic that is used to make durable items such as window frames, buckets, etc.
- LDPE - low-density polyethylene is used to create children's toys, bottles for drinks and dairy products, packaging items, and cold water pipes.
- PP - polypropylene, a chemically inactive and heat-resistant plastic, is used for the production of medical items, dishes, kitchen and household utensils, hot water pipes, etc.
- PS is polystyrene; it is used to create disposable tableware and parts of kitchen appliances, and in its foamed state it serves as a very good thermal insulator (foam plastic).
- O Other - plastic that can be recycled, for example if it contains metal or paper.
How to learn to read markings on glue?
The problem is that it doesn't match the plastic recycling signs.
- PC - polycarbonate.
- ABS is an acrylonitrile copolymer.
- PP - polypropylene.
- PS - polystyrene.
PPMA is a general purpose organic glass.
- PE - polyethylene.
- PVC - polyvinyl chloride.
- PA 66 - polyamide.
- PUR - polyurethane.
The ability to distinguish these markings will not be enough to choose the right glue, so you need to understand this issue in more detail.
Examples of waterproof glue
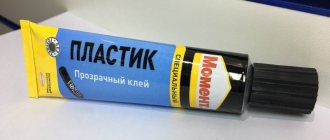
Moment plastic
One of the best contact agents, produced in Russia. The average cost of a tube weighing 30 grams is 60 rubles. Reliably holds plastic and polyethylene together, dries quickly, retains its properties under the influence of moisture, temperature changes, acids, salts, alkalis and other aggressive chemicals of inorganic origin. After drying, a transparent seam remains. It is recommended to protect your skin from this product, as it contains toxic substances.
3m scotch weld pr100
It has an epoxy composition and bonds firmly to plastic. It hardens completely 20 minutes after application to the surface. Can interact with different types of plastic, waterproof.
Loctite 406
This plastic adhesive is made in Ireland but is a German brand. Reliably connects smooth and rough surfaces. One package contains 20 grams, its cost is approximately 635 rubles. It has a high polymerization rate, low viscosity and resistance to temperature fluctuations from -40 to +80 degrees Celsius. When interacting with plastic, no gap appears at the junction of the parts. But this product also has disadvantages: a strong toxic odor, high price, and is not suitable for all types of plastic.
Star
It is inexpensive and the adhesive is suitable for many types of plastic. It dries completely a day after application to the surface of the product.
Second
This glue comes in two forms: gel and liquid, and does not leave a stain after gluing. Dries completely after 2 hours. Mainly stored in tubes.
Tamiya
Glues small parts well, sold with a brush. This product has a special feature: it has a lemon scent.
Step-by-step gluing scheme
First you need to determine the type of plastic and the type of glue suitable for it using the methods indicated above. Then proceed directly to repairing the product.
- It is necessary to degrease the surface of the object. This can be done with alcohol, degreaser or soap solution (it is important to use laundry soap).
- Treat the product with a velvet file or fine sandpaper. This action is necessary to increase the wettability of the object and create a stronger bond.
- If two-component glue is used, then the compositions should be mixed only after preparing the parts.
- Do not use brushes made of natural fur to work with the adhesive composition.
- Apply enough glue so that when joining objects, its excess does not ooze out beyond the seam.
For this procedure to produce results, you need to rely on the following points:
Deformation welding - technology features
Using this technology, aluminum parts are joined at room temperature, hence the name “cold welding.” In order to obtain a permanent connection, the workpieces are subjected to significant plastic deformation, as a result of which the oxide film on the aluminum surface is destroyed. In addition, the strong compression of aluminum parts against each other during the cold welding process helps to create intermolecular bonds between their crystal lattices.
An important condition for the formation of a reliable connection obtained using cold welding technology is thorough cleaning of the surfaces of the workpieces and their degreasing. The pressure that acts on the aluminum parts being connected can be static or with variable vibration.
Depending on the type of connection being formed, the following types of cold welding are distinguished:
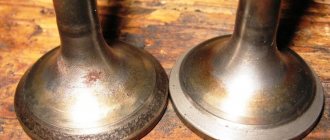
Butt method
When using this cold welding method, aluminum parts are connected by their end parts, which are first thoroughly cleaned and degreased. In order to make a connection using this method, the workpieces are fixed in special jaws with a small release of the end parts, which will be subject to compression. After the parts are securely fixed, axial pressure is applied to the clamping jaws, which compresses the end parts of the workpieces being connected, which is accompanied by the formation of a reliable permanent connection.
Scheme of butt cold deformation welding
This cold welding method, despite its simplicity, has a number of significant disadvantages and limitations in application.
- The dimensions of the clamping devices used to perform such welding limit the length of the joint formed.
- When aluminum parts are compressed, not only the ends being connected are subjected to plastic deformation, but also the part that is clamped in the jaws.
- After obtaining a permanent connection, the workpieces are quite difficult to remove from the clamping jaws.
Point technology
This technology, which involves overlapping aluminum parts, is the most common method of cold welding of this metal. The workpieces to be joined are compressed at individual welding points, for which a special punch is used. According to this technology, parts are predominantly connected by several welding points located at a certain interval relative to each other.
Cold spot welding diagram
The quality of cold welding performed using spot technology directly depends on the degree of deformation of aluminum in the area of the weld spot. In numerical terms, this parameter characterizes the relationship between the thickness of the parts being connected and the depth to which the punch is pressed into the metal. There are standards according to which this parameter for aluminum should be 60–70%, and for alloys based on this metal – 75–90%.
Cold spot welding, which can be used to join fairly large sheets of aluminum and alloys based on this metal, has a number of advantages.
- The parts to be connected do not require preliminary fixation in special clamping devices.
- Aluminum is deformed in very small local areas - weld points.
Suture method
When using this cold welding method, the junction of aluminum workpieces takes the form of a continuous seam, which is formed using rotating rollers or a punch with a ring-shaped working part.
Scheme of the seam cold welding method
Pre-cleaned and degreased aluminum parts that need to be joined using cold seam welding are placed between one movable and one fixed roller (single-sided welding), or between two movable rollers (double-sided welding). After squeezing the rollers and the metal underneath them to the required depth, the movable rollers begin to rotate, which leads to the movement of the joined workpieces and the formation of a continuous seam.
The process of resistance seam welding on an industrial machine
The use of this technology makes it possible to weld even very large aluminum sheets, but the presence of a continuous seam pressed into the metal seriously weakens the structure. It is for this reason that when it is necessary to cold-weld flat aluminum sheet structures, spot-seam technology is used.
It involves obtaining a connection using a rotating roller on which working protrusions are located that exert pressure on the metal being welded. The seam in this case does not look like a solid line, but like an intermittent chain of welded points, which very slightly weaken the structure.
How to restore integrity and how to seal the engine pan
Author: premierautos · Published 01/22/2010 · Updated 07/29/2018
- device and purpose of the oil pan
- A brief description of their common consequences and underbody failures
- How to restore the integrity of the bottom
The engine oil pan is a removable part located under the bottom of the engine. The pallet is made by stamping from soft elastic steel or casting from aluminum is used.
In shape, this detail resembles a small deep bath, the upper edge of which is made in the form of a plane for a tight fit to the lower part of the engine crankcase. There are special holes in the edge to connect the engine sump to the crankcase.
device and purpose of the oil pan
This part is the reservoir of engine oil and lubricant. The bottom of the engine crankcase performs the following important functions:
- Accumulation of motor oil flowing from engine elements.
- Protection of internal parts and assemblies from external aggressive actions.
- Collection of small abrasive iron shavings formed during the friction of parts.
- Oil cooling.
- Preventing lubricant from splashing.
Depending on the design of the engine, the sump has a shape that protects the engine from contact with the transmission, front gearbox, and suspension elements. In the manufacture of these oil pans for cars with forced power units, aluminum alloys are used.
The design of aluminum parts includes special ribs designed for accelerated oil cooling.
The oil intake tube does not touch the bottom of the bath, so that small iron waste is not sucked into the lubricant system. Accumulated chips are removed when the lower crankcase is removed.
Quite often, the bottom is equipped with magnets that serve to fix abrasive accumulations.
To replace the lubricant, the bottom is equipped with a special drain hole with a plug.
A brief description of their common consequences and underbody failures
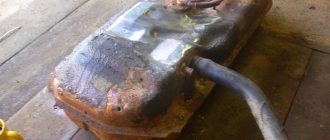
reliability and simplicity of this detail prevents frequent breakdowns. But, when hitting obstacles in the form of stones, reinforcing wire, snags and large stumps, wide dents or holes may appear in the lower part of the engine crankcase.
Damage to the protective element leads to malfunctions of the power unit. If deep deformations of the pan plane occur, the oil receiver tube breaks or is located above the lubrication level.
With “oil starvation,” the connecting rod may break, damage the cylinder block, and jam the engine.
Violation of the tightness of the bottom of the engine crankcase occurs due to the formation of cracks, breakdowns, and through holes in the details. An apparent oil leak leads to serious damage to the power unit, the consequences of which can be unpredictable, especially if the defect is not detected in a timely manner.
In order not to break through the bottom while driving, many car owners install engine crankcase protection.
How to restore the integrity of the bottom
When a difficult situation arises, car owners need an answer to the question: the engine sump has broken, what should I do? The first reaction should be to turn off and stop the engine.
If the engine is not turned off, a rapid decrease in the engine oil level will occur, which will lead to oil starvation with subsequent important breakdowns of the elements of the power unit.
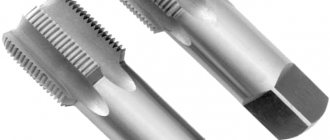
Repair of metal pallets is carried out by welding or gluing with a special sealant or cold welding. Aluminum parts are restored by welding in an argon environment.
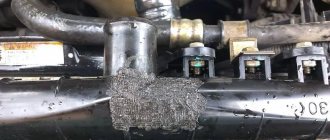
How to seal an aluminum engine sump? In order to independently repair the underbody, eliminate oil leaks and repair cracks in the body without removing the part from the car, you need to perform the following operations:
- clean the surface from dirt using an iron brush;
- blot the leaking oil near the hole that appears;
- cut off a piece of cold welding and carefully knead it, like plasticine;
- remove any oil leaks again using a rag;
- apply the first layer of cold welding in the form of putty:
- After the applied layer has hardened, treat it with emery cloth;
- Apply a second layer of cold seal until the leaks are completely eliminated.
This description is given for emergency cases in order to quickly repair the engine oil pan for a short period of time.
To reliably eliminate the shortcomings of this unit, you need to contact a service center for qualified assistance. In a service station, the lubricant is completely drained, diagnostics are carried out, high-quality restoration and removal of the tightness of the part is carried out using welding operations with the installation of the bottom and subsequent checking for the previous place.
Repairing a hole in the engine oil pan without removal in 5 minutes.
What happens if the pallet is not repaired or replaced?
So, if an element is damaged, this will clearly affect the operation of the power unit. Let's look at a few damages. If there is a deep deformation of one of the planes without a hole on a motor with an oil pickup, and the pan itself is made of aluminum alloy or plastic, then in this situation there is a risk that the oil pickup tube will be higher than the level of the lubricant. Often, with such damage, these parts break off completely.
If the oil does not leak out, but the deformation is quite deep, you need to add the required amount of oil and try to start the engine. In the case of minor deformations and no breakdown, the oil pickup device may not break off, but the gap between the tube and the bottom of the pan will greatly decrease - this may be enough to operate the engine under low loads. It is important to consider that if the pan is damaged, at any moment the engine may experience “oil starvation” during sudden acceleration and increased speed. All this will not have the best effect on all nodes. The most common consequences of oil starvation is the seizure of the upper connecting rod bearing, which entails jamming of the entire engine. Also, the liner may turn during operation. In extreme cases, the connecting rod will break, which will damage the cylinder block.
The engine oil pan is broken: what should the driver do?
It's no secret that the condition of roads in the CIS leaves much to be desired. We are talking about the asphalt surface itself, which has numerous deep potholes and holes, as well as open hatches, curbs, curbs with sharp edges, stones, protruding metal rods, etc.
Hundreds of motorists face such obstacles on the roads every day. In this case, as a rule, not only bumpers and decorative plastic elements in the lower part of the body are affected, but also the bottom of the car, as well as the engine. Next, we will talk about what can happen if the driver breaks the engine sump, what to do in such a situation and how to fix the problem.
Read in this article
A little exotic
In the 90s, the Gorky Automobile Plant began production of a licensed diesel engine from the Austrian company Steyr, which was produced for about 10 years under the symbol GAZ-560. In those years, the term “innovative” solutions was not yet in use. Although, as for those, there were more than enough of them in this unit.
Even now, you probably won’t find such people. Since our article deals with such a part of automobile engines as the engine oil pan, we will talk about the design of this unit in an engine that has taken a leap into the future.
Let's start with the fact that instead of the usual cylinder block and cylinder head there was one part - a monoblock, which was installed on elastic rubber-metal supports in the engine oil sump. The crankcase consisted of two aluminum parts connected by screws.
After connecting, the result was a container that was open only at the top. The connector ran in a vertical plane, and the entire assembly, due to the cooling corrugations on the side surfaces, resembled an openwork wicker basket, which is why it was called “basket” in production. The basket was attached using elastic supports to the car chassis.
Thus, the monoblock suspension was double: the monoblock was in the basket, and the last one was on the body. In addition, the monoblock was completely located in the crankcase oil reservoir, and the upper gap between it and the basket along the entire perimeter was closed with a rubber cuff of a rectangular configuration. There was no pallet in this design.
To gain access to the ShPG, it was necessary to disassemble the crankcase: remove the two covers of the elastic supports of the monoblock, then unscrew the fasteners connecting the two side halves of the crankcase and remove them. After this, access to the ShPG parts was opened. Naturally, this could only be done after removing the engine from the car.
How to avoid engine damage in the event of a sump failure
Let's start with the fact that the damage listed above threatens not only passenger cars, but also vehicles with increased ground clearance (city crossovers and SUVs).
At the same time, one of the most serious problems, along with dented sills or various problems with the chassis, can be considered a situation when, for one reason or another, the engine sump was broken.
First of all, you need to take into account that it is strictly prohibited to continue driving a car with a broken pan. The fact is that the pan itself on most cars is a kind of reservoir for engine oil (an exception is a dry sump system).
From the sump, the oil pump of the lubrication system constantly takes in lubricant, after which it supplies engine oil under pressure to the loaded rubbing elements and components inside the power unit.
It is quite obvious that the engine oil will simply leak out even through a minor crack in the sump, and without the proper amount of lubrication, the oil pressure will drop, oil starvation will begin, as a result of which the engine will be subject to severe wear. If the leak is strong, then the power unit can completely jam in just a few minutes.
In view of the above, the following recommendations must be adhered to:
- If, while driving, there was a collision with any obstacle or the driver felt an impact in the area of the front axle of the car, then the load should be removed from the internal combustion engine as quickly as possible (release the gas, reduce the speed, lower the engine speed to the minimum, stop car and turn off the engine).
- Then you should open the hood and carefully inspect the car engine from above and below. When inspecting the upper part, you should check the integrity of the engine mounts and their fastenings, inspect the internal combustion engine for fresh leaks at the gasket locations, etc. As for the lower part, it is highly advisable to find the place where the blow directly fell.
Sealants for two-stroke engine assembly
When considering a more or less serious repair of a scooter engine, the question of choosing a sealant for assembling the crankcase is one of the first to arise.
What should I apply to the halves to prevent air leaks and dirt from getting inside the engine? It is clear that the chemistry used must satisfy a number of requirements. Among them are heat resistance, elasticity, resistance to prolonged exposure to oil and gasoline.
Only a correctly selected composition will ensure the required tightness of the crankcase for a long time. I thought this issue was very easy to solve. The stores are full of formulations in beautiful tubes that promise reliability and quality for years. But when I read the recommendations for use, it became clear that the vast majority do not even come close.
The majority of sealants sold in car dealerships are silicone-based. From my own experience, I know that when in contact with gasoline, silicone quickly degrades and turns into snot.
Polyurethane, which is no less often used in the manufacture of automotive sealants and adhesives, simply dissolves with gasoline without special additives.
And it turns out that the choice is very small. To select the appropriate composition, you need to carefully study the manufacturers' recommendations for using a particular product.
There are not many compounds available on our market that are suitable for assembling a two-stroke engine. You can’t always find them in a convenience store; most likely, these sealants will have to be ordered from large online markets like Exist, and they will cost somewhat more than the mass market stores.
Permatex MotoSeal
Permatex MotoSeal Gasket Resistant Gasket Former
The composition is from the well-known manufacturer of auto chemicals Permatex, which has generally proven itself well in our market. For example, I constantly use their thread locker when repairing a scooter and so far I see no reason for dissatisfaction.
Permatex MotoSeal is the most inexpensive sealant, which, according to the manufacturer, allows you to quickly and reliably assemble the engine and send it to the race track within 20 minutes. The sealant is carefully positioned as a composition for emergency repairs, and from the product description it is not clear how it will behave during long-term use.
This is what he writes
Since Permatex MotoSeal is one of the few products designed for repairing motorcycle engines, it is not difficult to find user reviews in this area on the Internet. In general, the product assessment is moderately positive, but there are also a number of serious critical reviews. When I first delved into this topic, Permatex MotoSeal seemed like an excellent option for use when assembling a big block, but, taking into account the vague description and user reviews, I decided not to buy it.
Loctite 5972
Heat resistant sealant Loctite 5972
Loctite is a heavyweight in the sealant market. The compositions of this manufacturer, as a rule, are clearly specialized and are of the highest quality.
Loctite 5972 is a synthetic rubber based sealant. It is distinguished by extremely high resistance to high temperatures and the ability to withstand the effects of most technical fluids. It does not freeze, which means it is not afraid of vibrations, which are a hallmark of two-strokes. The sealant can withstand crazy pressure.
The icing on the cake is excellent adhesion to cardboard and paronite, that is, the ability to use Loctite 5972 in addition to standard cylinder gaskets.
Oil pan repair: what you need to know
To begin with, many owners try to repair the hole themselves. Some also try to solve the problem on the spot so that they can get to the service station under their own power. For these purposes (depending on the degree of damage), sealants, liquid welding, conventional welding, metal rivets or even wooden plugs can be used.
In this case, you can try to use some suitable external sealant (do not pour “stop-leak” compounds directly into the engine oil), then you should add oil almost to the maximum on the dipstick and drive the car under your own power.
While driving, you should avoid even medium loads on the internal combustion engine and increasing the crankshaft speed by more than 25% of the total available number on the tachometer (the higher the speed, the greater the pressure in the lubrication system, which increases the likelihood of an existing leak becoming worse).
At the same time, during such a ride, you need to carefully monitor the oil pressure light, and also make stops at short intervals, check the oil level in the engine and re-inspect the damaged area of the sump. It should also be understood that this method of delivering a car to a service station under its own power involves traveling only over relatively short distances.
After the car has been delivered to the service, you can immediately replace the part, but you should prepare for certain financial expenses. Moreover, on some engines, the cost of the pan itself and the price of services for replacing it can be quite high, since replacing a part will require a fairly large amount of complex work.
It is for this reason that many take a different route and prefer to repair the oil pan using one of the available methods offered by specialists. Each method is selected individually, depending on the material from which the oil pan itself is made (steel or aluminum). The extent and nature of the damage, the risk of further enlargement of cracks, etc. are also taken into account.
It is quite obvious that one of the most reliable and proven methods is to weld the oil pan. In this case, the pan must be removed from the engine, since welding without removal directly on the internal combustion engine is strictly prohibited. The fact is that high temperatures can damage other elements and parts inside the unit.
Causes
How can water get into the engine? This problem occurs due to various reasons. We list the most common of them:
- Deformation of the oil pan. If the car is old, the pan may rot under the influence of reagents. Mechanical damage that can occur on a country road should not be ruled out. In both cases, the tightness of the sump is broken - oil gradually leaves the engine, and dust and water enter the crankcase.
- Careless passage of water obstacles. Not only fords, but also puddles pose a great danger. The higher the speed, the more spray gets onto the ignition elements and into the intake manifold.
Overcoming a deep puddle
- Cylinder head gasket failure. This can happen due to high mileage, or when the surface of the head is deformed (due to overheating). Incorrect installation (the torques and tightening pattern must be observed) and poor quality of the gasket itself should not be ruled out.
- Crack in the cooling jacket. Occurs due to detonation, untimely replacement of antifreeze and overheating of the internal combustion engine.
- Violation of the tightness of the air pipes. These are cracks, abrasions, poor tightening of clamps.
- Malfunction of the crankshaft (rotation of the liners), which leads to impacts of the piston on the cylinder head. The problem arises due to low level or quality of oil, operation of the internal combustion engine under heavy load and the entry of metal particles into the lubricant.
- Low quality lubricants. In an attempt to save money, car owners purchase low-quality oils (often “on tap” from large containers), which not only do not meet the requirements, but also contain a certain percentage of moisture. This can happen due to improper storage of liquids. High-quality, expensive oil does not contain moisture particles.
Let's sum it up
As you can see, damage to the oil pan is a serious problem. Repairing such a breakdown also has certain difficulties and can be very expensive. For this reason, it is strongly recommended to immediately install additional engine crankcase protection.
At the same time, standard solutions that can be installed on a car are made of plastic and provide more protection from dirt and moisture than from impacts. This means that engine protection must be purchased separately, giving preference to the most durable metal products.
Let us also add that when choosing engine protection, you must also take into account that the engine compartment becomes more sealed and closed from outside air. This can cause problems with cooling the power unit, especially when the car sits for a long time in traffic jams with the engine running.
For this reason, it is advisable to buy only certified products that are specifically designed by the manufacturer for a specific car and its features (attachment points, oil drain hole, etc.), and not more affordable universal solutions.
In simple words, even a steel protection sheet can bend or break through from a serious blow (for example, from reinforcement). This means that if there is a collision with an obstacle, while protection is in place, the engine still needs to be immediately turned off and inspected. Only a timely detected problem allows you to avoid engine overheating, oil starvation or seizure as a result of oil leakage.
What should be understood by the definition of “knocked engine”. Why does the engine start knocking? In what cases does a knocking sound in the engine indicate a breakdown of the internal combustion engine.
Why the engine jams and the main symptoms of this malfunction. How to prevent the motor from jamming, what to pay attention to.
How to independently determine that the cylinder head gasket has burned out. Recommendations for pulling the cylinder head after replacement. Which gasket is better to choose?
The most common causes of engine knocking are: piston knock, connecting rod knock, crankshaft knock. What to do if the engine suddenly starts knocking while driving.
Basic methods for repairing a cracked engine block. Crack detection, repair by welding, riveting or applying an epoxy layer.
The appearance of knocking noises in different diesel operating modes. Fault diagnosis. The nature of the knocks of the crank mechanism, timing gear, and fuel equipment.
Varieties
Products for sealing cylinder head covers and oil pans have a liquid consistency. The main function of the valve cover gasket sealant is to ensure complete absence of lubricant leakage from the engine cylinder head.
To choose the right sealing compound, you need to consider what components the engine sealant is made of and whether the substance has sufficient heat resistance. High-quality preparations for the prevention and repair of internal combustion engines are anaerobes and silicones.
It will be useful: How to make a stabilizer strut with your own hands?
Anaerobic sealant
The main advantage of using anaerobic engine sealant is the long-term activity of the components in the presence of air and rapid hardening in the absence of oxygen. This allows a repairman or a novice motorist to correct the mating of the parts being processed. In simple words, if you were unable to apply the cylinder head sealant correctly the first time, you can slowly align the contacting parts for a tight seal. Advantages of Anaerobes for Valve Caps:
- Solidification rate in air and airless space.
- Obtaining a uniform sealing film on parts.
- Wide operating temperature range, thermal stability.
When using anaerobes, you need to apply the product to one part and press it firmly onto the mating surface. If oxygen is left available, the cylinder head gasket or crankcase pan sealant will retain a liquid consistency for a long time.
An important condition for quick sealing is a tight connection of the parts. Be sure to apply anaerobes to a clean, dry surface to prevent the ingress of foreign impurities. Engine sump sealant should be used immediately before assembly.
On video: Instructions for using anaerobic gasket sealants
Silicone sealant
The most popular at service stations and among vehicle owners is the valve cover sealant with a silicone component, which prevents oil leaks and has good sealing properties. Heat-resistant silicone sealant for engine repairs has the following qualities:
- Firmly seals cracks with gaps up to 6 mm.
- Resistant to mechanical stress.
- Provides elasticity to the repair seam.
- The sealant hardens upon contact with moisture.
- Adapted to the pressure of forced engines.
It is understood that when using an oil system sealant, it will polymerize when exposed to atmospheric moisture. Silicone compounds have a long service life and are recommended for experienced craftsmen and vehicle owners. Silicones can be used to seal the oil system so that engine oil will not leak from the engine compartments.
Design and purpose
The engine oil pan is a metal structure usually made of aluminum, but in older cars it could be made of steel. The shape of the oil pan resembles an elongated rectangular basin; it is attached to the cylinder block from the bottom side through a gasket on studs or bolts. There is a plug on the bottom or side surface designed to drain oil from the engine.
The pan is designed, firstly, to protect the oil receiver, crankshaft, and other parts of the engine crankcase from mechanical damage, dirt and dust. Secondly, it serves as a container for motor oil. It is from this that the oil pump delivers it upward through a filter - to the cylinder head, from where, having lubricated the parts of the gas distribution mechanism and connecting rod-piston group, it flows back.
Possible faults
Malfunctions of this part do happen, and it is dangerous to ignore them, since loss of oil threatens serious and expensive repairs of the internal combustion engine. They can be easily diagnosed by oil leaks - a characteristic small puddle that remains on the asphalt after an overnight stay and a wet sump. The causes of leaks may be:
- loose oil pan bolt;
- gasket wear;
- loose drain plug;
- cracks in the metal.
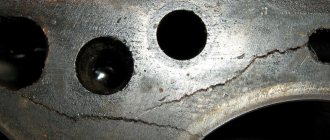
Cracks in metal are a much more serious problem than a poorly tightened bolt. They can appear as a result of impacts with large stones, curbs, etc. Even if protection is installed under the crankcase, it can crack due to non-compliance with the bolt tightening torques recommended by the manufacturer. A crack can also occur if the drain plug is overtightened after an oil change or repair. It has a slightly conical shape, is made of a harder metal, and can tear the pan. Such a crack is difficult to see, and some service workers, trying to eliminate the leak near the plug, tighten it even more, which subsequently aggravates the situation.
Audi A4 1.8MTQ HoOLiGANKA 250hp › Logbook › A story that lasts forever. How I broke through the pallet...
Every owner of a low car gets goosebumps that run from head to toe when he hears the treasured combination of words... “broke the pan”! Those who have already experienced this situation immediately begin to imagine how much of a hassle it is to fix. And for people like me, who are experiencing this for the first time, this is a big surprise and quite a lot of trouble: who to give it to, so that nothing is broken along the way, so that a centimeter layer of sealant is not applied, and most importantly, who will weld the hole?! I just pierced the pan absurd, in a place where I have visited more than once, but not this time. When leaving the store, I need to carefully drive through two holes with the left and right wheels at the same time, and it turns out that at this moment the car practically “falls” onto the asphalt. The maneuver has already been perfected and is more than familiar to me, but I never expected to encounter a stone! Which lay exactly in the place where, when driving into holes, I practically “drew” on the asphalt with my belly. Well, according to the classics of the genre, I don’t notice this stone and feel how it went under the whole car.
Driving out of these holes and steering onto the road, I notice in the side mirror a strange black trail behind me... I immediately brake and turn off the car. I get out of the car, already prepared with tears in my pocket and throw them in all directions)) I broke through the pan! From under the car comes the black “life” slurry of my Hooligan (((I’m in mourning, the car is in mourning, my friends are in mourning, passers-by are also in mourning because of the oil puddle that has formed in their way
But it is on this day that I need to leave the city at night for the next 14 working days. I send my friends home, and try to call a friend so that I can rattle off the almost two-ton carcass of the Hooligan. The car was towed and I left for work. The repair was very delayed due to financial issues and the search for a master in a new city who would patch up the battle holes in my baby’s soul... As a result, two months later, the machine is back in service and feels great. The car was laid up from the beginning of July to the 10th of September. Having purchased new oil, an oil filter, a new oil receiver, and a plug with a magnet, I sent the car for repairs.
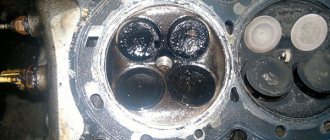
A couple of days later I picked up my car. There was no need to change the oil receiver; the old one was pristinely clean. There was no kaki in the form of coked particles in the pan. The hole where the pan was punched was carefully welded with argon.
What I used: 1) Oil filter (068 115 561 B) 502 RUR 2) Oil drain bolt with magnet masuma mitsubishi (M52) 173 RUR 3) Oil receiver (06B 115 251) 786 RUR 4) Motor oil 4 liters Idemitsu zepro euro spec sn/ cf 5w40 (1849041) 2319 RUR 5) Motor oil 1 liter Idemitsu zepro euro spec sn/cf 5w40 (1849001) 622 RUR.
Engine sump: repair
You can often repair or restore the engine oil pan yourself.
When a leak occurs in the area of the gasket between the crater pan and the cylinder block, first of all it is worth checking the tightness of the mounting bolts/nuts. It is necessary to tighten the bolts according to the tightening torques recommended by the manufacturer, otherwise you can strip the threads or cause a crack to appear - then you will have to make more complex and expensive repairs, restoring the tightness of the engine crankcase.
If tightening the bolts does not eliminate the leak, the gasket must be replaced. In this case, you cannot do without removing the pallet. This is not difficult to do from a viewing hole, on an overpass or a lift. We will look at how to remove and install the engine sump yourself below.
The most easily corrected malfunction can be considered a poorly tightened drain plug; they could simply have forgotten to tighten it well after the next maintenance. It is tightened using the appropriate key, by hand, without using additional levers or pipes.
But if you have diagnosed a crack in the oil pan in your car, then the best way to repair it is to completely replace it. However, there are situations when a car of a rare model or a new part is quite expensive, there are several ways to restore its integrity. For example, using glue, dry welding or argon welding.
The nuances of using valve cover sealant
Each of the listed sealants has its own characteristics. Accordingly, you will find precise information on their use only in the instructions supplied with the product. However, in most cases there are a number of general rules and simply useful tips that should be followed. In particular:
Review of popular automotive high-temperature sealants
- The sealant is completely vulcanized only after a few hours. You will find the exact information in the instructions or on the packaging. Accordingly, after applying it, the car cannot be used, and even just start the engine at idle until the composition has completely dried. Otherwise, the sealant will not perform its intended tasks.
- Before applying the product, working surfaces must not only be degreased, but also cleaned of dirt and other small elements. For degreasing, you can use various solvents (not white spirit). It is better to clean it with a metal brush or sandpaper (depending on the degree of contamination and the elements being cleaned). The main thing is not to overdo it.
- When reinstalling, it is advisable to tighten the bolts with a torque wrench, following the specific sequence provided by the manufacturer. Moreover, this procedure is performed in two stages - preliminary tightening, and then full.
- The amount of sealant should be average. If there is a lot of it, then when tightening it can get into the engine, if there is not enough, then the effectiveness of its use is reduced to zero. Also, do not cover the entire surface of the gasket with sealant!
- The sealant must be placed in the groove of the cover and wait about 10 minutes, and only then can the gasket be installed. This procedure provides greater comfort and effectiveness of protection.
- If you are not using an original gasket, then using a sealant is highly advisable (although not necessary), since its geometric dimensions and shape may differ. And even a slight deviation will lead to depressurization of the system.
Draw your own conclusions...
Each car enthusiast must decide whether or not to use sealant. However, if you are not using an original gasket, or there is a leak from under it, you can use a sealant. However, it must be remembered that if the gasket is completely out of order, then using sealant alone may not be enough. But for prevention, you can still apply sealant when replacing the gasket (remember the dosage!).
How to remove and install the oil pan yourself
This is not a complicated procedure, and most car enthusiasts can do it, although it does require some repair skills and tools. Depending on the brand of the car, nuances are possible. For example, in VAZ cars of the classic family, with a longitudinal engine, you need to lift the engine. Therefore, before you start disassembling it yourself, read the repair manual for your car.
Procedure for removing the oil pan:
- Prepare a clean container - it can be a canister with a wide neck or a cut one. Its volume must correspond to the amount of oil in the engine of your car;
- Drive onto an inspection hole or overpass; it will be more convenient for you if it is deep enough so that you can stand under the car at full height;
- Warm up the engine to a temperature of 50-60 degrees, the engine oil will become thinner and more fluid;
- If the engine compartment protection is installed, remove it; it is usually secured with 3-4 bolts;
- Carefully unscrew the drain plug, placing a previously prepared container under it, be careful - the oil will definitely flow onto your hands and possibly somewhere else;
- Unscrew the oil filler plug. After unscrewing the filler plug, the flow of escaping oil will increase sharply, make sure that it flows into the canister and losses are minimal;
- Wait until all the oil has drained and begin unscrewing the fastening bolts/nuts;
- If all the bolts are unscrewed and the oil pan cannot be removed by hand, this means that the parts have been glued together. You need to tap it with a rubber hammer, carefully pry it with a screwdriver or other flat object, but so as not to damage the joints. Scratches may cause leaks in the future.
Now that the pan has been removed, you can carry out repairs and also see the crankcase structure.
Installation is carried out in reverse order. The drain plug must be screwed into the pan immediately, and oil must be poured through the filler hole last. It is recommended to combine pan repair with an oil change. It is important to ensure that the bolts and plug are properly tightened, as already mentioned.
It is the gasket that ensures a tight connection between engine parts. When purchasing, be sure to match the article number. It is not possible to repair a worn gasket. It is recommended to replace it after each removal of the oil pan during installation. In this case, you need to carefully and very carefully clean the surfaces that will be in contact from the remnants of the old gasket and sealant.
To improve the properties of the gasket, you can use graphite lubricant, a special sealant for the engine crankcase, or any heat-resistant silicone-based sealant.
Graphite lubricant is applied to both sides of the gasket in a thin layer; after assembly, it fills micro-cavities, and hardens under high temperatures.
It is preferable to use a special sealant; it is applied in a thin, uniform layer over the entire contact area, on the pan and on the cylinder block. After assembly, the sealant will dry and, as it were, glue the surfaces, ensuring a tight fit and sealing.
Some craftsmen use sealant instead of a gasket, in which case its layer should be thicker, but it is better to leave this method in case the car is so rare that it is difficult to find the right gasket for it.
Sequence of actions for replacing the gasket
Place the car over a hole or on an overpass so that it is convenient to get to the oil pan, otherwise removing it will turn into a “quest”. Having correctly placed the car over a hole or on an overpass and secured it securely (at least with a handbrake), you can begin the main process.
Going under the car, we see the oil pan protection, which we have to remove to get to the gasket.
The protection is attached to 4 bolts, which can be easily unscrewed with a socket wrench or a socket wrench. Having removed the protection and thoroughly wiped everything with a rag (and you will need a lot of it, because there is more than enough dirt), we see the oil drain plug.
The next step is to remove the engine protection, which prevents us from removing the pan. After this, unscrew the plug with a special key (hexagon) and drain the oil to remove the empty oil pan. Sometimes the drain plug can be tightened too tightly or become soured if it has not been unscrewed for a long time. In this case, we put a tube on the hex key; it will serve as an excellent lever.
Before draining the old oil, warm up the car engine, this will ensure more complete drainage (hot oil drains much better and faster). And it’s worth preparing a container for old oil in advance; the neck of the container should be as wide as possible, otherwise there is a danger of burning your hands with hot motor oil.
After this, unscrew the 19 bolts, which are evenly spaced around the perimeter of the pallet.
After unscrewing the bolts, we try to remove the pan. It is unlikely to succeed the first time; it rests on the oil pump. Exit - you need to raise the engine by unscrewing the engine mounts with a 17 key. The engine mount is attached on both sides, top and bottom, in both cases the same key is used, 17.
To remove the pan, you need to lift the car engine by at least 10 cm, otherwise all your efforts will go to waste. If everything is done correctly, we will see such a picture.
After removing the pan, carefully wipe it from the inside from oil and dirt, wipe the oil receiver, and remove the remnants of the old gasket.
Now we install a new gasket and carry out the assembly process. This is done in reverse order. The final touch will be to fill in new engine oil (don’t forget to change the oil filter).
Something else useful for you:
Here, in brief, is the entire process of replacing the cylinder block gasket; there is nothing overly complicated about it. The process (with associated work) takes on average no more than 5 hours, although experienced car mechanics do it much faster. But, as they say, experience comes with time.
Cold welding
The cheapest way to repair a crack is by cold welding. It is no different in terms of reliability, because it is not brewing, but rather caulking/sealing. Cold welding, as a rule, consists of two components, which are mixed together, applied to the damaged area and allowed to harden. Before doing this, be sure to degrease and thoroughly clean the damaged area. In the case of a small crack, you can try to seal it without removing the pan. When choosing cold welding, pay attention to the temperature at which it retains its properties - it should be at least 200 degrees.
DIY shower cabin repair video
A cheap cabin must be carefully looked after so that restoration of both the cabin itself and its individual elements is not required. You need to keep the cabin tidy and clean at all times. Before installing the cabin, you first need to put a filter on the pipes so that the water enters the cabin already purified. Having done all this, you will be able to use the shower stall and enjoy it for a very long time.
Attention, TODAY only!
Add site to bookmarks
- Kinds
- Choice
- Installation
- Finishing
- Repair
- Installation
- Device
- Cleaning
Argon welding
Argon welding is the most effective way to remove damage. This type of welding can be used to weld both aluminum and any other non-ferrous metal alloys. A good welder can easily fix a crack or weld a small hole, and the seam will not affect the functionality in any way. The disadvantage of such repairs is the high price. You can, of course, save money if you remove the part yourself and contact welding specialists directly. But in the case of common brands of budget cars, it will cost less to replace the oil pan with a new one.
You can also use glue for repairs. There are many different types that allow you to seal metal, but epoxy remains wear-resistant, heat-resistant and water-resistant. It is based on resins, substances to accelerate curing, and other fillers. The application of epoxy adhesive is similar to dry welding, it is also two-component and comes in paste or liquid form.
Why was the crankcase damaged?
A metal protective sheet located on the bottom of the car protects the crankcase from damage. But an occasional hole on the road or an unnoticed stone off-road can bend the protection. Even at low speed, such an impact can form a crack on the surface of the crankcase. Through a small hole, the car will lose two to three liters of oil in a few days.
It is recommended to check the underbody of the car after hitting potholes and rocks!
Another reason why oil leaks is due to wear on the crankcase gasket. The cardboard or rubber gasket may lose its insulating properties over time, or become dislodged due to crankcase impact. The defect can be easily eliminated by tightening the pallet mounting bolts.
In any case, the cause of the leak must first be identified. You can do this yourself. But you need a pit or a lift, free time and experience. The work is very dirty and requires tools. Moreover, the leak may be for a completely different reason. It is safer to contact specialists.