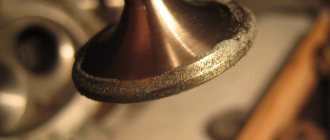
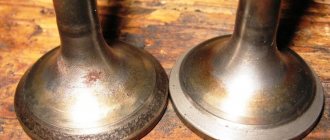
Valve lapping is considered a simple technological operation of fitting the valve face chamfer to the seat. This process is relevant when repairing an old valve. Grinding is also carried out when updating the valve. During the procedure, a special paste or sandpaper with oil is applied to the valve chamfer. The whole process occurs with the help of the oscillatory movement of the knob. In parallel, the whole process continues until the gray color of the valve chamfer and seat is obtained. In a car service center, a special machine is used for the procedure, which processes 3-5 products at once. You can also perform grinding yourself without contacting specialists.
What is lapping and why do you need to lap valves?
Valve lapping is basically grinding along the surface of the valves (which allow fuel and air to flow freely) and where they meet each other. This is done by applying a special paste to the edges of the valves. The result is a perfect seal that will prevent gases from escaping while the engine is in use.
An internal combustion engine works by achieving a certain compression ratio, which differs between models, and burning an air-fuel mixture, which is compressed to a certain volume, set by the compression ratio. And if the air-fuel mixture leaks through the seat, the volume of the air-fuel mixture will change and the combustion process will not be accurate, resulting in poor engine performance.
Benefits of the procedure:
- Creates maximum seal between valve and head, which will prevent gases from escaping while the engine is running.
- The large contact area ensures heat dissipation from the valves to the head, which will prevent the valves from burning.
As a result, the entire process will lead to thinner surfaces, the elimination of minor defects, and the creation of a more reliable seal.
Let's sum it up
So, as can be seen from all of the above, lapping is a responsible, labor-intensive procedure, but extremely necessary for good engine operation, not only after repair, but also after a mileage of over 60,000 kilometers. The only question that remains unclear is whether it is necessary to grind the valves on the new head.
Regarding this case, there are two options: if the head is completely new and was purchased fully equipped, then you don’t have to grind it in. In any case, experts say that this is not necessary. However, if the head was purchased separately from the valves, then grinding will be necessary. Again, in any case, before installing it, the tightness of the fit of the plates can always be checked in a well-known way, that is, by pouring gasoline or kerosene into the cylinder head or manifolds.
What is needed for grinding in
All lapping tools work the same way. This means that the tool is attached to the valve head, lapping compound is applied to the valve seat or surface, and the tool is rotated in different directions to ensure a firm hold.
The procedure will also require:
- kerosene;
- lapping paste;
- a spring, along the outer diameter, which passes directly into the valve seats.
Valve grinding tools
There are certain tools for grinding valves. They will be discussed below.
So, the devices that are used for grinding valves with your own hands:
- Dry cloth . Necessary for wiping treated surfaces.
- Solvent . A special product that provides high-quality cleaning of work surfaces.
- Hose and spring . The springs must have a sufficiently reduced stiffness. Their diameter is 2 or 3 millimeters, slightly larger than the diameter of the valve stem. It can be placed on a rod. You can also use a small clamp to secure it securely. You also need a short metal rod with a diameter similar to the piston rod so that it fits comfortably into the rubber hose.
- Kerosene . Used in all lapping procedures.
It is also necessary to check the grinding in thoroughly after the procedure. It is very important to carry out the procedure very efficiently.
Minuses
- The undoubted disadvantage of internal combustion engines is the high degree of emissions generated during driving. The main problem is that the fuel does not burn completely. Only 15% of the combustible material is used to move the car, the rest flies into the air as a result of the fuel combustion chamber not reaching perfection. Exhaust gases include hundreds of harmful components, heavy metals and hydrocarbon derivatives.
- A gearbox is always required. This device is necessary in order to change the gear ratio, which regulates the number of engine revolutions, which in turn transmits energy to the wheels, and they begin to rotate either faster or slower.
- The need to change the oil every 10,000 km. This is due to contamination of the fluid by small particles entering the engine, as well as when working waste appears from the pistons and crankshaft.
- High cost of fuel. The price per liter of gasoline or diesel fuel is steadily rising. At this rate, driving cars with internal combustion engines will be a great luxury. A way out of this situation can be the installation of gas equipment, since the price of gas is now 2 times less than the cost of gasoline, and so far remains around 23 rubles, depending on the region.
- Limited resource of cheap motors. Manufacturers of low-cost engines use low-quality parts that have a lot of wear. Although, with modern lubricants, the operating time can be significantly increased. The main thing is to change fluids and other consumables on time.
- Low efficiency. This indicator reflects the efficiency of the engine relative to the energy generated in mechanical forces. It is expressed as a percentage. Unlike electric motors, whose efficiency can reach 95%, the efficiency of internal combustion engines does not have such indicators. Efficiency losses occur as a result of incomplete combustion of fuel, heat costs, as well as losses on other equipment, such as an air conditioner, pump, generator.
Modern engines have stepped far ahead of their previous counterparts. Today they have no competitors. Perhaps, unless people come up with something radically new, such motors will exist in our world for many more decades. How I would like internal combustion engines to live forever, but their existence will end along with oil, and the era of electric engines will come.
But, despite the fact that internal combustion engines have earned universal love, they can cause a global environmental crisis. The emissions created by millions of cars into the atmosphere pose a real threat to our planet.
Valve lapping tools
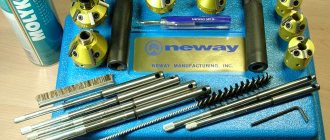
The main tools for lapping valves include:
- Manual valve holder . One of the most frequently used tools. Often the holder comes complete with a special paste for grinding valves. You can also buy this tool separately at any auto parts store.
- Drill or electric screwdriver . Considering that this procedure is always performed in two directions of rotation, many prefer to use a drill. A drill that rotates in two directions at once and provides more efficient grinding. Also, for these purposes, some people choose an electric screwdriver. Its operating principle is very similar to a drill.
- Lapping paste for valves. You can buy a ready-made composition in automobile workshops. If you have some knowledge and skills, then save money and you can do it yourself.
Methods for running in the engine
The algorithm described above is a classic natural run-in. But besides this, there are at least three more ways to grind in parts of a restored power unit:
- cold rolling method, performed using a special stand;
- cold running, performed without a stand;
- method of hot lapping of engine parts.
Let's consider the features of each of the listed methods.
Run-in on the stand
Of course, the stand itself is very expensive equipment. Only large service stations can afford it, but thanks to its use it is possible to gain complete control over all technological stages of running-in.
In this case, the power unit is installed on a stand and started by connecting to the driveshaft, which, in turn, is driven by an electric motor, which is considered to be leading in relation to the car engine.
A special device called an encoder controls the rotation speed of the drive engine, while the tachometer records slightly less accurate readings. The bench equipment operates under the control of a microprogram that regulates the operating parameters of the electric motor, based on sensor readings.
The total duration of operation of the driving/driven motor pair is determined by the scope of work performed as part of the vehicle's overhaul. In particular, normal grinding in of a new cylinder-piston group requires approximately three hours of continuous rotation of both engines.
The result of such cold grinding suggests that the following indicators were achieved:
- when the SA operates at idle (at speeds not exceeding 600 per minute), the speed stabilizes;
- pressing the accelerator pedal in the same mode does not lead to interruptions in the operation of the lead engine, and it should not stall.
Let us note that purchasing an expensive stand for cold running-in is not enough - you also need a specialist who is well versed in the nuances of reaching a certain mode, and in unquestioning adherence to the technology of grinding in parts.
Benchless cold running
It consists of towing the car in third gear, but with the engine turned off, for 2-3 hours. Before running-in, the car is filled with all necessary technical fluids, including oil and antifreeze/antifreeze.
Although experts do not recommend using this method, it has become widespread among garage repairmen.
Hot running
It is carried out directly on the car, but immobilized. It is characterized by the ability to control the assembly quality of the power unit after overhaul and leveling of minor defects made during the production of parts and assemblies installed instead of worn ones. What’s good is that this technology can also be used in garage conditions. Cold running algorithm:
- start the engine, set the speed to idle speed;
- let it run for about 3-4 minutes, turn off the engine for approximately the same amount of time. We repeat the cycle 10-15 times. Stopping the engine is necessary in order to prevent local overheating of the power unit;
- we start the engine again, set the speed at 1200 rpm, gradually increase it to about 50% of the maximum level. We calculate the increase in speed so that the total operating time of the power unit is 45-50 minutes.
During the last stage, we especially carefully monitor the engine temperature; if it rises uncontrollably, you should turn off the engine, let it cool and only then start it again. If everything is normal, we check the levels of technical fluids and the presence/absence of leaks, and measure the compression of the cylinders. Finally, after the break-in is complete, we set the ignition again and adjust the valve clearances.
Natural engine running-in
We have already given the sequence of classical running-in. It is worth noting that, regardless of the complexity and scope of the restoration work, the running-in should be carried out exclusively in a gentle mode, even if you are limited to only replacing the chain (of course, the total mileage in this case will be minimal, about 500 kilometers).
Driving in fifth gear should be avoided and you should start very smoothly
We have already talked about the importance of filling in high-quality engine oil, but it is no less important to use good fuel - at least until the break-in period is completed.
Valve lapping methods
This procedure can be completed quite successfully without visiting a workshop, but it does require some mechanical skills.
Manual grinding method
For maintenance purposes, valve grinding is considered a mandatory procedure. Most modern engines do not require valve lapping because they are made of aluminum, and if engine parts are damaged, the risk of valve replacement is higher. However, on the VAZ 2109 this is a necessary procedure.
So, what does lapping valves on a VAZ 2109 look like:
- You need to remove the valves from the head. They always start by removing the valves from the head. It is recommended to take advantage of this and remove any carbon deposits using a brass wire brush. Whether regrinding will be necessary depends on the condition of the head, but in this case new valves will be installed and slammed shut to create a perfect seal. Valve lapper kits may include special tools for lapping valves, and there are also options with four suction cups for different valve sizes.
- Then you need to carefully insert the valve. You should ensure that the valve is as clean as possible before applying a small amount of sanding paste to its surface. You need to insert this valve into the port it belongs to and press the appropriate suction cup onto the valve head - a little water or grease will do a good job of holding it in place.
- Identify changes in tone. Now you just need to turn the valve, rubbing it between your hands, and listen for the change in tone from the loud grinding sound. When the tone changes, you will need to lift the valve and again spread the paste over the face of the valve.
- You should continue to do this until the surface of the valve is uniformly bright and shiny with no signs of dull spots. It is important to thoroughly clean each valve and head and then reinstall the valve.
- Ready! This is all that is required to grind the valves yourself.
Grinding in valves with a drill
Using a drill for lapping is a great solution to save time and effort.
- You need to take a pre-prepared metal rod.
- A rubber hose of the same diameter should be placed on the rod. It is recommended to use a clamp for this.
- You need to fix it to a metal rod in the socket or to an electric screwdriver.
- Place the spring on the valve stem and install it on the seat.
- It is necessary to remove the valve from the cylinder head and carefully distribute the lapping paste over the entire surface of its plate.
- Insert the valve stem into the rubber hose and, if necessary, use a clamp of the same diameter for better fastening.
- Use the drill at low speed and grind the valve by moving the drill back and forth. As a result, the installed spring will be especially effective. After this, you need to turn the drill in the opposite direction until a matte surface appears on the valve body.
- After grinding in, it is necessary to wipe the valve from residual paste, preferably with a solvent. It is necessary to remove the paste not only from the valve plate, but also from its seat. There is no need to change valves, because grinding is performed for each valve individually.
How to properly lap valves using a pneumatic tool using the rotary method
Another way to lap the valve is to use a pneumatic tool. Such tools work well in removing fuel and oil contaminants. When performing this procedure, be sure to spray cleaner only into the probe tip and the holes on the sides. You can use duct tape to cover the ends of the connectors and prevent them from spraying. To use the tool, you must be connected to a source of compressed air. You need to place a suction cup of suitable size on the pin, which will then be installed on the valve plate. This is the easiest method for cleaning as it provides good results in a short period of time.
How to grind valves on a 16 valve engine using a pneumatic machine using the tapping method
Do-it-yourself valve lapping can be prone to errors. This is why it is recommended to use an air machine that will do this automatically. Do-it-yourself valve grinding is possible using a pneumatic machine. In this case, the valve will not be cleaned by rotating movements, but only by tapping. This method resembles real engine operation.
So, this is what the whole process looks like step by step:
- You need to place one of the suction cups on the rod of the device (included in the kit).
- The suction cup must be securely attached to the valve plate.
- Using the wheel you can control the operation of the tool.
- The tool has a wheel to control the speed.
- Grinding occurs through constant repetition of reciprocating movements.
This method does not require any special skills. If you have no experience, you can learn during the grinding process. In addition, this method fully guarantees high efficiency and safety. When using this machine, you don’t have to worry about the risks of damaging parts or getting hurt yourself.
By repeating the operation of the valve, the engine achieves the most precise grinding possible.
Grinding in new valves
Valve lapping is considered an integral part of engine rebuilding and must be performed even when new valves are installed to match the valve head. Accordingly, new valves may also be subject to grinding.
Is it necessary to grind the valves on a new cylinder head?
The selection of valves for a new cylinder head must be treated with special attention. You should supply quality options and not save on their purchase. In this case, you will not need to do anything. However, some still prefer to carry out grinding, but in this case it is not necessary.
Do-it-yourself valve lapping video
Below are videos with which you can perform valve grinding yourself without the help of specialists.
What lapping paste to use
Our grandfathers made their own rubbing agent. They collected dust under sandpaper with a diamond wheel, and then mixed it with oil. Today, thanks to the progress and development of trade, motorists have a decent selection in specialized stores. Therefore, for beginners, a logical question arises about how to grind the valves, what paste. There is no talk about price. Here everyone chooses at their own discretion and in accordance with their capabilities. It is much more important to decide on the grain size and composition.
An inexperienced car enthusiast should not use coarse pastes. An error in operation can lead to significant defects in the chamfers of the valve and seat, which will entail additional costs. For this reason, it is better to use medium-grained pastes for basic work and fine-grained ones for grinding.
Very often, two tubes are included in the kit, which makes the task easier for the buyer. In stores you often find FABO paste in stylized (valve-shaped) packaging. By the way, the name is an abbreviation and stands for Finishing Anti-Friction Non-Abrasive Treatment. This paste should be used as a finishing paste after the valve has been ground in using “Classic” or “Diamond” pastes, sold in the same packaging.
In addition to the above-mentioned paste, ABRO Grinding Paste GP-201 is on sale. In this case, there will be two options in one package: coarse-grained and fine-grained. It costs much less than FABO. In addition, this paste is suitable for removing rust from any metal surface, as well as for straightening cutting tools. In a word, this paste is multifunctional. You can get medium and fine paste in one package by purchasing Done Deal. The basis here is silicon carbide powder. It is also a universal product that will come in handy around the house. And if there is a possibility and need to work with chrome surfaces, then you should pay attention to PERMATEX paste. In any case, before purchasing, it is recommended to carefully study the instructions and only then make a choice.
Now let's answer the question of what to do when there is no pasta. Sometimes there are situations when you need to grind the valves if there is no paste. Well, in this case you will have to remember the old-fashioned methods, as already mentioned above, or diversify them a little. So, if there is no dust from the diamond wheel, then you will need the finest sandpaper. You need to remove the abrasive from it and mix it with motor oil or grease. GOI paste mixed with the same lubricants is used as a finishing paste. Of course, the quality of processing with such means will be much lower. Especially when there is no relevant experience.
How to check valve lapping
If there are defects in the valve seals and seats, the air-fuel mixture can enter the combustion chambers. This will result in reduced engine performance. Therefore, special attention should be paid to carrying out a detailed check of the perfect lapping of the valves.
During valve lapping, it is important to observe the valve seat area. This will help you understand whether further lapping of the valve is required. After the valve grinding process, the most common test method is the gasoline method. After completing the work, you need to place the valve in the exact location in the cylinder head and pour gasoline into the valve stem. Then there is a gasoline leak. If gasoline flows through the valve seat, then we can conclude that the work was not successful. If gasoline does not flow through the valve seat, then we can say that the procedure was performed correctly.
Checking valve tightness after lapping using an EGR valve
The check requires that when the engine is idling, the valve is disconnected from the hose through which the vacuum (vacuum) flows. If you have a vacuum pump, you can connect it to the valve opening. Due to this, a vacuum will be created. If there are malfunctions and problems, the engine will “suffocate” and the speed will drop sharply.
Compressor test
To ensure that the valves have been properly ground in, it is recommended to use the compressor test method. This is the fastest way. You need to measure the compression, pour about 20g of oil into the spark plug compartment and take the measurement. If the compressor performance has increased, then everything is fine with the valves.
How much to rub?
How can you tell when the valve is ground in? There are several ways
- air check
- kerosene
- pencil
The vacuum tester performed best, which is not surprising, because the principle of operation of the vacuum tester is similar to the processes occurring in the engine. In the engine, gases break through the cracks, which we will check with this test.
The device is connected one by one to all openings on the intake and exhaust manifold sides and a vacuum is created. If the valves are poorly lapped, then there will be insufficient vacuum on the pressure gauge, as air breaks through the valves. This shouldn't happen.
Another test method, which is available in any garage, is the kerosene test. The valves are inserted into place, the head is placed with the combustion chamber facing up, and kerosene is poured on top. According to legend, if all the kerosene does not leak out overnight (or if it does not leak out at all? There are different opinions), then the valves are ground in correctly. But the inconsistency is that it makes no difference to the engine whether kerosene spills or not; air can either break through the connections or not, so this verification method can be neglected.
Another simple way is to check for uniform distribution of the marking substance. On the working edge of the valve seat, radial marks are drawn along the entire circumference. Then they insert the valve, press it and make rotational movements. Then they take out the valve and see what pattern has formed: if the marks have been erased and the entire surface of the seat is painted evenly, then it’s fine, it can work, if there are any irregularities, we continue grinding in.
What does a ground valve look like?
Valve lapping refers to the procedure to ensure proper seating for the intake and exhaust valves in the engine cylinders. Often this procedure is performed after a major engine overhaul or in case of valve renewal. The valves ensure maximum tightness in the combustion chamber, thereby guaranteeing the normal functioning of the engine and its technical characteristics, and also guaranteeing a high level of compression and efficient operation of the engine. After grinding in, there should be absolutely no lines left on the valve, and the surface should be painted over evenly and neatly. If any defects are noticed, it is recommended to carry out the grinding again.
Finally, valve lapping is one means of improving the efficiency of a car engine. As the engine improves its performance, it will improve fuel efficiency. Fuel combustion will be greatly improved.
Functionality check
There are three ways to check that the valve is properly lapping.
- Using a vacuum tester. The most reliable and simple option. Connect a tool to each hole on the intake and exhaust sides of the manifolds. Now use it. If the valves are poorly lapped, the vacuum level on the pressure gauge will be insufficient.
- Using kerosene. Reinstall the valves, place the combustion chamber head up and pour kerosene on top. Leave them like this for several hours. If the kerosene does not leak out, everything is in order. Experts do not recommend using this method as it is not very reliable.
- Using a pencil. We draw radial lines along the entire circumference of the working edge of the valve seat. We install the valve in place, press it firmly and rotate it in a circle. We take out the product and look at the pattern. If the lines are erased and evenly paint the surface, everything is in order. If there are irregularities, the grinding was performed incorrectly.
The need for engine overhaul
Various reasons contribute to the gradual wear of parts; this occurs over a long period of time. Signs of engine malfunction appear in a certain sequence.
High oil and fuel consumption. Fuel fills the gaps between parts. Oil is consumed when the piston rings become clogged and the elasticity of the cap seals decreases.
- The car's power decreases and traction disappears.
- Black, dark blue smoke from the exhaust system. This indicates that there are problems in the internal combustion engine.
- The oil pressure light does not turn off.
- Extraneous sounds that are not typical during normal driving. The knocking noise may be a result of the bearings being worn out.
- A decrease in compression pressure in the cylinder occurs when the gaskets and piston rings are faulty.
- Burnt spark plugs.
- Reduced coolant level, frequent overheating.
- Excessive play in the steering mechanism.
Any of the listed signs is a reason for a thorough inspection of the engine, and perhaps even a reason for a major overhaul. Postponing repairs can lead to undesirable consequences. If the part is not repaired in time, you may have to buy a new part, or replace the entire system.
