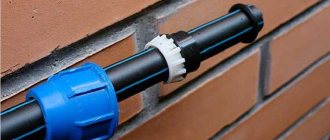
Connecting polypropylene pipes without soldering became possible with the advent of such connecting elements as fittings, couplings, flanges, as well as high-strength adhesive compositions designed specifically for polymer products.
The use of a material such as polypropylene solved the problem of corrosion of water supply, heating and sewage pipes. The widespread use of polypropylene pipelines brings significant economic benefits in almost all areas of human activity.
Unlike metal products, plastic pipes are connected by soldering using a special soldering iron. The process itself is quite simple, but it is not always advisable to purchase expensive equipment for this, and it cannot be rented everywhere.
The craftsmen learned how to independently connect polypropylene pipes without soldering, using plastic fittings. Today there are several methods of connection without welding.
One of them is that the ends of the communication are fastened with fittings, which are crimped with special pliers. As a result, soft alloy fittings, when deformed, form a strong, dense, one-piece unit.
In addition, plastic is tightened with flanges, glued, connected with couplings and threaded combination fittings. All this will be discussed in detail below.
Is there an alternative to a professional soldering iron for polypropylene pipes?
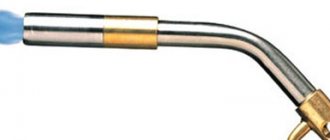
Before we sort out the soldering of wires and awnings, let's focus on the pipes. The machine for welding them costs several thousand rubles. Mostly professionals buy it for themselves, but for the average person this device simply will not pay for itself. In this regard, we have to look for an alternative option, which could be a gas burner, which is much more common in ordinary homes.
This burner performs well both in repair and installation. At the same time, it can solder both small-diameter pipes and fairly large analogues. It is used not only for connecting pipes, but also as a means of installing plastic taps to control the flow of water into the pipeline.
When may such a connection be necessary?
By and large, soldering of plastic pipes should only be done using a special soldering iron. But in certain situations it is possible to use alternative options:
- When performing local work (where soldering of 2–3 joints is required);
- When restoring utilities (for example, for inserting a new pipeline segment or installing a meter);
- In the manufacture of utilities from plastic pipes at non-critical facilities (irrigation system, etc.);
- For making crafts from plastic pipes with your own hands.
Tips for joining polypropylene pipes without a soldering iron
- The quality of the connection largely depends on the cleanliness and absence of grease on the pipes themselves. Therefore, before work, it is recommended to degrease and clean them from dirt;
- All pipes, as well as fittings and other parts must be from the same manufacturer. This way you will be sure that the same temperature effect must be applied to connect them. In addition, you should not skimp on quality. Its absence may appear both during the soldering process and during subsequent operation;
- Do not solder in cold conditions. If, for some reason, the room temperature has dropped by less than +5 degrees, the connection may be fragile;
- It is recommended to practice on unnecessary sections of pipe.
How to choose a soldering iron
If you solder polypropylene pipes once, skip this point, but when such a tool is needed for work or you plan to install a system of plastic pipes for your mother-in-law, godfather, brother, matchmaker, etc., then buying a soldering iron is issue No. 1.
Soldering iron characteristics:
- The compactness of the device, how comfortable it sits in the hands;
- Equipment power;
- Basic equipment (over time you buy different attachments, but at first, if the required attachment is not in the set, it is better to buy it right away, so as not to run to the store for it later);
- Soldering iron material.
Compactness is important. After all, you will have to keep the device suspended for a long time. Because of this, after the next pipe, your hands will begin to get very tired. Therefore, before buying a soldering iron, take it in your hands and try how convenient it is to work with it.
Power determines which pipes can be welded. The voltage of 220 V is taken as the reference point, to which the soldering iron is connected. Builders use very powerful devices. But in private practice, completely different characteristics are needed (power depends on the diameter of the hole):
- 16 – 63 mm. – 700 W;
- 63 – 73 mm – 850 W;
- 125 mm. – 1200 W;
- 125 – 150 mm. – more powerful heating tools.
The equipment consists mainly of attachments. The more nozzles the manufacturer provides, the more pipes the device can solder. All of them have a pair (for two products at the same time). Some devices join several pipes at the same time with different diameters. It is recommended to use Teflon coated tips. They are more durable.
Manufacturer. The Czech Republic is a country that produces the best soldering irons. It is their equipment that is considered the most expensive and high quality. Following the Czechs are the Turks, but among them there are many Chinese fakes.
China is not considered a very bad manufacturer. But it depends. You can get a good quality one from China or buy a cheap model that will fail after several repairs. To solder two polypropylene pipes, you need to be patient, attentive and, preferably, a good partner. The presence of a soldering iron plays a very important role, but there are analogues in the absence of a heating tool. If you do not understand the work, it is better to hire a specialist.
Currently reading
- Three ways to lay pipes in the toilet and bathroom
- Six ways to disguise pipes in the bathroom and toilet
- Overview of the operation of end caps for all types of pipes
- We select the diameter of polypropylene pipes ourselves
Alternative - PVC pipes
There are plastic pipes that do not require soldering, since they can be glued together. In addition, they have all-plastic pipe threads located on the internal and external sides.
In addition, there is a special solvent-based cement for PVC and CPVC pipes. After treatment with this cement, the surface becomes soft and can be quickly glued together.
Connection of pipes without welding and threading - metal to plastic
With the arrival of the warm season, the need for awnings increases. When you put it out on your property or take a small tent for a picnic, you may find an unpleasant surprise - a hole. Is it worth buying a new awning after this or can I somehow correct the situation?
For soldering, we need a construction hair dryer, which will have a special crevice nozzle, as well as a patch with a roller. After preliminary cleaning the damaged area and patching it from dust and grease, it is necessary to place the awning on a flat surface. Having attached the patch to it, we begin to heat both surfaces using a crevice nozzle, simultaneously securing it with a roller. The better you heat the surfaces, the better they will stick to each other.
But here it is extremely important not to overdo it and not burn a hole.
Anatomy of polypropylene pipes
Most polypropylene (PP) pipes are the same at first glance. A more detailed examination of them will allow you to notice differences in material density, internal structure and wall thickness. The scope of application of pipes and the features of their installation depend on these factors.
Classification of PP material
The quality of a polypropylene weld and the operational characteristics of pipes are largely determined by the PP manufacturing technology.
There are the following types of parts, based on the material they are made of:
- PRN . Single-layer products made of homopolypropylene. Used in industrial pipelines and cold water supply systems.
- RRV . Single-layer products made from PP block copolymer. Used for installation of underfloor heating networks and cold pipelines.
- PPR . Single-layer products made from random copolymer PP. They are used in water supply and home heating systems with water temperatures up to +70°C.
- P.P.S. _ Refractory type of pipes with operating temperatures up to +95°C.
There are also multilayer reinforced PP parts.
When heated by 80 degrees, reinforced PP pipes elongate by 2-2.5 mm/m, and conventional single-layer pipes by 12 mm/m
They have an additional internal aluminum shell, which dramatically reduces thermal expansion, facilitating wiring installation and operational safety.
The disadvantage of these products is the need to remove the top polymer layer and aluminum to the depth of penetration of the pipe into the fitting before soldering.
What does the marking look like?
You can select the required pipes and fittings for plastic wiring in the construction market yourself. You just need to know the labeling symbols.
The indicators may be in a different sequence and in a foreign language, but store managers must know any decoding
To determine the scope of application of polypropylene products, the main indicator is PN. This is an indicator of the nominal pressure in kgf/cm2 (1 kgf/cm2 = 0.967 atmospheres), at which the operational life does not change. The base temperature of the coolant in the calculation is assumed to be 20 °C.
In the domestic sphere, 4 main types of PP pipes with different PN values are used:
- PN10 – for cold water supply;
- PN16 – for cold and warm water supply;
- PN20 – for hot water and heating systems;
- PN25 – for heating systems, especially central type.
Products with PN25 often have a large linear length, so they are almost always reinforced with aluminum foil or strong fiberglass for less expansion when heated.
Appearance and internal structure
High-quality PP pipes have a perfectly round shape when cut. The thickness of the walls and reinforcing material should be the same around the entire circumference, and there should be no breaks in aluminum or fiberglass.
To trim the top layer of plastic and foil on reinforced pipes, you need to purchase a special tool - a shaver. It is inexpensive and easy to operate
A reinforced pipe traditionally consists of three layers: inner and outer polypropylene and middle aluminum or fiberglass. The surfaces of the pipes must be smooth, without sagging or depressions.
The color of the material can be green, white or gray, but the quality and characteristics of the pipes do not depend on this at all.
Step-by-step instructions for welding PP pipes
After purchasing all the necessary pipes and fittings, you can begin welding them. This process will be discussed step by step, with illustrations, so that no questions remain.
Step 1. Pipe cutting
This process is carried out using a pipe cutter. If the cut is beveled, then the longer edge can form a bead during soldering and narrow the internal passage of the fitting.
The pipe cutter has a wide base, which helps maintain a right angle when cutting, but this does not mean that you do not need to control the perpendicularity of the cut yourself
Pipe cutters have a maximum diameter limitation, so you need to choose the model that fits the purchased pipes.
Step #2. Pipe processing and chamfering
After trimming, it is necessary to form a small chamfer on the part that will fit into the socket. For this purpose, hand calibrators or screwdriver attachments of various sizes are used. Both tools have built-in knives that form a chamfer with standard parameters.
You can form a chamfer using a screwdriver attachment directly in your hands, without resorting to rigidly fixing the pipe in a vice.
A universal method of soldering an awning
With the arrival of the warm season, the need for awnings increases. When you put it out on your property or take a small tent for a picnic, you may find an unpleasant surprise - a hole. Is it worth buying a new awning after this or can I somehow correct the situation?
For soldering, we need a construction hair dryer, which will have a special crevice nozzle, as well as a patch with a roller. After preliminary cleaning the damaged area and patching it from dust and grease, it is necessary to place the awning on a flat surface. Having attached the patch to it, we begin to heat both surfaces using a crevice nozzle, simultaneously securing it with a roller. The better you heat the surfaces, the better they will stick to each other. But here it is extremely important not to overdo it and not burn a hole.
How to connect two different pipes
Sometimes the design involves connecting two systems of different types (for example, polypropylene and metal-plastic). This happens very often. Especially in old houses, where it is very difficult to replace the metal type section, but the rest of the pipeline needs to be changed.
The hardware store has threaded fittings. The figure shows that the device looks like this. On one side of the fitting there is a metal thread, which is connected to the metal part using a nut, flax tow (or fum tape) and an adjustable wrench. And on the other side there is a plastic protrusion. It connects to the plastic part.
Soldering wires without a soldering iron using soldering tape
Despite the fact that a regular soldering iron is found in our homes much more often than its counterpart for plastic pipes, it still may not be at hand at the right time when you need to connect two wires. Of course, you can try to twist them and wrap them with “blue electrical tape,” but this option is only temporary. At the same time, you can connect wires “forever” without a soldering iron.
A special soldering tape will help us with this, which allows us to create a durable polymer layer around the wire, providing a complete connection and insulation of the problem area. The stages of working with this tape are as follows:
- Stripping the wires that we will connect and their subsequent twisting;
- Removing the protective layer from the tape and wrapping it around the twisting area;
- Heating the tape with an open flame until it melts and evenly covers the problem area. Regular matches are suitable for this;
- After the tape has cooled, remove excess flux. The wire is fully connected and ready for further use.
Advantages and disadvantages of such soldering
Considering options for how to solder this or that part of polypropylene pipes without a soldering iron, you can see that each method has its own advantages and disadvantages. The advantages of this method include:
- No need to purchase a soldering iron if it is not available;
- Ability to use simple available tools;
- A cost-effective process for creating a connection that is cheaper than using a soldering iron;
- The ability to work with pipes of any diameter, both the smallest, which is quite easy, and larger ones, which will require more patience and experience.
Welding wires using special paste
The paste is used to join various metals such as steel, nickel, copper and others. The reason for this versatility is that this material is produced on the basis of silver. In general, the paste contains flux, solder and binding components crushed to a powder state. In the vast majority of cases, this method is used for soldering small wires. So, if your favorite headphones are out of order, and you don’t have a soldering iron at hand, then paste is the ideal solution. The way to use it is extremely simple:
- We clean the wires and twist them together;
- Apply the paste to the twist area as evenly as possible;
- Using a regular lighter, the paste is heated until it melts and turns into a full-fledged solder;
- After this, it is necessary to insulate all exposed parts of the wire. The ideal means for this is a heat shrink sleeve. We put it on the joint, then heat it up and get reliable insulation.
Features of solderless connections
Connecting plastic pipes without soldering will not require large financial expenses. And you won’t have to get expensive soldering equipment from somewhere (obviously, not everyone has it) either.
It is worth admitting that the soldering process itself seems very complicated to some. A person must be able to properly handle a soldering machine, set the required pressure and temperature, and select solder. In general, in order to solder pipes efficiently, you really need to know a lot of nuances.
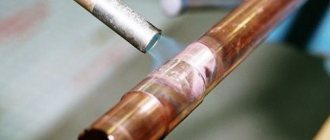
There is also an option such as soldering polypropylene pipes without a soldering iron. To do this, you simply take solder paste (this is a mixture of flux, solder powder and lubricant sold ready-made), apply it to the joint and heat it up.
Moreover, instead of a soldering iron, it is proposed to use a gas burner or lighter. But this method may also cause rejection for some, since here you have to deal with open fire.
Let's imagine a force majeure situation: there was a break in a plastic water pipe. It can take a long time to restore its seal by soldering. And restoring the tightness of pipes connected without soldering can be carried out much faster - this is a really important advantage.
Using soldering tape to solder pipes
Soldering tape is often used for wiring. It is widely used at home, as it is a convenient and easy-to-use way to solder various parts without a soldering iron.
Soldering tape for soldering
To solder something using this method you need:
- Clean the surface of the soldered parts from excess substances;
- Wrap the soldering area with soldering tape;
- After this, you need to heat the place where the tape is located until the solder begins to spread over the surface;
- Wait until everything cools down and remove the remaining flux.
Use of paste and requirements for it
Solder paste is a mixture of flux, lubricant and solder powder that is mixed mechanically. It is often used when choosing ways to solder something without a soldering iron. Manufacturers produce pastes with the addition of silver, which helps to carry out more complex soldering processes, as the material becomes more pliable.
The main requirements for solder paste include:
- Adhesive properties that help to better hold parts together;
- Quick delamination when used, but it should not oxidize;
- The paste must retain deformation and at the same time be viscous;
- It should not have any effect on the technical properties of the material being soldered;
- After application, the paste should not leave any indelible residue;
- It should be washed with ordinary solvents;
- Do not spread beyond the boundaries of its application.
Threaded
In threaded connections, various designs and sizes of polypropylene, combined or metal fittings are used. Tightness during assembly is ensured by sealing gaskets, sealing tape or flax tow, as well as by controlling the tightening force of the union nuts.
Crimping
Crimping, or collet, connections are made when assembling polypropylene pipes with metal elements. The required seal is achieved by tightly pressing the ferrules onto the pipe while tightening the nut. Silicone sealant provides additional density.
The range of compression fittings includes the entire standard set of these elements - couplings, bends, tees and transitions, and the method is used when installing hot water supply and heating systems.
Do-it-yourself soldering of small-diameter propylene pipes
We will talk about pipes that are most often used for wiring inside the house, i.e. about pipes with a diameter of 20 mm. Let's say we need to solder a pipe and an adjacent corner fitting.
Soldering propylene pipes of this diameter can be easily done if there is some safe source of fire at hand, which could be, for example, a miniature gas burner.
According to existing regulations and to ensure the required quality of the connection, the pipe must extend into the fitting by 14 mm. To avoid violation of this standard, it is advisable to measure this distance from the edge of the pipe in advance and put a mark with a pencil.
Having done this, you can begin deep heating of the elements being soldered. The fitting, of course, must be heated from the inside.
The end of the pipe is heated from the outside.
When both parts are thoroughly heated, they can be inserted into each other.
When inserting the pipe, you should be guided by the previously applied pencil mark, which should be exactly along the edge of the fitting.
After this, the completed connection should be cooled without exposing it to any external influences. The cooled joint will be very strong and will in no way be inferior in strength to those connections that are usually made using special welding machines, which we have already talked about. You can verify this by cutting the soldering area you just made.
As can be seen in the photo above, the junction of the pipe and the fitting is completely monolithic, and such a pipe can be included in the home water supply system without the slightest fear.
So, if you need to solder polypropylene pipes, you can easily do this work on your own, without purchasing any special tools for this. To do this, just take note of the recommendation we have given.
www.allremont59.ru
Nuances of the work
If you are faced with the task of how to connect polypropylene pipes without a soldering iron, then at the next stage you can apply glue. In this case, you need to use a brush, carefully distributing the composition over the surface of the socket and pipe. The elements are inserted into each other; to distribute the composition evenly, you need to rotate the fitting 90 degrees relative to the pipe. The parts are fixed for 30 seconds, during which time they should not be rotated again. It is important to complete the entire process within 1 minute. If you are thinking about how to connect polypropylene pipes without soldering, then after gluing is completed, you need to check the presence of a bead, which is a uniform adhesive layer located around the circumference. You may have to get rid of excess glue using a soft rag.
Using couplings
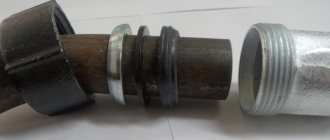
An ordinary coupling for plastic pipelines is a fairly simple part in its design. It consists of:
- cast iron body;
- two nuts;
- rubber gaskets;
- four metal washers.
The coupling can be found at the nearest plumbing store, or, if you have certain skills and knowledge, you can make it yourself. In this case, the characteristics of the coupling must strictly correspond to the dimensions of the products being connected. Ordinary couplings are suitable for both pressure plastic pipelines and pipelines without pressure. With their help, they provide a reliable connection of polypropylene without the use of a soldering iron.
To form a connection, the ends of the pipes must be inserted into the coupling so that they touch in the middle. The ends must pass through washers, gaskets and nuts. Then you need to tighten the nuts tightly so that the pressure on the gaskets is strong enough.
Joining plastic pipes with a coupling provides a 100% sealed seam, even without the use of soldering. But in certain cases, for example, if the pipe is short or adjacent directly to the floor (or other horizontal surface), it is not possible to install an ordinary coupling.
For such difficult cases, a clamping coupling was invented. How to use it? First you need to clean the edge of the plastic pipe. Then you need to unscrew the coupling and put all the fastening parts on the plastic product in the correct sequence. Moreover, the sealing ring should ultimately be located at a distance of at least one centimeter from the edge of the product.
Then you need to insert the body of the clamping coupling into the end of the plastic pipe. And then you need to move all the existing rings to this body and tighten the bolt. And to the thread located on the other side of the coupling, it will be necessary to attach an “American” fitting with a plastic pipe connected to it.
To control the strength of the connection, you must carefully pull the coupling towards you, holding the pipe to which it is attached with your free hand. The coupling must remain stationary. If it moves, it means that the wrong size part was selected. That is why it adheres so poorly to the pipeline. However, this is easy to fix - you just need to tighten the threads.
Installation work
When starting to work with polypropylene pipes, I first of all remembered their main qualities:
- The low price allowed me, without much outrage on the family budget, to purchase all the necessary plastic products, including connecting fittings, with some reserve . After all, even with the appropriate experience, no one is immune from making mistakes, and in case of an unsuccessful operation, it is better to have replacement parts on hand, rather than run to the store to get them, leaving behind an unfinished pipeline and an unwatched TV series;
- Simple connection instructions including hot and cold methods. But simplicity does not exclude the need for a special tool for each option. Next, I will describe both in detail, since I used both soldering and crimp fittings in different areas. It’s better for you to make your choice in advance in order to ensure that you have the appropriate equipment. You can do this immediately after reading the article;
- No corrosion processes . The plastic surface is not subject to either internal corrosion, which can be caused by the transported liquid, or external corrosion, which usually appears after laying the pipeline in the ground. Thus, when laying an underground water supply system, I knew that it would last for decades, but only taking into account high-quality and absolutely tight connections.
If you plan to use polypropylene pipes for installing a heating system, then I recommend purchasing reinforced samples that can withstand high temperatures, which will eliminate the risk of an emergency.
Based on the above, I purchased a supply of materials, took out the necessary tools and prepared to make high-quality connections that could be left unattended for many years.
Hot method
Where I planned to lower the water supply line underground, I had no doubts about the choice of connection method: soldering only. The melting point of propylene is only 260 degrees Celsius , and after hardening, completely sealed seams . In addition, the process itself goes quite quickly. In this case, the impossibility of dismantling did not bother me at all.
When laying pipelines indoors, welding is also great. The only exceptions may be those areas where pipe disassembly is required, or a situation in which it is not at all possible to obtain a pipe soldering iron.
If you are planning a one-time installation, then it is not necessary to purchase an expensive welding machine for plastic pipes; it would be more rational to rent one.
Before connecting polypropylene pipes using the “hot” method, in addition to the “iron”, I also prepared the following tools:
| Name | Purpose |
| Tape measure and pencil | Applying all necessary markings |
| Soldering iron attachments | Melting pipes and couplings of different diameters |
| Shaver | Cleaning of reinforced products |
| Special scissors or hacksaw | Pipe cutting |
| Sharp knife | Edge correction |
Now I will describe to you in detail how polypropylene pipes are connected, you will actually have time to install small sections while watching commercials on TV:
If this is your first time starting to solder plastic pipes, I recommend that you first practice on a couple of products that will not be part of the system being installed. This way you will get the hang of it and be able to avoid common mistakes when performing “finishing” work.
- Preparation:
- I took the soldering iron out of the suitcase in which it was located and placed it on a level and stable oak table . You can place the device on the floor or on the asphalt, the main thing is that it has a secure position, because you will have to deal with high temperatures;
- Then I inserted nozzles corresponding to the diameters of the elements to be soldered . In this case, a product is installed under the pipe in the form of a kind of “bowl”, which wraps around its edge from the outside, and under the coupling a pipe-shaped element that enters it and performs melting from the inside;
- Turned on the device . If your device has a power regulator, then set it to 260-270 degrees Celsius. If this is not the case, then the unit will warm up to the specified temperature automatically;
- Marking. Here I have already moved on to working with the pipes themselves. Using a tape measure and a pencil, I marked out the required sections to form the pipeline . In addition, I measured the depth of the heating elements and, adding a couple of millimeters, applied it to the soldering areas. This can be done after cutting the products. This technique will help you control the immersion of the edge of the segment into the nozzle, since excessive melting can lead to the formation of a bulge in the seam, preventing the passage of liquid;
- Cutting. The main thing here is to maintain a right angle. Thanks to having some experience, I have no problems with this, that is, I brought the scissors evenly to the line and made a clear cut in one smooth, strong movement . Also try to cut without worry and with the necessary effort. Otherwise, if you make oblique cuts, you will have to straighten them with a hacksaw or knife. It is also worth noting that when using reinforced pipes, you must first remove the top layer of plastic and the foil laid underneath with a shaver;
- Heat. At this stage, I put the prepared coupling on the mandrel, and with some delay inserted the pipe section into the sleeve nozzle . Why late? Because the walls of the connecting element are thicker and, accordingly, they will take longer to melt, that is, a head start will not interfere with them. The products should be kept in this position, guided by the following table:
| Section, cm | Melting time, s |
| 2 | 6 |
| 2,5 | 7 |
| 3,2 | 8 |
| 4 | 12 |
| 5 | 18 |
| 6,3 | 24 |
| 7,5 | 30 |
| 9 | 40 |
| 11 | 50 |
- Docking. After the time indicated above had passed, I removed both fragments with molten edges from the welder and connected them , again, strictly at right angles, after which I kept the time indicated in the following table:
| Section, cm | Connection time, s | Cooling time, s |
| 2 | 4 | 2 |
| 2,5 | 4 | 2 |
| 3,2 | 6 | 4 |
| 4 | 6 | 4 |
| 5 | 6 | 4 |
| 6,3 | 8 | 6 |
| 7,5 | 10 | 8 |
| 9 | 11 | 8 |
| 11 | 12 | 8 |
Under no circumstances should you rotate the products being joined while they are solidifying, as this may cause the seal to break.
- Control. I ran water through the finished pipeline and checked all joints for leaks . If you suddenly find one in your place, then cut out the problem area and weld a new section in its place.
Cold method
Compression fittings allow you to connect polypropylene pipes without soldering. All you need besides the connecting elements themselves is a crimp wrench , which, as a rule, is sold with them.
| Designation in the figure | Explanation |
| 1 | Union nut |
| 2 | Collet |
| 3 | Rubber sealing ring |
| 4 | Thrust sleeve |
| 5 | Frame |
I performed the process of connecting pipes using the “cold” method as follows, when I didn’t have an “iron” at hand, and it was necessary to urgently restore the damaged section of the water supply:
- Measured and cut the required piece of pipe;
- I calibrated the hole . It is very important that its cross-section ideally matches the diameter of the fitting tail;
- a crimp coupling on the edge of the pipe ;
- Then I inserted the fitting itself inside;
- I crimped the coupling with a special key, securely fixing it on the pipe;
- I checked the coupling for the presence of characteristic grooves, indicating a high-quality connection.
The described method also well solves the problem of how to connect a metal pipe to a polypropylene pipe. To do this, simply select the appropriate compression fitting, one of the ends of which is equipped with a metal thread of the required pitch and diameter.
If you have a question: “How to connect a HDPE pipe to a polypropylene pipe?” Then again you can turn to compression fittings, since welding here most likely will not work due to the significant difference in the melting temperatures of these materials. At least I wouldn't risk it.
And a little fly in the ointment: despite some universality of the “cold” connection method, it requires much more time to implement. So, if you have to install a long pipeline, then during the advertising on TV you may not have time to complete the task.
obustroeno.com
