mark_kr
11661 0 2
mark_kr August 9, 2016Specialization: professional in the field of construction and repair (full cycle of finishing work, both internal and external, from sewerage to electrical and finishing work), installation of window structures. Hobbies: see the column “SPECIALIZATION AND SKILLS”
If you have straight arms, bending tin and making pipes out of it is quite simple!
Making a pipe from tin with your own hands is an excellent alternative to buying an expensive drain or ventilation casing. In practice, the savings turn out to be colossal, and if you consider that having mastered the technology, you can literally “stamp” pipes of any (okay, almost any) diameter - then it’s definitely worth reading my tips and at least trying to implement them in practice!
Below I will talk about what we need to form the pipe, and also describe the algorithm by which I have been successfully bending tin products for five years.
Galvanization and polymer coating: what are the differences?
For most modern machines, it makes no difference what type of sheet metal is bent on it. But there are some difficulties in working with metal coated with a polymer composition. It’s easier with galvanizing, because its protective layer is more resistant to abrasion and damage. Therefore, nothing prevents you from bending galvanized steel with blows or sliding it along a rusty template - the main thing is that there are no deep scratches.
The coating with special paint has less mechanical strength, it is thinner and peels off relatively easily. It would not be the best solution to bend rolled polymer on old sheet bending machines with defective rolls, rotary beams or loose hinges, and even more so, such metal should not be processed with a mallet. Likewise, you should not use any available devices that can damage the anti-corrosion film.
Types of steel structures
Such structures are divided into the following:
- Chimney with one wall.
- With two walls. In these types, fire-resistant insulation is located between two blanks of different volumes.
- Coaxial. With two walls, but without an insulating layer between them.
The first type of chimney is used in areas with warm climatic conditions. The third type is suitable for gas boilers.
But the second type is considered a popular option, because the insulation reduces condensation, as a result the structure can last a very long time.
Required Tools
The list of tools and devices necessary for making a galvanized chimney pipe with your own hands is determined by the properties of tin, in particular softness and ductility. Processing this type of material does not require the special efforts required to work with sheet materials.
Therefore, when producing tin chimney pipes, the following set of tools is required:
- Scissors for cutting metal. This tool helps to cut sheet material into the required pieces without much difficulty, since the largest thickness of the sheet reaches 0.7 mm.
- Hammer with a soft striker. You can also use a wooden hammer, mallet, or a steel tool with a soft rubber grip. However, the latter option is used very carefully or not at all, since it can cause deformation of a thin sheet of tin and ruin the entire work.
- Pliers. With the help of this tool they solve the problem of how to bend a pipe made of tin, because it is steel, although thin, therefore it is impossible to bend it with your hands.
- Crafting table. This device is necessary when cutting material and when applying markings.
- Calibrating element. This can be a pipe product with a diameter of more than 10 centimeters, as well as a corner with edges of 7.5 centimeters. These elements must be well secured, since the joining seam will be riveted on their surface.
In addition to these tools, you should prepare a ruler or tape measure and a marker, which is a steel rod with a sharp sharpening.
Which tin should you choose?
How to make a pipe out of tin? What kind of tin is best suited for this type of work?
Tin pipe
Thin tin is an excellent material for homemade bathhouses and smokehouses. Tin is a thin sheet of steel that is susceptible to corrosion. To make beautiful drainpipes, as well as weather vanes, canopies over chimney pipes, do-it-yourself covers over chimneys, or original filigree lace, galvanized roofing iron is used.
Tip: tin pipes can also be used as samovars; they increase draft well and also remove smoke.
Sheet metal
Drain from sewer pipes
To make a standard drainage system yourself, plastic sewer pipes are often used. They have a number of undoubted advantages:
- affordable price;
- a wide range of pipes and adapters, as well as all kinds of fastening mechanisms;
- light weight, which facilitates transportation and installation;
- possibility of self-cutting;
- durability.
- White. This type of pipe is used only indoors, when pipes of a different color do not fit into the interior. They are not suitable for external installation.
- Gray. These pipes are stronger, but do not withstand loads and are not intended for use in cold weather. Suitable only for regions with warm winters.
White and gray pipes are not suitable for external installation
- Brown or red pipes. They are recommended for external drainage, as they tolerate low temperatures and water pressure well. They cannot withstand prolonged exposure to sunlight and become fragile over time.
Brown pipes are most suitable for drainage
Before purchasing pipes, a diagram of the entire system is drawn up, including all parts of the structure and their quantity:
- roof gutters (length is calculated based on the perimeter);
- drain pipes - one per 10 m gutter;
- brackets - 17 pieces per 10 m;
- bends - according to the number of drains;
- funnels - according to the number of drains;
- plugs;
- corners (the number depends on the type of roof);
- connecting elements for gutters, they need 1 less;
- knees - depending on the complexity of the scheme;
- transition couplings;
- outlet for rainwater inlet or markings.
The easiest way to install a drainage system is from plastic pipes
The cross-section of the pipes is selected based on the area of the roof slope. You can use the following scale:
- slope area up to 50 sq. m - pipe diameter 8 cm;
- up to 125 sq. m - 9 cm;
- more than 125 sq. m - 10 cm.
The remaining elements are purchased based on the diameter of the pipes from which the gutters are made.
As already noted, before purchasing materials and installing a drain, it is necessary to draw a detailed diagram, which should indicate:
- roof perimeter;
- length and number of gutters;
- mounting points for brackets, joints and funnels;
- location of drains.
Based on the perimeter of the roof, the pipe footage for future gutters is determined. Since it is sawn in half and two pieces are made from one piece, the required length of the pipes will be equal to half the perimeter of the roof. Next, the number of drainage risers is calculated. To do this, a plan is drawn on which all elements are marked.
The distance between them cannot exceed 5 m. After determining the number of gutters, their length is calculated, for which the distance from the eaves overhang to the ground is measured. This will be the estimated height of the drainage riser. This figure is multiplied by the number of parts and the required pipe length is obtained.
Features of using sandwich pipes for baths
Since a bathhouse, as a rule, is built of wood (and if it is made of foam blocks, then it is lined with flammable material), issues of thermal insulation become of particular importance. It is prohibited to use single-layer chimneys for bathhouses - only brick and sandwich chimneys are allowed. All distances from the chimney to flammable objects must be carefully verified and observed in accordance with SNiP. All pyrohazardous surfaces must be insulated with vermiculite or asbestos. It is forbidden to install a deflector on a sauna chimney due to its strong windage. The distance from the chimney to the wall is at least 25 centimeters!
Caution: under no circumstances should a sauna ventilation system be combined with a chimney.
Characteristics of galvanized pipes
Pipes made of galvanized metal are used to equip chimneys; they are popular due to their light weight and, accordingly, ease of installation. Galvanized chimneys do not require the construction of a foundation, and this significantly reduces the cost of chimney equipment.
Such pipes meet fire safety standards, withstanding temperatures up to 900°, so they can even be used for smoke removal from solid fuel heating boilers and furnaces.
Galvanized pipes are also used in home construction to equip drains. Such pipes are already quite affordable in cost, but the process can be made even cheaper by using hand-made products.
What is a chimney and how does it work
The chimney is one of the main components of your heating device, be it an old brick stove or an ultra-modern gas boiler. Your safety and budget depend on the free passage of flue gases through the chimney: with a well-designed and constructed chimney, the stove consumes much less fuel. Previously, chimneys were built by professional stove builders. Current technologies make it easy to do this yourself. Of course, you need to study the issue and carefully follow the drawing and manufacturing procedure.
How to roll a sheet into a tube
What if we aim to produce even more complex elements: hoppers and pipes? Of course, it’s better to practice in segments first, but otherwise these skills are quite understandable.
Products with a closed surface, such as pipes, tanks and funnels, are assembled using so-called seam joints. A fold, for simplicity, is a lock that can be used to connect the edges quite firmly and even hermetically. A regular (single) fold is made as a fold at the edge with two bends. On different sides of the connection, the folds are directed in the opposite direction.
Typically, folds for drainpipes are made with a fold width of 4 to 10 mm. The edges of the strip are beaten on a steel angle, then the sheet is folded, the folds are interlocked and pressed tightly with a hammer when the pipe is put on the mandrel.
There is only one difficulty in the manufacture of pipes - to ensure the possibility of joining them with each other. Therefore, before twisting the sheet, its short edge is straightened on a platform with a small threshold so that one end of the pipe is thinned by a couple of millimeters. Also, pipes can be connected using seams, but they cannot be fastened in place in this way: a large segment of the drain is assembled at the bottom, and then assembled as an assembly.
Of course, bending equipment manufacturers have something to offer in this regard. To make locks, there are folding carriages, and the metal is rolled into a pipe on a longitudinal roller bending machine. For edge thinning, crimping machines or separate pairs of rolling rolls can also be used.
Types of bass reflexes
The bass reflex port is the main element of the body; it can be round (pipe) or rectangular (slit).
Round port (pipe)
It is impossible to say for sure which of these ports is better. They do what is more convenient or what they like best. The only point is that in sports (sound pressure competitions) pipes are used more often , since their use makes it easier to change the bass reflex setting by changing the length of the port.
Separately, it is worth noting this type as a passive radiator. A passive radiator (more correctly, a passive reflector) is the same bass reflex and the principle of its operation is the same. It is used in cases where the desired port for the FI does not suit the dimensions. A passive radiator uses a speaker without a magnetic system instead of a port .
Operating principle of a passive radiator
Work process
Let's start making a pipe from tin with our own hands.
The whole process can be divided into several main stages:
- Preparation. This includes marking the product and cutting out individual blanks from a piece of tin.
- Molding. At this stage, the initial formation of a circular pipe occurs.
- Compound. Here it is necessary to finally sew the parts into the finished product.
Let's look at each of them in more detail.
Step 1. Preparation
No complicated instructions are needed here, everything is very simple:
- the sheet is placed on a flat area (workbench or floor);
- a segment equal to the length of the future pipe is measured from the top edge (marks can be made with a marker or a special marker);
- then a line is drawn through the mark using a square, perpendicular to the top edge of the sheet;
- on the upper edge and the line drawn at the bottom, the width of the workpiece is measured, which is equal to the circumference of the pipe (and 15 mm must be added to this parameter to arrange the joint);
- All marks are connected, after which the workpiece is cut along the resulting lines.
Step 2: Molding
After receiving the workpiece, it is necessary to form a round profile of the future pipe.
Here the work is done like this:
- The line for the folds is marked. Its width is 0.5 cm on one side and 1 on the other. The folds are bent at an angle of 90 degrees to the plane of the sheet metal. To do this, you can use a steel angle and a mallet.
A sheet of tin is placed on the edge of the table with an offset to the desired length, then its edge is carefully bent with blows of a rubber hammer. At the end of the work, it should be in close contact with the bottom plane of the angle.
Work should be done evenly along the entire length of the workpiece. To make the procedure easier, you can use pliers.
- Then another bend is made on the centimeter fold in the shape of the letter G. The upper part (its width should be 0.5 cm) must be made parallel to the sheet of tin. It is advisable to make markings for this bend in advance.
- After finishing work with the folds, we move on to working on the pipe itself. For this purpose, a pre-stocked round part is used. Having placed a sheet of tin on it, use a mallet to give it a rounded shape. This should be done gradually along the entire length of the sheet until the folded edges meet.
Step 3. Docking
All that remains is to align the edges and secure the seam. To do this, the horizontal section of the larger fold is folded down, covering the opposite edge. Then the protruding seam is bent to the plane of the pipe using a mallet.
Galvanized steel pipes are an integral element of the drainage system of any home. Purchasing ready-made gutters is quite expensive. How you can make drainpipes yourself and thereby significantly save money is described in this article.
Buying ready-made elements of a drainage system is quite expensive. So, for example, a gutter made of galvanized metal costs about 100 rubles/m, a drainage funnel - 160 rubles/piece, a pipe with a diameter of 100 mm - 110 rubles/m, an elbow for a drainpipe - 110 rubles/piece. If you calculate the cost of all the elements necessary to equip a drainage system for the whole house, you will get a rather impressive amount. The natural question is how to save money? The answer is simple - do all the elements yourself.
Let's do the math. Galvanized iron is required for the drainpipe. The price for a sheet of 2500x1250 mm is 600 rubles. To make a pipe with a diameter of 100 mm, you need a strip of metal 340 mm wide - this is, in fact, the length of a circle with a diameter of 100 mm, plus bends. One sheet produces 7 stripes with this width. We get: 600 / 7 = 85 rubles.
for a pipe 1250 mm long, or 68 rubles/m - the cost of one meter of galvanized pipe. Save more than 60%! On other elements it will be even greater.
If the above calculations have convinced you of the need to learn how to independently manufacture galvanized pipes and other sheet metal elements, then let’s start learning. You need to start with the simplest thing - with pipes. How this is done will be discussed in this article.
Useful tips
When working with tin, it is advisable to consider the following points:
- It will be more comfortable to work with metal scissors if you attach a leather loop to one of the handles , which is put on your fingers.
- It is advisable to process the cut edge with a plow made from an old blade for a hacksaw for metal . This will free the cut from burrs that could cause injury.
- You can use a can opener to shorten the finished vent pipe..
You can cut pipes using a can opener
The first simple product
First, let's make the simplest roofing element - a ridge. So that it subsequently lies evenly and tightly on the roof, first determine the angle of rotation by placing a long thin strip on one of the slopes.
The width of the ridge shelves is from 15 to 30 cm; accordingly, you will need a strip twice as wide with an allowance of 10 mm on each side. This edge can have 2-3mm of unevenness, so an even cut is not necessary. Apply a marking of three longitudinal lines: the center of the ridge and both its edges. Place the strip centered on the edge of the table and press it with a block under two clamps along the marking line.
You need to place a flat board underneath the protruding edge of the sheet and bend the shelf upward, observing the marked rotation angle of ±10º. Now the workpiece needs to be released and moved back so that the edge marking line falls exactly on the edge of the block. We clamp the workpiece again and tighten the clamps well, and then we go along the edge with a mallet, turning it perpendicularly upward.
Edge processing is necessary to stiffen the ridge profile. To make them, you can also use a rule rail pressed through a block: the wedge-shaped end of the bar will allow you to bend the edge more than 90º. After preliminary bending of both edges, they need to be laid on a wooden sleeper and beaten with a mallet, flattening the bend. In many sheet benders, this operation is performed with one pass of the roller bender carriage.
When finishing the edge by hand, go from one edge to the other sequentially, and then smooth out any visual unevenness with your hands. Already at this stage, you can think about partial mechanization and creating a primitive machine. For example, if the bending bar is made of metal or hard wood and secured to two-axis hinges, the processing will be much faster and more precise.
Thread
Threaded connections are among the most ancient.
They are used only on round pipes. Based on the direction of torsion, a distinction is made between right-handed and left-handed threads. The second is rarely used, only in special cases. This type of joint is suitable for water, gas, and oil products.
The ends themselves are twisted using additional fitting coupling parts.
Couplings are standard with internal threads on both sides. There are also combined ones, internal on one side and external on the other.
Threaded connection of steel pipes
Handmade: how to bend a gutter segment
To make parts with a radius profile from tin, you should prepare a template in advance; it is not realistic to carry out such work “on your knees”.
Take an inch tube and weld two reinforcement rods at its ends as drive handles. Make a cut along the seam of the tube with a grinder, then sand the edges well, you can even cover it with a silicone hose unraveled in two.
Clamp the strip of roofing iron on the edge of the table, insert the end into the cut and rotate the tube 360º so that the “straight” petal in the center of the twist is parallel to the rest of the sheet.
You can form the tray using a rack pipe bender, or you can use a loose 200 mm pipe. We bend the smooth edge of the workpiece at 90º, press the edge against the table with the wall of the pipe and straighten the iron with a mallet. We finish the twisted edge with our hands, bending it slightly inside the arc. Remove the workpiece from the template and press the rectangular fold.
This molding can be made in segments of 1–1.5 meters, which are then easily joined at the installation site and secured with a cutter. The presence of two stiffening ribs will prevent the tray from bending between the fastenings under the weight of the ice, and a hidden groove will allow you to further strengthen the drain on specially shaped hooks.
Metal duct classes
Such designs are divided into two main classes:
- Dense (P). They are intended for transit sections of general exchange ventilation systems, as well as air heating networks that serve premises of categories A and B. These galvanized steel air ducts are designed for static pressure at the fan exceeding 1400 Pa, regardless of the pressure in the transit sections.
- Normal (N). They are used in all other cases.
The production of air ducts from galvanized steel is carried out in accordance with the requirements of SNiP 41-01-2003. During the work, damage to the protective and decorative zinc coating is not allowed. In order to increase the tightness of the system and eliminate air leaks, a sealant or sealant is used when installing products.
Funnel making technique
If you understand that a seam connection is the essence of almost any tin product, you can give free rein to your imagination and assemble complex products from several simpler ones. An example of this is all kinds of funnels, tees and corner bends.
The funnel consists of two short pieces of pipe of a larger and smaller diameter. They are assembled like regular pipes, only their edges are flared outward by 8–12 mm. Subsequently, these bent sides are used for further production of folds, or, if there are no complaints about tightness, the hard edges are folded and fastened together with a cutter.
The riveting technique for different products may differ significantly, but in reality this is not as important as the correct drawing up of the pattern. All blanks should be cut only according to the template
For example, for the central part of a funnel - a truncated cone - the pattern is a ring segment, where the length of the inner arc is determined by the diameter of the drain, and the outer arc by the diameter of the receiving socket.
Unfortunately, the equipment for the production of such products has a very narrow specialization, and therefore is not available due to both its high price and low prevalence. However, all products made of tin and sheet metal, be it a bucket, a tank or an ordinary skate, can be made manually; machines only facilitate some operations.
You can buy galvanized pipes freely, but the cost of such products can be quite high, so the desire to make a galvanized pipe with your own hands is dictated, first of all, by considerations of economy.
At the same time, the production of galvanized pipes does not require the use of special efforts, special expensive devices and tools and any professional knowledge, so any home craftsman who has a set of standard carpentry tools can cope with this.
Pipes made of galvanized metal are used to equip chimneys; they are popular due to their light weight and, accordingly, ease of installation. Galvanized chimneys do not require the construction of a foundation, and this significantly reduces the cost of chimney equipment.
Such pipes meet fire safety standards, withstanding temperatures up to 900°, so they can even be used for smoke removal from solid fuel heating boilers and furnaces.
Galvanized pipes are also used in home construction to equip drains. Such pipes are already quite affordable in cost, but the process can be made even cheaper by using hand-made products.
How to do the calculations
The diameter, height and wall thickness of the pipe during construction must be determined accurately. It is important not to make any mistakes. After all, the diameter of the chimney must be sufficient to exhaust the processed gas. And at the same time, the thrust should not be very large.
If this is a pipe for a boiler, the primary source when choosing is the instructions from the manufacturers. Provided that this data is not in the passport, then calculations are made taking into account the volume and height of the firebox.
The height of iron pipes is a little more difficult. The greater the height of such a pipe, the greater the thrust. And how much the pipe needs to be extended is a difficult question. When determining the distance from the stove to the tip, specially developed formulas and programs are used.
But one condition for such calculations remains the same - the chimney must be at least 50 cm higher from the roof peak, and in vertical sections its height can be at least five meters.
Video on how to calculate height
How to calculate the height of the chimney!
The wall thickness of the pipes used should be from three to five millimeters. At the exit from the stove, at least 5 or more millimeters. In the upper sections it is allowed to use a pipe of three millimeters or more.
We make a galvanized iron pipe with a diameter of 100 mm
1. Cut a blank from a solid sheet of metal with a width of 340 mm on one side and 330 mm on the other. The strip is narrowed so that the finished pipe fits into the next one according to the “male-male” principle.
It makes sense to immediately mark the entire sheet and lay down the segments on each side in turn - on one side 340 mm, 330 mm, 340 mm, 330 mm and so on, on the other, respectively, 330 mm, 340 mm, 330 mm, 340 mm. If you do not plan to connect the finished pipes to each other or other elements, then mark out rectangles with sides of 340 mm.
2. We begin to make seams for the pipe on both meter sides. To do this, use a mallet to bend the edges of the sheet 7 mm on both sides, 90° in different directions relative to each other, on a metal corner.
3. Turn the workpiece over, turn the corner up and use a mallet to achieve the angle to approximately 130–150°.
4. Make another bend. The workpiece should protrude 1 cm from the corner. Using a mallet, tap along the entire length of the corner. The blows must be strong, dense and confident. In this case, the mallet must lie clearly on the plane of the corner, without deviating either to the left or to the right, otherwise the seam will simply flatten.
5. The end result will be a sheet with the following folds along the edges:
6. We squeeze the workpiece around the “gun” pipe with our hands.
7. We hook both bends to each other.
8. We put the workpiece on the “gun” pipe and hit it with a mallet at the place where the corners meet until they are completely flattened.
9. The pipe is ready.
10. Ideally, you can slightly flare the pipe on the wide side to facilitate joining with each other, and roll rings on both ends to ensure rigidity; however, the resulting pipe is suitable for use. If no mistakes are made during marking, then it will easily fit with other elements, including factory-made ones.
Features of the source material
Before you start making a pipe from a sheet of metal, you should become more familiar with the material from which the pipe will be made and its features. To begin with, it is worth saying that this is a rolling type product, in other words, tin is a sheet of steel that has passed through the rollers of a rolling mill and has a thickness of 0.1-0.7 mm.
In addition to rolling operations, the technology for producing tin plates involves processing the finished rolled products to prevent the formation of corrosive processes. To do this, a layer of material is applied to the steel after rolling, which is not susceptible to corrosion.
The result of the performed actions is a steel sheet, the width of which can vary from 512 to 1000 mm, with a chrome or zinc coating. The finished product is flexible, so tin can be easily processed by hand. At the same time, rolled stiffeners can be compared in strength to steel products. This allows the use of tin in the manufacture of products of complex designs.
Methods for making pipes from tin
Before you make a galvanized pipe with your own hands, you will need to make a drawing of it. The resulting pattern will need to be transferred to a sheet of iron. This can be done either with chalk or a sharp knife.
It is worth considering that when marking the workpiece, its width should be equal to the diameter of the future pipe increased by 1.5 cm, and the length should slightly exceed the height of the straight section of the future pipe.
The finished pipe pattern must be cut with metal scissors and placed on the edge of the workbench.
To create a fold on one side of the workpiece along the entire length, you need to draw a line, stepping back from the edge by 0.5 cm. This line is combined with a corner on the workbench so that using a wooden hammer you can bend the edge of the workpiece down.
Next, the workpiece is turned over and the resulting bend is finally pressed onto the canvas by lightly tapping it with a mallet.
At the next stage, they begin to process the other edge of the pattern. To do this, turn the canvas over and, making a 1 cm indent from the edge, bend the other edge in the same way, but in the opposite direction.
After this, the resulting edge must be bent again so that in cross-section it resembles the letter G.
Now you can start connecting the galvanized pipe with your own hands. If possible, you can use a mandrel (a piece of pipe of the required diameter), however, this is not necessary. So, having inserted the prepared template into the mandrel, they begin to smoothly bend the opposite edges of the pipe towards each other.
The opposite edges are connected so that the smaller part of the lock hooks onto the larger one. After this, the locking connection is pressed and compacted with pliers.
At the last stage, you will need a metal strip and a hammer, which will need to be used to carefully knock down the connection.
There is another way to make a galvanized pipe. In this case, rivets made of tin, aluminum or steel are used.
The sequence of work is as follows:
- Holes for rivets are drilled along the entire length of the workpiece in 3 cm increments.
- The edges of the sheet must be bent in opposite directions.
- You need to bend the tin blank so that the bent edges are on the outside of the future pipe (for more details: “How to make a pipe from tin - we make tin pipes with our own hands”).
- Secure rivets into the resulting holes.
Preparatory stage
First, markings are applied to the sheet of tin, according to which the semi-finished product will be cut. In other words, the necessary part is cut from a certain sheet of tin, from which the contour of the future pipe will be formed. The marking process is carried out as follows: the sheet metal is laid out on a workbench and a segment equal to the length of the pipe is measured from the top edge. A mark is placed here with a marker.
Then, using a square, draw a line along this mark perpendicular to the side edge. Now along this line the circumference of the pipe, the same is done along the upper edge. In this case, about 1.5 cm is added on both edges to form the joining edges. The upper and lower marks are connected and the workpiece is cut out.
Installation
Do-it-yourself chimney installation is done as follows:
- All necessary measurements are taken.
- A laying diagram is drawn up.
- Surfaces are prepared for installation work.
- The necessary materials are being purchased.
- Brackets are fixed to the wall at intervals of every 40-60 cm.
- The chimney elements are installed in stages.
- In places where floor and roof slabs pass, heat-insulating and non-combustible material is attached.
- Inspection wells for maintenance are installed.
- The build quality and draft are checked, and the heating equipment is started.
Installation rules:
- turns of moves are performed at an angle of 45°;
- joints must be sealed with hot glue or clamps;
- It is better to abandon horizontal sections or minimize their number;
- inspection windows must be installed at all corners or turns;
- an umbrella and a net must be installed on the top;
- the height of the galvanized product above the roof should be 2 m higher;
- assembly is carried out using the condensate method (the upper part is inserted inside the lower one) or along the smoke path (the next part is inserted on top of the previous one).
What you need for work
To install galvanized chimney pipes, you will need the following tools:
- metal scissors;
- roulette;
- level;
- marker;
- pliers;
- tools for creating holes in ceilings or walls.
How and with what to insulate a galvanized chimney
A galvanized steel chimney must be insulated with loose or mineral wool roll insulation material. To protect it from moisture (condensation), you need to wrap it with a foil layer. All seams and joints must be taped with a special metallized tape to prevent contact of the insulation with the external environment.
For increased wind loads, it is recommended to additionally tie the insulated layer with wire or clamps at intervals of 40-60 cm.
To insulate, you must do the following:
- Clean the surface of the chimney from dirt, scale and rust.
- Wrap it in mineral wool.
- Secure the layer by tying it with steel wire or mesh.
- Place a steel casing on top or wrap it with a foil layer.
- Paint the casing with special heat-resistant paint.
To insulate mine chimneys, the pipe is first insulated, then it is lowered into a brick structure and connected to an underwater pipe. Broken bricks, expanded clay, and slag are poured into the resulting space. It is recommended that all these actions be performed initially during construction in order to lay the bulk material more densely.
Chimney insulation
Is it possible to paint a galvanized chimney?
Galvanized chimneys lose their aesthetic properties during long-term use, so it becomes necessary to apply a decorative layer. It is necessary to use powder paints for finishing steel roofing sheets.
Conventional enamels are not suitable for these purposes, since with sudden temperature changes they begin to crack and peel off.
Types of steel structures
There are two main types of chimneys according to their orientation relative to the heating device: straight (attached) and side (attached).
Straight chimneys
They are placed above the heating device, indoors and pass through the internal ceilings and through the roof. Most often, this is the best solution specifically for stoves. Advantages:
- Acid condensation does not fall out, or falls out only slightly, but the ease of passage of gases through a straight chimney is important.
- Less soot deposits, easy to clean yourself, and therefore less fire hazard.
- Works well without a gate draft regulator.
- Only the pipe on the roof is visible on the house, this is aesthetically pleasing.
Flaws:
- Passing through floors and roofs is more difficult than through a wall.
- Large unevenness of thrust, pulsating and even reverse thrust during gusts of wind. Therefore, for modern boilers with an emergency shutdown device, such a chimney is not suitable, even if equipped with a complex deflector.
A straight chimney passes through the ceilings and roof
Side tie-downs
The axis of such a structure does not coincide with the axis of the heating device. Advantages:
- Installation outside the house with a single passage through the wall.
- Ease of construction.
- The presence of a container for collecting acid condensate, completely eliminating its flow into the heating device.
- Even with the simplest fungus it works stably in strong winds, and if a deflector is mounted on it, the draft will always be direct and stable.
- Makes it possible to precisely regulate thrust due to low thermal inertia. This will always ensure optimal fuel consumption.
Flaws:
- In cold weather, condensation can turn into ice and burst the container. The container may freeze up to the tee, which will block the draft. Hence the need to place a container for condensate inside the house.
- The place through which the chimney exits to the outside is designed as a passage unit. But in winter, the unit absorbs moisture from the air, and the insulation can cake and settle. Then thermal stress will accumulate in the upper part of the assembly, which can cause a serious crack in the wall.
- The weight of a chimney, unlike an attached one, lies on the passage unit; this can also affect the insulation and cause the phenomena described above.
- Cleaning is quite difficult due to the bends of the chimney. A specialist is required.
A side, or attached, chimney runs along the outer wall of the house
Lateral internal
However, side chimneys can be located both inside the house and in the thickness of the wall, then contact with the roof cannot be avoided.
The difference in attached chimneys - outside and in the wall
No one type of chimney can definitely be called the best. Each of them is good in its place and depends on the conditions: type of heating device, roof structure and floor beams, wall material and type of chimney (single-wall or sandwich). The advantage of the attached side chimney is that in this case there is no need to go through the roof. But it is completely excluded in the case of single-wall pipes due to the cold in winter.
How to bend metal correctly
Roofing elements, as a rule, are hidden from the eyes of passers-by and no decorative claims are made against them. This makes it possible to manually produce parts using templates, but you have to constantly straighten the product with a mallet.
This is not the best approach: the fold lines and the entire product as a whole turn out wavy, and work on one part can take a long time. For piece products this is quite tolerable, but if you have to surround the entire house with drainage, you should get the necessary equipment and devices at your disposal.
Today, sheet bending machines occupy their own segment in the professional tool market and are available everywhere. Their price is quite high, but only with our own, proven equipment can we produce parts of excellent quality. Renting a sheet bending machine is also an option, but a machine that passes from hand to hand will not have the necessary accuracy and reliability.
Peculiarities
Materials
Requirements for materials and assembly are standard. The bass reflex box must be strong, sealed and not vibrate. Material - plywood or MDF from 18 mm. and thicker.
Please note that all wire entry channels, terminal blocks, etc. must be reliably sealed , internal partitions (port walls) must not have any gaps .
Rounding of the bass reflex port
If the slot port is long and has turns, then stagnation zones may appear in the corners; to avoid this, the bends are smoothed out - as a result, efficiency increases, since the resistance to air movement decreases . It is quite difficult to determine the improvement in quality by ear, but for the fight for a high result in sound pressure, this solution works.
Port smoothing options
The ends of the ports can open up, which can eliminate parasitic noise from air friction at the outlet, but this problem is not common. Also, due to the openings at both ends, the tuning of the port (bass reflex) is lowered, or its length is reduced. That is, for the same setup, a port with extensions at the ends will be shorter than a straight one and will take up less volume.
Slot Port Expansion
Practical video on rolling out a pipe for a port:
It is worth understanding that selecting the correct expansion (opening) geometry is a separate task when calculating the bass reflex housing.
Homemade drain pipes made of tin
To make a straight drain pipe from tin, measure a piece of galvanized sheet to the length and width and cut it with scissors along the marked lines.
Using a file, carefully clean the edges from burrs and process them until they are smooth. Along the long side, bend both edges of the sheet in one direction to a width of 10-15 mm.
Sequence of work in the process of creating a straight pipe for a drainage system made of galvanized steel (copper) with your own hands. The main tool is a wooden tinsmith's hammer
A galvanized sheet is tapped on a rigidly fixed pipe of a suitable diameter until it is given a round shape. Then the previously folded edges are placed on top of each other.
Using a wooden hammer and a metal rectangular block, “wrap” the edges into a lock. Carefully tap with a hammer along the seam until a securely pressed joint is obtained. Align the shape of the product on the blank pipe, trying to obtain a cylinder close to an ideal circle.
An example of making a straight drain pipe from galvanized metal sheet. Editing for a round shape is carried out using a regular metal pipe of suitable diameter
Having the skills to manufacture straight drain pipes from galvanized steel, it is not difficult to master the technology for producing inlet funnels and other parts of the system. With the same success, self-taught craftsmen make brackets for metal gutters and for attaching drainpipes.
This is how they make brackets for metal drainage systems with their own hands. For round gutters and pipes, a metal strip thickness of 1.5 mm is sufficient. For square gutters 3-4 mm
Manufacturing technology of steel (copper) bracket:
- Cut a piece of steel strip 300 mm long.
- File the end parts.
- Step back 10 mm from either end and make a 90º bend.
- Consistently moving the strip and fixing it in a vice, bend it in an arc to the size of the radius of the gutter.
- On the remaining straight part of the strip, drill holes for the clamp and fasteners.
Brackets for drainpipes are made in the same way, but in the form of a clamp consisting of two oval-shaped strips, the curved end edges of which are supplemented with holes for tie bolts.
There are several articles on our website with detailed instructions on making roof gutters, we recommend that you read:
- Do-it-yourself roof gutters: instructions for making your own drainage system
- How to make roof drains: do-it-yourself recommendations for arranging drainage
The design of a double-layer chimney and its distinctive features
This is a structure of two steel pipes inserted into each other, different in diameter. The outer one is called the casing. A pyre-resistant insulation is placed between the pipes, usually basalt wool (laid so that the fibers are oriented along the pipe) 30–35 millimeters thick, capable of withstanding heat of a thousand degrees. Mineral wool is completely unsuitable.
Sandwich chimney parts
What you need to make a galvanized pipe
At home, to make a galvanized pipe, you need a sheet of tin; the material does not require much effort due to its softness and ductility.
Tin plates are industrially made from thin sheet steel with a thickness of 0.1 to 0.7 mm on rolling machines, after which they are coated with an anti-corrosion protective layer of chrome, tin or zinc. Finally, the workpieces are cut to standard sizes, ranging from 512 mm to 2000 mm wide.
The strength of such products is in no way inferior to their steel counterparts, especially if the material has additional stiffening ribs, but at the same time it is very plastic and allows the installation of pipelines of complex shapes by hand. Anti-corrosion coating protects the pipe from the effects of the external environment.
The problem with such pipes is insufficient bending strength, therefore, for the manufacture of open parts, stiffeners are added to the structure to strengthen the product.
- The stores offer a wide range of such pipes of various sizes: single-circuit;
- double-circuit (made in the form of a sandwich and consisting of an internal and external pipe);
- corrugated, characterized by increased flexibility.
When choosing sheet thickness, the purpose of the pipe should be taken into account. For example, a galvanized pipe for smoke removal from solid fuel stoves and fireplaces must have increased resistance to high temperatures, and at the same time high anti-corrosion properties.
Tools
To work, you need special tools to bend, correctly measure the bend angle and cut the pipe to the required length.
A set of tools that will be needed for work:
metal scissors;
- a hammer with a rubber pad, a mallet (a carpentry tool made of wood in the form of a hammer);
- bending pliers;
- workbench for cutting and marking;
- a pipe for calibration measuring more than 100 mm and an angle with edges of 75 mm;
- ruler or tape measure;
- marker (sharpened steel rod).
Operation, repair and cleaning
You have received a chimney that will serve you for fifteen years. But you need to follow the simplest rules. It is impossible to replace a boiler or furnace so that the temperature of the flue gases is higher than that calculated specifically for this chimney. It is necessary to monitor the condition of the heat-insulating substance in the wall opening and trouble-free drainage of condensate.
Sandwich chimneys on a brick wall
Such a chimney needs to be cleaned approximately once every three months, but it is better not to use a mechanical method at all. In severe cases, you need to call specialists. And your destiny is chemical cleaning. This is a substance in the form of a briquette or powder, which, when burned in the firebox of a boiler or stove, releases chemicals that dissolve soot and other deposits in the chimney.
Chimney sweep powder for cleaning chimneys
Instructions for making a tin pipe for ventilation with a do-it-yourself hood
Making a pipe from a sheet of iron means performing a sequence of actions. The work consists of simple steps. First, preparation takes place, which consists of marking parts and cutting out blanks.
At the stage of forming the body of the structure, an element of circular cross-section is created. When connecting, it is necessary to secure the elements into one product.
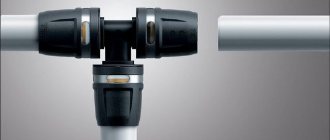
Adapters for connecting sheet metal pipes
You can make markings and preparations in several stages:
- The tin sheet is placed on the surface without joints. A floor covering or workbench is suitable for this.
- A segment is marked from the top edge, which is equal in size to the future highway. The marking is carried out by a marking device. The manufacture of drainpipes also takes place.
- A line is drawn through the mark. In this case, a square is used.
- The width of the segment is marked from the line, which is equal to the cross-section of the pipe. 15 mm per joint is added to the obtained value.
- The resulting markings are connected, and the workpiece is cut out.
Next, tinsmithing work consists of forming a round profile of the structure.
Working with tin with your own hands is done as follows:
- The folds are bent to the sheet surface at right angles. A line is first marked for them. A mallet is used for bending. The sheet is placed on the edge of the table with a descent to the desired length and a bend is made using a rubber hammer. The work is carried out along the entire length of the product.
- A do-it-yourself tin pipe requires one more bend on the seam. In this case, marking is performed.
- A round element is used to construct the pipe. On it there is a galvanized sheet, which is given a rounded shape. In this case, the bent ends of the pipe are connected.
The bends are made so that the mallet fits exactly on the surface of the corner. The blows are made precise and clear, but not strong, otherwise the seam will flatten.
The production of tin products is completed by joining. In this case, the edges are aligned, and
the seam is attached. In this case, the horizontal section bends down and covers the edge. The protruding seam is bent to the surface using a mallet. The bend is made away from the L-shaped fold. If you do otherwise, water will penetrate inside.
You need to connect tin products with your own hands. The edges are secured with aluminum or steel rivets.
- Holes for rivets are made every three centimeters.
- The edges bend towards each other.
- The workpiece is bent back so that the edges are on the outside of the structure.
- The edges are mounted using rivets.
To facilitate the connection of the structure, the element on the wide side should be slightly flared. To ensure rigidity, rings are rolled from the edges of the product. Correct markings facilitate ease of joining with other elements, even factory-made ones.
Similar products are used for gutters, ventilation systems and chimney structures.
Connecting metal pipes - methods: threading, welding, coupling, fittings
Pipes are classified according to a large number of characteristics, the main ones are listed below:
- Material from which they are made: metal;
- reinforced concrete;
- polymer.
- round;
- for high pressure;
This simplified diagram minimally shows the large family of this product as well as its wide range of applications.
The task of connecting pipes is to obtain a seam that is tight, durable, and reliable. They are divided into two types: detachable and one-piece:
- Detachable connections: threaded;
- flanged;
- bell-shaped
- welding;
Depending on the operating conditions, material, and geometric dimensions, the best connection method is determined.
Thread
Threaded connections are among the most ancient. They are used only on round pipes. Based on the direction of torsion, a distinction is made between right-handed and left-handed threads. The second is rarely used, only in special cases.
This type of joint is suitable for water, gas, and oil products.
The ends themselves are twisted using additional fitting coupling parts.
Couplings are standard with internal threads on both sides. There are also combined ones, internal on one side and external on the other.
Threaded connection of steel pipes
Flange connection
A widely used method during the installation of pipelines for various purposes. The connection occurs using two flanges welded to two pipes and bolted together.
This option is also convenient for connecting to equipment and mechanisms.
Trumpet
Used for water supply and sewerage.
Pipe gluing
This method is used to join two dissimilar metals.
This method is very convenient where thermal effects are unacceptable.
It is worth noting that plastic rather than metal pipes are often glued together.
Pressing
A rare way to obtain a connection. Used for copper pipes that operate in aggressive environments. Such systems can be seen in refrigeration units.
Welding
The welding connection is the most reliable. It is used to obtain sealed seams on large-diameter pipelines intended for gas or oil products.
Threaded
They can be done in several ways, the most common being squeezing.
The following tools will help you do this job:
- Pipe wrench.
- Coupling with internal thread.
- Seals for sealing. Maybe: hemp rope, FUM tape or sealant.
- Lock-nut.
Two pipes have external threads . We apply sealant to them. One has a longer thread length than the other. Where there are more turns the nut is screwed on until the end. Then the clutch. Then we screw it onto the second part, twisting it with the first one. When the coupling stops screwing, we support it with a locknut. Tighten with wrenches, carefully, so that the coupling does not burst.
Flanges
For a flange joint you will need:
- two flanges;
- paronite gasket;
- bolts, washers, nuts;
- keys;
- manual arc welding;
- level.
The flanges need to be welded. Avoid displacement; they must be in the same plane.
We catch using a horizontal level. We screw two bolts into the upper holes. We put the part on the edge of the tube so that the bolts are at the top. We put a level on them and catch the position of the bubble between the strips in the middle. When caught, we make a tack by welding at the top point. The horizontal plane is ready.
We rearrange the level to a vertical position, leaning it against the flange mirror. We catch the level by slightly adjusting the lower end of the flange that is not yet stuck. Having established the vertical, we installed the second tack. And then two more, resulting in four even sections.
Then the welder welds the flange on both sides. Manipulations are carried out similarly with the second pipe.
After welding, we get two pipes that can be connected. We insert four bolts into the holes from below and tighten them a little. We make a gap, insert a gasket. We insert four more bolts and tighten everything.
Bonding
This method is used very rarely in metal parts. The process itself does not require any special skill from a person, but it takes a lot of time.
This job requires:
- glue. BF-2 or 88N or EDP;
- brush.
Before gluing the parts, first apply the first layer on their surface and allow to dry. This layer will be the bonding layer. Each glue has a drying time written in its instructions. Then a second layer is applied and the parts are placed under the press for a day or even more. It all depends on the glue.
Then clean the seam from any glue leaks.
Crimp connectors for steel pipes
Welding
The welding process is used in almost all metal pipe joints.
In order to obtain a seam, the following welding methods are used:
- gas;
- electric arc;
- contact
Gas welding is used to obtain permanent connections in small diameter pipes with minimal thickness.
When welded in this way, it can also conduct water. The main thing is to test the seams for leaks after welding.
The gas welding station consists of:
- oxygen cylinder;
- acetylene;
- rubber hoses;
- burners.
Resistance welding is rarely used. This method has proven itself more effective in working with plastic pipes.
The most popular method of producing permanent joints is electric arc welding, divided into:
- manual
- semi-automatic in protective gas environment
When constructing pipelines, connections are made only by welding. An important part is preparing the joint for welding.
The pipe must be connected to another:
- no fractures or displacements;
- the joint must be cleaned;
- make a chamfer;
- set the gap to 1-3 mm.
Required welding equipment:
- electrodes;
- power source (transformer or rectifier);
- cable;
- Personal protective equipment for welders: overalls, mittens, brushes.
Soldering of polyethylene pipes end-to-end and using an electrofusion coupling
Tips and tricks
- When working with cast iron pipes, you must remember that they are fragile. For embossing and pressing, use rubber hammers.
- If the installation of a socket joint is carried out outdoors in hot weather , then when the cement is in the gap, it is suggested to lay a damp cloth on it. So that the cement does not crack.
- When gas welding, the flammable gas acetylene is used. If desired, it can be replaced with propane, which is cheaper and safer.
- When constructing a water or gas supply pipe system, try to weld the rotary joints first, and then, when the entire structure is assembled, weld the fixed joint last.
- When tightening the bolts on the flanges, do not overtighten. It is possible to strip the thread, this also applies to threaded connections.
Source: https://househill.ru/kommunikacii/otoplenie/element/truba/soedinenie.html
How to make a pipe body from tin
The purpose of this stage is to form the pipe profile. A line is drawn along the length of the workpiece at the bottom and top along which the folds will be folded. In this case, 5 mm are measured on one side, and 10 mm on the other. The folds must be bent at an angle of 90. To do this, the workpiece is placed on a steel corner, aligning the bend line with the edge of the corner. Hitting the edge with a mallet, bend it to the perpendicular side of the corner.
It is recommended to bend the product gradually, passing the hammer along the entire length. In this case, you can start bending using pliers.
Now, on the fold, the size of which is 10 mm, another fold of the fold is made to form a kind of letter G. In the process of bending the fold, you need to ensure that the upper bend is parallel to the workpiece, and its length is 5 millimeters. Therefore, when drawing a fold line, measure 0.5 cm once on one side, and 0.5 cm twice on the other side.
Having completed the molding of the folds, you can proceed to the formation of the pipe body. To do this, the workpiece sheet is placed on the calibrating element and begins to be tapped with a mallet or other suitable tool to obtain a profile of a certain shape. The workpiece first takes on a U-shape and then becomes round. In this case, the folds should join together.
Processing the seam joint
The final stage involves processing the joining seam, that is, crimping it. To do this, the upper part of the L-shaped fold is folded down, wrapping the edge of the other fold. The result should be a kind of sandwich located perpendicular to the pipe. To obtain a joining seam, you need to press the sandwich to the product.
For greater reliability, the joining seam is strengthened using rivets. However, do-it-yourself tin pipes using this joining method do not require additional reinforcement.
Purpose
Bell - a funnel-shaped extension at one end of a sewer pipe
A bell is a funnel-shaped extension at one end of a sewer pipe. Thanks to this extension, pipe installation can be carried out correctly and quickly. Typically, the socket connection is used on pipes made of:
- cast iron;
- polyvinyl chloride;
- ceramics;
- become.
For asbestos-cement and concrete pipes, such a connection is also sometimes used, but quite rarely. The essence of the installation is that one end of the pipeline is simply inserted into a funnel-shaped expansion at the end of the adjacent pipe. To make the connection airtight, additional methods of waterproofing the joint are used. The choice of one method or another depends on the material from which the pipes are made.
The main purpose of the bell and the functions assigned to it are as follows:
- With its help, pipeline installation is greatly facilitated and accelerated.
- Protects against leakage and ensures a tight connection.
- With its help, fittings are connected to pipes.
- Thanks to the socket, you can connect elements from different materials into one system without using fittings.
- When arranging external networks, the socket acts as additional stiffening ribs, thanks to which the system is protected from deformation and damage.
- When dismantling, the socket connection of pipes allows you to do without sawing the elements.
- Pipes with a socket can not only be quickly installed, but also dismantled in case of repair or replacement.
Types of socket pipes
| PVC |
|
| Cast iron |
|
| Ceramic | Sewage fittings with a diameter of 150-600 mm. It has a ribbed inner surface of the mounting thickening and the same bell shoulder. Complies with GOST 286-82. |
| Reinforced concrete |
|
| Steel |
|
Socket of cast iron sewer pipe
From this assortment it is clear that pipes with a socket can be found anywhere, so the methods of sealing them cannot be the same.
Used for water supply and sewerage.