When it comes to mechanical water drilling, you need unique tools, which you often have to make yourself.
Augers are used for mechanical drilling of water wells.
A high-quality auger can be made with your own hands quite quickly and inexpensively, but to do this you will need to get good at it and have all the necessary equipment in your arsenal.
Preparatory stage
Before you begin assembling the auger structure, you need to prepare a working tool . This list includes:
- sheet steel;
- car springs;
- file;
- special vice for fixing workpieces;
- hammer;
- cardboard and marker;
- grinder and wheels for it;
- fasteners; roulette;
- pipes of different lengths.
In addition, you will need a welding machine and safety glasses to reduce the risk of sparks getting into your eyes while working.
As for the pipe material, it is better to select steel elements that have increased corrosion resistance. If you take a cheap option, then after some time rust will appear on the surface.
If everything is prepared, then you can start working. To make a screw with your own hands, you must perform the following steps:
- first make a project, and then a template on thick cardboard;
- take a hollow steel pipe, this material must withstand severe mechanical stress;
- make coils from a flexible steel sheet and use a welding machine to weld the feathers to the pipe - you get a kind of spring.
If a screw is required to work with bulk material, then the turns must be arranged continuously. Otherwise, the desired effect will not be achieved. If everything is done correctly, you will get an effective tool that will have the following positive qualities:
- compact size;
- high performance;
- long service life;
- easy to use;
- rapid deepening and raising of the earth.
But all these characteristics can be obtained only if you strictly follow the installation instructions. Even a beginner can install some homemade devices.
Advantages of auger pump
Screw pumps are often installed. They are characterized by the following features:
- High performance. There are models of equipment on sale that have a fairly high throughput. This is due to the fact that many other characteristics of the created mechanism depend on the geometric features of the screw. That is why problems with choice, as a rule, do not arise.
- During operation, the possibility of vibration and noise is eliminated. This disadvantage is characteristic of a fairly large number of different products. Due to strong vibration, as a rule, the service life is significantly reduced, and fastenings lose their reliability.
- The device can create pressure in the system independently. Some types of pump cannot create a vacuum in the system, so after a long period of inactivity, a quick start is almost impossible. In the case under consideration, liquid injection occurs almost immediately after power is applied.
- The operation of the pump does not involve damage to the walls of the well. Therefore, the well can last for a long period.
- The design is quite easy to maintain. Most of the elements can be replaced independently, and they cost a relatively small amount of money.
- No pumping technique required. Due to this, the required pressure is ensured throughout the entire service life.
- There are quite a few models on sale, designed to work in a wide variety of conditions.
- The pump can be used at almost any depth. This is due to the fact that the structure can withstand high axial loads.
- The device can be used to pump out sewage.
The information above indicates that the pumps of this category have a fairly large number of advantages, due to which screw pumps are installed in a wide variety of areas.
Easy way
There is a very simple way to quickly assemble a homemade auger with two blades. These elements will fit perfectly into the ground. The only negative is that it can only be used at shallow depths, no more than 10 m.
The screw is manufactured using the following technology:
- We take a pipe with a length of 100 to 140 cm, it all depends on the height of the worker. In its upper part we weld an oblong nut that will correspond to the bolt. Can be replaced with two standard ones. If you take less, the structure will not hold securely.
- We weld a metal sleeve or thick reinforcement in the lower part - this element will act as an adapter to the drill. We buy a ready-made chisel or make it ourselves from a steel strip 30 cm long and 3 mm thick. First, we thoroughly calcinate it and then cool it in boiling lead or oil. We fix this spiral in the sleeve, and then carefully sharpen it.
- We take two discs from an angle grinder: one with a smooth edge of 150 mm, the other toothed - 180 mm. We saw these disks in half, in which case the central part expands and coincides with the main pipe. We install them one by one: first the smaller one, and 10 cm higher - the larger one. We place the parts strictly at an angle of 35 degrees to the ground. In this case, the efficiency increases with minimal effort.
- Next, we make tubular elements for extension. To do this, take a pipe with a similar diameter and length of 100-140 cm. Then insert a bolt from below and weld it. In the upper part we install and weld an oblong nut.
In this case, the drilling structure will make longer strokes, which means that working with the tool will be easier and faster. At this point the auger is ready.
Development of the surface of a straight annular helical conoid
Coupling in technology: definition, purpose, examples of use
When designing, screw reaming is often considered. Let's call its features the following:
- The development of one turn is represented by a part of a flat ring, which is located between two concentric arcs.
- The length of the major arc is the length of one turn of the outer helix.
A variety of methods can be used to calculate the main parameters; analytical and graphical ones have become quite widespread.
Analytical method
This method involves the use of certain formulas when calculating
It is important to have input parameters. The basic ratio is represented by the formula: L/l=R/r
Also, if necessary, you can calculate the angle of the cut. It is derived from the following relationship: a/360=2пR-L/2ПR.
Graphic method
Also, when making calculations, a graphical method can be used, which is characterized by less accuracy and difficulty in application.
When plotting graphically, the main indicators that are used in analytical calculations are also noted.
Complex option
This method of manufacturing a screw will allow you to assemble a high-quality and accurate device that will serve for a long time. First, calculations and drawings are made, then measurements are made. It is also worth preparing tools and suitable material in advance, and only then start assembling a homemade drill.
Step-by-step instructions for installing a screw mixer are as follows:
- Take the prepared pipe, and it should be smooth, without any bends or deformations. Drill a perpendicular hole with a diameter of 8 mm at one end. This is where the top part will connect to the handle.
- Install the tip from below - this part will set the direction of movement of the earth. You can make it from an old car spring. You can cut the required square using a grinder.
- Make a longitudinal cut in the pipe, which should have a thickness equal to the tip. Next you should insert it with its sharp tip inside the pipe. The result should be a device that resembles a spear.
- Connect the parts using a welding machine, not forgetting about safety measures.
- Cut a cutter from the spring equal to ½ the diameter of the drill being made, and cut the teeth on it. It is these elements that will bite into the soil, loosen it, and only after that the soil will fall onto the spiral of a homemade auger.
- Position the cutters so that they are at an acute angle to the main surface. After this, the parts should be welded to the steel pipe.
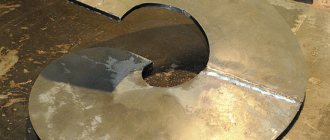
- Cut a circle from a metal sheet, the same in diameter as the auger spiral. Make a hole in its center into which the pipe will be inserted. Attach the manufactured disk to the cutter welded to the tube. Mark their contact using a pencil or a special marker.
- Using the marks obtained, cut the circle from the edge to the center; it is best to do this with a grinder. Place the cut disk in a vice and twist the elements into a spiral with a hammer. Place the self-made auger onto the pipe and weld it. Finally, brush the surface with a wire brush and paint.
Actually, this is where the work is finished. All that remains is to make a handle and an extension cord. The first one can be made of plastic, it will be more convenient, but the last part can be made from any suitable pipe.
Some tips
Some recommendations will help you make a high-quality drilling device. When working, you should consider the following:
- It is necessary to correctly calculate the diameter of the screw. The fact is that during operation the hole will differ slightly from the size of the cutting part. For example, a 200 ml element will provide a well of 240-250 ml.
- You can replace the grinder discs with regular sheet steel, the thickness of which will be about 2 mm. But it will have to be further bent and sharpened to give it the ideal shape.
- When working with the disk, you must follow safety precautions. It should be carefully and securely secured in a special vice, and cut only with safety glasses.
- To calculate the auger feather, you can use the special program “Compass-3 D”. She will do everything necessary, just enter the initial data and wait for the finished drawing. All this will significantly save time.
To extend the service life of a homemade auger, you need to clean it after each job. Remove soil from metal parts, adjust blades and sharpen them if necessary. In addition, for storage, choose rooms with low humidity.
How to make a screw with your own hands - make a flexible one
About two and a half thousand years ago, the ancient Greek mathematician, physicist and engineer Archimedes invented a water-lifting machine, which later became known as the Archimedes screw. It was this invention that served as the prototype of modern screw conveyors.
Augers, as they are otherwise called, have extensive applications in industry and beyond. Meat grinders, drills, drilling tools, all of this works with the help of augers.
Well, today we will talk in detail about the use of screw conveyors in snow blowers, consider the causes of malfunctions of its belts (read about them here), and learn how to replace worn-out machine elements with your own hands. Read more about DIY repairs here.
Belt application device
There are two types of belts used in snow removal equipment; they do different jobs, but the principles are the same. In both cases, their task is to transmit torque from the drive shaft to the driven shaft. The first belt transmits the moment of force to the auger, and the second distributes it to the wheels.
Due to their strength and similarity to the structure of chains, timing belts are used on snow blowers. They are more convenient and lighter than regular ones, transmit torque well, and are easier to secure in hard-to-reach places. Among other things, belts are divided into two types:
The first type is more likely to be found on the auger; it is more elastic and durable, and is more difficult to deform. The second type is suitable for transmitting high torques in both directions; it is more often used for wheels.
Now it is clear that belts are integral structural elements, without which work is not possible. It is for this reason that it is important that they remain intact during operation, because they are one of the most frequently broken parts in a snow blower and wear out very quickly at the most inopportune moment.
If, while clearing snow, you suddenly notice that the wheels or augers are not responding when you try to operate them, you can be sure that you will have to replace one or both belts.
You can carry out the replacement work yourself, this will save you some money, but first you need to understand what exactly caused the belt to fail.
Causes of malfunctions and repairs
There is no way to protect the belt from wearing out; at some point it will still have to be replaced, but there are some operating tips that will help the belts “live” longer:
- Take breaks from work; long-term non-stop operation of equipment leads to the fact that all structural elements become very hot. Such conditions will very quickly destroy the belt, and will not have the best effect on the car as a whole.
- At the same time, you should not turn the snow blower on and off too often. This also has a detrimental effect on the operation of all parts.
- You should never forget that any technique loves caress and lubrication. Regularly lubricate all parts, this will significantly increase their life.
These tips will help you delay the death of your belts, and your car will certainly thank you for it.
With the help of minitrator you can remove snow in your garden or in the city.
About
What are they made from?
Self-tapping screws in construction are used in assembling frames of house walls, rafter systems, floor and ceiling padding, and cladding of enclosing structures.
That is, the load on such fasteners during the operation of the house is significant. Therefore, the material for the production of such elements must be very durable and also quite flexible. You may be interested in: Vacuum lift: characteristics and operating principle
In modern enterprises, screws are made, of course, from steel. At the same time, the production of such elements usually uses chemically and thermally treated material of this type ST 10 KP or ST 08 KP. This steel has fairly high surface hardness and ductility. Its only drawback is its increased susceptibility to aging.
A wire is pre-made from steel ST 10 KP or ST 08 KP, the diameter of which corresponds to the diameter of the stem of future self-tapping screws. Next, such material is wound into coils and sent to factories specializing in the production of construction fasteners.
Instructions for replacing belts
When a belt fails, you should use these instructions for replacing it:
- First, decide which belt you are going to replace.
- Remove the cover covering the belts. It is located in front of the engine, under it you will find nuts. Usually there are six such nuts.
- Unscrew the nuts. If the drive cable prevents you from doing this, loosen it
- So, you got to the belts, remove the damaged parts.
- After installing new belts, you need to spend some time tensioning them. Find the optimal distance at which they will be well tensioned.
- Screw the nuts back and return the cover to its original position.
- The auger gears are available in 20- and 24-tooth types.
For more information about replacing belts on a snow blower, watch the video:
How to make a screw with your own hands
The manufacture of the screw is carried out in several successive stages:
- We make a frame from pipes. Typically, the drawings give dimensions of 50 x 70 cm. Based on the size of your motor and the size of the bucket 50 x 30 cm, you can choose the most suitable frame size yourself.
- The auger itself is made of a pipe; a 270 x 120 mm blade made of two or three mm steel is installed in its center. The screws can be made from conveyor belt, but it is preferable to use steel.
- Balance the screw by removing excess metal with a grinder. To do this, install the screw in the finished seat and turn it by hand, so you can find out where the metal needs to be removed.
- If you decide to use a conveyor belt, you will need about 1.5 meters one centimeter thick. Four rings with a diameter of 28 cm are cut from the tape.
- Use a rubber plug to cover the bearings in which the shaft will rotate. Otherwise, they will immediately jam.
- The bucket can be made from ten-millimeter plywood. For rigidity, the walls of the bucket should be attached to the frame.
- When making such structures, it should be remembered that if an electric motor is used (for electric snow blowers), it must be protected from snow. If you choose a walk-behind tractor, decide in advance on the adapters to connect it. Read the article about how to make a snow blower for a walk-behind tractor with your own hands.
Making a screw with your own hands
In a country house, in the absence of a centralized water supply, they equip an autonomous one - a well or a well, and to drill a well, in order to save the budget, they do not rent a drilling rig, but drill with a homemade auger, which makes the process cheaper, although it makes it a little more time-consuming. You can make an auger with your own hands in one day: it is enough to have some tools and materials for this, which will be discussed, as well as the manufacture of an auger with your own hands is described in detail.
Drawing for making a screw spiral
Comments (1)
Wonderful site! I was attracted by the detailed, expertly described making of homemade devices. I myself make various devices and devices and I understand that giving such a detailed description and illustrating it well is a lot of work. Do you have any ideas for making a homemade waterjet cutting machine? This topic has been bothering me for a long time. At one time I worked on such a machine and since then I have the most enthusiastic memories of it. It is very expensive to buy, but on the other hand, the principle of its design is quite simple. We have plenty of homemade CNC machines, but I haven’t heard about a machine made by ourselves. The main problem, as I understand it, is the manufacture of an ultra-high pressure pump (4000 atm). If you're interested, we can think about it together.
Screw manufacturing procedure
Materials and tools you will need:
- Thick-walled iron pipe Ø 40 mm and profile pipe;
- Grinder with metal disc, electric drill and welding;
- Steel sheet ≈ 2 mm thick;
- Tape measure, pencil, cardboard for making a template, paint;
- Chisel, rasp, sharpener and hardware (bolts with nuts);
Construction of a screw conveyor
First, you need to make the actual belt conveyor, which is offered in two versions:
- For self-production, a screw loader with dry soil unloading is more suitable, that is, the soil is not wetted with water, but is taken to the surface in the same condition as it was at depth. This method involves rapid wear of parts and is designed for drilling shallow wells, or preparing several augers for replacement during the drilling process;
- Excavation with water flushing is much faster, but the mechanism requires improvement in the bit area. Part wear is reduced by reducing friction and water cooling of the mechanism. Below we will consider just such an option, which can be used without water not only as a drilling tool, but also, for example, as a grain loader.
Hand drill with flushing the auger
Before making an auger with your own hands, prepare the material. A 120-centimeter piece of pipe is taken as the body, the ends of which are cut evenly with a grinder. Next, you need to cut a square with sides 200 x 200 mm from sheet steel, drill Ø 40 mm in the center of the square and make a slot with a grinder from the center in any direction to the edge. This will be one turn of the conveyor spiral, of which several will need to be made. To make it round, the square is cut by welding or a grinder to the shape of a circle with Ø180 mm, the spiral is bent so that the pitch between the turns of the spiral is within 80-100 mm.
Schematic diagram of the auger interturn feather
You should end up with a circle, the beginning and end of which do not coincide in the plane. This part will serve as a template: you will need to attach it to a sheet of steel, outline the outline with a pencil and cut out the next circle. It is better to paint these blanks immediately to protect them from corrosion, and after assembling the structure, paint them again.
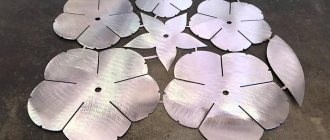
With a pitch between spirals of 100 mm, 12 spirals (feathers) must be cut for each auger segment. The rings are secured to the auger axis by welding, and to each other too. After welding, the seams are hammered and cleaned of scale with a rasp.
A profile pipe is needed to make the auger mounting system. The pipe is left open at the top to allow water to flow into it. To produce an auger, water is simply not poured under the grain. The profile pipe is inserted 2/3 into the round one and welded, and the gaps between the pipes are closed with pieces of sheet steel. In a square pipe, step 2 cm away from the top and drill a through hole Ø 10 mm.
Auger drawing
The manufacture of the receiver, which is located on the back side of the auger, involves welding four steel sections that follow the contours of the profile pipe. Departing 2 cm from the lower end, a through hole Ø 10 mm is also drilled, through which the entire structure is fixed using a bolted connection. It is better not to use a threaded connection so that when the screw rotates in reverse, the structure does not become disconnected.
Next, a bit for the auger is made, which will be welded and placed in a separate lift. It is easier to purchase a ready-made chisel than to make it yourself, since it requires hard metal alloys, which are very difficult to process at home. In addition to carbide tips, you can use diamond ones. The chisel is a replaceable tool and is attached to the auger using a pin or a threaded connection. Most often, industrial bits are two- and three-bladed, reinforced with six- or octagonal cutters made of hard alloys. A homemade chisel is welded to the auger (see picture below):
Homemade and industrial chisel
At the end of the work, the auger blades are sharpened to make cutting the soil easier - this can be done on a grindstone or with a file. When using an auger for handling grain crops, sharpening is not required.
The finished auger is painted with anti-corrosion paint and the steel surfaces are pre-primed. During operation, most of the paint will be erased, but there is no need to restore it - it will be erased in those places that are constantly in contact with the ground, so rust will not appear there.
Practice has shown that making one auger will take no more than 5 hours if you do not have the skills to work with iron. But what is important here is quality, not speed of production, so it’s better not to rush.
Shutdown
At the very end, you need to sharpen all the blades so that during advancement they do not encounter any special difficulties. Sharpening is done on a machine or manually with a sharpening stone. In any case, micron precision is not required, but it is enough to be able to cut the roots or a broken piece of stone.
After you have managed to make a screw with your own hands, it is advisable to cover it with special anti-corrosion paint. Over time, some of the paint will peel off from work, but there is no need to rush to replace it, because... there will be no rust in this place.
Making one conveyor usually takes up to 3 hours, but if you're not used to it, it can take longer. The most important thing is not speed, but quality, because... Only a high-quality tool will last for years without breaking.
You should not be afraid of such work, because... it will allow you not only to master a new specialty, but also, possibly, to have additional income over time.
The operation of various mechanical devices is based on the use of a screw. A similar part is represented by a screw, which is characterized by a certain shape. An example is the installation of a screw in conveyors designed to move various bulk materials. This design has become very widespread and is represented by a combination of a wide variety of components.
Preparatory stage
Regardless of what kind of auger you have to make, the handle should be as comfortable and durable as possible, because it is she who will take on the load. It’s worth considering immediately 2 options for working for 1 and 2 people.
To begin with, pipe sections with a diameter of 40 mm and a wall thickness of 3.5-4 mm are prepared. The length depends on how much a person will work, and at the same time on the individual characteristics of body proportions, because for a person 2 m tall, longer blades can be used, and the work will proceed more quickly.
For the average person, a handle of 80-85 cm is used, while for working in pairs you can safely make blades of 100-130 cm in each direction (convenient when drilling to great depths). Another 1 cut is made, stable 40-50 cm, and this cut will be used as the main working trunk.
Figure 1. Schemes of roller bits.
To fix them together, a grinder makes an arc cut in the main trunk so that the pipe can be immersed into it at 13, after which it can be welded thoroughly. If you want to increase the strength characteristics, then you can insert a profile pipe inside the handles and weld it with sheet steel. This move will allow you to seriously increase the load without fear of damaging the tool.
The handles can be left in the form of a tube, but it is better to make rubberized linings on them, which will prevent your hands from slipping, and at the same time reduce the likelihood of calluses. There is no need to install any limiters, but using an angle grinder it is advisable to grind the ends of the pipe so as not to injure your hands while working.
At the end, a bolt is inserted into the pipe and welded tightly so that only the thread is lowered down. It is advisable to choose a bolt from the strongest grades of steel, so as not to have complications later.
Polymer sand tiles
VIDEO ON THE TOPIC: Business in waste processing and production of polymer sand products
Equipment for the production of flexible bitumen tiles is fully automated and therefore expensive. For a novice businessman, it is preferable to manufacture polymer sand tiles - the initial costs and production costs are much lower. Plastic waste is used as raw materials: bottles and packaging, household appliances and building materials that have become unusable.
Deep sorting and cleaning when preparing raw materials is not required; the only condition is that the ratio of hard and soft polymers should be 50-60/40-50. Moisture evaporates during the production process, food waste and paper burn.
To make tiles from plastic bottles and other similar waste, a lot of dry sand with a fraction of up to 3 mm without clay impurities is required. Production premises must have electricity, good ventilation, and water. Tables and conveyors.
Equipment for the production of polymer sand tiles:
VIDEO ON THE TOPIC: Line of equipment for the production of polymer sand tiles
- polymer crusher – from 90,000 rubles;
- chamber for drying sand – 175,000 rubles;
- thermal screw mixing heating and melting machine – 200,000 rubles;
- electronic balance;
- two-way molding unit – 140,000 rubles;
- racks.
Sand moisture content should not exceed 5%. The crushed polymer, sand and dye are mixed in the heating-melting machine. The mixture is weighed while still hot, placed in a mold and exposed to a press for 4-10 minutes, then placed on a rack until it cools.
In terms of performance characteristics, plastic tiles are practically not inferior to materials made from bitumen, but are cheaper.
Making a screw
A simple method will allow you to make an extremely simple system with 2 blades that cut perfectly into the ground, but they can only be used at shallow depths (up to 10 m), because Each time you will have to take out the working tool completely to extend it.
To begin with, select a pipe similar to that used above. The length of the pipe is 100-140 cm, depending on the height of the person who will be working. An elongated nut is welded into the upper part of the pipe, completely matching the bolt. If you can’t find an oblong one, then you can use 2 standard ones, but no less, so that the bolt holds securely.
Figure 2. Drawing of the auger ring.
A sleeve or thick reinforcing rod is welded into the lower part, which will serve as an adapter to the drill. The chisel itself can be purchased at a specialized store, but a primitive version can also be made. For a primitive version, it is enough to take a steel strip 3 mm thick and 30 cm long, twist it into a spiral into 3 turns, and then calcinate it (cooling in boiling oil or lead). Such a spiral is fixed in a sleeve, after which it is sharpened in the most careful way.
At this stage, you will need 2 grinder discs, the 1st 150 mm with a perfectly straight edge, and the 2nd 180 mm toothed (for wood). These 2 discs are sawed exactly in half and the central part is widened to match the work pipe. The disks will be positioned alternately on the working pipe, i.e. first 150 mm, and 10 cm higher than 180 mm. They are located at 35° to the ground to achieve maximum efficiency with minimal effort. When fixing, there is a possibility that you will have to adjust the central part with an angle grinder.
Tubular elements for extension are made quite simply:
- Take a pipe of the same diameter and length 100-140 cm.
- A bolt is inserted from below and welded, and an oblong nut is inserted from above and also welded tightly.
Thus, you can make very long strokes, but it is better to limit yourself to 10 nozzles, because It is difficult to remove them every time due to their high mass.
More complex option
Schemes of garden drills: a - drill, b - auger drill.
Here you will have to work much longer and harder for production, because... the screw conveyor will go from the bit to the very top.
The chisel can be used according to the technology described earlier, but it is better to purchase it in a store (Fig. 1). In any case, it will require regular care, and the difference depends solely on the skill of the worker, because... You can make it with your own hands as good as an analogue.
After the bit has been mounted on the working pipe, you need to begin forming a spiral (Fig. 2). The most convenient way to make it is to use the already familiar toothless discs under the grinder, but as a base one you will have to use a toothed one with a smaller diameter, which will immediately relegate the problem of the roots to the second plan.
Instead of grinder discs, you can take and bend 2 mm sheet steel, which will be much more economical, but more labor-intensive, because You still have to shape it into a perfect circle and sharpen it. In any case, the work ahead is astronomical, and this procedure is done for each subsequent auger.
Necessary equipment
The price of production equipment for self-tapping screws is high, so it is necessary to carefully study the design and performance. There are many models on the market, the price range varies depending on the purpose, country of manufacture, and production speed. The most common installation is a line for the production of self-tapping screws, where metal is harvested, threads are applied and heads are made, drying and galvanic processing are carried out.
Self-tapping screw production line
The productivity of the machines is selected in accordance with the needs of production
There are various automatic models that produce from 30 to 300 screws per minute; it is important to understand that the price of the device depends on this indicator. Control over product quality and technical condition of equipment is carried out by trained operators
The number of people in production depends on the volume of the line and the work plan.
Drawing machine
Procures rods at the initial stage of the process. Production begins with a furnace with spinneret holes through which the wire passes and is reduced in diameter. Drum-type raw materials are used for the process, as they are easy to install into seats. For prolonged use and compliance with temperature conditions, the equipment is cooled with a cutting fluid.
Cold heading equipment
The main work of a cold heading machine for self-tapping screws is the production of caps and special holes on them for working with the tool. Before processing, the raw materials are divided into an even number of products, then the screw head is formed.
Cold heading equipment requires adjustment and technical maintenance. Correct alignment of all systems will allow you to achieve a high-quality self-tapping screw at the exit, convenient for the client to work with. The equipment controls the supply of raw materials automatically, then, after work, dumps it into a hopper or basket.
Thread rolling machine
The equipment is equipped with a small conveyor with fastening elements. Next, the workpiece is processed with dies on both sides. The knurling elements are adjusted according to the available stroke; this happens when the type of part is changed. The pitch, shape and number of turns on the product completely depend on the element used and the correct setting. Each different type requires a separate removable tool.
Hardening equipment
After the above processes, the product appears finished, but is not usable. Machines for the production of self-tapping screws are not capable of working with solid products, so hardening occurs at the end of the process. The hardening furnace is set at a temperature of about 900 degrees, after the process the products are placed in a furnace with a low degree.
Due to the temperature difference, the metal relieves stress and is less prone to fractures. After hardening, washing is carried out to clean the finished product from traces of dirt and carbon deposits, and cooling also occurs.
Electroplating equipment
Galvanic coating is necessary for anti-corrosion properties and increased mechanical parameters of self-tapping screws. The process is carried out using several baths with different solutions, in which the part is processed sequentially. The initial stage is immersion in a bath with a degreaser, then a phosphate solution is applied, then oxide, etc. After all treatments, rinsing with water occurs, and a zinc coating is applied under electrical influence.
Drying and packaging machines
To dry the finished product, a drum with a centrifuge is used, the work is carried out on the principle of a washing machine. For packaging, bags with the possibility of packaging several dozen pieces are used. In wholesale trade, goods are packaged in boxes or other metal containers.
https://businessideas.com.ua/business-ideas/stanok-dlya-proizvodstva-samorezovhttps://rushbiz.ru/upravlenie-biznesom/oborudovanie-dlya-biznesa/biznes-po-proizvodstvu-samorezov.htmlhttps:// promzn.ru/stanki-i-oborudovanie/dlya-proizvodstva-samorezov.htmlhttps://biznesvsele.ru/proizvodstvo/proizvodstvo-samorezov.htmlhttps://stankiexpert.ru/stanki/kuznechnye-stanki/oborudovanie-dlya-proizvodstva- samorezov.html
