Grooves are required for more dense and reliable joining of logs to each other. If you purchase rounded elements, they are usually ready for assembly, but sometimes you need to make a groove yourself, this process is not very simple, so it’s worth talking about it in more detail so that you can understand some of the nuances better.
It is important to carry out the work correctly, as the elements can very easily be damaged.
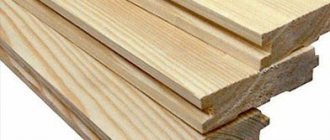
In the photo: you can make a longitudinal groove with your own hands using special tools
Tools needed for the job
Let's consider what tool will be needed for a longitudinal groove in a log, since it is unlikely to be possible to make it with improvised means. The list is as follows:
| Measuring fixture | To work, you will need a special carpenter's point, which is a compass with a scale showing the distance between the legs. One of the supports is sharp, and a pencil is inserted into the second to draw a line; there is also a level in the design so that you can control the position of the measuring element |
| Chainsaw | With its help, longitudinal and transverse cuts are made, thanks to which the work is greatly facilitated and accelerated. Of course, you can use an electric saw, but it requires electricity, and the wires will constantly get in the way when working, reducing mobility |
| Adze | This tool resembles an axe, but the blade is located across the handle and can be either flat or semicircular. It is with the help of this device that the wood is removed and a groove is formed in accordance with your markings. You should select a convenient tool with a sharp blade, this will greatly simplify the work |
Important! The line can be made from a piece of rigid wire, from which the legs are bent to the desired width, sharpened so that they do not leave scratches, and firmly attached to the handle of a hammer or to another element.
The line is similar in appearance to an ordinary compass and differs only in its larger size and more complex design
Cutting logs with corners without residue
As we said earlier, the corners are colder without any residue, but they allow you to significantly save on building materials.
Angle "to the paw"
Among the joints of logs in the corners, the “paw” method is popular. It is easy to implement, and at the same time provides high strength and reliability of the connection. Also, the presence of inclined cuts makes it possible to achieve high tightness. The method has been tested for a long time, even GOST standards have been developed: size tables for each log diameter (see photo).
Table of foot joint sizes for different log diameters
All dimensions are plotted relative to the found middle of the log and a vertical line drawn from it (it is drawn using a plumb line).
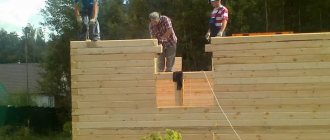
Connecting logs without leaving any residue. Angle to paw
The order of work is as follows:
- Find the length of the cut part (called the block). It must be no less than the diameter of the largest log available (in the figure it is marked L). We set this value aside from the edge of the log (let it be 250 mm), draw vertical lines in these places. They will be the boundaries of the idiot.
- Let the diameter of the processed log be 200 mm. From the middle line, 1/2 of the value of A is set aside. D for a 200 mm log is 141 mm. We divide this value in half and put it on both sides of the center. We draw vertical lines.
- We trim (cut with a chain saw). As a result, you should get the same picture as in figure a).
- We take the appropriate dimensions from the table and mark them on the block.
- We trim off the excess (cut it off). The result should be a figure like in Figure b).
This is what the angle from the logs into the paw looks like (dovetail due to the fact that the connection is in the form of a trapezoid)
All logs are processed in this way one by one. As you can see, the dimensions depend on the diameters of the logs. In order not to have to worry about drawing every time, they make templates from thin plywood according to the diameters of the logs that are available (they label them). Then, having found the middle and made a block, they apply and trace a suitable template. With this order of work, there is less chance of making mistakes, and chopping bowls takes less time.
The working process
Now let's look at how to prepare correctly and in what sequence to perform operations to get a good result.
Preparation
At this stage it is necessary to carry out a number of important activities:
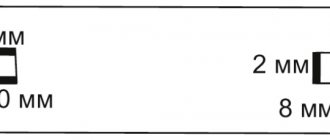
- First of all, you need to determine what width of the groove of a rounded log is required, everything is simple: if in winter the temperature does not drop below -30, then the joint should be 15 cm, if frost can reach -40 - 17 cm, and for the most severe regions the indicator can range from 18 to 20 cm. If we are talking about cold rooms, then most often a narrow groove of 5-7 cm is made.
- Next, marking is done, for this purpose the center is marked, the radius is measured and the profile of the future groove is marked, now you can imagine what the final result should look like.
Read also: The specific gravity of water is
The most important thing is to clearly mark the boundaries of the cut
- Now you can start marking, but to do this you need to place two logs on top of each other, since they will be installed after fastening. The elements need to be set level and secured so that they do not fall on you during work.
- After this, take a scriber, on which the desired width is set, now you can begin longitudinal marking, to do this, carefully move the device along the logs so that a line is drawn on the top one, and a scratch remains on the bottom one. It is for these marks that the logs should be connected subsequently, on the other side the operation is repeated.
- We also recommend making a template for the future groove from a piece of thick cardboard or plywood, so that during the work you can quickly check whether the material still needs to be removed or everything is fine. This simple device will greatly simplify your work, since you won’t have to constantly look closely at the plane.
- The marked log is removed and turned over, place it on a flat surface so that it is convenient for you to work and nothing interferes, at this point the preparatory stage can be considered successfully completed.
Drawing a line with a scriber is a process that requires accuracy.
Main stage
The instructions for carrying out the work are as follows:
- First of all, inclined cuts are made along the line, which will set the boundaries of the groove and will serve as a guide for you. You should not make them too deep, because if you lack experience, you can disrupt the configuration of the recess, and it will turn out to be too deep, which is undesirable.
- Next, transverse cuts are made; they are designed to simplify the removal of wood and should have an oval shape. That is, you carefully make such cuts along the entire length of the tire, the distance may vary, but remember that if it is too large, then further work will become more complicated, so it is better to do everything as needed.
The cuts greatly simplify the work process and speed it up several times.
- Next, the adze comes into play, with its help you carefully chop off one element after another, for this you need transverse cuts. We recommend that you first go along the entire length and remove the material, and it is more convenient to adjust the groove profile to the pattern in the second pass.
Important! You should be careful and not remove too much, of course, all unevenness is compensated by tow or other sealant, but it’s still better when the elements are adjusted to each other more accurately, then they themselves resist blowing well and keep the heat in the room.
An adze is an indispensable tool for working with logs, and its price is quite affordable
- After completing the work and checking all areas with a pattern, you can begin installation, and do not forget about the sealant.
Read also: How to check a three-phase electric motor with a tester
The question often arises of how to make a groove at the end of a log in door and window openings; there are several options for carrying out the work:
- If the openings are quite wide, then lines are drawn in them at the required width, after which the cut is made with a chainsaw. Next, excess parts are removed using a wood chisel. The most important thing is not to cut too deep, so don't go too hard.
- If there is not much space, then you need a more compact tool, we recommend using a milling cutter with a side handle with a power of 2 kW or more, with its help the work happens quite quickly and with high quality, the only drawback is the need to hold the device with outstretched arms, because it weighs a lot, and When working for a long time, fatigue accumulates.
- For the smallest openings, only the traditional option - a hammer and chisel - is suitable, since access is difficult.
In order not to waste time and effort, we advise you to purchase ready-made elements; nowadays, the Finnish groove of rounded logs is very popular, thanks to the grooves it is less blown, fits more accurately and does not require caulking after assembly.
The Finnish groove simplifies installation and improves the quality of connections
Connecting timber in a corner without leaving a trace
First, let's talk about log houses. Recently, they have become popular again, especially in suburban construction: they look attractive and are also natural. Moreover, even despite a significant overconsumption of material, the corners are made with a remainder. These methods of joining logs are traditional. They came to us from our great-grandfathers, this is how they built their houses.
Log house in a bowl
As has already been said, a longitudinal recess is made in each log - a groove. In the corners they are trimmed more, according to the shape of the log lying across. This notch is round in shape, which is why it is called a bowl, and the method of cutting a corner is called a bowl. The second name is “in the oblo”.
Marking the upper and lower bowl
Depending on the location of the bowl, there are upper and lower bowls. The upper bowl is so called because the log rests on top of the crown, clasping the lower one. This connection is also called “clap”. Remember: the bowl is upper, despite the fact that it is formed at the bottom of the log.
The work is carried out in several stages. The log is first placed in the log house and leveled. Then they outline the contours of the groove and the bowl, place it on a flat surface and process it there - cutting the bowls. When the excavation is ready, the log is raised again and placed in place, trying it on. If necessary, they are adjusted (removed again, trimmed where necessary) and only then laid on a compactor (tow, jute, moss).
Types of bowls for joining logs in corners
The lower bowl can be molded directly in the log house: all manipulations can be done on the laid crown. When the walls are already raised high, it is very inconvenient to do this if you lack dexterity, so you still have to drag the logs up/down. Perhaps this is why this method is less popular.
It is easier to make a frame into a bowl: it allows you to correct almost all mistakes. In addition, despite all the apparent complexity, it is this type of joining of logs that is easier for beginners to do. All others require more carpentry skill.
How to make a joint from a log frame into the lower bowl is shown in the video below. The explanation is detailed, showing techniques for working with an ax and the full procedure. First you just need to talk about the tool that is used to draw the log. This is a carpenter's trait or scriber.
The device is very similar to a school compass. There is also a sharp stop on one side and a pencil on the other. Just like in a compass, the required distance is fixed with a screw. Having placed the ends at the required distance, the sharp part is guided along the log for which the bowl needs to be cut. Using a pencil, respectively, according to the one in which the groove and bowl will be cut. This produces markings, which are then drawn with a marker. It will become clearer when you see the process of marking the bowl in the video.
Actually, now a video about how to connect logs into the lower bowl. The first part deals with molding the longitudinal groove, the second directly deals with cutting the bowl.
Connection in okhryap
This type of connection consists of two semicircular bowls. In order for a corner folded using this method to be warm, considerable experience is required: even minor errors in the width of the groove or the thickness of the lintel will cause drafts.
Log in okhryap
The easiest way to join beams in the corners of a log house is “into the floor of the tree.” A rectangular groove is cut, the dimensions of which depend on the thickness of the timber and are: The depth of the notch is half the thickness of the timber. That’s why it’s called “half a tree.”
Connecting the timber in the corners with the remainder - in half a tree, in a fat tail, in an okhryap
The “tail tail” method is distinguished by the presence of an additional tenon, which provides a stronger and more reliable connection, but requires more carpentry skill. More difficult is connecting the timber into an okhryap. Here you cannot make a mistake when calculating the width of the jumper, but it is much easier to implement than on a log: the geometry here is standard and you can use a template, which significantly speeds up the work, and then an error can only occur when cutting.
There are several types of connection. Traditionally, “half-tree” and “paw” are used for bathhouses and houses. They differ only in shape. Half a tree has smooth, parallel edges. It's easy to implement. When joining the timber “into the paw”, the shape of the tenons is made trapezoidal. It is a little more difficult to perform, but there is less chance of through holes occurring.
Joining the beam in the corner without leaving a trace: half a tree and a paw
There are several other types of butt joints for timber. They are not very reliable and do not provide proper tightness, although they are economical in terms of material consumption. They are rarely used for residential buildings, mainly for the construction of outbuildings.
A simple butt connection occurs with alternation. This makes the angle stronger. For reinforcement, you can use steel plates or knock down the beam with long nails at an angle.
Butt joint of timber
There are also methods for butt assembly with dowels of different shapes.
Another method of construction: using frame-timber technology. Then, in the corners and at the joints of the timber along the length, a vertical stand is placed with grooves formed in the required planes. At the ends of the beam, a spike is formed into the appropriate shape. When laying, you have to “put on” each element from above.
The advantage is that you can mold all the studs according to a single template, and then simply assemble everything like a construction set (not forgetting to lay inter-crown insulation). The connection turns out to be airtight and quite reliable, moreover, the joint itself is not visible and the appearance is very attractive.
Connecting timber using panel technology: quickly, warmly and reliably
Conclusion
Almost anyone can make grooves on their own, although this is a labor-intensive process, so if such a need arises, do not be afraid and boldly get down to business, and the video in this article will help you with this (see also the article “How to properly connect logs and timber in the manufacture of a log house").
Sampling of quarters and grooves
It is often necessary to select a quarter in a log or block (Fig. 47).
A quarter is chosen in the manufacture of, for example, window and door blocks. This is done in a log like this: they fix it, find the centers at the ends, draw circles with the radius of the small end, use a plumb line and a square to draw the vertical and horizontal diameters, the perpendicularity of which is checked with a plumb line and a square. Next they are divided into 3 equal parts. Lines are laid through the division points parallel to the diameters. The angle formed between the perpendiculars and in contact with the surface of the log is a quarter. After this, threads are beaten along the marks with a tightly stretched cord covered with chalk, between which notches are made and wood is selected (this can also be done with a chisel).
Read also: The height of the mirror above the dressing table
Rice. 47. Sampling a quarter: a, b – marking; c – selected quarter
Making a rectangular groove (Fig. 48) is also a fairly common type of carpentry work.
Rice. 48. Making a rectangular groove: a – marking; b – sample; c – finished groove
As usual, the log is fixed; circles with a radius of small diameter are first drawn at the ends, then the vertical and horizontal diameters are drawn, controlling them with a plumb line and a square. The width of the groove is most often a sixth of the diameter of the circle, and the depth is a quarter. After the depth and width of the sample have been measured at the ends, marks are placed to which the cord is attached and the threads are beaten off with it. Then, with an ax, notches are made across them across the fibers and the wood is chopped off. Finally, the groove is cleaned with a chisel.
It is much easier, more convenient and safer to process a log if it is securely fastened. For this purpose, for example, reverse staples are used, although there are other methods of fixation.
When making a log house, you may need to select an oval groove (Fig. 49).
Rice. 49. Making an oval groove: a – pattern; b – thread beating; c – notches; g – groove; 1 – pattern; 2 – log
The width of the groove is determined depending on climatic conditions. So, for example, at a temperature of – 30 °C it is 150 mm, at – 40 °C – 160–170 mm, at – 50 °C – 180–200 mm. The groove must be the same along its entire length. To achieve this, a template is first made from a board or plywood along the small end diameter, then divisions are applied to it along the diameter. Division 2 corresponds to 50 mm, 5–75 mm, etc.
On a fixed log at the ends, controlling the actions with a plumb line, mark the vertical diameters. A pattern is applied to them so that the vertical lines are aligned, then marks are made on which a chalk-covered cord is attached, and the threads are beaten off. Between them, notches are made along the width of the groove, after which a groove is selected, regularly checking its shape, for which a pattern is applied.
When making log houses, the grooves in the log are selected using a debarker. This device allows us to make even grooves along the entire length of the log. This operation can be compared in effect to the passage of a plane. Mechanization of this stage allows us to reduce the influence of the human factor.
Making a rectangular groove
Before marking the width and depth of the groove, the log should be secured by laying it on pads.
Using a compass on the thinner end of the log, you need to find the center and draw the radius, the same should be done on the thicker end of the log.
Using a cord and a square, vertical and horizontal diameters are drawn at both ends of the log. After this, mark the width and depth of the future groove. Typically, the width is chosen equal to 1/6 of the diameter of the circle, and the depth is ¼ of the diameter.
After the necessary markings have been made on the ends of the log, use a cord and notches to mark the boundaries of the groove on the surface of the log and begin chopping the wood.
Making an oval groove becomes necessary when building walls. It is the oval groove that allows you to more tightly connect the logs stacked one on top of the other. This connection prevents the penetration of outside air well. Also, a transverse oval groove has to be made to form a bowl when cutting a log house into a clapboard.
It is customary to take the width of the oval groove in logs depending on the outside temperature in winter. For warm rooms, it is recommended to make a groove at least 15 cm wide at winter temperatures of -30 degrees, 17 cm at temperatures reaching 40 degrees below zero, and at lower winter temperatures - 18-20 cm.
If a cold room is being built, the groove is made narrower and in most cases a width of 5 cm will be quite enough.
Before choosing a groove, you must, as in the case of a rectangular groove, make markings, starting from the ends of the log - find the center, draw circles, mark the diameters, applying a special pattern to them, mark the transverse profile of the groove.
After marking along the entire length of the groove, transverse cuts are made every 20-40 cm, as before cutting the edge. Only the cuts should not be flat, but oval. They are convenient to make with a gas or electric saw.
After the cuts are made, you can select the groove. For this, a special tool is used - an adze. Its cutting edge, reminiscent of an ax blade, is located perpendicular to the handle (like a hoe). The groove is passed by chopping off excess wood with an adze from one cut to another.
During the process of selecting a groove, its profile should be controlled using a pattern.
Now you know how to select a groove in a log.
In the next publication we will learn how to properly splice logs.
How to connect beads lengthwise
The easiest way is half a tree. Its configuration and shape are similar to those made when connecting a corner. But the disadvantage of this splicing method is that when longitudinal forces arise, which can occur during drying or movement of the soil, such a connection is easily broken. A continuous gap is formed.
Long beam connection
The oblique rim lock has the same disadvantage: it is easy to disengage. If you need reliable joining of timber, use a straight rim lock. As you can see, due to the protrusion, pressed by the crowns located on top and the weight of the roof, it will resist the forces of longitudinal tension (and compression too). It is more difficult to implement, but much more reliable.