Do-it-yourself laminate apron for the kitchen
One of the most problematic and vulnerable places in kitchen furnishings is the small space between the top tier of cabinets and the countertop, which is called the apron. To protect a wall with an apron, you need to use tiles, mosaics, and even glue panels that are equipped with photo wallpaper. For this reason, it is not surprising that the idea of making a kitchen apron from laminate with your own hands appealed to most apartment owners.
Pros and cons of using laminate for a kitchen backsplash
Laminate with the highest precision conveys the texture of natural wood and stone and creates the necessary atmosphere
Most people are accustomed to the fact that laminate is used exclusively for flooring. However, in recent years, designers are increasingly using it in other places, because the result is inexpensive and high-quality. But such a popular finishing material has its advantages and disadvantages.
The advantages include:
- ease of cleaning - just wipe it with a soap or chemical solution to get rid of any dirt, and it will not lose its properties or deteriorate externally;
- ease of installation - the laminate is installed quickly and without problems, leaving little dirt and debris;
- moisture resistance of moisture-resistant laminate;
- resistance to mechanical damage, durability;
- low price;
- wide range and ability to imitate almost any material;
- Contains environmentally friendly materials.
Disadvantages include instability to high temperatures (that is, the laminate cannot be placed close to the slab, otherwise it will quickly deform) and moisture, if the material is not specialized. Otherwise, this is an excellent option for decorating a kitchen apron.
Before you start
Installation of the material can be carried out in several ways: on the lathing or using the adhesive method. Regardless of the method chosen, the preparation measures for the material and surface are the same.
Installation tools
- Jigsaw or hand saw.
- Hammer.
- Building level.
- Pencil and ruler.
- Wooden block.
- Electric drill.
- Wooden slats for sheathing. If the glue method is used, then liquid nails.
- Nails, screws.
Which laminate to choose
For a kitchen apron, you should choose a laminate with environmental safety class E1
There are several types of laminate, differing in composition and installation method:
- Laminated chipboards are durable panels fastened without sheathing. They are not resistant to moisture and will require a special profile during installation.
- MDF is inexpensive and can be installed on any type of sheathing, but, like laminated chipboard, it has low moisture resistance.
- Floor-mounted - quite durable and suitable for covering on the wall. Mounts either on the sheathing or on a wall with a flat surface.
- Laminated hardboard - has a high density and is resistant to moisture, installed on the sheathing.
For a kitchen apron, it is recommended to select a laminate with high resistance to humidity, strength class 31–32 and resistant to high loads. Preferably from environmentally friendly materials.
When choosing, you should consider the shade of the laminate. It should match the style of the kitchen itself.
User reviews
Sergienko Anton Pavlovich, 59 years old, Kemerovo: “I would like to compare laminate flooring with lining, which is made of larch. Polished fresh wood is much more beautiful, and if it is installed correctly, then when heated from the heat of the stove, the aroma of resin is formed. One of the disadvantages is that larch quickly turns black from water. I suffered for a long time and looked for a laminate with a specific pattern and color. I made an apron from lamellas near the sink, and from larch near the slab. Everything has been fine for four years now, there is a characteristic aroma, and the apron looks like new. In terms of money, everything cost the same as for Turkish tiles.”
Larik Nikolai Andreevich, 33 years old, Volgograd: “My advice to you is that as soon as the apron is laid, you should immediately cover it with a monolith or glass. No varnish compositions or polishes can save you from moisture. Because of the drawers, steam will not escape, and the water will hang in drops on the wall. There is neither the energy nor the time to constantly wipe and dry. It’s not for nothing that the apron was invented earlier; it’s a great phenomenon. It will be a little more expensive, but it will last for 30 years, and no less.”
Installation methods
There are two ways to install laminate: adhesive (the laminate is attached to a bare wall) and with lathing (attached to a pre-prepared structure). You should not start work immediately after purchasing the material; it should “get used” to the conditions of the apartment (humidity, temperature). It is necessary to keep the laminate indoors for 48 hours. Otherwise, the material may become deformed after installation.
Before installation, it is necessary to remove all furniture and trim and polish the wall surface with putty. There should be no switches or sockets on the wall.
To lay laminate you will need the following tools:
- hand saw or jigsaw;
- hammer;
- Ruler and pencil;
- building level;
- electric drill;
- wooden block;
- wooden slats (for sheathing);
- silicone or liquid nails (in the case of the adhesive method);
- screws, nails.
With sheathing
First of all, you need to create a structure. The bars for the sheathing should not exceed the size of 4x4 cm.
Work order:
- Using dowels, secure the bars at a distance of 30–70 cm from each other and at least 2 cm from the floor.
- Check that all elements are on the same level.
- Start laying the panels from the lower right corner. During installation, the laminate sheet must rest on the sheathing.
Panels can be attached to the sheathing using liquid nails - Press the next panel into the end groove to the first at an angle of 45°.
- Continue installing rows upward.
- Adjust the panels to each other (you can use a hammer), fix the laminate with screws.
Without sheathing
For this method, the wall must be perfectly flat. You need to make sure of this by checking it with a level, and in case of any violations, level it, for example, using cement-sand plaster or drywall.
Fixing the laminate to the wall using liquid nails with locking locks begins from the very bottom of the surface, while the panel is positioned so that its ridge is located at the top. If panels with click locks are used, then they are mounted, on the contrary, with the groove up, and the ridge located below is pre-cut with a jigsaw or a circular saw with a fine-toothed disk.
Then you can start installation:
- Apply liquid nails to the first panel, then press it tightly against the wall and press it for a while with heavy objects at hand.
Liquid nails are applied to the back of the panel in the form of a snake, avoiding the adhesive getting on the locks - The second and subsequent panels must be attached to the wall after 1-2 days, since the first panel will serve as a stop for all subsequent ones and it must dry well. For each panel, you need to machine the ends and groove, then carefully attach the next panel to the left of the first at an angle of 45°, connecting them. Moving in the same way, from right to left, from bottom to top, glue the second row.
- Wait 1-2 days again.
- Continue installation. If cracks form, they must be treated with a sealant.
- Before fixing the last laminate panel to the wall, it is first sawn to length in accordance with the existing gap.
All you have to do is wait until all the glue sets.
It is important to remember that when trying to complete the job in one go, for example when gluing panels in the middle of a wall, the bottom laminate may move away from the wall.
Required Tools
tool for laying laminate flooring on an apron
To carry out the work, you will need tools that are available to almost any home owner:
- roulette,
- level,
- ruler,
- putty knife,
- screws and nails,
- glue,
- hammer,
- screwdriver,
- electric drill,
- jigsaw
How to care for a kitchen apron
The easiest kitchen apron to clean is made from ceramic tiles.
After installation, the apron must be cleaned of dirt: just wash it with water or detergent if necessary. In the future, clean in exactly the same way. You can use industrial soda; it removes almost any dirt and has a whitening effect (if the apron suddenly darkens).
The most difficult thing to clean is the seams; dirt gets stuck in them much more often. Bleach or lemon juice will help with this. The solution should be sprayed onto the seams from a spray bottle, left for half an hour or an hour, and then rinsed off with plain water.
You should also not wash your apron too often, otherwise it may lose its properties over time.
If scratches appear, you can polish them with a wax pencil. Wax can also be used as a preventative measure by applying it to the entire surface of the apron for additional protection. For deep scratches, use a special putty.
Functionality of the material
MDF panels have the following advantages:
The characteristics of wood dust pressed in the presence of glue are very close to natural solid wood. However, due to the use of wood processing waste and wood from trees that were sanitary felled, the cost of such material is several times lower.
The paraffin present in the material provides good moisture resistance, which is an invaluable quality in the kitchen.
Pressing under high load makes it possible to obtain a slab with maximum resistance to mechanical loads. MDF boards are securely fixed to the wall surface, and any fittings can be easily mounted on their surface. A practical MDF apron has successfully served for more than ten years without any visible changes in appearance.
You can create a beautiful MDF apron that imitates natural wood and natural stone, metal, and plastic.
The slabs are easy to install, without requiring strict leveling of the wall surface.
Determining the height and dimensions
The standard height of a kitchen apron is 60 cm, which is convenient for people of average and tall height. However, if the majority of household members are short, then it is better to make the apron 45-55 cm high. We also recommend slightly lowering the height of the apron if the upper cabinets open upward using door closers. After all, if opening such doors is not difficult, then to close them, you will have to stand on a stool or do it in a jump.
Low apron
For a kitchen set partially or completely without wall cabinets, the apron can be designed at a standard height or an elevated one. For example, it can reach the ceiling or occupy approximately ¾ of the wall. Below are examples of aprons for kitchen sets without wall cabinets.
If desired, you can protect not only the area above the countertop and stove, but also the area behind the hood.
If the work area has a niche, then it is best to cover it completely.
See more: The correct size of the apron is the secret to a comfortable kitchen.
How and with what to update old furniture in the kitchen with your own hands?
Many housewives dream of new kitchen furniture. If you can’t do this yet, update the old furniture yourself. With a creative approach, this is quite possible and looks beautiful.
You can restore an old kitchen set using the decoupage technique. For this you will need decoupage napkins, PVA glue, varnish, and paint.
How to decorate old furniture using decoupage technique:
- First, you can paint the kitchen set with paint from a spray can or with a regular brush. All sides are thoroughly cleaned and wiped dry.
- When the paint is dry, glue the decoupage napkins using PVA glue. Do it quickly but carefully.
- After the glue has dried, open the walls of the headset with varnish. In total, several layers of varnish are needed, but with breaks for drying.
Now the look of an old kitchen set will no longer depress you. Using the decoupage technique, you can decorate your kitchen in Provence style.
An easier way to decorate old furniture is by gluing film or wallpaper. You need to buy a sufficient amount of film or washable wallpaper, cut it into pieces of the required area and stick it on old cabinets and doors. The kitchen will immediately look completely different.
It is not necessary to refinish the entire surface of the cabinets. You can highlight some areas that are especially in need of restoration and decorate them.
If glass is inserted into the doors, you can decorate the inside of the cabinet with film.
Many people have a leather sofa in their kitchen. Over time, it may also lose its appearance. The skin becomes dull, scratches appear, and significant damage in the form of holes may appear. You shouldn't leave your old sofa like this. By purchasing leather paint, you can breathe life into it. If there are scratches or holes, you can hide them:
- Using liquid skin.
- Using a patch to match the sofa.
- This could also be an interesting application.
Before you start gluing a piece of leather, degrease the damaged area with an alcohol-containing product.
Updating old stools and chairs is also easy:
- Wooden chairs will become as good as new if you open them with several layers of varnish.
- A stool with a wooden seat can be covered with a self-adhesive thick film.
- You can sew a fabric cover on a stool with a soft seat that will harmonize with the overall color scheme of the kitchen.
- You can also crochet or knit beautiful chair covers.
The refrigerator can be decorated with various magnets. In addition, the refrigerator can be decorated with stylish, laconic or bright stickers.
Refrigerator decor with vinyl film
Personal impressions
Usually, when choosing a material, reviews and personal impressions have a greater influence on the decision than manufacturers' assurances.
The author of the article used a regular seamless floor laminate of class 32 in an area of much greater risk than the walls and even the apron - as a covering for the work area countertop and dining table. The laminate was glued on and edged with an aluminum threshold.
Impressions after a year are as follows:
- The material is extremely durable. Numerous contacts with dishes, cutting vegetables on the table surface and other loads did not leave any marks on it at all.
- The joints between the boards stand out slightly; however, the boards remain lying without the slightest gap. Food residues and dirt do not accumulate in the seams.
- The appearance of the table is beyond praise.
- Near the stove and sink, where hot and wet dishes were constantly placed on the boards, the joint between the boards swollen barely noticeably. If you had to redo the countertop, it would probably be a good idea to assemble click locks with sealant.
The opinion that laminated wall panels in the kitchen should be used away from the stove and cooking area was also hard-earned: in one of the previous apartments, the panels were installed within the range of splashes and quickly lost their original appearance.
Something like this.
The laminate boards are secured at the edges with self-tapping screws, which will be hidden by the edging.
Moisture-resistant or water-resistant coating?
High-quality modern laminated panels are practically not afraid of water - special water-repellent wax-based compounds are applied to them as a protective layer. However, not all manufacturers process the joints between panels, and therefore these parts of the coating remain susceptible to moisture.
For the kitchen you can choose:
- Moisture-resistant coating - does not react to high humidity in the room, but the base may deform if water gets into the joints. Able to withstand drops, splashes and even small puddles, but the exposure time to the liquid should be no more than 20 minutes. In this case, sealing of the seams is required during installation.
- Waterproof laminate is more expensive, but can withstand moisture for 6 hours. Here the joints are processed at the factory, so no additional measures are required to protect them. Laminate with a plastic base is considered the most reliable, but it is also the most expensive.
Peculiarities
A laminate apron is an original idea for decorating a kitchen. According to many builders, this material is considered the best for finishing rooms with high humidity, since it consists of several layers:
- a base made of wood fiber, it gives strength to the board;
- paper impregnated with a special composition;
- textures with imitation tiles, stone and wood;
- acrylic protection, extending the life of the panel.
Thanks to its special structure, the laminate is characterized by a high level of moisture resistance. The board is easy to care for; to clean it, simply wipe it with a damp cloth.
The advantages of the material include easy installation, which is quicker than tiles. In addition, the board is available in a huge range of textures and colors, which simplifies its selection to suit the design style. Manufacturers produce boards of various classes, so anyone can purchase one, regardless of their financial situation.
As for the disadvantages of finishing the apron with laminate, there is only one - the panels are afraid of high temperatures.
Grouting joints
The choice of grout should be done in the same way as with glue. We take the most popular and affordable option. Fortunately, the stores are full of them. The mixture is a mixture of varied composition and shade. You will also need a regular sponge, for example, for washing a car.
We choose a rubber spatula as our main assistant. It does not scratch or otherwise mechanically damage the top layer of ceramics, which is varnished and its appearance and functions depend on this. A small spatula will fit perfectly when grouting internal corners.
It is better to get rid of the remaining grout within 15 minutes, otherwise it will harden and the process will be considerably delayed. After this, all ceramic tiles should be carefully and thoroughly washed more than once until the stains completely disappear.
Design options
Finishing a wall with laminate is a non-standard solution for the kitchen. A kitchen apron with wooden paneling performs a protective function and acts as a decorative element. Moisture-resistant types (floor and laminated hardboard) allow you to accomplish your plans without encountering the unpleasant consequence of deformation. If you play with color and decorate the wall in contrast with other finishing materials, you will be able to differentiate the cooking and eating areas.
White
Whitened laminate in a cool shade is an excellent solution for small kitchens. He gives them freshness, neatness, and emphasized cleanliness. With it they gain airiness and spaciousness.
Black
Glossy high-tech is the choice of young married couples who are setting up a cozy nest for the first time. A style of design and architecture that originated in the 60s. XX century, presupposes the presence of modern equipment in the kitchen. To emphasize its modernity, you cannot do without walls decorated using black laminate. The “neighborhood” of technology and this finishing material enlivens the interior and warms on chilly autumn and spring days.
Grey
If you decorate the interior in bright blue (or you bought furniture in this color for the kitchen), then gray panels will neutralize its strength. The idea is a losing one if the kitchen is small and there are no mirrors or glass surfaces.
Yellow, red, green
Laminate flooring, painted in such bright and rich colors, looks advantageous against the background of snow-white cabinets and walls. If there is a small pattern on it, you will get an interesting visual effect. If to decorate the kitchen in an apartment they choose a minimalist style (the apron above the work area is decorated with a laminate laid in a herringbone pattern) and are content with that, then in dachas and country houses they are experimenting. For the kitchen they buy a single-level U- or L-shaped set. In the first case, a fireplace (including a decorative one) is placed near a free wall and covered with laminate. In the second case, the corner between two walls trimmed with laminated wood panels will be highlighted. To prevent them from looking pretentious, lay laminate flooring in the same color or buy furniture in the same color scheme.
Manufacturing form
Wall panels for the kitchen can be made in three forms:
Slatted - an inexpensive panel made of plastic, its width is 10–50 cm. The slats are connected to each other using a special groove connector, and the panels are attached to the wall using sheathing. A small kitchen can become visually larger if you use light-colored slatted panels. A vertical arrangement will make the ceiling visually higher, and a horizontal arrangement will make the kitchen longer.
Tiled. Common shapes are square and rectangle, their size is 30 × 30 cm or 30 × 60 cm. If a wood pattern is applied to the tiles, changing the arrangement of the squares can create a unique design.
Sheet products are solid oblong slabs, their size is 1.20 m by 2.40 m. At the moment, this is the most common and practical option among buyers. Due to the large shape of the sheet, installation is easy and convenient, and finishing does not take much time.
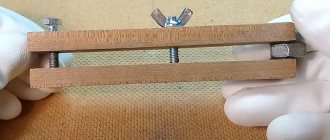
Preparatory stages
You can install the laminated apron yourself. First you need to prepare the material and tools for work. In the process, the master will need a jigsaw, a building level, a screwdriver, spacer wings and a soft spatula. A pencil, ruler and tape are used as accessories. You will also need a hammer for this work.
Before installing a laminate backsplash, you need to carefully prepare the surface. The whole process begins with leveling the wall. For this, standard putty is used. It is worth noting that the composition helps eliminate all defects and irregularities on the surface. After applying the putty, you need to start creating the sheathing. You can use small wooden beams for this.
Criterias of choice
Before you start creating a kitchen apron, you need to study in more detail the basic requirements that professionals often place on such elements. If you decide to arrange the protective surface yourself, pay attention to the following points:
- apron sizes. You can calculate the parameters yourself by first performing the necessary measurements. Basically, the covering is installed so that it extends slightly beyond the countertop area. Most often, the height of the apron does not exceed 85 cm. The choice of width depends on the location of the furniture;
- operational period. To create a kitchen apron, it is best to choose durable and reliable materials that are resistant to moisture and temperature changes. These qualities directly determine how long the protective coating will last you;
- practicality. Surfaces are installed near the sink and stove, and therefore the aprons get dirty quite quickly. It is worth giving preference to materials that are easy to clean and do not deform under the influence of household products.
It should be noted that recently, in the creation of modern kitchens, laminate is often used instead of an apron. This is due not only to the attractive appearance of the material, but also to its excellent performance qualities. The laminate surface is easy to clean and is not afraid of temperature changes and moisture.
Advantages and disadvantages of design
Wood paneling is a stylish and timeless option. It is appropriate in any interior decoration, looks elegant and harmonious, and is combined with other finishing materials. Natural wood is difficult to maintain. If cleaning wallpaper is limited to wiping with a damp cloth during general cleaning, then wooden walls are polished every day. Therefore, instead of wallpaper and natural wood, a laminate or a laminate that imitates rare and valuable types of wood is chosen for wall decoration.
Advantages of using laminate:
- looks like natural wood;
- durable and wear-resistant material due to the fact that it consists of several layers;
- not afraid of mechanical impact;
- abrasion resistant;
- service life averages a quarter of a century;
- the planks and modules have ideal geometric shapes and precise dimensions, so after easy installation they create a single piece;
- does not require painstaking and daily care;
- costs less than lining or parquet.
Laminate coatings have a drawback: they do not withstand prolonged exposure to moisture. Therefore, they are not suitable for finishing balconies, basements and baths. For this reason, the kitchen apron area is a bad place to install panels, but there are moisture-resistant varieties that can be installed in any room.