Features and types of vise jaws
- What it is?
- Varieties
- Dimensions
- How to do it yourself?
Jaws for bench vices are made from different materials. In existing vice models, they have different sizes, widths, properties and scope of use. We will look at what replacement sponges are for, their varieties, how and from what raw materials you can make them yourself.
What it is?
Jaws are the working parts of a vice designed to fix the workpiece. They are the ones that come into contact with the workpiece, and the accuracy of the workpiece location and the quality of its surface layer depend on their properties.
Therefore, certain requirements are imposed on sponges:
- high coefficient of adhesion to the workpiece material;
- the clamping force must correspond to the strength of the workpiece;
- accuracy of workpiece positioning (especially for machine vices);
- reliability and durability.
The workpiece clamping force can be 15–55 kN. And to increase it, notches are made on the sponges. Therefore, if used incorrectly, dents and scratches may remain on the workpiece.
To prevent this from happening, the vice is equipped with a set of replaceable pads designed to work with different part materials. This is especially true for locksmith models, in which both soft aluminum and hard steel workpieces are fixed.
Carpenter's and some other models of vices are usually not equipped with replaceable pads.
DIY vice for a drilling machine
A drill press vise differs from a regular bench vise in its overall height. They are significantly lower.
Manufacturing instructions
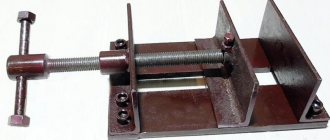
The manufacturing technology is determined by the fact that metal is being worked. Specific parts are manufactured according to specific drawings. Between the variants of different models of vices, the only fundamental difference can be in where the running nut is installed - on the moving or stationary part. This determines how the lead screw is secured. And another nuance: a vice for a drilling machine usually moves freely around the workbench.
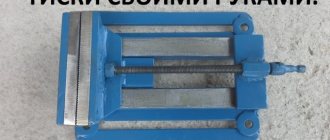
Vise for drilling machine PHOTO:
Dimensions
A vice is a standardized equipment that is manufactured in accordance with GOST. There are several standards for them:
- small vice: jaw height – 50 mm, maximum stroke – 80 mm;
- medium: height – 180 mm, working stroke is 120-125 mm;
- large: height – 220 mm, stroke length is 140-160 mm.
Chair models have similar characteristics. In them, the height of the jaws is in the range of 65–75 mm, and the length of the working stroke is 120–150 mm or more.
The protrusion of the linings from the grooves should be 2–3 mm (for large bench vices). In more compact copies it may be smaller.
There are models with other sizes of clamping bars. But if for some reason they are not suitable, then the linings can be made independently.
Need jaws for a vice
Good day to all! I can't find jaws for a 140mm vice. If anyone has it, please suggest it.
milling machine operators have
Use electric welding to weld a metal strip several times, and do it yourself
Mutru4, It's clear what they have.
LexxLexx wrote: Use electric welding to weld a metal strip several times, and do it yourself
LexxLexx, Hack work to be honest.
Kolbenschmid, . In terms of? Are there any special requirements for the vise jaws? With minimal effort, the result will be indistinguishable from the original.
LexxLexx wrote: Kolbenschmid, . In terms of? Are there any special requirements for the vise jaws? With minimal effort, the result will be indistinguishable from the original.
LexxLexx, This work cannot be called hack work. Cook from a strip (Oh, sorry
Kolbenschmid, -Saw! Saw, Shura! Saw! They are golden. )))) These sponges will cost you more than new yew trees ))) Are you, by any chance, building the Zenit Arena?
LexxLexx wrote: Are there any special requirements for the vise jaws?
At least hardness. The strip that is sold in the markets is St3
Using old mechanisms and scrap metal at hand
A high-quality new channel, angle, plates are not the only suitable material for making your own vice.
An old jack will work as a basic mechanism. For ease of work, a support plate is made (or pipes with a rectangular profile, as shown in the illustration) and clamping jaws are welded - also from a pipe or channel, angle. Do-it-yourself jack vices are no less convenient than industrial ones.
Another budget option is a rail vice. Considering the load capacity of this rolled metal, the model turns out to be very powerful. It can also be used as an anvil, the main thing is to securely fasten the product to the workbench.
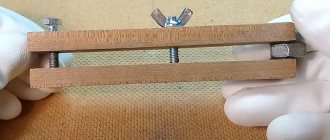
For those who work primarily with wood, a wooden vice would be a good solution; making them with your own hands is easier and faster - no welding is needed, the parts can be sawed off by hand. The main thing in this model is to select suitable threaded elements.
The option shown in the photo is designed to be permanently attached to a workbench. To make a quick-release version, it is better to make the base part with a plate that is bolted to the workbench.
For milling and carving, models with double-sided clamping are convenient - this design allows you to center the workpiece and/or move it during operation without removing it from the vice.
If the clamping force required is not very large, but you often need to change the position of the parts or the parts themselves in the jaws, you can look for a cam mechanism and make a quick-clamping vice. In this version, the screw clamp is replaced with a small cam; the clamp can be loosened or strengthened by slightly turning the lever.
Making a drilling machine
Necessary materials
It’s quite easy to make a homemade vice for a drilling machine at home. They do not require complex calculations and design developments. You can find a lot of high-quality drawings of bench vices on the Internet. A very simple but high-quality design is made using iron pipes or channels.
To assemble a bench vise with your own hands, you will need the following materials:
- A small iron pipe that will serve as the internal moving part of the device;
- A smaller iron pipe that will serve as an external fixed part;
- Large nut size M16;
- Large screw size M16;
- A special knob through which rotation will be transmitted to the screw;
- Two metal supports that will fix the stationary part on the frame;
- Two pieces of metal rectangular profile that will serve as vise jaws;
- Several lock nuts size M16.
Bench vice
Assembling such a home-made structure must begin by attaching a flange to the edge of the end of a large metal pipe, which will be the stationary unit of the device, using a manual welding machine. You need to weld a nut size M16 into the center of the flange. Next, another flange must be welded to the end of the smaller iron pipe and a lead screw must be inserted into it.
Another nut needs to be welded to the edge of the screw, which will serve as a fixing element. The end of the screw to which the nut is attached must be passed through a small diameter pipe, and then inserted into the through hole of the flange. It is worth remembering that the nut must be screwed to the flange from the inside.
On the lead screw, which is located outside the flange, you need to put a washer and screw on the nut. Next, it is securely welded to the screw. Another washer should be installed between the surface of the metal flange and the nut. This will help reduce the friction between them. At this stage of work you need to be very careful and avoid mistakes.
After assembling the movable assembly of the device, you need to insert it into a larger metal pipe and screw the other end of the screw into another flange. In order to attach the knob to a screw that protrudes slightly from a smaller pipe, it is worth welding a nut or a fly to it. You need to pass the knob into its through hole.
Good clamping jaws for bench bench vices should be made from small rectangular pipes. They need to be secured to the fixed and moving parts of the device. To make the vice much more stable, several supports must be welded to the bottom of the stationary iron pipe. Their role can be played by rectangular pipes and pieces of corners.
A small pipe can also rotate when the lead screw rotates. This makes the use of such a design very problematic. To avoid this, make a small slot on top of the stationary pipe and screw the lock into the moving part. This screw must move in the slot without allowing the small pipe to rotate.
Carpentry tools
Many people have to process wooden parts quite often. This processing is usually associated with the assembly of various wooden structures or their repair. It is very inconvenient to do such work using factory devices with iron clamping jaws. This can also lead to damage to the wooden product, cracks or dents. For this reason, it is better to use a homemade vice for wooden parts. It doesn't take much time or effort to assemble them.
To assemble a carpenter's vice with your own hands, you need to find the following materials:
- A small body made of a durable wooden beam, which will act as a stationary sponge;
- Wooden beam for movable sponge;
- Cylindrical iron guides along which the moving part must move;
- A metal screw that can ensure the movement of the movable jaw;
- A durable knob that will transmit rotation to the screw.
A bed of a similar cross design, on which metal guides are fixed, is fixed on the working surface of the workbench using bolts or self-tapping screws. Three through holes must be drilled in the movable jaw of the vice and in the body. They are needed for a screw and two metal guides. These through holes should be drilled simultaneously in both bars so that they are at the same level relative to each other.
Next, the guides are fixed in the body of the machine tool, and a movable jaw is placed on them. A lead screw must be inserted into the central through hole of the two corner bars, onto which a nut is screwed from the back of the housing. A lock nut must also be screwed and welded onto the other end of the screw, which extends beyond the front of the moving part. To attach the knob to the screw, you should drill a through hole of the same diameter in it. Next, another nut is welded to the collar.
These mini carpentry vices work very simply. While rotating, the lead screw is screwed into a metal nut, which is welded to the back side of the product body. Thus, the movable sponge is attracted to the stationary part. Their operating principle is very similar to a jack.
Hello, dear members of the community. To protect the parts from damage when fastening them in a vice, I used plywood in the old-fashioned way, with hemorrhoids. I was pretty tired of this whole thing and I solved this problem radically.
Instructions for making a vice for a drilling machine with photos and descriptions
To work on a drilling machine, it is almost impossible to do without one important part - a special clamping vice. This is especially true when using a homemade drilling machine from a drill. For a drilling machine, a vice is used, which has a design that differs from metalworking and carpentry tools.
For a drilling machine, it is not at all necessary to buy a factory-made vice, since you can make them yourself with your own hands. To do this, you will need a welding machine, a drill or drilling machine, a grinder, as well as metal blanks from which a drilling vice will be created. Let's look at how to make them in detail.
- First you need to take a steel plate, the thickness of which should be at least 8 mm. Markings should be applied to the plate to cut rectangular holes
- Next, you will need to take a channel on which the jaws of the tool will subsequently be located. The channel also needs to be marked, as shown in the photo above
- To make sponges, two steel plates, 10 cm thick, are used. The dimensions of the plates are 40x100 mm. A rod is cut out on the second plate, through which the plate or future jaw will move in the channel groove
- The moving jaw will be moved using a screw, for which it is recommended to use a 16 mm pin
- Let's start making the tool. We cut a rectangular groove on the channel along the previously marked lines. To do this, use a grinder and a drill with a drill bit.
- On the steel plates on one side it is necessary to make a diamond-shaped notch, which will act as cheeks
- A hole with a diameter of 10 mm is drilled in the second jaw. Through this hole the pin will be attached to the sponge. We cut the plate to get a rod for connecting to the channel groove
- One side of the pin needs to be ground down to a size of 10 mm in order to be able to install the part in the pre-drilled hole in the jaw
- It is necessary to drill a hole in the rod and cut a thread in it. Using this threaded hole, the movable jaw will be fixed
- A frame is prepared in which rectangular holes are cut. A square hole in the center is needed in order to have access to tighten and unscrew the bolt on the channel
- To make a drilling vice, you will also need an oblong nut, through which the screw will move
- The channel is welded to the frame, after which the seams are cleaned. A fixed jaw and nut are welded to the channel, after which you can begin assembling the tool
At the final stage, the handle is made from the anchor. To do this, a groove is made in the screw structure and a hole is drilled. The photo above shows how to make a handle for a drill vice with your own hands. A detailed description of the manufacturing process of a vice for a drilling machine is presented in the video material.
Vise manufacturing process
You need to cut 2 plates for the vice doors from a thick steel plate. Their width should correspond to the desired grip of the vice. The longer the length, the thicker the workpieces can subsequently be placed between the jaws.
In casements with a slight offset from the middle, the hole is drilled and countersunk.
Next, a turned hinge is welded to the doors on the opposite side of the holes.
Then they are built up with narrow plates. The latter are welded at an angle of approximately 45 degrees.
Next you need to work on the jaws of the vice. They are cut from 20 mm steel. The width of the jaws is the same as that of the sashes. The parts are pressed together with a clamp, then drilled lengthwise at the joint.
After this, they are separated, and notches are cut into them with a drill, grinder or hacksaw.
Now you need to tighten the clamp flaps with a bolt, placing jaws between them. Then the latter are trimmed and welded.
To attach the vice to the table, a shelf is welded to one leaf. Below it, an elongated nut is welded onto the spacer so that you can screw a bolt into it, thereby clamping the vice on the table top.
Now you need to make 2 screws. One is needed for clamping the vice on the table, and the second for bringing the jaws together. To do this, extended nuts are screwed onto the studs and welded. The resulting heads are drilled, and handles made of thin pins with nuts at the ends are inserted into them.
The short screw is used to mount the vise to the table. For the second screw, you will also need to select a compression spring and cut the extended nut at an angle.
To install it, you first need to put on the washer, then insert it into the hole in the sash, and install the spring. At the exit from the second leaf, 2 washers and a beveled nut are put on the screw. Due to this slope, it does not rotate when the screw rotates.
All that remains is to check the vice, and if everything fits correctly, then paint it. Now they can be used for their intended purpose.
Do-it-yourself vice for a mechanic: step-by-step instructions
On the Internet you can find many options for homemade vices made by yourself. I also decided to make a bench vise from the metal I had, so as not to buy factory ones. And this is what came of it.
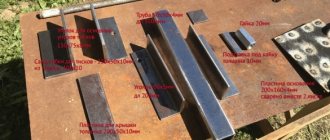
To make a homemade vice you need the following parts:
- The base of the vice is a metal plate 4 mm thick;
- Guide prism – profile pipe with a cross-section of 5x5 cm, wall thickness 4 mm;
- The base of the sponges is a corner with a shelf 7.5 cm, wall thickness 8 mm;
- The lead screw is a pin with a diameter of 20 mm;
- Also required was a metal strip 5 cm wide and 1 cm thick, a reinforced nut for the stud and an angle with a shelf 60 mm and a wall thickness of 5 mm.
The work on manufacturing bench vices was divided into a number of stages:
1. The base for the Korkus vice was welded from two metal plates measuring 20x16 cm.
Then the welding areas were cleaned.
2. In the center of the base, the user drew a line to mark the place for the lead screw - the pin. The nut for the lead screw is welded to a spacer 10 mm thick.
3. The vice guide is made of a square profile pipe, in which a longitudinal groove is made with a grinder slightly wider than the welded stand with a nut.
4. To attach the guide, a 60th corner (2 pieces) 20 cm long was used.
The corners wrap around the profile pipe, and a lid made of a strip 1 cm thick and 5 cm wide is welded on top of them. The result is a box.
In order for the profile pipe to move freely in the box and create a gap, spacers were used - 2 blades from a metal saw.
Because the gap between the plate and the corners turned out to be quite large, then, after welding the plate on top, I cut off the tacks and welded the same plate from the inside.
5. The base of the bench vice jaws is made of a durable angle with a 75 mm flange and an 8 mm wall.
The vise jaws are made of 1 cm thick strip.
Through holes with a diameter of 4.2 mm are drilled in the corners and jaws.
Then the user cut M5 threads in the corners, drilled holes in the jaws with a 5.1 mm drill and countersunk the holes for countersunk.
Bolts are screwed into the jaws, and nuts are screwed on the back side, which are then scalded.
Drawing of jaws for a bench vice.
6. Two corners are welded at the end of the profile pipe.
The jaws are reinforced with triangular stiffeners and welded with a metal plate 4 mm thick.
Classic homemade vice
There are many types of vices, but the most popular and traditional is the type with steel material.
Such a vice will be much more reliable than a factory-made one. The structure consists of:
- a steel plate of at least 3 mm, but it can be much thicker;
- external and internal channel (120 and 100 mm);
- steel lugs;
- turning cutters 2 pieces;
- a small piece of reinforcement (rod for a gate);
- a nut (2 pieces), a pin or a screw of a certain diameter that corresponds to the rod;
- washer (2 pieces) of the same diameter with the lead screw;
- screw pair 335 mm;
- To secure the propeller chassis, a thick plate is needed.
It is necessary to separate the lead screw with washers on both sides of the plate. One of the two washers must be secured with a cotter pin or a locking ring, so that the part is completely removable; you must first weld the screw thread to it.
The handle should also be collapsible on one side, and welded on the other side using a nut. It is necessary to weld a nut with a channel from the screws flush to the plate. To make the channel inside with the screw move easier while moving, it is recommended to lightly process it with a file.
Sponges are welded to the so-called ears, made from turning cutters. They are placed in the right place when the lead screw is screwed in, so the ears stand at the ideal distance from each other.
These homemade vices allow you to process larger parts.
To perform work in a home workshop, it is recommended to choose the simplest fixed vice for the machine.
It’s not at all difficult to make them yourself, you just have to watch the videos and recommendations, which can be found without much difficulty on the Internet and first draw up the drawings correctly.
Vise for metalwork: do it yourself
When doing plumbing and carpentry work, a home-made craftsman cannot do without a powerful vice. Larger, newer vises are expensive. The solution is to either look for a used vice on the secondary market, or roll up your sleeves and, if you have a welding machine and an angle grinder, make an inexpensive vice with your own hands. Let's look at an example of a portal user with the nickname Korkus and tell you:
- How to make a metal bench vise yourself.
- What parts are needed to make a homemade vice.
- What tools will be required?
Homemade bench vise: video, photo, drawings
It’s not difficult to make reliable and easy-to-use vices with your own hands. The need for this may be caused not only by the desire to save on the purchase of a serial model, but also by the need to use a clamping device that will allow it to more effectively solve the tasks assigned to it.
Simple homemade vice from corners
Serial models of vices, although they are universal, are not always able to provide high precision in fixing parts; they are quite bulky and have a significant weight.
Homemade vices, used primarily in a home workshop, can be made more suitable for performing certain technological operations, and therefore more efficient and convenient.
Homemade bench vices may differ little from factory ones in both appearance and reliability.
Any person who spends a lot of time in his home workshop will confirm that it is quite difficult to do without such a device as a vice. Without a clamping device, it is difficult to perform various operations with parts made of metal, wood and plastic.
The use of a vice guarantees not only high accuracy and efficiency of drilling, milling, etc. operations, but also the safety of the machine operator.
If there is no desire or opportunity to purchase a serial model of such a device, then it is quite possible to make a vice with your own hands, spending very little time and effort on it.
Do-it-yourself vice - detailed instructions with photos
How to make your own carpenter's vice
Almost any home craftsman has to deal with the processing of wooden products. The need for such processing may be associated both with the manufacture of various wooden structures, and with the repair of existing ones. Carrying out this work using improvised devices with metal clamping elements is not only inconvenient, but also fraught with damage to the surface of the wooden part, the appearance of dents and cracks on it. This is why it is best to use a carpenter's vice for wooden products. Making them yourself is also easy.
Homemade vice with wooden guides
As in the case of a bench vice, finding drawings, photos and even videos of the manufacture of such devices on the Internet is not difficult.
The simplest design of a homemade carpentry vice consists of the following elements:
- bodies made of solid wood, which also serves as a fixed clamping jaw;
- a movable sponge made of a wooden block;
- cylindrical metal guides along which the movable jaw will move;
- a lead screw that ensures movement of the movable jaw;
- a crank through which rotation is imparted to the lead screw.
The device of a carpenter's vice
The body of such a vice, on which the metal guides are fixed, is attached to the surface of the workbench using long screws or bolts. It is necessary to make three holes in both the body and the movable jaw of the clamping device - for the guides and the lead screw. It is best to drill such holes simultaneously in both bars so that they are positioned exactly relative to each other.
Attaching the vise to the bottom of the workbench
After the guides are fixed in the body, a movable clamping jaw is put on them. Then a screw is inserted into the central hole of both bars, onto which a nut is screwed from the back of the body. A nut must also be screwed and welded onto the second end of the screw, which protrudes beyond the front surface of the movable jaw. To secure the knob to the front end of the lead screw, a hole of the appropriate diameter is drilled in the screw (or a nut is welded to it).
The photo shows the principle of assembling such a vice
Such a vice operates as follows: when rotating, the lead screw is screwed into a nut fixed on the back of the support, thereby attracting the movable clamping jaw to it.
The vise is mounted on the workbench and ready to go
Thus, the manufacture of metalworking and carpentry vices for a home workshop does not require any special skills or the search for hard-to-find components.
Homemade bench vise: video, photo, drawings
It’s not difficult to make reliable and easy-to-use vices with your own hands. The need for this may be caused not only by the desire to save on the purchase of a serial model, but also by the need to use a clamping device that will allow it to more effectively solve the tasks assigned to it.
Simple homemade vice from corners
Serial models of vices, although they are universal, are not always able to provide high precision in fixing parts; they are quite bulky and have a significant weight.
Homemade vices, used primarily in a home workshop, can be made more suitable for performing certain technological operations, and therefore more efficient and convenient.
Homemade bench vices may differ little from factory ones in both appearance and reliability.
Any person who spends a lot of time in his home workshop will confirm that it is quite difficult to do without such a device as a vice. Without a clamping device, it is difficult to perform various operations with parts made of metal, wood and plastic.
The use of a vice guarantees not only high accuracy and efficiency of drilling, milling, etc. operations, but also the safety of the machine operator.
If there is no desire or opportunity to purchase a serial model of such a device, then it is quite possible to make a vice with your own hands, spending very little time and effort on it.
Do-it-yourself vice - detailed instructions with photos
Do-it-yourself vice: making different options
A vice is one of the most important devices for facilitating the work of any craftsman, whether when working with metal or when working with wood. By holding the part in a vice, the master frees his hands for the tool. In addition, a vice can hold a part more tightly than by hand. Moreover, manufacturing accuracy is improved.
There are different types of vices – general purpose (universal) and specialized (for specific jobs).
Regular benchtop vice, small benchtop vice, hand jewelry vice PHOTO: Leonid Shalman
Basic elements of a vice for a home workshop
The vice consists of several parts. The main elements are jaws - movable and fixed, between which the workpiece is clamped. The fixed jaw is made as one piece with the base. A nut is fixed in the movable jaw, through which a powerful lead screw passes. At one end of the screw there is a handle by which it is rotated, the other end rotates freely in a stationary jaw. When you rotate the handle, the movable jaw moves towards the stationary one.
The base can be made of two parts. The lower one is tightly attached to the work table (workbench), and the entire vice mechanism is assembled on the upper one. Some models can rotate around a vertical axis.
Main elements of a vice PHOTO:
Varieties
There are no fundamental differences in different vice designs. The number of jaws may vary (there may be additional ones), as well as their configuration (there are corner models, there are chain vices for pipes, and there are also special ones).
All types of vices have fixed jaws and movable ones.
- Fixed. They are usually manufactured as one piece with the frame. They often have a small anvil that expands technological capabilities. Some larger locksmith models have a turntable on the bed.
- Movable. A uterine nut is welded to them, into which the lead screw is screwed. When it rotates, the sponge moves, and in different models it is implemented differently.
- Chairs. In them, the movable sponge is attached to a hinge and moves around a circle, like tongs (at a small angle). Now they are practically not used.
- Parallel. In any position of the vice they are strictly parallel to each other. Now this is the most common type of clamp.
Parallel ones are divided into 2 types:
- with one movable jaw;
- self-centering.
In the latter version, they both have a drive, and the clamped part is strictly in the center of the body. Such designs are used in mechanical engineering to perform similar operations. For plumbing tasks, their purchase is impractical.
One of the most important parts is the replacement pads. To secure different workpieces, the material used to make them is different. It could be:
- tree;
- plastic;
- hard rubber;
- soft metal (copper, aluminum and others);
- hardened steel.
