Making a sheet bending machine with your own hands is not so difficult, but craftsmen, both amateur home-made workers and individual entrepreneurs who live by their labor, still use it little. Meanwhile, the price of only ready-made additional roofing elements - valleys, ridges, eaves strips - and drainpipes with gutters is several times higher than the cost of the material. The same applies to paintings (roofing sheets, completely ready for laying) with double-seam edging. And that's just roofing work.
Meanwhile, many craftsmen still prefer to either buy ready-made parts, losing money, or make do in the old fashioned way with a hammer, losing potential customers - modern products should not look like crap. What's wrong here: economics, technology, prejudices? Or maybe just ignorance? Maybe you just need a clear drawing of a sheet bending machine that you could build yourself in a shed, and use it for a long time and successfully? Let's try to figure it out.
Among the main indicators (efficiency, productivity, simplicity of design), it is also necessary to determine durability, subject to stable performance results. At the height of the season, when the day feeds the year, there is no time to bother with repairs or adjustments, and with occasional use once a month, not every month you can do without special equipment, see below.
The minimum requirements are for a jack-of-all-trades who does roofing and tin work on a case-by-case basis when there are orders; Buying an industrial machine like this is expensive and won’t pay off. But then a homemade sheet bender must withstand at least 1200-1500 working cycles per season without deteriorating the quality of bending. There is another important point - corrugated sheeting. More precisely, its independent production. It is worth special mention.
Qui prodest?
Translated from Latin - who benefits? Producing corrugated sheets yourself, at least for yourself, is a very popular material. Let's try to figure it out.
A manual pass-through type sheet bender (see below) costs about $2000. It seems that in a day or two a ton of 0.55 galvanization worth $1000 can be converted into 250 square meters. m of corrugated sheets, which would cost $1,400 to purchase. It would seem a direct benefit; especially if you don’t wait for a sale (the market is full of offers), but put it into action yourself. Yes, but not so.
Corrugated sheeting is not rolled in one pass - the corners sometimes end up being over-tightened. Intercrystalline bonds in the metal are broken; The rough area of the bend cannot always be identified by sight or touch, but soon a crack will spread from it. Who will give an order now without a guarantee? Please correct it. For our own, of course.
You can reduce the pressure, but then the wave will be non-standard. The customer may not know the standards, but he will immediately see that the material is not the same. Put it, be as polite as everyone else, or - goodbye, I’ll turn to someone else. And I’ll tell my friends and acquaintances. Should I roll each sheet in several passes, changing the clamp or rollers? What kind of productivity and profitability are there?
Line for the production of corrugated sheets
A line (actually a rolling mill) for corrugated sheeting is a complex unit, see fig. Pay attention to the number and configuration of rolls. The purpose of such a system is to disperse residual stresses across the sheet so that they do not go beyond acceptable limits. Therefore, the wave is formed gradually.
Such equipment costs at least $20,000 and is made in China. Stable quality of finished products is guaranteed only for specific grades of steel from a specific manufacturer. Power consumption – from 12 kW. Those. a specialized production area with an appropriate power consumption limit and a ground loop is required, although one operator is sufficient for maintenance. Is there an unsatisfied demand for corrugated sheeting in your operating area (simply, in the surrounding areas available to you) that allows you to pay for it all in an acceptable time frame? And are you ready to start a very serious business with fierce competition?
Properties of manufactured corrugated sheets
The main metal for the manufacture of corrugated sheets is cold-rolled steel. A galvanized coating of 20−26 microns is applied to its surface. If this value is reduced, the service life of the product will be reduced.
When forming a sheet using the hot-rolled method, it is subjected to heating. This process is possible only at large metallurgical enterprises. It is impossible to do it at home.
The thickness of the workpiece sheet may vary . Depending on the value of this parameter, the corrugated sheet can withstand different loads. Depending on the method of application, the zinc coating is replaced with paint or another material. It is important that the surface is protected from the influence of the external environment. Otherwise, the metal will begin to corrode and the durability of the corrugated sheet will decrease.
The production of corrugated sheets is carried out in dry conditions. Heating of the area must be provided. The material does not like sudden temperature changes. The same conditions should exist in a warehouse for storing sheet steel coils as blanks.
Note to masters
Of course, it’s not easy to “recapture” $2000 for an individual master. Therefore, let’s try to figure out how to make a sheet bending machine yourself. Not for corrugated sheeting, but for a variety of roofing and tin work, on which you can also make a good living and raise some money to start something more serious. Non-standard little things fundamentally cannot be unified, but are always needed. And a homemade sheet bender can be a very good help here.
About purchased handbrake
To put an end to the “company” (the article is not an advertisement) and move on to homemade products, let’s briefly look at what you can buy if you still need it. The market is clearly dominated by TAPCO and VanMark. And the domestic SKS-2, produced in Orsk, is almost unknown. In terms of price, they are all about the same; The width of our working area is 2.5 m versus 3 m for foreigners, but this is not a defect. 3 m is designed for the inch system of measures (10 feet = 3.05 m), and in metric 2.5 m is just more convenient.
But the Uralian is a passing type; you can, for example, pull gutters up to 90x90 mm. The traverse is raised/lowered using eccentrics; there is no need to turn the flywheels. Supplied with a cutting knife. User reviews are not only favorable, but enthusiastic. The general tone is “an irreplaceable hard worker.”
History repeats itself. Nikita Khrushchev spoke about similar situations live on Central Television after his trip to America (when he was there hitting the UN podium with his shoe and threatening to make everyone’s motherfucker). They say that in the States they know how to sell any obscene rubbish, but here we cannot properly serve the necessary good things.
Maintenance of corrugated roofing
Snow on a roof made of corrugated sheets lingers quite a bit, and therefore there is no need to clean it. But, if you need to carry out certain repairs, then arm yourself with small plastic shovels that will not leave scratches.
Caring for a roof made of corrugated sheets is quite simple: the rain itself will wash away all the dirt and dust, and you only have to clean the gutters and drainage systems from clogged fallen leaves once a year.
If for some reason more serious cleaning is necessary, then use ordinary water and a hose with a pressure of up to 50 bar. Detergents can only be used that are intended for painted surfaces, and “White spirit” will help to deal with stubborn stains.
As you can see, nothing complicated!
Drive unit
Bending and pressing equipment with a mechanical drive (a flywheel with a clutch and a crank or a falling load with a system of blocks, cables and levers) has high efficiency, but is still becoming a thing of the past. The mechanics give a sharp impulse (blow) at the beginning of the working stroke, and towards the end it weakens. For bending/pressing, just the opposite is needed.
The efficiency of an electric drive decreases rapidly as the size of the workpiece decreases. To form corrugated sheets on the mill described above, 12 kW is enough. To make a flange on a roof picture, you can’t get by with less than 1.5-2 kW. The fact is that the external characteristics of AC electric motors (except for three-phase ones with a wound rotor - complex, expensive, requiring regular maintenance) are quite tough. Due to the resistance of the bending metal, the engine does not increase the torque on the shaft, but on the contrary, the rotor slip increases and the torque decreases. And energy consumption increases.
The hydraulic drive, in theory, is ideal - the hydraulic cylinder itself automatically adjusts its force to the resistance of the part. But precision hydraulic systems are complex and expensive. Even an experienced designer would not undertake to distribute the force of, say, a car jack evenly along the entire length of a meter-long bend, nor would he be able to synchronize the work of two or more using improvised means.
The handbrake remains, and this is not so bad. If you design a sheet bender in such a way that, as in swing rowing or powerlifting, the strongest and most enduring muscles work (biceps, latissimus dorsi, thighs, calves), and the reaction (recoil) of the machine presses the feet to the floor, then the work, due to its cyclical nature, will not will be exhausting. But a skill will be developed that will give accuracy and productivity.
For example: an average person running up a flight of stairs can develop a power of about 1 hp within 1-2 s. But already on the third flight, the muscles will switch from oxygen to glycogen, lactic acid will begin to be released, and fatigue will hit the body. You need to take a break to move on.
Note about the sport: the rowers are lean, because the “kendyuh” makes it difficult to give a full go-ahead with the body. But for weightlifters, the “callus,” on the contrary, helps them maintain balance when jerking. But the muscle function of both is largely similar.
Coating Forming Equipment
To produce corrugated sheets, professional equipment or homemade machines can be used. According to the technology, at the first stage the metal is passed through rollers, forming a profile. Then the required parameters of the product are cut using guillotine shears.
For production, 3 types of machines are used:
- manual;
- with partial automation;
- automatic lines.
Manual homemade and semi-automatic machine
Manual equipment allows you to produce a product only with a profile of 1 standard size. This is due to the fact that on a machine operated at home, there is no way to adjust the rollers. Metal of small thickness is rolled here. The products are of low quality and are used only as fences or barriers.
You can make such a machine yourself. The operating procedure is as follows:
- A metal frame is made, which is attached to the concrete base using anchor bolts.
- A desktop is installed on top. Its dimensions must exceed the length of the workpiece. It supplies metal to the work area and removes the finished product.
- A strip is attached with bolted connections, which is necessary for fixing the metal roll.
- Using bearings, angles and pipes, equipment tools are made - rollers.
- They are installed on the frame. Pressing is carried out using a lever. Then the workpiece is fed into the working area.
The rollers are made of tool steel with a hardening degree of 54−58 HRC.
When using partially automated equipment, the machine is additionally equipped with an electric motor. The products produced are more professional. At the same time, the machine is mobile due to its low weight. It is easy to carry. It is installed next to the object for which the corrugated sheet is made. This could be low-rise construction, covering for agricultural warehouses or fencing.
Fully automatic lines
An automatic line is a complex of units. Includes the following settings:
- rolling mill with rollers;
- guillotine shears;
- coating equipment.
An electric car is used to transport profiled sheets. The productivity of such lines is several times higher than any equipment and is used in large industries.
Description of installation and components
To produce high-quality products, equipment and components are selected.
Such devices include:
- Mechanism for fixing rolls. Large enterprises are supplied with galvanized sheets in the form of rolls, the weight of which is up to 10 tons. During operation they need to be untwisted. This is what the mechanism is used for.
- An automatic device that regulates the sagging of the workpiece between the feed mechanism and the rolling mill. The speed of the work process is high and the operator is not able to control and have time to make adjustments.
- The replacement tools of the rolling mill must have 2-3 sets. If the standard sizes of corrugated sheets change, they change.
- The power of the electric drive determines the speed of the line.
- The working tool of guillotine shears must be sharpened in accordance with technology. The presence of burrs at the time of trimming depends on this.
The workpiece is rolled between rollers, which are located at the top and bottom. The gap between them must correspond to the thickness of the metal being rolled. The rolling procedure is carried out several times. This is necessary due to the springing of the metal, which cannot be deformed by the required amount at one time.
The process of making corrugated sheets can be carried out using homemade equipment. However, the productivity of such a machine will be low. If it is necessary to produce large batches over a long period of time, the work should be performed on automatic lines.
Schemes and purpose
Listogib is a rather general concept. The design of a sheet bender depends on its purpose. According to the nature of the work, you need to choose a homemade scheme, see fig.
Schemes of operation of sheet bending machines of various types
At pos. A - a method familiar to everyone who has done at least a little plumbing. This way you can simply bend sheets up to 0.5 m wide by hand. If the bend length is no more than 200-250 mm, then the base can not be attached to the workbench, but together with the pressure beam and the part can be clamped in a vice. The bend turns out well if you press the traverse more low, as shown in the force diagram, and move it slightly forward, as if smoothing the bend. Most designs of homemade sheet bending machines are based on this principle; we'll get there yet.
Due to the elasticity of the metal, it is not possible to bend the sheet exactly 90 degrees, so spacers made from a strip of metal are used, as shown in the inset. Why are there channels on the cut and not corners? Next we will consider this issue; The seemingly simple design has significant nuances.
Pos. B shows how a press brake works. Press like a press: bed-die-punch-hydraulics-impact-ready. These are used only in industrial production with a developed labor protection system: they are complex, expensive, require qualified care and are extremely dangerous. A sheet that slips due to improper filling or equipment malfunction can cut off a person’s hand or head.
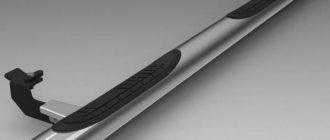
At pos. B – broaching (pass-through) sheet bending machine. By changing the relative position of the rolls, you can set the bending radius of the sheet. The walk-through sheet bender can be either manual or electrically driven. Those that go on general sale are usually multifunctional:
- Smooth rolls are intended for tinsmithing work - bending blanks for casing shells, sections of wide pipes, etc.
- The rollers can be replaced with complete profiled sheet-bending rollers designed for pulling roof extensions - ridges, valleys, gutters and flanges.
- Also, many models are equipped with a support, a clamp and a traverse for manual bending of sheets.
These are the kind of sheet metal benders that sell for $2000 or so. Many are equipped, or can be purchased later, with shaped rollers for corrugated sheeting, but, as has already been discussed, you cannot “drive a shaft” for sale on them. You can roll a piece if you need it now, but there is no point in buying a whole sheet.
Note: there is another interesting type of sheet bending device, but due to its high usefulness and relatively low cost, a separate section will be devoted to it.
Let's take on the sheet bending machine
Let's start making our own sheet bending machine by developing the simplest specifications. And we will calculate the latter, in addition to the longevity criteria described above, based on the expenditure of muscular energy that an average-sized adult man is able to produce day after day without deterioration in health. Of course, simplicity and low cost of design are also not in last place. Also, due to its weight and dimensions, the machine must allow transportation in a passenger car and use directly at the work site. It turns out:
- The width of the bendable sheet is up to 1 m.
- The thickness of the bendable sheet is up to 0.6 mm galvanized; up to 0.7 mm aluminum and up to 1 mm copper.
- The number of operating cycles without readjustment and/or repair is at least 1200.
- Bending angle – at least 120 degrees without manual adjustment; This is necessary for folds.
- The use of special steels or non-standard workpieces is extremely undesirable.
- Welding - as little as possible; parts/assemblies lead from it, and the welds are fragile and quickly tire from alternating loads.
- Metalworking on the side (turning, milling) is also as little as possible, it costs money.
Let's face it: drawings of finished structures that meet all these requirements are not found in publicly available sources. We will try to improve one, widely known, and, in principle, very successful.
Let's bring it to mind
Incision
The design principle of this sheet bender is clearly visible in the cross-section (see the figure on the right and the list of items). Its main advantage is good ergonomics. With such a working stroke, the muscles work as they should and the feet are pressed to the floor, which will give a stable result even for an inexperienced operator. And the maximum bending angle is 135 degrees, which has a large margin for any conceivable and inconceivable elasticity of the sheet being bent.
Homemade sheet bender in section
- wooden pillow;
- support beam – channel 100-120 mm;
- cheek - from a sheet of 6-8 mm;
- workpiece;
- pressure beam (clamp) – welded from angles 80 and 60 mm;
- traverse axis – 10 mm pin;
- rotary traverse – angle (?) 80-100 mm;
- handle – 10 mm rod.
The material of all parts is ordinary structural steel. But already here it is conditionally shown that it is better to replace the traverse from the corner with a channel of the same standard size. Why? Let's take a closer look, this is important for what follows.
The reaction (recoil) from the sheet being bent to the traverse (and the clamp, but more on that later) is uneven across the width. In the middle, where each elementary (tiny; this is a hint of differentiation and integration) section of metal is surrounded on all sides by the same metal, it is maximum. At the edges, where there is no side support, it is minimal.
The second point is that the sheet, although thin, is of finite thickness. Stresses in the workpiece will spread and be reflected on the edges. As a result, the diagrams of the load on the traverse and the clamp will take the shape of a bow with a string. On the free (distant) edges of the corner shelves, such a load will produce a tensile force, but metal does not work well in tension - it quickly gets tired of it. A DIYer who has built such a machine soon discovers that the corner in the middle is bent and the fold in the middle is swollen.
The side flanges of the channel are wedge-shaped, and it has fillets that are more developed than in the inner corner of the corner. This, firstly, smoothes out the diagram - the bow string is barely taut. Secondly, the seemingly extra side flange of the channel absorbs tensile stresses, which are converted into compression at its free edge. And the metal holds compression - wow!
The result of the calculation is impressive: if a traverse from a corner can withstand at most a couple of hundred bends, then a channel of the same width can withstand more than 1200! What is 200 bends? One or a little more roofing at best. At the height of the season, when customers are standing in line, the machine gets damaged and the work stops. And 1200 operations means the season will last. In winter, there will be time to straighten it, or replace the traverse, or, after calculating the proceeds, buy a “company” with a guarantee of service life.
Detailing
Detailing a homemade sheet bender
The next figure shows details with a list of positions. Here, not only do some shortcomings need to be eliminated, but some things can be further improved.
- clamp – corner 40-60 mm; M8-M10 screw with knob and heel;
- cheek;
- support beam;
- bracket – corner 110 mm;
- pressure beam;
- traverse axis;
- traverse
Pressure beam
First of all, about milling the lower surface of the clamp onto a plane. It is needed for any design, and the permissible unevenness is no more than half the thickness of the sheet being bent (minimum! We will consider it equal to 0.2 mm). Otherwise, the sheet will creep (flow) under pressure - and again there will be a pot-bellied fold.
So for anyone who has ever done anything with metal, advice on smoothing the clamp with a file or grinder will only cause a grin. It needs to be sent for milling. Moreover, AFTER the welding of the entire assembly, when everything that could have happened has already happened. Otherwise, the work and payment for the router will be in vain.
Further, everything that was said above about the load on the traverse is also true for the clamp. And its most loaded part - the leading edge - is not supported by anything. It is impossible to reinforce or replace the entire assembly from a corner with a channel: the bend angle will be no more than 90 degrees.
As a result, after the same 100-200 operations, the machine will “open its mouth” (or “smile”, if you prefer white rather than black humor) and the same swollen bend. The clamp will not bend upward; in this respect it is well fortified. But the metal on the leading edge will simply flow from fatigue.
A cross-section of the clamp design, which is equal in durability to the traverse, is shown in the inset at the top right. The base is a steel strip 16x80 mm. The front edge is milled at 45 degrees, and a chamfer of at least 2.5-3 MAXIMUM thicknesses of the steel sheet being bent is removed using the same milling cutter, i.e. 1.5-2 mm. From the upward deflection, the clamp is reinforced with a six-point angle for welding. Milling, again, after all welding work.
The idea is this: if in the previous design the leading edge worked half in bending (which for metal is even worse than tension), then in the new one it works only in compression. At the same time, the general support on the edge will not allow it to leak soon.
Note: if an ancient broken lathe is found somewhere nearby in a landfill, the problem of the traverse with the clamp is solved once and for all. From the frame you can cut pieces of the desired configuration, made of special steel and of excellent accuracy.
In terms of the number of working operations for manufacturing, both clamps are equivalent: cutting, drilling, welding, milling. The material consumption of the new clamp is higher than the old one; Three standard sizes of workpieces are required for both. But the durability ratio is the same as for the two types of traverses described above.
Table mount
The next point is clamps. The author of the design, of course, clearly understands the role of the stiffeners, but it seems that he lost sight of the fragility and rapid fatigue of the welds. And the working stroke of the traverse gives a variable tensile force on the clamps with lever arms of 10:1 or more. If the clamp breaks, the work is over, even if everything else remains perfectly straight. The machine will lift itself, not bend.
Why not give up clamps altogether? And then you won’t need cheeks, and welding is for both. How to do it?
- Extend the support beam laterally beyond the table.
- Select U-shaped eyes at its ends.
- Fasten to the table with bolts somewhere around M10 with shaped nuts - claws.
The second option is holes in the legs without threads. The bolts are turned over and tightened with wing nuts. A little more expensive, but more convenient to use.
Cross-beam fastening
Here the question arises: how to attach the traverse, since the cheeks are no longer there? And they are not needed. Firstly, the design is non-removable, and the traverse will have to be changed once a year. Secondly, remember, we need an accuracy of about 0.1 mm, otherwise the fold will swell. How soon will the pin break a simple “hole” in the cheek by a large amount? The question is rhetorical. And at the same time I apologize to my fellow engineers: I, of course, know that someone has a hole somewhere, and in metalworking there is a hole.
But how then to attach the traverse? Butterfly door hinges; lower right inset in Fig. They do not require insertion (they were designed specifically for metal doors), and two of these hinges hold the door armored against a burst of Kalash or F-1 grenades. It takes six healthy men to put one on.
As for accuracy, most butterfly loops easily pass the “choke” test. If you quickly separate the loop, you can hear a smacking sound from the air replacing the vacuum formed when the pin was pulled out. That is, the fit of the parts is very tight, but they rotate easily.
The butterflies are secured with countersunk screws. If you put it on a red lead, the traverse will stand indestructible. Opening angle – 160 degrees. Probably, the inventor of butterfly hinges once made a homemade sheet bender. It's a joke.
Assembly
Finally, in front of you is an assembled sheet bending machine:
Homemade sheet bender assembly
- support beam;
- threaded (M10) flywheel;
- pressure beam;
- processed sheet;
- clamp (see previous);
- traverse
Just one remark can be made here. Perhaps the author of the design had flywheel nuts lying around somewhere in his stash, that’s why he installed them. In fact, the clamp will only have to be raised by 2-3 mm to place the next sheet. Well, by 30 mm, if you need to remove a picture with a fold already molded on the other side. Do you remember the M10 thread pitch? That is, you don’t need to turn the flywheels for a long time, like a gun when aiming. Wing nuts or even ordinary ones with welded collars are enough.
Note: after welding the knobs, it is necessary to drive the thread “completely” - holding the nut in a vice, and using the first and then the second tap, or a single-pass machine tap. The welding makes the thread look so bad that oh...
Installation of corrugated sheeting: step-by-step master classes
Let's first of all immediately understand the construction terms so that you don't have to look on the Internet for the meaning of each new word:
You will be surprised, but the same (at first glance) material needs to be laid in different ways. It's all about the manufacturers - everyone gives their own recommendations for installation, and they are really important. Because corrugated sheets from different companies are demanding in terms of their conditions, even if the differences are small. Therefore, carefully study the instructions supplied with the roofing material and do not completely trust hired workers who “have eaten the dog on such roofs” and are trying to do everything their own way.
Here is a simple example of how the installation of corrugated sheeting with a thickness of less than 0.7 cm and more durable differs:
And when working with such material, a wooden scaffold is no longer needed:
Imagine that the hired team will trample their feet on thin corrugated sheeting, because before that they “installed exactly the same roof for your neighbor” and “nothing was bent”? And now it will bend, and how, to which the would-be workers will declare that “that’s how it was.”
But, speaking in general, the main indicator of high-quality roof installation is tightness. After all, the roof serves precisely this purpose, so that all internal structures are protected from moisture and cold. And even an inconspicuous gap can become a serious problem: dampness, smudges, quickly deteriorating materials and fungus. That is why we will now analyze in detail all the subtle points.
A little about safety
The technology of metal roofing itself is not so complicated, but it is important not to damage the roofing covering during its installation. After all, although this material looks durable and tough, you still need to be careful when working with it:
- Walk on the finished metal profile flooring in soft shoes.
- Try to step only on the concave waves of the sheets and preferably directly on the screws.
- So, you can only step on your toes on the roof.
- Always place your foot parallel to the slope.
- There should only be one leg in one notch.
Construction of sheathing for corrugated sheets
The lathing for roof installation is either continuous, if the slope is small, or sparse, in increments of up to 5 meters. But with what step the roof sheathing is needed depends on how thick the corrugated sheets are:
Waterproofing and windproofing
Next, we think about how to properly make a roof pie. The modern market produces many waterproofing materials of various types and properties. We even have a whole separate article about this. But in general, focus on the following program of action:
- Step 1. So, secure the selected waterproofing material to the rafters. To do this, take the most ordinary construction stapler, but before installation, be sure to check whether you are laying the film or membrane on the wrong side. Glue the panels together with special tape.
- Step 2. After this, we punch slats along the rafters (take a thickness of at least 2 cm) and thus form the ventilation gap necessary for ventilation.
- Step 3. Now we lay the roofing material along this top sheathing.
Here's what it all looks like in real life:
We select high-quality screws
The consumption of self-tapping screws when attaching corrugated sheets is usually about 6 pieces per 1 square meter. Suitable screws are 4.8 by 28-35 mm, as for wood, and for additional elements - 4.8 by 50 or 60 mm. As a tool, purchase a screwdriver with a special attachment or a cordless electric drill from the same manufacturers of roofing materials.
Special self-tapping screws for fastening corrugated sheets are indispensable, because... This is the only way to ensure:
- Fully waterproof roof.
- High connection strength.
- Minimal risk of injury to the coating during fastening, which means no corrosion in the future.
The highest quality and most reliable self-tapping screws for corrugated sheets are sold by the same suppliers that deal with sheets. If possible, use carbon or stainless steel screws with a zinc coating - these are ideal. But when purchasing, still carefully inspect all sealing washers.
How to properly attach corrugated sheets?
You can tell that you have secured the screw correctly by the metal washer - about 1 mm of the rubber gasket will protrude from it.
Screws must be screwed into the roofing material strictly perpendicularly, directly into the deflection of the vertical wave near the corrugated sheeting. Although there is a lot of controversy about this in the construction community, and each method has its own advantages. Thus, a self-tapping screw in the lower wave creates a more reliable fastening, and in the upper wave, rainwater has much less chance of getting into the under-roof space.
Let's just say one thing: manufacturers recommend fixing corrugated sheets in the deflection.
At the eave and ridge, you need to drive screws into the camber through the wave, and in the middle of the sheet into each sheathing board. In total you will need about 5-8 pieces per square meter.
What tools will be needed for installation?
Note that the construction of the roof itself from corrugated sheets is really within the power of even a person with little knowledge of construction. Of course, there are roofing materials that only experienced professionals can install correctly. But in the case of modern corrugated sheeting, we can reassure you: you can handle it yourself!
Fortunately, there is nothing complicated here. Thanks to the long length of the sheets, the roof slopes overlap without additional transverse joints, and the material itself can be easily cut and adjusted in shape. You will need a minimum of tools for this task:
So, corrugated sheeting can be laid on slopes of almost any inclination angle; it is only important to correctly calculate the amount of transverse overlap:
- 150-200 mm for roofs with 15-30°.
- 200 mm for a slope of 14°.
- 100-150° at large angles.
For fastening you will need self-tapping screws with special sealing washers:
In what order should the sheets be laid?
Many roofers install corrugated sheets this way: starting from the bottom row, first lay 4-5 sheets, and each of them is fixed with only one screw in the center. After this, the sheets are connected to each other with 4.8x19 mm self-tapping screws, which are installed in increments of 500 mm. Now they check how aligned the sheets are with the roof overhang, and finally fix the roofing material. Here's the scheme:
But, if you are working on the roof for the first time, to avoid distortion, attach the corrugated sheets according to the same pattern, but in this order:
- Step 1. Install the first sheet on the sheathing, and fasten it with one screw at the very ridge.
- Step 2. We lay the second sheet so that the lower edges of both sheets below form one perfectly straight line.
- Step 3. We fix the overlap along the top of the wave under the very first transverse fold.
- Step 4. We evaluate by eye how correctly the sheets are joined. Uneven? Then lift one sheet from the other, tilt it slightly from bottom to top, and again join fold by fold. Secure everything with self-tapping screws along the top of the waves.
- Step 5. So work with 3-4 sheets, carefully align them with the cornice and then install the remaining sheets.
The corrugated sheeting must be mounted to the base of the roof so that the edge offset is 40 mm from the eaves. This is necessary in order to leave a gap of optimal size on the ridge and the ventilation of the roof is not impaired. By the way, if the profiled sheets have a drainage groove, then each subsequent one should overlap the groove of the previous one.
Remember: when laying, you cannot step on the ridge of the sheets - they will bend. In general, for such work, installers wear soft shoes. That's all the subtleties!
Zig machine
Manual tabletop zig machine
A Zig machine is, of course, not a robot in the form of a screaming Hitler with an outstretched hand. A creasing machine (see figure) or a zigging machine is a device for creasing, or zigging. And zigovka is the pulling out of flanges or special potholes - zigs - on sheet metal blanks. Have you seen the rigid edges on buckets and basins? These are zigs. The actual machines are also often called zigovkas for short.
Sealing machines, as follows from the definition, also belong to the category of sheet-bending equipment, only special ones. They can be electric or manual. The latter are desktop stationary (in the figure) or portable (mobile), with a clamp. You can carry these with you in your tool bag.
Zigmashina is an indispensable assistant in tin roofing work. You can zig not only round shell blanks, but also sheets. Try using the best manual sheet bender to make a bend for the already mentioned double fold. This kind of zigging is achieved in one pass; with some skill - right on the roof. What else can be achieved by zigging using standard pairs of rollers can be seen in the following figure. Letter designations are standard; they correspond to the type of operation performed. The bevel machine costs three to five times, or even ten times less than a factory manual sheet bender.
Serving rollers
Video: working on a zig machine
Installation of rolling shafts and first start-up
The next component - rolling shafts - is very difficult to assemble with your own hands, so it is best to purchase them ready-made. Finding such devices on the market these days is not difficult.
Rolling shaft
Using brackets made from metal angles, the shafts are secured to the machine frame near the hand lever.
Having tightened all the bolts not to full strength, the almost completely hand-made machine for the production of corrugated sheets is ready for the first running-in of the material. If the manufactured corrugated sheet has the desired shape, the parts can be secured in place by firmly tightening all the bolts. Otherwise, adjustments are made to certain parts, and the procedure is repeated.
What to whom?
Let's summarize - which sheet bending machine is best for whom:
- For an amateur DIYer - bending with improvised means, as described, or homemade by hand, if you have a supply of scrap metal and a desire to tinker.
- For a general-purpose craftsman on the job, who from time to time receives orders for sheet metal or roofing, a homemade manual one like the one described plus, if there is some excess funds, a zig machine.
- A roofer or tinsmith - a professional who has a stable flow of orders - a branded manual one with a zig machine.
- For mass production of corrugated sheets, standard roofing elements or sheet metal structures - specialized industrial equipment for the appropriate purpose.
A final note: for stable work results with a dense flow of orders, you still shouldn’t rely on a homemade sheet bending machine - the metal in the structure is not the same, it will soon float from fatigue.
Automatic and manual machines for the production of profiled sheets
The main difference between corrugated sheets and other similar metal sheets is that the corrugation has a trapezoidal shape. At first glance, it may seem that it is impossible to make a machine for the production of such material yourself, but this is not so.
Production lines of such material represent a whole complex of mechanisms, each of which performs its own functions.
Thus, even the simplest automatic line for the production of profiled sheets consists of:
- unwinder of rolls of metal sheets;
- rolling mill, where the material is actually formed;
- scissors that look like a guillotine;
- receiving device.
Production line for the production of profiled sheets
It is clear that it is unrealistic to make such an automatic line on your own. But it’s quite possible to make a manual machine that can bend workpieces at the required angle so that you get a sheet of corrugated sheets.
It should be taken into account that a home manual machine will not be able to produce profiled sheets that are too thick - the maximum thickness of the workpiece is about 5 mm.