Scissors that do not cut, but only crush and shred; an ax with a chipped blade that always gets stuck in a tree... Who is not familiar with these problems? Cutting tools sooner or later become dull, requiring timely sharpening and grinding. A simple but effective device will make your work much easier.
As you know, a good tool is already half the battle. However, it remains reliable only as long as the owner monitors its condition and puts it in order on time. Cutting tools require special attention and care. The working edge of the blade wears out during operation, becomes dull and stops cutting, but instead crumbles or wrinkles the material.
However, the thickness of the removed chips and the quality of processing of the wooden surface depend on how sharp the plane knife is. How correctly the jaws of the pliers are sharpened determines the safety and convenience when pulling out nails or cutting wire. The correct sharpening angle of a drill or cutter ensures that they will cut and not rub the material until it overheats to the combustion temperature - as a result, this not only worsens its mechanical and aesthetic properties, softens (overheats) the metal of the tool, but can also cause to the fire. In addition to sharpening, grinding the cutting edge, sometimes called sanding, honing or dressing, is equally important.
Abrasive processing
Sharpening and grinding are two similar processes of abrasive processing of a tool to eliminate wear on the cutting edge. They differ only in the thickness of the metal layer being removed and the cleanliness class of the resulting surface. When sharpening with coarse-grained abrasive materials, a larger layer of metal is removed, and when grinding with fine- or even micro-grained abrasive material, a much smaller layer is removed. Upon completion of grinding, a thin (less than a millimeter wide) and smooth shiny line appears along the cutting edge.
Since high-quality cutting tools are not cheap, it is important to correctly determine the degree and criteria of its wear. Optimal geometric parameters of the cutting edge of the tool, regular timely sharpening and grinding ensure the maintenance of its working properties and the longest service life with minimal effort and expense. In some cases, grinding the cutting edge of a tool can be supplemented by polishing, which further increases the cleanliness class of the processed surface.
Drill sharpening
The drill is sharpened along the back surface, for which it is pressed against the grinding wheel and at the same time rotated, as shown in Fig. 5.
Rice. 5. Sharpening the drill along the back surface: c - rotation of the drill; o - oscillation; h - backing
It is advisable to sharpen the surface near the cutting edge first, and then the surface located at a large clearance angle. For carbide drills, the plate is sharpened first, and then the drill body.
Sharpening by hand (with a certain skill) ensures that the two cutting edges of the drill are equal in length, the angles φ are equal, and the back angle is constant along the entire length of the cutting tooth.
The transverse edge of the drill has negative rake angles, so it scrapes rather than cuts metal.
To reduce the harmful influence of the transverse edge, which manifests itself in high feed resistance, for drills with a diameter of more than 15 mm, the transverse edge is ground on a small-diameter wheel. Drill angles are measured using a universal goniometer (Fig. 6).
Rice. 6. Measuring the angle Ψ at the tip of the drill with a protractor: 1 and 3 - protractor bars; 2 - drill
The symmetry of sharpening the back surfaces means that the back surface of one tooth (feather), after rotating around the axis of the drill by 180o, completely coincides with the back surface of the other tooth.
When making precise grooves, the symmetry of sharpening is assessed by the parameters of the location of the main edges in one of the following combinations (Fig. 7): the difference in angles φ1 and φ2 and the deviation from the center of the transverse edge ek; axial runout of the peripheral points of the main edges bn and deviation from the center of the transverse edge ek; axial runout at the midpoints of the main edges bs.
Rice. 7. Parameters characterizing the asymmetry of drill sharpening
Twist drills are sharpened primarily along the back surface. Drills with a diameter of more than 6 mm are often sharpened with double sharpening and sharpening of the transverse edge. Sometimes the front surface of the grooves and the back surface of the ribbons are ground.
When conical sharpening (Fig. 8, a) the back surface of each tooth is shaped as part of a cone. When sharpening, the drill swings around an axis that intersects with the axis of the drill.
Rice. 8. Conical (a) and cylindrical (b) drill sharpening
Conical sharpening parameters:
h is the distance between the drill axis and the swing axis (with increasing h, the rear angle α increases); Н – distance between the tip of the sharpening cone and the axis of the drill; ε – drill rotation angle; φо – drill installation angle, measured between the axis of the drill and the plane of the grinding wheel. The installation angle is always slightly less than φ - half the angle of the drill at the tip.
Cylindrical sharpening (Fig. 8, b) is a special case of conical sharpening, when the angle at the apex of the cone is zero.
When screw sharpening (Fig. 9), the drill rotates around its axis and moves at a certain angle β to it at a constant angle φо. Translational movement at an angle to the drill axis is usually obtained by adding two movements - backing and oscillation.
Rice. 9. Screw sharpening of the drill: a - initial position; b - final position when sharpening with a point; c — final position when sharpening without sharpening; Z - backing; O - oscillation; B - drill rotation
When helical sharpening with sharpening, at the initial moment of sharpening, the drill axis does not leave contact with the grinding wheel, and at the final moment it is located outside the corner edge of the circle, which sharpens the transverse edge of the drill.
When helical sharpening without sharpening, the axis of the drill never extends beyond the corner edge of the circle. The division is carried out kinematically due to the fact that for each revolution of the drill there are two cycles of reciprocating movements.
With complex screw sharpening (Fig. 10), the drill rotates around its axis, moves along it and swings around an axis perpendicular to the axis of the drill. The angle φо between the drill axis and the plane of the grinding wheel gradually decreases by 4–6° during sharpening.
Rice. 10. Complex screw sharpening of a drill: a - initial position; b - final position; 3- backing; P - turn; B - rotation
This facilitates the formation of the transverse edge and improves the fall of the back surface. For each revolution of the drill there are two cycles of backing and turning movements, i.e. kinematic division is ensured. With screw and complex screw sharpening, a larger relief stroke corresponds to a larger relief angle.
Drills are sharpened without bringing the cutting edges to complete dullness, which is judged by a sound reminiscent of a whistle. They are sharpened on sharpening machines, ordinary machines with a device, or manually.
When sharpening by hand, the drill is held with the left hand by the working part as close as possible to the cutting edges, and with the right hand by the shank. Pressing the cutting edge of the drill against the side surface of the circle, swing the drill with a smooth movement of the right hand, ensuring that its back surface receives the correct slope and takes the proper shape.
After sharpening the back surface, the cutting edges of the drill should be straight. The sharpening of the drill is checked with a template (Fig. 11). A properly sharpened drill should have equal cutting edge lengths and equal sharpening angles. Otherwise, the hole will be larger in diameter and have a curved axis, and the cutting edges will quickly become dull.
Rice. 11. Checking the correct sharpening of drills: a - length and angle of inclination of the cutting edge; b - back surface; in - angle of inclination of the transverse edge
There are various forms of sharpening drills (Fig. 12). In some of them, the transverse edge and ribbon are improved (sharpened). With normal (single) sharpening, one transverse and two cutting edges are obtained on the cutting part of the drill (Fig. 12, a), with double sharpening - one transverse and four cutting edges in the form of broken lines (Fig. 12, b). By sharpening, the length of the transverse edge is reduced as the cutting part of the drill is ground down; without sharpening, this length gradually increases. The sharpening also reduces the width of the ribbon at the cutting part of the drill.
Rice. 12. Types of drill sharpening: a - single (normal); b - double
Defects that can occur when manually sharpening drills, and their impact on the quality of drilling:
- The length of the cutting edges is not the same, the middle of the transverse edge does not coincide with the axis of the drill. The drill deviates away from the axis of rotation aa to position bb, the hole is larger in diameter compared to the diameter of the drill. The drill hits and may break.
- The cutting edges are sharpened at different angles to the drill axis, but the middle of the transverse edge coincides with the drill axis. Only one edge of the drill removes chips. Under the influence of a one-sided load on the cutting edge, the drill is deflected to the side, as a result of which the hole diameter increases.
- The cutting edges are not equal in length and have different inclinations to the drill axis.
Impact on drilling accuracy, since the middle of the transverse edge is displaced from the axis of the drill and the drill rotates around the displaced axis.
Practical device
Regularly maintaining a sharp cutting edge is much easier than re-sharpening a completely dull tool blade.
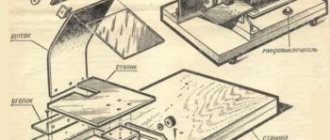
A small but practical device with a set of grinding wheels coated with abrasive powders of various grain sizes allows you to optimize the grinding process of cutting tools. Thanks to the universal design of the round support disk with a central fastening rod and an adjustable rotating bracket-holder, you can fix the device in the chuck of any electric drill, and the drill itself can be securely fixed on the workbench horizontally, vertically or at the desired angle.
The most important condition for successful grinding is the correct positioning of the tool blade in relation to the surface of the grinding wheel. Since most modern drills allow you to change the direction of rotation of the chuck to the opposite (reverse), the rotation of the grinding wheel can be set either clockwise or counterclockwise. The second condition for safe work is safety glasses. And the third is the correct position when working: you should stand with support on both legs, firmly holding the tool in your hands and not leaning on the grinding wheel.
What to sharpen: grit
The main characteristic of whetstones (brushes) used for sharpening knives is grain size. It is designated differently in different countries; It is more convenient to define grain size as the number of grains per unit area, but the designation in English terminology is also accepted. The classification of stone grain size is as follows:
- Rough (coarse) stone. Sharpening is carried out using sharpening stones No. 300-350. The coarse abrasive helps form the correct angle (geometry). Often used if the cutting edge has visible damage.
- Medium. For it, choose abrasive No. 400-500. The metal surface is ground to the required smoothness.
- Fine. The most common type of material suitable for household use. Restores the sharpness of knives that have become dull during normal use.
- Very fine (extra or ultra fine). Final finishing is carried out if necessary; The connections are polished to a mirror finish.
Sharpening stones with different grain sizes Source top-nozhi.ru
Advantages of quick replacement
The highlight of this device is the adhesive method of attaching grinding wheels to the support disk. Thanks to a layer of polymer adhesive applied to the back of each circle, they can be repeatedly and at the same time firmly attached to the surface of the support plate, and, if necessary, can be easily replaced with one another. The abrasive blade fits tightly to the support disk, forming a working surface for grinding the cutting edge of the tool. If the blade needs to be sanded first with a coarse grit and then with a fine grit, the second wheel can be mounted directly on top of the first.
The adhesive method of fixing the grinding wheel allows you to install it not only on the support disk, but also on a previously fixed wheel. This is very convenient when working with wheels of different grain sizes. The surface adhesion (adhesion) of the elastic polymer-based adhesive composition is designed so that the circle is firmly held in the device during operation and can be easily peeled off at the end of operation. In this case, the glue does not stain either the surface of the support disk or the abrasive layer of the circle located below.
The thickness of the support disk (more than 10 mm) allows you to forcefully press the tool to its surface, and the tight and uniform fit of the emery wheel to the support plane eliminates runout and eccentricity during rotation, ensuring the formation of a smooth, burr-free cutting edge. In this case, the side (end) surface of the disk made of durable polymer is used for polishing the tool.
Briefly about the main thing
Sharpening a knife is a necessary operation, no matter how expensive and high quality it is. When the blade loses its former sharpness, you have to resort to manual or machine sharpening. To restore the functionality of the knife, it is important to know what the sharpening angle should be. Its value depends on the method of using the blade, the shape of the cutting edge, and the material.
For manual sharpening, sharpening stones are used. In order not to spoil the blade, it is important to choose the right characteristics of the bar: grain size and material. An easier way to sharpen a knife is to use a mechanical or electric sharpener.
At home, alternative solutions are often found: they use sandpaper and construction power tools (for example, a grinder). If desired, you can make a simple sharpener with fixation of the knife or sharpening surface.
Useful tips
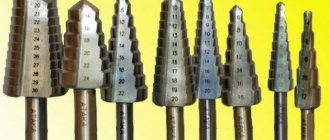
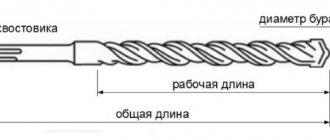
Subtleties of grinding A twist drill for woodworking has a centering tip, which allows it to be fixed at the moment it enters a material with a fibrous structure; accordingly, the configuration of the working part of the drill is quite complex. Therefore, when grinding it, the device is fixed horizontally, and the drill is positioned so that the centering tip is adjacent to the outer edge of the grinding wheel. The direction of rotation is indicated by an arrow.
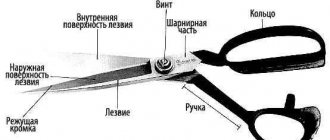
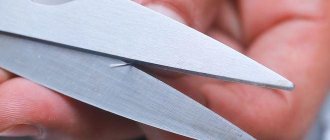
Sharpening scissors Professional scissors (medical, hairdressing, etc.) are sharpened by professional craftsmen, but their simpler analogue - household scissors - can be regularly polished by a home craftsman. Without periodic grinding of the blades, scissors will not be able to properly cut paper, cardboard, etc. materials, but will only crush them. As with pruning shears, when grinding household scissors, only the outer side of each blade is processed.
Chisel-scalpel: processing secrets An impact-cutting tool in the form of an elongated rod with a working part sharpened in the form of a blade and a flat butt plate for striking with a hammer or mallet at the other end is intended for making nests and grooves in the brick and concrete walls of a house. The working part of the scarpel chisel is sharpened on both sides, but for greater tool life, the cutting edge is slightly dull. When sharpening and grinding (grinding wheel grit - 80), both edges are not joined into a corner, leaving a slightly noticeable flat strip between them.
What to sharpen: a variety of materials
Sharpening stones can be divided into materials of natural and artificial origin. Natural stones are slates, quartz, chalcedony and corundum of various types and colors (for example, black Brazilian slate). They wear down faster than their artificial counterparts; the grain size is often uneven and rarely fine. Artificial ones include ceramic and diamond varieties.
The most durable and hard sharpening device for knives is considered to be a diamond whetstone. It is based on metal or plastic, with a thin layer of diamond coating applied on top. The device cannot be called cheap, but it will serve for a very long time, since it practically does not wear down. The diamond stone needs time to grind in and produce excellent results, and can be cleaned under running water.
The market offers technological varieties of material, for example, CBN sharpening stones. They have a continuous working layer made of cubic boron nitride, are characterized by high hardness and resistance to the chemical components of alloys and steels.
Stones with two types of grain size Source ytimg.com
The most convenient type of whetstone is an elongated whetstone, as this makes the sharpening process easier. Ideally, the length of the bar should be greater than the length of the blade. At home, it is enough to have two medium-grained bars (different), and one or two fine-grained ones. The option with double grain has proven itself well; on one side it is coarse, on the other it is finer (for example, grain 125/100).
To improve the quality of sharpening, natural stone is moistened with water (or soaked in it for a short time) before use. Water is absorbed into the structure of the material, and during operation it is released and mixed with particles separated under the pressure of the blade. A mixture of water and abrasive forms a paste that improves sharpening quality.
Water can be replaced with mineral oil. Knives are always sharpened using oil on Arkansas stone, which has different textures. Hard varieties are used for additional grinding and the sharpest sharpening, medium - for sharpening the tool, soft - for quick grinding. After work, Arkansas stone is cleaned with a brush, hot water and soap.
Wetting with water increases work efficiency Source prom.st

