Tsoi Dmitry. Author: Tsoi Anatoly Irnamovich.
posted: September 26, 2013
Comments
They are contacting. “Table for pipeline installation specialists and specialists in the preparation of components from large diameter pipes.” Not for engineers or designers. It’s easier for someone to give a pretty penny than to waste time learning software that won’t be useful; everyone has a choice.
Maybe you are the one who is ready to do free calculations for everyone?
The pipe is inserted into the pipe at an angle of 90 °. On a sheet of roofing felt, make a view from the end of the tee. Draw a semicircle with a diameter equal to the diameter of the fitting and divide it into 6 equal parts (Fig. 1, a). Through the division points, draw straight lines parallel to the axis of the fitting until they intersect with the pipe circumference at points 01, 11, 21, 31, 41, 51, 61. Then draw a straight line A'A', (Fig. 1, b), put it on it the circumference of the fitting and divide it into 12 equal parts. Drop perpendiculars from the division points.
Reaming out the insertion of a pipe into a pipe.
Rice. 1. Manufacturing and inserting a fitting into a pipe:
a – preparatory markings;
b – markings for the template;
c and d – markings for fittings.
On the perpendicular 0'0′1 lay down segment 001, on the perpendicular 1'1′1 lay off segment 111, etc. Connect points 0′1, 1′1, 2′1, etc. with a smooth curve that will correspond the outline of the lower end of the deployed fitting. Cut out the template along the marked lines.
Making templates (fish) for inserting pipes into pipes at 90°.
To make a fitting (Table 1), it is necessary to place a template on the blank pipe and make markings using it, and then cut the blank using the markings. To mark the hole on the tee pipe, you need to install a manufactured fitting on it and outline its lower end. Reduce the marked outline of the cutout in the pipe by the wall thickness of the fitting [1].
You can also take an ordinary sheet of paper as a template for marking.
Dimensions of reamed fittings for tees.
Table 1. Dimensions (in mm) of reamed fittings for tees (Fig. 1c and d).
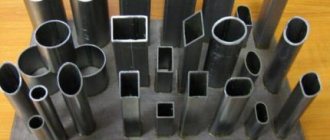
It is necessary to cut a pipe into a pipe if a certain part of the pipeline must be connected to existing communications - for example, sewerage or water supply. You can even do this kind of work yourself, after first understanding the intricacies of the work. This article will discuss how to cut a pipe into a pipe.
Types of pipe taps
Before you cut a pipe into a pipe, you need to understand some issues regarding the classification of cut-ins.
Insets are divided into types depending on several factors:
- Purpose
. You can crash into plumbing, sewer and heating systems. - Pipe material
. You can cut into pipes made of plastic, cast iron, steel, polypropylene and metal-plastic. - Inset method
. In order to cut the pipe into the pipe, you can use welding or clamps.
Taking into account all these factors, we can come to the obvious conclusion - in each individual case, pipe insertion will be carried out according to its own algorithm, so they need to be given more attention.
Inspection well above the insertion point
Naturally, the location of the tie-in must be under the control of the owner of the house/site, because there is a risk of deformation of the connection, which will require prompt intervention. For these purposes, a special well (caisson) is created above the treated area. Work begins with the pit being deepened by 50-70 centimeters. The created depression is filled with gravel to a depth of about 20 centimeters, then roofing material is rolled out onto it and a concrete screed is poured into a layer of 10 centimeters. It is imperative to reinforce this layer using a reinforcement grid.
Concrete gains optimal strength (about 70%) in 3-4 days. Then a block shaft is installed above the concrete slab. Usually we are talking about a round or square shape.
A cast plate is placed on top of the shaft on the neck part, in which a round hole is made. Subsequently, a hatch will be installed in this place. The outer part of the shaft is coated with an insulating compound and filled with soil that was selected from the pit earlier.
Construction work involving the installation of a well requires significantly more time, effort and money than when inserting a water supply through a caisson. Getting to the underground part of the main canal is much more difficult.
Sewage systems
Tapping into a sewer pipe may be required when installing a system from scratch or if it is necessary to add several plumbing fixtures that require a sewer outlet.
There are two fundamentally different methods of tapping into a sewer, one of which requires cutting the pipe, and the second can be done without such intervention (read: “How to tap into a sewer pipe - proven methods from a master”). In any case, before work you need to know how to cut into a metal pipe without welding and with it in order to choose the best option.
Permitting documents
Tapping into a water supply system on your own property does not require obtaining any permits. In this case, it is quite enough to make appropriate changes to the water supply system plan. The situation is completely different if you want to make a connection into a centralized water supply pipe. If you do this on your own initiative without obtaining permission from the competent authorities, this may lead to penalties against you. Such actions must be carried out only legally.
Also, such work requires a certain amount of care, since damage to the water supply system can cause a serious accident, which will lead to the need for restoration work, the cost of which, as well as fines, will have to be paid by the person responsible for the event. Tapping into the main highway for the purpose of organizing a diversion must be consistent with precautions at each stage of the work.
Split method of inserting pipe into pipe
For tapping into the sewer, a branching tee is usually used. The operating algorithm does not depend on what material was initially chosen to create the system.
To implement the cutting method you will need the following set of tools and materials:
- Hacksaw;
- Branching tee;
- Compensator pipe;
- Sealant;
- Pipe plug (required if the pipe will not be connected to the system immediately).
In the case of a metal riser, the installation process will look like this:
- First, the height of the adapter is accurately measured, after which it is necessary to make markings on the riser in accordance with the result obtained;
- The marked section of pipe is cut out with a hacksaw, and a tee must be installed in the freed space;
- Further work depends on what the riser is made of: for a metal riser, you will need to install a splitter by welding, and in the case of a plastic riser, you will need to mount suitable sockets, and only then assemble the structure.
Connection of asbestos-cement pipes
Asbestos-cement pipe products, the material for which is Portland cement mixed with asbestos fibers in a ratio of 4:1, are connected by installing couplings and fittings.
The choice of method depends on the operating pressure in the system:
- For pipes with a working pressure within 3 kgf/cc, when inserting, use asbestos-cement double-breasted couplings equipped with rubber seals. Sections 150-200 mm long have a slightly larger diameter than the size of the pipes being connected.
- For pressure pipelines with a working pressure of 3 kgf/cc, special fittings called Gibot couplings are used. They are collapsible structures with flanges and cast iron bushings, complemented by rubber sealing rings.
In both options, rubber sealing rings play a key role in achieving joint tightness.
When choosing fittings and couplings for inserting asbestos-cement pipes, the main attention is paid to the elasticity of the sealing rings of the fasteners
The technology for performing tapping using couplings and fittings is the same as when working with metal fittings. The only thing is that since asbestos-cement products are quite fragile, the insertion should be done with the utmost care.
The intricacies of the process of inserting into an existing water supply system under pressure are described in this article, which we recommend reading. It provides step-by-step guidance on how to make a difficult connection.
Plastic riser
Insertion into a plastic riser is carried out in the same way as in the previous case, but has a number of nuances:
- First you need to find out the dimensions of the compensator, after which a part of the appropriate size is cut out of their riser;
- The cut edges of the riser must be cleaned before further work to avoid problems associated with a lack of tightness;
- The upper part of the cut is treated with sealant, after which the pipe is put on the structure;
- Next, the underside of the cut is treated with sealant, after which the tee can be fixed;
- The narrow side of the compensator is also coated with sealant and inserted into the tee so that the resulting connection is sufficiently tight;
- The last step is to install the cap or final collection of the sewer system.
As can be concluded from all of the above, there is no particular difference between the installation of metal and plastic pipes. Small differences are noticeable only in the complexity of cutting the material and the method of connection - for example, metal risers can be fixed by welding or bolts.
Existing types of clamps
Today, the construction market offers several types of clamps that can be used for insertion:
- clip - cannot be used when it comes to embedding a valve into a pipe under pressure, but for a cleaned system it is ideal due to its simplicity of design and low cost. It can be found in both metal and plastic versions;
- saddle - when working under pressure on asbestos-cement, metal or plastic pipelines, you need to use this type of clamp. The flow of water will be blocked by a special locking plate;
- drilling - as one of the structural elements of this product, a rotating bolt mechanism is used, which remains on the pipe as a shut-off or control valve;
- Electric welded saddle clamp is suitable for working with plastic pipes. It is initially supplied with a milling cutter of the required diameter. To install it you will have to use additional tools.
The polyethylene pipe is inserted into the water supply using the last two types of clamps.
Insertion method without cutting
If necessary, inserting a pipe into a pipe can be done without making a cut. To work, you will need an adapter, with which you can insert a pipe into a pipe of different diameters.
Tapping into a steel pipe without welding is performed according to the following algorithm:
- First, you need to agree with the residents of the upper floors that no one uses plumbing fixtures at this time;
- A hole is drilled in the pipe, the diameter of which must correspond to the diameter of the adapter being connected;
- The installed adapter is fixed with bolts and nuts.
This method of insertion is not very good: it will not be possible to remove the resulting burrs and roughness, so when using sewerage, all these elements will literally attract various debris. To at least partially compensate for this factor, you need to show miracles of accuracy when working. If you think about how to cut into a pipe without welding, the thought may come to mind to abandon such an idea.
Insertion on a secondary section of the water pipeline
So-called secondary pipelines branch off from any central highway, supplying water to neighboring streets. The pipes of such distributions are predominantly polyethylene; they have a smaller diameter - on average 50 mm. Typically, taps are installed at branch points of secondary pipelines, closing which simplifies the work of inserting pipes, which is available in two ways.
First:
- A 2 meter long trench is dug along the pipeline. This implementation of the problem is used mainly in relation to small diameter pipes (up to 50 mm).
- The pipe is being cut.
- A tee is mounted on the pipe, which can be welded if the pipe is metal, or simply fastened with union nuts if it is polyethylene, for example.
Second:
- An overhead clamp is installed, factory samples of which are equipped with the threads necessary for installing the taps.
- The tap is screwed on.
- A hole is drilled, which is done directly through the tap. This can be done without shutting off the water supply, since secondary pipelines are characterized by low pressure pressure.
If possible, it is necessary to install a well in the place where the insertion is made. For this, a concrete ring or a used brick as a base is suitable, followed by closing the structure with a lid with a built-in hatch.
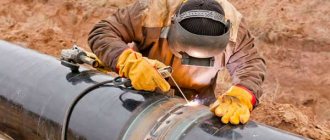
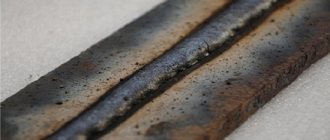
Welding steel pipes
Welding of round pipes is carried out using a continuous seam. That is, if the process began from one point, then it should end at that same point, without lifting the electrode from the surface to be welded. When welding large-diameter pipes (over 110 mm), it is impossible to fill the seam with one electrode. Therefore, it is necessary to use multilayer welding, where the number of layers is determined by the thickness of the pipe walls. Eg:
- If the wall thickness is 6 mm, then two layers of metal are sufficient.
- 6-12 mm – welding is carried out in three layers.
- More than 12 mm - more than four layers.
Attention! Multilayer welding is carried out with one requirement. Before applying the next layer, the previous ones must cool down.
Pipeline assembly
Before welding pipes, to simplify the task, it is necessary to assemble the welding joint. That is, you install the pipes according to the assembly design, clamp them so that they do not move or shift. After which the tack is done. This is when spot welding is done in one place; if the pipeline is assembled from large-diameter products, then tack welding can be done in several places.
In principle, everything is ready, you can weld the pipeline. It would seem that this could be the end of the conversation about welding. But for novice welders it is just beginning, because the welding process associated with pipeline assembly involves a large number of nuances. Here are just a few of them that need to be taken into account.
- Pipes with a thickness of more than 4 mm can be welded using a root weld, this is when the metal fills the space between the edges to the full depth, and a roll weld, when a roller 3 mm high is formed on top of the seam.
- When connecting pipes with a diameter of 30-80 mm with a vertical seam, the technology is slightly different from the bottom location of the seam. First, the volume is filled to 75%, then the rest of the space.
- With multilayer welding technology, a horizontal seam is welded in two layers so that the next one is applied in the opposite direction than the previous one.
- The connection point of the lower layer should not coincide with the same point of the upper layer. The locking point is the end (beginning) of the seam.
- Usually, when welding pipes, the latter must be rotated all the time. This is done manually, so you need to know that the optimal rotation sector is 60-110°. It’s just that in this range the seam is located in a place convenient for the welder. Its length is the maximum, and this allows you to control the continuity of the seam connection.
- The most difficult thing, as many welders believe, is to turn the pipeline 180° at once and at the same time maintain the quality of the weld. Therefore, with such a rotation, it is recommended to change the welding technology. That is, first the seam is welded to a depth of up to 2/3 in one or two layers. The pipeline is then rotated 180°, where the seam is completely filled in several layers. Next, there is a 180° turn again, where the seam is completely filled with the electrode metal. By the way, such joints are called rotary joints.
- But there are also non-rotating joints, this is when pipe is welded to pipe in a fixed structure. If the pipeline is located horizontally, then the joint between its parts must be welded by dividing it into two parts. Welding starts from the bottom point (ceiling) and moves to the top. The second half of the joint is welded in the same way.
And the last stage in pipe welding technology is seam quality control. It must be tapped with a hammer to knock off the slag. Then visually check for cracks, gouges, chips, burns and lack of penetration. If the pipeline is intended for liquids or gases, then after assembly, water or gas is introduced into it to check for leaks.
The welding process is actually a responsible undertaking. And only the experience of a welder can guarantee the quality of the final result the first time. But experience is a gain. We invite you to watch a video on how to properly weld steel pipes.
Some tips for performing quality welding
The quality of welding depends on proper preparation for welding work, the choice of electrodes and process technology, which is somewhat different when connecting joints.
Selecting suitable electrodes
The quality of the weld largely depends on which electrode is used for welding. It is a thin metal rod with a special coating. The inner part of the electrode serves as a conductor to create an electric arc, and the coating ensures its stability and also participates in creating the weld.
Based on the type of core, electrodes are divided into consumable and non-consumable. In the first case, the product is based on steel wire, in the second - a tungsten, carbon or graphite rod.
Based on the type of protective coating, electrodes are divided into:
- cellulose - marked “C” - used for labor-intensive and complex welding work with large-diameter pipes, on long technological lines;
- rutile acid - “RA” - the most used type of electrode for welding water supply and heating utilities;
- rutile - “RR” - can also be used for welding water supply and heating pipes, they are distinguished by greater thickness and better quality of the weld;
- rutile-cellulose - “RC” - provide a more durable seam when using the vertical joining method;
- universal - “B” - suitable for welding pipes of various diameters and thicknesses, in a wide temperature range.
Another classification of welding electrodes is the diameter of the rod. The strength of the electric arc, which can cope with pipes of a certain thickness, depends on it:
- 3 mm – electrodes are suitable for welding pipes up to 5 mm thick;
- 4 mm – electrodes allow you to weld up to 10 mm thick, as well as make multilayer metal seams.
Attention! In addition to the thickness and material of the electrode, for high-quality welding it is also necessary to take into account the current strength, which depends on the method of connecting the pipes. For example, for a simple butt joint an arc from 80 to 110 amperes is suitable, but for overlap welding you will need to switch the machine to 120 amperes
Working with cast iron pipelines
A cast iron pipe can be drilled under pressure using special clamps with bimetallic crowns.
It is important to know the following features of this process:
- cast iron is an extremely brittle material, which requires caution from the worker;
- before drilling a pipe, you need to clean it from the anti-corrosion coating;
- it is unacceptable to overheat the crown on the clamp;
- the equipment should operate at low speeds.
After the stripping is completed, it is necessary to install a collapsible type saddle in place of the insertion. This place must be sealed with rubber pads. The pipe itself is drilled with a carbide crown, which simply cannot be replaced during the procedure.
The insertion sequence is as follows:
- The pipe is excavated and cleaned in the right place.
- The top layer of hot cast iron is cut using a grinder.
- A removable saddle is mounted. The joint between the reinforcement and the clamp is sealed using a rubber seal.
- The shut-off valve is then attached to the flange elbow required for insertion of the crown.
- The pipe is drilled with constant cooling of the cutting site.
- The crown is removed, and the water is shut off with a valve.
We must not forget about maintaining a constant slope of the embedded pipe towards the house. We are talking about a value of 2 degrees.
How to connect to the main pipeline
It is impossible to drain water from such a pipeline, so the following actions must be taken:
- First you will need to dig up the soil to the place where the insert will be made.
- Make a sidebar.
- Complete all work on assembling the circuit down to the plumbing elements.
Excavation work will require digging a pit 150x150 cm. The bottom of the excavated pit must be made approximately 50 centimeters below the pipe. You need to use shovels for this; an excavator can only dig to a depth of about 30 -50 cm from the pipe. If the insertion point is in the well, the work will be much easier.
When using a saddle clamp or a collapsible one, it is necessary to puncture the reinforcement . This method is most familiar to plumbers with no experience, when the technology is similar to a tee on a water pipe. The shut-off valve, which acts as a plug, is screwed onto the side outlet after a hole is made in the main.
If the pipeline is plastic, you can use a saddle-clip or saddle clamp.
When working with polymer materials, a dismountable electric welded clamp . When installing it, its two parts must be mounted exactly at the insertion point, and then soldered to the pipe. The completed connection will be very tight and, importantly, durable.
When the tie-in is completed, the side pipe is diverted from the clamp valve to the meter located in the room.
Weld joint quality control
Having completed the electric welding, an external inspection determines the presence of burns, pores, fistulas and other visible defects. To detect microcracks that are invisible to the naked eye, the mounted area is usually connected to the heating system. If water droplets do not appear on the seams, the work has been done efficiently. This method of checking is acceptable in a private home, where the system can be filled at any time.
In apartments with central heating, the quality of welded joints is checked in the summer using a compressor. Plugs are placed at the ends of the pipes, the joints are coated with soap foam, and air is pumped in under pressure. Places where there are flaws are identified by bubbles on their surface.
It is better to replace or install new heating pipes in the summer, so that most of the welding operations can be performed outside. There should be no flammable materials in the room near the place of work. If you still don’t have enough experience in welding pipes, you can first weld a few unnecessary scraps, so as not to spoil the new workpieces later.
Rules for tapping work
When connecting to a gas pipeline under any pressure, strictly follow the following safety rules:
- Tapping into a gas pipe under high or low pressure is carried out only by employees of the relevant organization and only with a certificate confirming their qualifications. This is very dangerous work.
- Connection to a low-pressure network is carried out at values no higher than 20–80 mmHg. To do the same at high or medium pressure, you must first reduce the value to an acceptable one. Switching devices are used, and a bypass is installed in dead-end gas pipelines.
- If the pressure cannot be reduced, specialized equipment is used. Such work is much more difficult and expensive.
- When welding or gas cutting, it is necessary to maintain the pressure in the work area in the range from 40 to 150 kg/cm.
With strict compliance with safety regulations, the likelihood of accidents and emergency situations is reduced to a minimum.
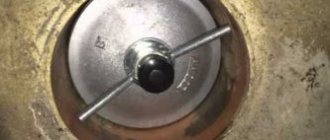
Drilling large holes
Now let's look at how to cut a hole in a pipe for a pipe or how to make holes of large diameters. To do this you need:
- fix the pipe and apply markings to it;
- according to the scheme described above, drill a hole of small diameter;
- put a special attachment on the drill for drilling large holes;
Large diameter hole drilling device
- insert the central drill into the prepared hole;
- Carefully, first at low speeds of the tool, make a hole of the required diameter.
When working with attachments, the drill must be kept in a strictly vertical position. Due to the slightest shift of the equipment, the hole will turn out to be of irregular shape and at an angle.
If a hole ranging in size from 5 mm to 10-15 mm is required, then the use of special nozzles is not required. It is enough to first drill a small hole, and then use a larger diameter drill to bring the hole to the desired size.