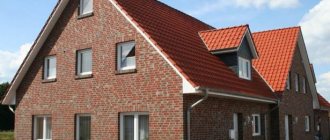
A sample business plan for the production of paving slabs on a mini-enterprise scale. Paving slabs are a popular material that is widely used in paving streets and territories. Paving slabs have a number of advantages over asphalt pavement
Paving slabs are a popular material that is widely used in paving streets and areas. Paving slabs have a number of advantages over asphalt pavement:
- Longer service life (up to 30 years);
- Environmentally friendly, since only safe components are used in the production of tiles;
- Strength, the material is not damaged by changes in temperature and humidity, and can also withstand heavy loads;
- Colorful appearance and unique design.
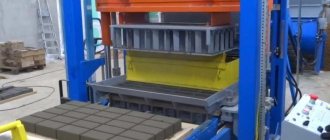
Today there is a large selection of equipment for the production of paving slabs, from manual to automatic lines. The production itself can be organized in almost any room with an area of 80 m2. Two workers can easily handle the production of 1000 m2 of paving slabs per month.
Two simple manufacturing methods
- Making from concrete is considered the easiest way. The raw materials used are Portland cement, fine crushed stone, sand, lime and plasticizer. In order for the cladding to have water-repellent and frost-resistant properties, modifiers must be added to the mixture. The production process is very simple. All components are mixed, poured into the mold and laid out on the vibrating table platform. This is a mandatory procedure to completely remove air. After drying, the product is painted in the preferred color.
- If you want to make clinker tiles, the technology is slightly different. A clay mass is used as a base, which is mixed with modifiers. The prepared mass is poured into a vibratory pressing machine, through which the tiles are formed. This process includes mandatory firing. The workpiece is also pressed under high pressure. The firing temperature reaches up to 1300 degrees Celsius. The result is a high quality finish.
Step-by-step instruction
Now let's look at the step-by-step process of how to make facade tiles with your own hands. All work must be carried out at temperatures from +15 to +30 degrees Celsius. This temperature range will provide ideal conditions for the product to harden.
Please note: For protection purposes, gloves and goggles must be used. The room should be well ventilated.
First, prepare the molds for casting
A vibrating table is also installed. Can use a regular table
First, molds for casting are prepared. A vibrating table is also installed. You can use a regular table.
Further work has the following sequence:
- The molds are treated from the inside with soap or oil. This will make removing the tiles from the mold simple and easy.
- Next, the solution for casting is prepared. Let's consider a simple cement-based option. For mixing, it is best to use a concrete mixer, so all components will be evenly mixed together. For one bucket of sand there is half a bucket of water. These components are mixed for one minute, and then two buckets of cement and another bucket of water are added.
- After this, half a bucket of water and four buckets of sand are added. These components are mixed.
- The resulting composition should not be rare. Its structure should be plastic and dense.
- When the required consistency is reached, dye is added to the composition and everything is mixed.
- Next, the solution is poured into molds. This must be done on a working vibrating table.
- The solution is evenly distributed throughout all forms.
- Throughout this time, the vibrating table continues to operate.
- During vibration, air bubbles will come out of the solution. At the same time, using a wide spatula, all forms are leveled to the same level.
- The solution protruding beyond the mold is immediately eliminated.
- After this, the workpiece is sent to a drying cabinet or a special drying chamber.
It is necessary to remove it carefully so as not to damage the workpiece. You can use a rubber mallet or light hand movements. Facade tiles will be completely ready for further cladding after 10 days
The facade tiles will be completely ready for further cladding after 10 days.
Conclusion As you can see, DIY tiles are a doable task. By making it yourself, you will save your family budget, but you will also need to spend time and effort on the production process itself.
But the end result will not leave you and those around you indifferent. To consolidate all the material presented, we recommend that you watch the prepared video.
House façade cladding technology
The technology for laying facing tiles for facades has two options:
"Wet" method.
Installation of tiles using glue. The method is suitable for lightweight products that externally cover walls whose surface is fairly flat: foam blocks, bricks. It is preferable to carry out external work in warm weather to ensure the best adhesion of the adhesive composition to the material.
"Dry" method.
The façade is tiled, mounted on a sheathing attached to the wall. This allows you to fix heavier elements. The method is used mainly for frame or wooden buildings. A facade lined in this way can be additionally insulated or made ventilated.
Preparing the base
Facing the facade with tiles using the “dry” method as a base implies the presence of a frame, starting, as a rule, from the base itself.
If the facade is not insulated and the facing material is not heavy, it is possible to install it without a frame.
To prepare the base for cladding, you usually need:
- clean the surface of the facade from all contaminants;
- apply adhesive primer;
- mount the starting profile around the perimeter.
Laying tiles on the frame
Do-it-yourself installation of a frame for laying facade tiles is made easier by the fact that there are already ready-made structures for specific finishing materials, including guides and brackets. Places for installing the bracket are marked on the wall. Installation is carried out using the points obtained using anchors. After this, the facade is insulated, thermal insulation is placed and secured with fasteners. Then the guides are mounted, and the frame is ready.
When laying façade tiles on the frame with your own hands, it is convenient to use clamps secured with self-tapping screws to the sheathing - fixing devices into the grooves of which the tiles are inserted.
To lay tiles on the frame you need:
- install the bottom row of fasteners horizontally on the guides at the same level, secure with metal screws;
- insert the tiles into them, attaching 2 clamps on top, and also fasten them to the guide.
This method of fixation is no less reliable than cement, and allows, if necessary, careful dismantling of the tiles.
"Dry" installation method
Finishing the facade with tiles using the “dry” method is carried out on a metal frame, which must first be assembled on the facade.
OSB cladding products are well suited for finishing in this way.
Frame technology is used to create ventilated facades, because Air circulates freely between the finish and the wall, providing ventilation. This space can be filled with thermal insulation: mineral wool or PPS boards, and topped with facade tiles.
"Wet" cladding method
Exterior finishing of the facade, in which the tiles are laid on an aqueous adhesive composition based on resins, polymers or cement, is considered to be produced by the “wet” method. With this installation method, frost-resistant special adhesives are used. To do a “wet” installation, the surface must first be prepared, and then the tiles must be laid with gaps formed by crosses, starting from the bottom. The cladding is done using an adhesive mixture, which then takes about a day to set. After drying, removing the crosses, rub the seams.
Sales technology
You can sell tiles immediately after setting up production, based on samples. The company should have samples of tiles prepared so that the buyer can navigate the assortment in advance. You should not focus on one type, but rather produce paving slabs of different sizes and different types.
In addition to sales, it is advisable to provide additional services: transportation, installation and project design development. This will increase business profitability by 20-30%. You can expand your customer base through advertising: placing city banners, as well as creating and posting information on a website on the Internet.
Loading…
Polyvinyl chloride siding
Plastic facade panels Nailite (Naylayt)
PVC panels are a cheap and easy-to-install method of finishing a facade, characterized by a wide range of models and, therefore, a lot of possible design solutions. The only drawback is the appearance. From a close distance, even with the naked eye it is noticeable that the house is covered with plastic.
Vinyl siding
Installation technology
PVC panels are installed only horizontally. To work you will need:
- knife;
- perforator;
- hammer;
- roulette;
- Bulgarian;
- level;
- chalk;
- punch - a tool for making ears on the edges of sheets of material.
Stage 1. First, a visual inspection of the house is carried out, the location for installation of the first row is determined. This row should coincide with the old finish or cover the top of the foundation (if we are talking about a new building).
Stage 2. All necessary components are installed - internal and external corners, trim, first strip, etc. You should start from the corners, leaving a small gap of 6.5 mm between them and the eaves of the building.
Stage 3. Installation of the first row is the most critical stage of finishing the facade, on which the evenness of the entire siding depends. First, the boundary of the first row is determined, after which a horizontal line is drawn on the wall. When installing the first strip, this line will serve as a guide.
Stage 4. The appropriate accessories are installed on the door and windows - trims, flashings, final trims. For greater accuracy, the strips of material are joined at an angle of 45ᵒ.
Fastening vertical elements
Stage 5. The remaining panels are installed from bottom to top, focusing on the first row. Each panel is inserted into the profile and nailed (not completely). The interval between panels should be 0.4 cm, and between them and other components - from 0.6 cm to 1.25 cm.
Parts are attached with a gap
The panels are overlapped one on top of the other by ½ of the factory mark, while vertical overlaps should be avoided - they are more noticeable from the facade.
Stage 6. At the top edge, the sheets are installed in the same way as under the windows. Only whole panels are used; trimming is possible only for gables. When installing the last row, a J-shaped profile is used with ø6 mm holes made in 0.5 m increments (to drain water from the roof).
Finishing
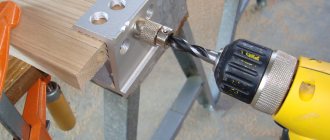
What is needed to make concrete?
When creating decorative tiles for facade or interior work with imitation of decorative natural stone, a number of the following devices and some types of equipment are used :
- Scales for measuring the amount of ingredients.
- If there are inert materials of different fractions, a set of sieves for sifting raw materials.
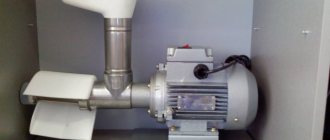
- A container with blades, a gearbox and an electromechanical drive for mixing ingredients.
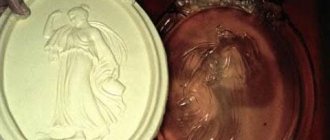
- Forms for pouring the resulting mixture and then achieving the desired texture of the tile.
- Vibrating table or deep vibrator for high-quality compaction of the molded product.
- An oven with the ability to create a moist high-temperature environment or a steaming chamber to accelerate hardening and gain maximum strength by the material.
- Station for finishing the surface, if necessary, obtaining a polished, ground or washed product.
- Devices for moving finished products or raw materials around a manufacturing site.
The power of electrical machines, as well as the level of their automation, is calculated on the basis of a business plan, which takes into account production volumes, production costs, as well as the range and composition of manufactured products.
Casting molds
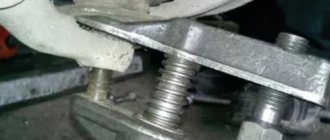
This is the main equipment on which the quality of the future product depends. The following requirements apply to the factory devices in question :
- High compressive, flexural and impact strength.
- Corrosion resistance - it is recommended to coat the material with oil, or choose polymer structures with high wear resistance.
- Geometric invariability - when filling a mold with a raw material mixture, its orthogonality should not change. The inner plane must also maintain a straight position.
- Durability, which affects turnover. Any steel mold for industrial use must withstand at least 100 thousand cycles. Elastomeric gaskets for setting texture should last at least 5 thousand cycles without the need to replace them.
- The presence of elastomeric gaskets on the front edge, which simplifies the delamination of the finished product and reduces the risk of adhesion.
- Chemical resistance of the material against acidic or alkaline compounds.
- Easy to clean and maintain.
- High level of maintainability.
- The minimum possible cost, which will provide an affordable initial price for the finished product when organizing mass production.
The forms can be transformable or stationary, and the range of future products depends on their number, as well as on the choice of internal surface textures. The owner of an enterprise can start production with 6 - 10 units, but in the process of business development, order new forms, which will expand its range.
Porcelain tiles
The composition of porcelain tiles includes: dyes, feldspar, clay, sand and minerals. During production, the material must be fired at a temperature of 1200 to 1300 degrees. At your discretion, you can choose tiles with a plain surface, with inclusions, or with an imitation of marble (granite) pattern.
The advantages of porcelain tiles include: moisture resistance, frost resistance, environmental friendliness and wear resistance.
Installation of porcelain tiles is carried out dry, that is, on a frame, which contributes to excellent insulation of the house and the formation of the necessary microclimate inside it.
How much money do you need for a business producing paving slabs?
Capital costs for starting a paving slab production business will be 358,500 rubles.
Download a business plan for the production of paving slabs from our partners, with a quality guarantee.
Material costs for the production of 1 m2 of paving slabs are 169.36 rubles.
The cost of paying wages will be 32,000 rubles per month.
The cost of production of 1 m2 of paving slabs is 252.8 rubles. Total monthly expenses are 278,036 rubles.
Types of cladding: pros and cons
The most common types of tiles used for cladding facades include the following varieties:
- ceramic,
- concrete,
- terracotta,
- clinker
In order for you to choose the most suitable option for yourself, you should familiarize yourself with the advantages and disadvantages of each type of tile.
Ceramic granite tiles
From ceramic granite
Facade tiles from ceramic granite are made by mixing different types of clay with the addition of sand, feldspar, dyes, and special mineral enzymes. The mixture thus obtained is first shaped and then placed in a kiln, where at a temperature of about 1300 ° C the tile takes its final form. The main advantages of this type include high frost resistance, water resistance and wear resistance of the resulting coating. The disadvantages of granite material include the difficulty of laying tiles due to their significant weight.
Concrete tiles
Concrete
Concrete tiles are made from classic Portland cement and well-sifted sand with the addition of fillers and additives, which give the product special strength and frost resistance. Vibration-pressed molds are first fired in a kiln and, after cooling, covered with colored sealants. The advantage of this type of coating is a wide selection of different textures and colors, as well as relative lightness and low cost. There are practically no significant shortcomings in tiles of this class.
Terracotta tiles
Terracotta
The starting material for the production of terracotta tiles is a special kaolin clay with a porous structure, fired in a kiln at a temperature of 1000° C. The advantages of these coatings are their ease of installation, resistance to temperature changes and solar radiation. A relative disadvantage of terracotta products is their insufficient mechanical strength.
Clinker tiles
Clinker
To produce clinker tiles, special slate clays are used, fired in a kiln at a temperature of 1300° C.
Its advantages include low moisture absorption, high frost resistance, as well as a wide selection of colors and textures, as well as resistance to mold and mildew. Its only drawback is its high price.
Step-by-step opening plan, where to start
A significant advantage in organizing a business for the production of paving slabs is the absence of the need to obtain special licenses and mandatory certification.
In this regard, it is necessary to draw up a business plan taking into account the following factors:
- Registration of an individual entrepreneur or LLC, depending on the volume of sales and production.
- Selection of premises for production.
- Purchase and installation of necessary equipment.
- Recruitment and training of personnel.
- Setting up sales of products to the sales market, establishing supply agreements with sales representatives.
Installation of concrete facade tiles
The facing material can be laid in two ways: dry and wet.
https://youtube.com/watch?v=gUQOS8VZAJE
Video instructions for dry laying facade tiles (including concrete)
Features of dry laying concrete tiles
Scheme of dry laying of concrete tiles
The dry installation method involves the use of facade tiles specifically designed for this method.
We have previously written about installing façade tiles with your own hands and recommended bookmarking the article.
Concrete facade tiles are fixed to a concrete or brick surface with dowels and nails. Self-tapping wood screws are used to attach the facing material to wood frames and walls.
| Dry installation is suitable for covering various types of surfaces - wood, brick, concrete - without the use of adhesives or other solutions. This method can be used regardless of the time of year. |
Facing the façade with concrete tiles is simple and economical, while the coating imitating the texture of brick or stone will look quite presentable.
Some examples of textures and colors of concrete facade tiles
Coloring of facade tiles suitable for the dry installation method occurs during its manufacturing process: this is how the products acquire a certain color not only on the outside. It is also significant that the material, which is completely painted, is less susceptible to fading under the influence of sunlight.
The appearance of modern concrete facade tiles is varied, so they can be selected in accordance with the overall design of the building’s exterior:
Marbled concrete tiles
- plain version;
- with overflows;
- with imitation granite surface;
- marbled;
- with imitation malachite;
- with imitation amber;
- other options.
We recommend reading about the pros and cons of corrugated sheeting for facades to learn more about this material.
Wet method of laying concrete tiles
For this installation method, ordinary facade tiles are suitable. Step-by-step instructions for wet installation are in the video attached to this article; you just need to familiarize yourself with the features of each stage of the work.
Wet laying tiles requires certain skills
- Before starting installation, use a paint brush to moisten both the surface of the wall and the inside of the tile with water.
- The cladding is laid from top to bottom, from the corner. Initially (if necessary), the corner elements are installed, and their short and long sides should be alternated.
- Tile adhesive is applied to the facade with a smooth trowel in a layer of 0.5 cm. Then it is leveled with a notched trowel (tooth size 4-6 mm).
- The back side of the facade tiles is completely covered with glue using the same notched trowel.
- The tiles should be glued to the base carefully, turning them from side to side and simultaneously pressing them against the surface until the glue is visible between the joints of the elements of the facing material.
Detailed video on wet laying of facade tiles
The result of the work will be a reliable and beautiful facade, which will not only protect the building from external negative factors, but will also delight the owners and guests of the house with its appearance for many years.
Exterior of a house lined with concrete facade tiles
Rate the material Rating: 5 out of 5 Votes: 1
Technology for laying and making clinker tiles for bricks with your own hands - We work with Brick
Clinker brick is a popular building material. Compared to ceramic analogues, it has a denser structure, which it acquires during special technological processing.
The first mention of clinker bricks dates back to 1743, when the first workshop began its work in the German city of Bockhorn, on the initiative of the Danish king Christian VI.
In it, ordinary bricks were fired in ovens, after which they became much more durable.
This made it possible to use them in road construction instead of imported and therefore too expensive building stone.
This building material appeared in Russia much later - in 1884. Its first manufacturer was the Topchievsky plant, located in the Chernigov province in the village of Topchievka.
At first, the company's product range consisted of clinker layers obtained by sintering clay raw materials. These layers were then crushed into smaller fragments for paving roads.
Only in 1904 the plant began producing real clinker bricks, which were used in road construction and in the construction of stoves.
Raw materials for the production of clinker bricks
This material is based on refractory clays with a high concentration of aluminum oxide. This component increases the resistance of the workpieces to melting under high temperatures and ensures the absence of deformation during firing. If the percentage of aluminum oxide in the original clay is below 23, the mixture is enriched by adding kaolinite clay.
When preparing a mixture for molding clinker bricks, special attention is paid to monitoring the content of three types of inclusions:
- ferric oxide. If the raw material contains more than 8% of this component, there is a possibility that swelling will form on the surface of the workpiece during firing or a sintered crust will appear, which will prevent uniform heating.
- calcium oxide. The concentration of this inclusion should also not exceed 8%. Otherwise, the workpieces will melt in the furnace, and air-filled cavities will form in their structure.
- magnesium oxide. Its content in the feedstock should not exceed 4%, otherwise the workpieces will shrink during further processing.
Methods for producing clinker bricks
This building material is made in two ways:
- extrusion. This technology involves pressing clay raw materials through an extruder. The strip emerging from the extruder opening is cut into individual fragments, which are then loaded into the kiln. The method provides products with high performance characteristics, but is relatively expensive;
- pressing. Plastic semi-dry pressing consists in the fact that raw materials are loaded into special molds and pressed until they acquire the required configuration. Products obtained in this way have a lower density than those produced by extrusion. They also have lower strength.
The final stage of material production is firing. Tunnel ovens are used for heat treatment.
In them, heat treatment is carried out in a continuous manner: workpieces are moved on a conveyor belt through a furnace, the length of which can be more than 200 meters.
Different temperatures are set in different parts of the oven to ensure gradual and uniform heating of the products. After this stage, the clay is sintered so much that it forms a monolithic dense stone.
Types of clinker bricks
Products can be solid or hollow. The former are characterized by increased strength, but conduct heat well. The latter, due to the internal cavities, are somewhat inferior in strength, but they provide better thermal insulation.
According to the scope of application, the following types of material are distinguished:
— for road construction and paving sidewalks;
— for the construction of stoves, chimneys and fireplaces;
— facing for internal and external decorative finishing;
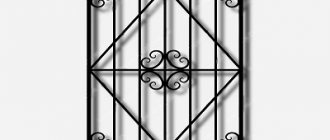
- for the construction of gazebos, fences, small architectural forms or landscape elements.
This material is rarely used in residential construction for three reasons:
- first - the relatively high cost of clinker bricks;
- second - the high thermal conductivity of the blocks, due to which houses require additional insulation;
— the third reason is the relatively large weight of the bricks. This requires the construction of a reinforced foundation and creates certain difficulties during transportation, loading and unloading of material.
Advantages of clinker bricks
In addition to strength and dense structure, the advantages of this material include:
— resistance to negative temperatures;
— durability and resistance to destruction under the influence of external factors;
- attractive appearance.
All this ensures the material great popularity in a variety of areas of construction.
Source of material: https://thermobrick.ru/
Laying clinker tiles on the building facade and porch
Clinker tiles have taken a strong place in the building materials market. It is used for cladding facades, for decorating rooms and embodying the most interesting and daring ideas. What explains the popularity of the material? How are clinker tiles installed?
Features of clinker tiles
Clinker is made from clay, which is fired at temperatures above 1200 C. Often clinker can be seen on the floor in a garage, in unheated rooms. This explains the high strength characteristics of the material and other distinctive features.
The advantages include:
- Low moisture absorption: thanks to this, tiles can be used for cladding facades; they are not afraid of exposure to moisture and direct contact with water.
- Resistance to temperature changes and frost resistance. The less moisture a material absorbs, the higher its frost resistance. In this case, clinker tiles show their best side.
- Durability: the material retains its attractive appearance and strength characteristics for 50 years.
- Resistance to mechanical damage: clinker can withstand impacts and other mechanical impacts along with natural stone.
The richness of colors and shapes make tiles a sought-after material for cladding.
Stages of clinker installation
All work can be divided into the following stages:
- preparatory work and marking;
- installation of tiles;
- finishing work and further care. Finishing work includes grouting.
Preparing the base
Clinker is laid on concrete, plastered and wooden surfaces. The base must be solid, clean and dry.
The weight of clinker tiles is small, but if there are fragments on the base that do not adhere well, it is better to knock them down and level the base with plaster or a starting putty mixture.
If the surface is dusty or absorbs a large amount of moisture, treat it with a special primer. The primer not only improves adhesion, but also additionally strengthens the top layer of the base so that it does not crumble.
The primer is designed to reduce moisture absorption of the base. This is an important factor, otherwise the surface will quickly draw moisture from the adhesive composition. It will be inconvenient to work with, it will dry out quickly, and the tile will not have time to fix on the base.
Before starting work, think about how you will lay the clinker. Select a material that is the maximum multiple of the surface area. Calculate how many rows will be needed where pruning will be required.
For clinker, spacer crosses are used for seams; the seam thickness can be from 4 to 10 mm. This value should be taken into account when calculating.
Tool selection
Preparations should include purchasing the necessary materials and purchasing tools. To lay clinker tiles you will need the following tool:
- Set of spatulas. A notched trowel is required to apply the required amount of solution to the base, and the rest play a supporting role. The height of the teeth and the size of the spatula depend on the size of the tile. The larger the spatula, the larger layer of glue will be used.
- Container for mixing glue.
- Rubber hammer.
- Crosses of the required thickness.
- Drill with attachment or construction mixer. To prepare the adhesive solution quickly and without lumps, you will need a mixer.
- Grinder for cutting tiles.
Installation
Now we will look at all the nuances of clinker installation in the form of step-by-step instructions. How to prepare the solution? How to cut clinker?
Laying clinker tiles on the wall - video recommendation
Preparation of the solution
There are instructions on the glue package. Follow the instructions regarding proportions and cooking technology. Fill a container with water, and then gradually add dry powder glue.
Stir the solution at low speeds, stirring from the bottom. After preparation, wait 10 minutes for the solution to infuse. Then stir again and you can get to work.
If you see that the solution has begun to set, stir it again with a mixer. Don't add water, it's a big mistake. In this case, the solution loses its properties and will not be able to provide adhesion and grip with the base.
Laying on a horizontal base
Often clinker can be seen on the floor in the garage, in unheated rooms. Laying clinker tiles on the porch is a smart decision because you can achieve high aesthetics and durability of the cladding in one shot.
- The surface is clean and primed. Some tilers use Betonokontakt quartz sand primers to improve adhesion.
- Before starting work, inspect the clinker. Tiles within the same batch may have slight differences in shade. Mix the tiles to achieve random laying of tiles of different shades.
- Apply glue to the base and remove any excess with a notched trowel.
- Lay down the first row. You can correct the position of the tiles using a rubber hammer. Check that each row is laid correctly.
- Insert the crosses and begin laying the second row.
Laying clinker on the facade
Clinker is also laid on vertical surfaces. There are two options for installing tiles on the walls of a building:
- “wet method” of installation;
- ventilated facade technology.
The wet method involves laying clinker on cement-based tile adhesive. The glue must be frost-resistant, moisture-resistant and suitable for outdoor use.
The base must be prepared and not have any changes. The primer will improve adhesion and stabilize moisture absorption.
The tile is laid on the mortar; its position can be corrected with a rubber hammer. The laying of clinker bricks begins from the second row and moves upward. The bottom row is laid at the end, after laying the terrace tiles. This allows you to hide the cut edges of the terrace cladding.
Ventilated facade technology
The technology involves installing a sheathing to which the clinker will be attached. It is possible to install insulation between the riser profiles of the sheathing.
- Markings are made and the pitch of the riser profiles is assigned.
- The riser profiles and the starting profile are attached to the brackets.
- The distance between the transverse guide strips depends on the size of the tiles.
- The clinker is fastened according to the provided fastening method.
Before laying clinker tiles on the wall, sheet insulation is installed between the riser guides. It is glued with adhesives for exterior use, and then additionally secured with dowels.
Tile cutting
You can cut clinker tiles in different ways:
- tile cutter;
- grinder;
- hacksaw for metal.
Each method has its own advantages and disadvantages. The tile cutter will provide an even and neat cut, there will be no noise and dust, but due to the high density of the clinker, the tile cutter wheel will soon have to be changed. It will wear out faster.
The grinder and the tile circle will cope with any task and any tile thickness. But there will be a lot of dust and noise, which is not always possible.
A hacksaw will cut clinker tiles, but the procedure will require more time and effort, and the cut will be uneven.
Grouting joints
After a day, you can begin grouting the joints; the clinker should adhere firmly and reliably to the surface. You can grout the seams with special grouts for clinker tiles.
The fact is that the large thickness of the seam in clinker tiles does not allow using all the grouts in a row. Use rubber spatulas or a float with rubber glued on it to fill the entire depth of the seam.
Afterwards you need to remove the remaining grout from the tiles. A wet and hard sponge or a grater covered with a sponge will help with this. Don't be afraid to apply pressure: clinker can withstand serious loads and mechanical stress.
Using thermal panels
Separately, I would like to talk about the use of thermal panels. This is both a beautiful cladding of the house and insulation of the entire building. The thermal panel consists of a layer of polyurethane foam up to 10 cm thick and clinker tiles, which is the upper part of such a panel.
Installation work
Installation of facade tiles is quite simple
The use of tiles with fastenings for self-tapping screws in finishing work makes it possible to equip the walls of the house with a ventilated system. In other words, first you can carry out thermal insulation work, and create a sheathing on top of the insulation, onto which the façade tiles will be attached with self-tapping screws.
We recommend reading about equipment for making facade tiles in addition to this article.
As a material for the sheathing, you can use a galvanized metal profile, edged board or wooden beam. If the sheathing is mounted from wood, before installation it is carefully treated with an antiseptic impregnation.
| Installation of the sheathing is carried out after the facing tiles have been selected. This is due to the fact that the distance between the profiles depends on its size. |
Following the technology, installation of the sheathing begins by determining the lower level of horizontal fastening of the facing material. Then, controlling the level, fix the guides to the wall. Whether they will be positioned horizontally or vertically depends on the tile model. The distance between the ribs of the sheathing must coincide with the dimensions of one segment of the facing material.
Detailed video about installing facade tiles with holes for self-tapping screws
| When choosing fasteners for the sheathing, you need to take into account the material of the main structure. The sheathing is fixed to wooden walls using self-tapping screws, to brick and concrete walls - using dowel-nails, and to foam concrete walls - with anchors. |
Scheme for installing tiles with holes for self-tapping screws (clamps)
The facade tiles are attached to the surface, starting from the lower left corner and laid out in a complete row to the opposite corner. Each subsequent tile is inserted with its left edge into the lock of the previous one, while the screws are screwed into the plates on the right side of the tile. As a result, the fastenings are covered with the front surface of the tile.
If it is necessary to cut the facing tiles to length, do this using a grinder equipped with a stone disc. First, appropriate markings are made on the tiles, then trimming is carried out. If you need to fasten tiles with cut fasteners to a wall or sheathing, you need to drill a hole in the seam between the tiles or directly in it, and use a self-tapping screw for fastening. The screw head is covered with a color-matched grout.
The process of lining corners and openings around windows and doors requires a separate description. If there are corner cladding elements, installation begins from the corner and is carried out according to the above scheme. If a corner needs to be highlighted and made voluminous, then before installation work it is sheathed with boards at the level of the facade cladding, and the corner elements are joined on them. These parts will cover the tile fasteners with their surface.
| If the protrusions of the facing tiles prevent the correct installation of the corner elements, then they are sanded using a grinder. |
Installation of tiles along the sheathing allows you to simultaneously insulate the facade of the house
As it becomes clear from the material presented above, no difficulties should arise when installing facing tiles on self-tapping screws for an owner who is interested in resolving the issue independently. A properly installed structure will allow you to create the perfect façade on your own.
If you need to attach such tiles to a wall without lathing, this can be done using a mortar mixture. To do this, just bend the metal plates inward. Thus, they will be completely immersed in the adhesive composition, which will ensure reliable adhesion of the material to the bearing plane.
Do I need permission to open a production facility?
To organize the production of paving slabs, it is enough to register an individual business. As a taxation system, the best option is the simplified taxation system (STS), 6% of revenue or 15% of profit.
Let us calculate the main indicators of the economic efficiency of the production of paving slabs using the vibration casting method.
Introductory information:
- Production area: 90m2;
- Type of property: rent (25 thousand rubles/month);
- Number of shifts: 1 shift;
- Productivity per shift: 50 m2 of tiles or 1100 m2 per month;
- Number of working days in a month: 22 days.
Features and stages of installing tiles with glue
In this way, houses made of brick or foam blocks are most often finished. This is often combined with insulating the walls from the outside with polystyrene foam or expanded polystyrene. First, the insulation is laid, then the sheathing is erected, which is plastered, and only then proceed to the work itself.
Finishing the facade of a house with tiles takes place in several stages:
The surface is primed. The adhesive composition for one or another type of material is mixed. This should be done in strict accordance with the instructions. The adhesive is applied to the wall in one direction with a notched trowel, and to the tile segment in the opposite direction, which ensures better adhesion. Installation of facing tiles begins from the bottom corner and is carried out gradually upward to the entire canvas. For alignment, markings are made before starting installation. You can nail a guide to the very bottom, which will then be removed. Each fragment is pressed tightly against the wall and tapped with a spatula. After drying, the seams are grouted with moisture-resistant grout
It is important to remember that you must remove the excess immediately, otherwise it will dry out and not be cleaned.
Installation instructions
Installation of ceramic facade tiles is not a complicated process, even if you arrange the cladding yourself.
In this case, you should know some rules that must be followed:
- installation of ceramic cladding should be carried out starting with cleaning the walls of debris and dust;
- The next step is priming the surface and installing the sheathing. The sheathing must be made of wood or metal profile;
- It is necessary to install ceramic tiles on the sheathing, starting from the bottom outer tile on the corner side;
- fastening of the material can be different: some tiles have special fastenings, others require screwing self-tapping screws into special holes;
- When installing tiles around the entire perimeter, you should be guided by the horizontal level readings.
In addition to mounting on a frame, ceramic cladding can be mounted on an adhesive basis in the following order:
- the base for installation should be prepared: cleared of debris, covered with a layer of putty with a reinforcing mesh;
- fix the profile under the tile;
- knead the adhesive base;
- glue the facade tiles in a manner similar to attaching them to the sheathing, but at the same time, special elements should be attached - crosses to create an even gap between the tile products.
NOTE! After installing the tiles, you should remove the crosses and grout the seams.
Insulation of walls before cladding
To insulate from cold and heat take:
- mineral wool;
- foam sheets;
- expanded polystyrene;
- or penoplex.
Fastening occurs in this order:
- First, the wall is cleaned of the old coating, leveled and primed.
- Mark the lower horizontal line using a level.
- Glue is applied to the insulation sheet.
- Press the insulation against the wall so that the bottom edge coincides with the mark.
- Secure with dowels.
- Fill out the next row in the same way. If necessary, the sheets are cut.
The solution is applied in two ways:
- on the entire surface of the sheet, removing excess with a notched spatula;
- along the edges, approximately 60% of the area.
If the tiles are attached to this façade using the wet method, it is necessary to carry out the following preparation:
- Apply mortar.
- Strengthen the corners of the slopes, and then the entire surface with reinforcing mesh.
- Cover with another layer of mixture.
What documents are needed to open
Registration of a business will require registration of an individual entrepreneur or LLC. In the first case, the businessman must submit a notarized application for business registration indicating the OKVED code, a photocopy of the passport and ID code, as well as a receipt for payment of the state fee.
If you want to additionally receive a quality certificate, then you need to contact the appropriate organization, which will conduct an analysis for compliance with GOST, identifying indicators of humidity, frost resistance, mechanical strength, etc.
Professional business plans on the topic:
- Business plan for the production of paving slabs (47 sheets) - DOWNLOAD ⬇
- Business plan for a brick factory (38 sheets) - DOWNLOAD ⬇
- Business plan for the production of cinder blocks (29 sheets) - DOWNLOAD ⬇
Facade tiles
Facade tiles are mainly used if it is not possible to carry out facing work using bricks. Tiles do not have a load-bearing function, and when a wall is erected, such material is not involved in installation. The cladding is carried out after the wall has been erected.
The thickness of façade tiles is generally 14mm. Considering this thickness parameter, the method of covering a wall with this material can be called gluing. For reliable fastening to the wall surface, a special adhesive composition is applied to the tiles. Using tiles, you can cladding not only the exterior of the building, but also the interior.
Among the variety of tiles, the following can be distinguished:
- Clinker room. It has a high level of density and has a wide variety of geometric shapes in which it is produced.
- Porcelain stoneware. It has become quite popular in recent years. The shape in which it can often be seen is a square or rectangle. It is quite large in size, making it not only profitable to use, but also convenient, since installation is simple and does not take much time.
- Polymer sand. The main purpose of this type of material is decoration. Thanks to this type of tile material, a wide variety of design ideas can be realized.
There are also less popular types, such as:
- ceramic;
- basement;
- under a stone;
- under brick;
- basement
Finish types
Despite the fact that all types of tiles for Fagot and Kiris facades on the market are manufactured using modern technologies and using only high-quality components, different products have different technical characteristics.
Fiber cement finishing
Fiber cement facade tiles of the Fagot brand are currently very popular among owners of private houses. The production of such finishing materials of the Fagot brand is carried out using lightweight concrete, the surface of which is treated with synthetic fiber.
Among the most important features of such finishing, it is customary to highlight the fact that laying facade tiles allows you to imitate the surfaces of natural materials, in particular, wood, rock and brick. Thanks to the wide variety of colors and textures, using such facade tiles you can implement design projects of any complexity.
Bassoon fiber cement products, in addition to excellent visual characteristics, are also distinguished by attractive technical parameters and retain their original appearance in any conditions.
Main advantages
Fiber cement concrete facade tiles have the following advantages:
- resistance to any negative environmental influences;
- resistance to mechanical damage;
- additional thermal insulation parameters;
- long service life;
- installation of facade tiles can be done by yourself;
- fiber cement products are characterized by increased resistance to fire;
- ensuring sound insulation at the facility;
- attractive decorative features.
Currently, fiber cement boards are used for both exterior and interior decoration of various houses and structures with their own hands. Thanks to all these features, today such decorative products are considered extremely attractive for attaching hinged ventilated facades.
Basalt products
Basalt decorative cladding materials Kiris for brick and wood are made from basalt rocks.
This finishing coating can differ in various visual features, imitate the surface of rock and stone, provides reliable protection against fires on site and improves the thermal insulation characteristics of any home. Due to the environmental friendliness of the Kiris finish, it is considered the most suitable for cladding any buildings.
Key Features
Basalt facade slabs have the following set of positive qualities:
- fire resistance;
- long service life;
- maintaining technical characteristics under any operating conditions;
- soundproofing;
- resistance to moisture and various chemical influences;
- such facade tiles can withstand even the most severe seasonal temperature changes;
- the opportunity to install facade tiles yourself.
Asbestos-cement
Asbestos-cement facade slabs are a type of cement facing materials, during the production of which stone chips of various colors and sizes are added to the prepared mixture. It is the stone chips that provide the decorative parameters of this type of cladding.
The basis of the asbestos-cement Rostov mini-slab is a fibrous, reinforced asbestos sheet. This is a completely environmentally friendly material that can be used in new construction and reconstruction of old buildings.
Advantages
Asbestos-cement facade tiles have excellent technical parameters; among its main advantages it is customary to highlight:
- the ability to carry out installation yourself in any weather conditions;
- affordable cost of this type of asbestos-cement tiles for facades;
- durability;
- fire resistance;
- variety of colors;
- imitation of natural stone and rock.
Polymer sand
A modern polymer sand panel or facade tile is a high-quality mini-slab that can imitate the surface of natural wood, brick, and rock. Due to the ease of fastening, polymer-sand finishing or facade tiles can be installed on the facade of any house with your own hands - by the owner of the building.
Among other things, polymer-sand finishing or facade tiles have excellent thermal insulation parameters, thanks to which mineral wool insulation does not need to be used when cladding.
Polymer sand products - facade tiles are perfect for owners of country and country houses.
How much can you earn in the production of paving slabs?
Conclusion: The net profit of the paving slab production enterprise will be 137.6 thousand rubles per month. The profitability of production at such indicators is 49.5%, and the payback period for capital investments is only 2.6 months. It is worth considering that such indicators are possible subject to 100% sales of all manufactured products, which is 1100 m2 of paving slabs per month.
We recommend downloading a business plan for the production of paving slabs from our partners, with a quality guarantee. This is a full-fledged, ready-made project that you will not find in the public domain. Contents of the business plan: 1. Confidentiality 2. Summary 3. Stages of project implementation 4. Characteristics of the object 5. Marketing plan 6. Technical and economic data of the equipment 7. Financial plan 8. Risk assessment 9. Financial and economic justification of investments 10. Conclusions
Materials for decorating
Technologies and the modern construction market offer a huge variety of materials for creating an attractive, durable and durable facade of buildings for various purposes. Thanks to such materials, it is possible to create various types of facades. All materials for decorating the facade of a house are divided into several large groups.
Polymer concrete
A fairly popular material, it consists of resin, crushed stone and quartz sand. Its main advantage is that the material is very similar in appearance to natural stone. The finished elements are light in weight and quite easy to install. Working with a specialist, you can develop a wide variety of decorative designs of any format, shape, and size. Very often used to create railings and columns.
Polymer concrete is a durable and lightweight material for facade decorationSource penoprofil.ru
Styrofoam
One of the most common materials. It is chosen due to its special characteristics:
- high strength and low weight;
- easy installation anywhere;
- resistance to temperature changes;
- invisible seams at the joints;
- low price and easy delivery.
This material is mainly used for several types of decorative elements - arches, archivolts, balustrades, cornices, columns, capitals, pilasters, sandriks and so on.
Foam plastic is a very light and stable material at an affordable price. Source remotn.ru
Polyurethane foam
The decor of the facade with polyurethane foam elements is chosen due to the fact that the material is very light and durable, it easily tolerates temperature changes, is securely attached to the walls, has no deformation, and its special characteristics allow you to create absolutely any patterns.
Polyurethane foam is a lightweight, durable and durable material for facadesSource soart-m.ru
Glass fiber reinforced concrete
This is one of the types of high-strength stone that is made from artificial fibers. This is one of the strongest and most durable materials for decorating building facades. The elements are made in the form of shells, the thickness of which reaches 2.5 cm. It is these shells that are attached to the surfaces. Glass fiber reinforced concrete is chosen due to its resistance to cracking, strength, resistance to the negative effects of moisture, temperature changes, ease of installation and lightness. But this material has a rather high price, it weighs more than its analogues, and in addition, fastening requires the development of precise installation drawings and the use of a special installation system.
Glass fiber reinforced concrete is an imitation of natural stone, but many times lighter. Source hi.decorexpro.com