The material cannot be considered new on the domestic construction market; it can be purchased from both domestic and foreign manufacturers.
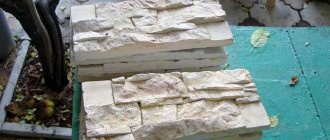
Clinker tiles for facade
Clinker tiles for facades have the highest physical properties among all types of building materials. The main advantages are:
- high resistance to abrasive elements. The strength of the surface of the material is almost as good as that of glass, it does not wear off, and is not afraid of scratches;
- long service life. If you follow the instructions for use, the service life is practically unlimited. There are only two reasons for the need for repair work - violation of cladding technology or mechanical damage;
Facade finishing with clinker tiles
- low water absorption values. This indicator allows the material not to respond to cyclic freezing/thawing. In addition, clinker tiles serve as additional protection for facade walls from the negative effects of precipitation;
- chemical inertness. Clinker does not react to the influence of various chemical compounds, including aggressive ones. In urban environments, tiles are not destroyed by smog;
- ease of maintenance. Almost no dust settles on the surface of the clinker tiles, as a result, the development of mosses and lichens is significantly slowed down, the surfaces of the facades are easy to keep clean;
Clinker tiles on the facade of a private house
- a large assortment. Thanks to modern equipment and technologies, manufacturers offer clinker tiles in a wide range of colors; there are various types of structured external surfaces. The same applies to linear dimensions.
But there are also disadvantages . The first is high cost. Depending on the brand, the price of clinker tiles can be several times higher than the cost of ceramic tiles. The second drawback is fragility. In its physical characteristics, clinker resembles glass, and it has the same fragility. It is difficult to cut, and the cut area is often chipped. In addition, as a result of sharp impacts, the material cracks.
The tiles are fragile and require careful installation
Excellent performance characteristics are obtained due to a special production technology; unlike other clay building materials, clinker is fired at very high temperatures (at least +1300°C). Under these conditions, clay and brick melt and turn into a glassy mass. The mineral dyes used provide color, and special pressing molds change the structure of the front surfaces. During production, the technology must be strictly followed, otherwise the tiles will be deformed, the linear dimensions will be violated, and the quality will be significantly reduced. Production can only be carried out by reputable companies that have not only the most modern mechanisms and equipment, but also responsible, highly qualified specialists in various specialties.
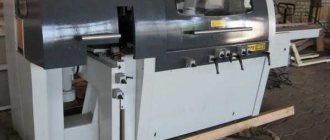
Clinker tile production technology: equipment
Features of clinker tile production
Two simple manufacturing methods
- Making from concrete is considered the easiest way. The raw materials used are Portland cement, fine crushed stone, sand, lime and plasticizer. In order for the cladding to have water-repellent and frost-resistant properties, modifiers must be added to the mixture. The production process is very simple. All components are mixed, poured into the mold and laid out on the vibrating table platform. This is a mandatory procedure to completely remove air. After drying, the product is painted in the preferred color.
- If you want to make clinker tiles, the technology is slightly different. A clay mass is used as a base, which is mixed with modifiers. The prepared mass is poured into a vibratory pressing machine, through which the tiles are formed. This process includes mandatory firing. The workpiece is also pressed under high pressure. The firing temperature reaches up to 1300 degrees Celsius. The result is a high quality finish.
Step-by-step instruction
Now let's look at the step-by-step process of how to make facade tiles with your own hands.
All work must be carried out at temperatures from +15 to +30 degrees Celsius. This temperature range will provide ideal conditions for the product to harden. Please note: For protection purposes, gloves and goggles must be used. The room should be well ventilated.
First, prepare the molds for casting
A vibrating table is also installed. Can use a regular table
First, molds for casting are prepared. A vibrating table is also installed. You can use a regular table.
Further work has the following sequence:
- The molds are treated from the inside with soap or oil. This will make removing the tiles from the mold simple and easy.
- Next, the solution for casting is prepared. Let's consider a simple cement-based option. For mixing, it is best to use a concrete mixer, so all components will be evenly mixed together. For one bucket of sand there is half a bucket of water. These components are mixed for one minute, and then two buckets of cement and another bucket of water are added.
- After this, half a bucket of water and four buckets of sand are added. These components are mixed.
- The resulting composition should not be rare. Its structure should be plastic and dense.
- When the required consistency is reached, dye is added to the composition and everything is mixed.
- Next, the solution is poured into molds. This must be done on a working vibrating table.
- The solution is evenly distributed throughout all forms.
- Throughout this time, the vibrating table continues to operate.
- During vibration, air bubbles will come out of the solution. At the same time, using a wide spatula, all forms are leveled to the same level.
- The solution protruding beyond the mold is immediately eliminated.
- After this, the workpiece is sent to a drying cabinet or a special drying chamber.
It is necessary to remove it carefully so as not to damage the workpiece. You can use a rubber mallet or light hand movements. Facade tiles will be completely ready for further cladding after 10 days
The facade tiles will be completely ready for further cladding after 10 days.
Conclusion As you can see, DIY tiles are a doable task. By making it yourself, you will save your family budget, but you will also need to spend time and effort on the production process itself.
But the end result will not leave you and those around you indifferent. To consolidate all the material presented, we recommend that you watch the prepared video.
Mold making
Today it is quite possible to purchase ready-made forms. They come in all types of tiles; if you look hard enough, you’ll be lucky enough to buy exactly what you need. The most important thing is not to purchase cheap plastic matrices. Usually they are enough for no more than one application of the solution, after which the plastic becomes unusable. As already noted, a suitable form may not be on sale, then you will inevitably have to make it yourself. Whatever material you choose for the matrix, you can take an artificial analogue, tile or natural stone as a basis. If you choose the second option, then buy several different samples, remember that nothing is the same in nature. The base can be a wooden beam or log. The main thing is to choose a beautiful wood texture. Let's understand the technology of the form.
Let us immediately note that the base can be made for one tile or directly for a group of stones. It is more profitable to do the second one, since the output is several finished products at once, and the speed of work, accordingly, increases. Whatever material you use, you will need formwork. Buy ready-made or make it yourself.
Silicone sealant is cheaper to choose in large packaging
Silicone
Silicone is sold in different packaging. It’s better for you to look in buckets, since in tubes you will overpay for packaging, but you need a lot of it.
Now we lubricate the bottom and walls of the formwork with a special lubricant, and lay tiles or stones on the bottom. The sources also need to be lubricated, since they will have to be freed from silicone.
Important! If gypsum stone or tiles are used as the starting material, then they must be covered with several layers of varnish, only then coated.
The form is filled to the brim.
Prepare a soap solution for brushes and spatula. Apply silicone and smooth it with a brush, constantly pressing. This way you will avoid bubbles. Now it is advisable to compact the silicone and level it with a soap spatula. Now the mold must be left until the silicone hardens.
The polymerization process takes a long time. The standard rate is 2mm per day. The thicker the future workpiece, the more time it will take. Don’t rush to pull out the matrix; the stronger it is, the longer it can be used. A poorly polymerized form can be used once or twice. Standard properties of silicone sealant that should be taken into account when working:
- tensile strength - 01 MPa;
- density - 1200 kg/m3;
- viability - 8 hours;
- durability - 20 years.
Base for stone-look tiles
After complete hardening, the material is removed, the matrix is washed with soap and can be used.
Compound molding dies
There are special compositions for casting molds. They can be purchased at construction stores or craft departments. There is no need to chase imported compounds; our compounds are of good quality and reasonable cost.
The example shown in the photo has two components. Silagerm -5035 has a tensile strength of about 4 MPa, shrinkage of no more than 1%, and a complete hardening time of 24 hours.
The quality of the composition is better, and accordingly the forms made from it are used longer.
Important! Before pouring plaster or cement, lubricate the mold with a special compound - Tiprom, then it will last even longer.
Domestic polyurethane compound
House façade cladding technology
The technology for laying facing tiles for facades has two options:
"Wet" method.
Installation of tiles using glue. The method is suitable for lightweight products that externally cover walls whose surface is fairly flat: foam blocks, bricks. It is preferable to carry out external work in warm weather to ensure the best adhesion of the adhesive composition to the material.
"Dry" method.
The façade is tiled, mounted on a sheathing attached to the wall. This allows you to fix heavier elements. The method is used mainly for frame or wooden buildings. A facade lined in this way can be additionally insulated or made ventilated.
Preparing the base
Facing the facade with tiles using the “dry” method as a base implies the presence of a frame, starting, as a rule, from the base itself.
If the facade is not insulated and the facing material is not heavy, it is possible to install it without a frame.
To prepare the base for cladding, you usually need:
- clean the surface of the facade from all contaminants;
- apply adhesive primer;
- mount the starting profile around the perimeter.
Laying tiles on the frame
Do-it-yourself installation of a frame for laying facade tiles is made easier by the fact that there are already ready-made structures for specific finishing materials, including guides and brackets. Places for installing the bracket are marked on the wall. Installation is carried out using the points obtained using anchors. After this, the facade is insulated, thermal insulation is placed and secured with fasteners. Then the guides are mounted, and the frame is ready.
When laying façade tiles on the frame with your own hands, it is convenient to use clamps secured with self-tapping screws to the sheathing - fixing devices into the grooves of which the tiles are inserted.
To lay tiles on the frame you need:
- install the bottom row of fasteners horizontally on the guides at the same level, secure with metal screws;
- insert the tiles into them, attaching 2 clamps on top, and also fasten them to the guide.
This method of fixation is no less reliable than cement, and allows, if necessary, careful dismantling of the tiles.
"Dry" installation method
Finishing the facade with tiles using the “dry” method is carried out on a metal frame, which must first be assembled on the facade.
OSB cladding products are well suited for finishing in this way.
Frame technology is used to create ventilated facades, because Air circulates freely between the finish and the wall, providing ventilation. This space can be filled with thermal insulation: mineral wool or PPS boards, and topped with facade tiles.
"Wet" cladding method
Exterior finishing of the facade, in which the tiles are laid on an aqueous adhesive composition based on resins, polymers or cement, is considered to be produced by the “wet” method. With this installation method, frost-resistant special adhesives are used. To do a “wet” installation, the surface must first be prepared, and then the tiles must be laid with gaps formed by crosses, starting from the bottom. The cladding is done using an adhesive mixture, which then takes about a day to set. After drying, removing the crosses, rub the seams.
Grouting joints
In order to grout the seams between the tiles, you should prepare materials and tools in advance
Has its own characteristics. After the glue has slightly hardened, use a special thin spatula to remove it from the seams and clean the surfaces of any glue residue. Start grouting no earlier than three days after installation, otherwise the tiles may become damaged and will have to be re-glued. Prepare the grouting solution taking into account the manufacturer’s recommendations; we described above which brand to choose. It should be semi-dry in consistency.
Place a little mortar on a trowel or any flat surface; to seal, you need to have a long, narrow tool the width of the seams.
Trowel or trowel for jointing or grouting clinker tiles
Lean the trowel against the wall, pick up small portions of the thick mortar with the tool and carefully seal the seams. Level their surfaces at the same time.
Practical advice. It is much faster to first seal several rows of vertical seams, and then horizontal ones. At the same time, remove the difference in height between them.
Colored grouting mixture (fugue) for clinker tiles
Prices for construction grout Ceresit Super
Construction grout Ceresit Super
Joining with a trowel
Vertical seams are easier to open with a smaller spatula
The picture shows the grouting
When opening seams with a trowel, you can create various optical elements
This method of semi-dry grouting significantly reduces contamination of the front surface of clinker tiles. Final cleaning is done with an ordinary brush.
Brushing the seam with a brush gives it the appropriate structure
Type of finished seam
It is not recommended to use seams that are not completely filled, as moisture and dirt collect in them.
If you have sufficient skills, then you won’t have to use a damp sponge; the work will be done neatly and beautifully. If not, then the problem areas will have to be wiped. But remember that the surface of clinker tiles is easy to dirty, but difficult to clean. After drying, the stains will appear again, the procedure will have to be repeated several times.
According to the surface grouting method, the seams are sealed using a jointing or plaster lath
After drying, the remaining grout is removed from the tile with a sponge using movements at 45 degrees to the tile
Using a plaster lath with a sponge, wash off the excess solution diagonally
Finished look
Polyvinyl chloride siding
Plastic facade panels Nailite (Naylayt)
PVC panels are a cheap and easy-to-install method of finishing a facade, characterized by a wide range of models and, therefore, a lot of possible design solutions. The only drawback is the appearance. From a close distance, even with the naked eye it is noticeable that the house is covered with plastic.
Vinyl siding
Installation technology
PVC panels are installed only horizontally. To work you will need:
- knife;
- perforator;
- hammer;
- roulette;
- Bulgarian;
- level;
- chalk;
- punch - a tool for making ears on the edges of sheets of material.
Stage 1. First, a visual inspection of the house is carried out, the location for installation of the first row is determined. This row should coincide with the old finish or cover the top of the foundation (if we are talking about a new building).
Stage 2. All necessary components are installed - internal and external corners, trim, first strip, etc. You should start from the corners, leaving a small gap of 6.5 mm between them and the eaves of the building.
Stage 3. Installation of the first row is the most critical stage of finishing the facade, on which the evenness of the entire siding depends. First, the boundary of the first row is determined, after which a horizontal line is drawn on the wall. When installing the first strip, this line will serve as a guide.
Stage 4. The appropriate accessories are installed on the door and windows - trims, flashings, final trims. For greater accuracy, the strips of material are joined at an angle of 45ᵒ.
Fastening vertical elements
Stage 5. The remaining panels are installed from bottom to top, focusing on the first row. Each panel is inserted into the profile and nailed (not completely). The interval between panels should be 0.4 cm, and between them and other components - from 0.6 cm to 1.25 cm.
Parts are attached with a gap
The panels are overlapped one on top of the other by ½ of the factory mark, while vertical overlaps should be avoided - they are more noticeable from the facade.
Stage 6. At the top edge, the sheets are installed in the same way as under the windows. Only whole panels are used; trimming is possible only for gables. When installing the last row, a J-shaped profile is used with ø6 mm holes made in 0.5 m increments (to drain water from the roof).
Finishing
Country style garden path paving
Paths play an important role in the garden.
This is not only a moving line, but also an important element of landscape design. Therefore, it is very important to ensure that the paths are not only comfortable and practical, but also fully harmonize with the landscape solutions and complement the existing style of the garden. In this article we will look at the country-style paving of garden paths that is popular today. Typically, paths occupy about 15% of the garden area. But their number may change: some appear as needed, others, on the contrary, disappear over time: they are dismantled or simply become overgrown - depending on the coating material - due to the fact that they are practically not used.
The width of the path depends not only on functionality, but also on the style of the garden itself. The main (central) path should be about 1-1.5 m, the secondary paths should be from 0.5 m to 1 m, and the paths between the beds should be about 0.5 m. It is necessary to decide what each specific “garden artery” will serve for. - this is what garden paths are sometimes called. The options are as follows: for constant movement, infrequent walks, or its purpose is to allow vehicles to enter the site. From this point of view, it is important to pay attention to the thickness of the paving material, the laying pattern and the dimensions of the joints.
Porcelain tiles
The composition of porcelain tiles includes: dyes, feldspar, clay, sand and minerals. During production, the material must be fired at a temperature of 1200 to 1300 degrees. At your discretion, you can choose tiles with a plain surface, with inclusions, or with an imitation of marble (granite) pattern.
The advantages of porcelain tiles include: moisture resistance, frost resistance, environmental friendliness and wear resistance.
Installation of porcelain tiles is carried out dry, that is, on a frame, which contributes to excellent insulation of the house and the formation of the necessary microclimate inside it.
Types of cladding: pros and cons
The most common types of tiles used for cladding facades include the following varieties:
- ceramic,
- concrete,
- terracotta,
- clinker
In order for you to choose the most suitable option for yourself, you should familiarize yourself with the advantages and disadvantages of each type of tile.
Ceramic granite tiles
From ceramic granite
Facade tiles from ceramic granite are made by mixing different types of clay with the addition of sand, feldspar, dyes, and special mineral enzymes. The mixture thus obtained is first shaped and then placed in a kiln, where at a temperature of about 1300 ° C the tile takes its final form. The main advantages of this type include high frost resistance, water resistance and wear resistance of the resulting coating. The disadvantages of granite material include the difficulty of laying tiles due to their significant weight.
Concrete tiles
Concrete
Concrete tiles are made from classic Portland cement and well-sifted sand with the addition of fillers and additives, which give the product special strength and frost resistance. Vibration-pressed molds are first fired in a kiln and, after cooling, covered with colored sealants. The advantage of this type of coating is a wide selection of different textures and colors, as well as relative lightness and low cost. There are practically no significant shortcomings in tiles of this class.
Terracotta tiles
Terracotta
The starting material for the production of terracotta tiles is a special kaolin clay with a porous structure, fired in a kiln at a temperature of 1000° C. The advantages of these coatings are their ease of installation, resistance to temperature changes and solar radiation. A relative disadvantage of terracotta products is their insufficient mechanical strength.
Clinker tiles
Clinker
To produce clinker tiles, special slate clays are used, fired in a kiln at a temperature of 1300° C.
Its advantages include low moisture absorption, high frost resistance, as well as a wide selection of colors and textures, as well as resistance to mold and mildew. Its only drawback is its high price.
Installation of concrete facade tiles
The facing material can be laid in two ways: dry and wet.
https://youtube.com/watch?v=gUQOS8VZAJE
Video instructions for dry laying facade tiles (including concrete)
Features of dry laying concrete tiles
Scheme of dry laying of concrete tiles
The dry installation method involves the use of facade tiles specifically designed for this method.
We have previously written about installing façade tiles with your own hands and recommended bookmarking the article.
Concrete facade tiles are fixed to a concrete or brick surface with dowels and nails. Self-tapping wood screws are used to attach the facing material to wood frames and walls.
| Dry installation is suitable for covering various types of surfaces - wood, brick, concrete - without the use of adhesives or other solutions. This method can be used regardless of the time of year. |
Facing the façade with concrete tiles is simple and economical, while the coating imitating the texture of brick or stone will look quite presentable.
Some examples of textures and colors of concrete facade tiles
Coloring of facade tiles suitable for the dry installation method occurs during its manufacturing process: this is how the products acquire a certain color not only on the outside. It is also significant that the material, which is completely painted, is less susceptible to fading under the influence of sunlight.
The appearance of modern concrete facade tiles is varied, so they can be selected in accordance with the overall design of the building’s exterior:
Marbled concrete tiles
- plain version;
- with overflows;
- with imitation granite surface;
- marbled;
- with imitation malachite;
- with imitation amber;
- other options.
We recommend reading about the pros and cons of corrugated sheeting for facades to learn more about this material.
Wet method of laying concrete tiles
For this installation method, ordinary facade tiles are suitable. Step-by-step instructions for wet installation are in the video attached to this article; you just need to familiarize yourself with the features of each stage of the work.
Wet laying tiles requires certain skills
- Before starting installation, use a paint brush to moisten both the surface of the wall and the inside of the tile with water.
- The cladding is laid from top to bottom, from the corner. Initially (if necessary), the corner elements are installed, and their short and long sides should be alternated.
- Tile adhesive is applied to the facade with a smooth trowel in a layer of 0.5 cm. Then it is leveled with a notched trowel (tooth size 4-6 mm).
- The back side of the facade tiles is completely covered with glue using the same notched trowel.
- The tiles should be glued to the base carefully, turning them from side to side and simultaneously pressing them against the surface until the glue is visible between the joints of the elements of the facing material.
Detailed video on wet laying of facade tiles
The result of the work will be a reliable and beautiful facade, which will not only protect the building from external negative factors, but will also delight the owners and guests of the house with its appearance for many years.
Exterior of a house lined with concrete facade tiles
Rate the material Rating: 5 out of 5 Votes: 1
Manufacturing of polyurethane molds for facade tiles
First of all, you need to decide what kind of tile the facade will be finished with, think about its size, format and configuration of the front surface. A rational solution would be to temporarily borrow several samples of natural stone products from a professional workshop, which it was decided to imitate. These samples will be used as templates when making molds with your own hands.
Molds for making polyurethane tiles
Installation work
Installation of facade tiles is quite simple
The use of tiles with fastenings for self-tapping screws in finishing work makes it possible to equip the walls of the house with a ventilated system. In other words, first you can carry out thermal insulation work, and create a sheathing on top of the insulation, onto which the façade tiles will be attached with self-tapping screws.
We recommend reading about equipment for making facade tiles in addition to this article.
As a material for the sheathing, you can use a galvanized metal profile, edged board or wooden beam. If the sheathing is mounted from wood, before installation it is carefully treated with an antiseptic impregnation.
| Installation of the sheathing is carried out after the facing tiles have been selected. This is due to the fact that the distance between the profiles depends on its size. |
Following the technology, installation of the sheathing begins by determining the lower level of horizontal fastening of the facing material. Then, controlling the level, fix the guides to the wall. Whether they will be positioned horizontally or vertically depends on the tile model. The distance between the ribs of the sheathing must coincide with the dimensions of one segment of the facing material.
Detailed video about installing facade tiles with holes for self-tapping screws
| When choosing fasteners for the sheathing, you need to take into account the material of the main structure. The sheathing is fixed to wooden walls using self-tapping screws, to brick and concrete walls - using dowel-nails, and to foam concrete walls - with anchors. |
Scheme for installing tiles with holes for self-tapping screws (clamps)
The facade tiles are attached to the surface, starting from the lower left corner and laid out in a complete row to the opposite corner. Each subsequent tile is inserted with its left edge into the lock of the previous one, while the screws are screwed into the plates on the right side of the tile. As a result, the fastenings are covered with the front surface of the tile.
If it is necessary to cut the facing tiles to length, do this using a grinder equipped with a stone disc. First, appropriate markings are made on the tiles, then trimming is carried out. If you need to fasten tiles with cut fasteners to a wall or sheathing, you need to drill a hole in the seam between the tiles or directly in it, and use a self-tapping screw for fastening. The screw head is covered with a color-matched grout.
The process of lining corners and openings around windows and doors requires a separate description. If there are corner cladding elements, installation begins from the corner and is carried out according to the above scheme. If a corner needs to be highlighted and made voluminous, then before installation work it is sheathed with boards at the level of the facade cladding, and the corner elements are joined on them. These parts will cover the tile fasteners with their surface.
| If the protrusions of the facing tiles prevent the correct installation of the corner elements, then they are sanded using a grinder. |
Installation of tiles along the sheathing allows you to simultaneously insulate the facade of the house
As it becomes clear from the material presented above, no difficulties should arise when installing facing tiles on self-tapping screws for an owner who is interested in resolving the issue independently. A properly installed structure will allow you to create the perfect façade on your own.
If you need to attach such tiles to a wall without lathing, this can be done using a mortar mixture. To do this, just bend the metal plates inward. Thus, they will be completely immersed in the adhesive composition, which will ensure reliable adhesion of the material to the bearing plane.
Features of cutting clinker tiles
The best option is to cut clinker tiles using a professional machine with a diamond blade and water cooling. This way you can get a perfectly flat cut surface and almost completely eliminate the risk of cracking or chipping. But such equipment is quite expensive; purchasing it is only beneficial for professional craftsmen, for whom laying tiles is their main income, not a pastime. If you do not have a machine, you will have to cut the tiles with a cylindrical grinder and a diamond disc.
Diamond cutting wheel
Important. There are two types of diamond blades: for cutting concrete and ceramics. Discs are not interchangeable and cannot be used for other purposes. What are the differences between the disks? For cutting concrete, the plane of the discs has through slots to remove large amounts of dust; discs for tiles do not have such holes. They only have small indentations where the diamond chips were applied. Discs with slots hit the tiles hard, which causes chips. Always keep these differences in mind.
Prices for angle grinders (grinders)
Angle grinders (grinders)
How to cut clinker tiles with a grinder?
- Prepare a level and stable stand and ruler. Draw a cutting line on the tile, making sure it is exactly on both sides.
- Cut the tile along a line of no more than half the thickness in one pass. Never try to cut off the disc in one pass, it will definitely crack.
- Turn the tile over and cut it in the same way, only reduce the cutting depth even more.
- Place the notched part on the flat edge of the table and, with sharp pressure on the edge of the tile, break it off along the cutting line. The more confident your movements are, the less risk you will end up with a marriage.
- Very carefully trim the edge of the cut with a grinder. Tilt the disk at the maximum possible angle, do not press it too hard, remove irregularities gradually.
Cutting tiles with a grinder
Keep in mind that cutting a strip less than one centimeter wide from clinker tiles is very difficult. To do this, you must have experience working with electric tools and clinker. If the technology requires gluing such pieces, then be prepared for a lot of waste.
Video - Master class on cutting clinker terrace slabs
Video - How to quickly cut clinker tiles
Features and stages of installing tiles with glue
In this way, houses made of brick or foam blocks are most often finished. This is often combined with insulating the walls from the outside with polystyrene foam or expanded polystyrene. First, the insulation is laid, then the sheathing is erected, which is plastered, and only then proceed to the work itself.
Finishing the facade of a house with tiles takes place in several stages:
The surface is primed. The adhesive composition for one or another type of material is mixed. This should be done in strict accordance with the instructions. The adhesive is applied to the wall in one direction with a notched trowel, and to the tile segment in the opposite direction, which ensures better adhesion. Installation of facing tiles begins from the bottom corner and is carried out gradually upward to the entire canvas. For alignment, markings are made before starting installation. You can nail a guide to the very bottom, which will then be removed. Each fragment is pressed tightly against the wall and tapped with a spatula. After drying, the seams are grouted with moisture-resistant grout
It is important to remember that you must remove the excess immediately, otherwise it will dry out and not be cleaned.
Preparing the filling solution
After the glue has dried, begin preparing the polyurethane mass for pouring.
The required quantities of polymer and hardener are poured into two separate dry and clean containers in the required proportions. Then pour them into a third dry and clean container and mix thoroughly with your hands, touching the walls of the container.
When working with the components of the compound, you should use protective clothing, gloves and goggles, avoiding direct contact of the polymer with the body. If the solution gets on your skin, wash it off immediately with running water and detergent!
Before filling the formwork with the compound, you need to dry brush the matrix with a thin layer of polyurethane to reduce the number of air bubbles that form on the surface of the sample when adding the bulk of the mixture.
One of the corners of the base is raised, and the filling of the formwork with polymer begins from the lower corner, while simultaneously introducing the composition and lowering the raised corner. When the base is in a horizontal position, the thickness of the polyurethane layer above the top point of the matrix should be 2-3 cm.
The compound, depending on the type, hardens in about a day, after which the matrix is removed.
Installation instructions
Installation of ceramic facade tiles is not a complicated process, even if you arrange the cladding yourself.
In this case, you should know some rules that must be followed:
- installation of ceramic cladding should be carried out starting with cleaning the walls of debris and dust;
- The next step is priming the surface and installing the sheathing. The sheathing must be made of wood or metal profile;
- It is necessary to install ceramic tiles on the sheathing, starting from the bottom outer tile on the corner side;
- fastening of the material can be different: some tiles have special fastenings, others require screwing self-tapping screws into special holes;
- When installing tiles around the entire perimeter, you should be guided by the horizontal level readings.
In addition to mounting on a frame, ceramic cladding can be mounted on an adhesive basis in the following order:
- the base for installation should be prepared: cleared of debris, covered with a layer of putty with a reinforcing mesh;
- fix the profile under the tile;
- knead the adhesive base;
- glue the facade tiles in a manner similar to attaching them to the sheathing, but at the same time, special elements should be attached - crosses to create an even gap between the tile products.
NOTE! After installing the tiles, you should remove the crosses and grout the seams.
Insulation of walls before cladding
To insulate from cold and heat take:
- mineral wool;
- foam sheets;
- expanded polystyrene;
- or penoplex.
Fastening occurs in this order:
- First, the wall is cleaned of the old coating, leveled and primed.
- Mark the lower horizontal line using a level.
- Glue is applied to the insulation sheet.
- Press the insulation against the wall so that the bottom edge coincides with the mark.
- Secure with dowels.
- Fill out the next row in the same way. If necessary, the sheets are cut.
The solution is applied in two ways:
- on the entire surface of the sheet, removing excess with a notched spatula;
- along the edges, approximately 60% of the area.
If the tiles are attached to this façade using the wet method, it is necessary to carry out the following preparation:
- Apply mortar.
- Strengthen the corners of the slopes, and then the entire surface with reinforcing mesh.
- Cover with another layer of mixture.
Facade tiles
Facade tiles are mainly used if it is not possible to carry out facing work using bricks. Tiles do not have a load-bearing function, and when a wall is erected, such material is not involved in installation. The cladding is carried out after the wall has been erected.
The thickness of façade tiles is generally 14mm. Considering this thickness parameter, the method of covering a wall with this material can be called gluing. For reliable fastening to the wall surface, a special adhesive composition is applied to the tiles. Using tiles, you can cladding not only the exterior of the building, but also the interior.
Among the variety of tiles, the following can be distinguished:
- Clinker room. It has a high level of density and has a wide variety of geometric shapes in which it is produced.
- Porcelain stoneware. It has become quite popular in recent years. The shape in which it can often be seen is a square or rectangle. It is quite large in size, making it not only profitable to use, but also convenient, since installation is simple and does not take much time.
- Polymer sand. The main purpose of this type of material is decoration. Thanks to this type of tile material, a wide variety of design ideas can be realized.
There are also less popular types, such as:
- ceramic;
- basement;
- under a stone;
- under brick;
- basement
Tips for choosing the type of clinker tiles for facades
Color range of domestically produced tiles
Variety of clinker facade tiles
Clinker tiles (corner element)
Before buying a tile, you should decide on its characteristics. What to look for?
| Options | Tips for choosing |
| Price | The price of clinker tiles can reach 4000 rubles/m2. and more. Do not buy too cheap material, it is better to focus on the middle range. For luxury buildings, purchase the most expensive products. Unfortunately, the price does not always correspond to the quality; on the building materials market you can find products with a high cost, but also of unsatisfactory quality. |
| Manufacturer | The best option is imported manufacturers. Domestic companies, unfortunately, do not always meet quality requirements. Buy products only from brands that have been tested by time and have numerous consumers. |
| Front surface texture | The more complex the texture, the better the facade looks. But you need to keep in mind that clinker tiles with such a texture require highly qualified craftsmen and additional costs for maintaining the facade of the building. |
| Color | Universal advice - the color should be in harmony with the overall appearance of the building. This applies not only to design, but also to the architectural features of the building. There is little personal experience - consult with experienced architects or designers. |
Select adhesive and grout at the same time as tiles. The glue must be frost-resistant and withstand at least 50 freeze/thaw cycles. Clinker tiles are a very expensive material; you should not allow unpleasant situations due to poor-quality glue, which subsequently cause the need for repairs.
Dry building mixtures, grout and Quick-mix glue
Special grouting for clinker tiles
As for the grout. All of them must compensate for the thermal expansion of the tiles. Clinker is very fragile; with increasing loads, it can crack. There are no universal recommendations for color; the grout in each specific case should emphasize the beauty of the finish.
Grout Kiilto Saumalaasti
Joint filler for clinker tiles
Prices for construction grout Ceresit Super
Construction grout Ceresit Super
Finish types
Despite the fact that all types of tiles for Fagot and Kiris facades on the market are manufactured using modern technologies and using only high-quality components, different products have different technical characteristics.
Fiber cement finishing
Fiber cement facade tiles of the Fagot brand are currently very popular among owners of private houses. The production of such finishing materials of the Fagot brand is carried out using lightweight concrete, the surface of which is treated with synthetic fiber.
Among the most important features of such finishing, it is customary to highlight the fact that laying facade tiles allows you to imitate the surfaces of natural materials, in particular, wood, rock and brick. Thanks to the wide variety of colors and textures, using such facade tiles you can implement design projects of any complexity.
Bassoon fiber cement products, in addition to excellent visual characteristics, are also distinguished by attractive technical parameters and retain their original appearance in any conditions.
Main advantages
Fiber cement concrete facade tiles have the following advantages:
- resistance to any negative environmental influences;
- resistance to mechanical damage;
- additional thermal insulation parameters;
- long service life;
- installation of facade tiles can be done by yourself;
- fiber cement products are characterized by increased resistance to fire;
- ensuring sound insulation at the facility;
- attractive decorative features.
Currently, fiber cement boards are used for both exterior and interior decoration of various houses and structures with their own hands. Thanks to all these features, today such decorative products are considered extremely attractive for attaching hinged ventilated facades.
Basalt products
Basalt decorative cladding materials Kiris for brick and wood are made from basalt rocks.
This finishing coating can differ in various visual features, imitate the surface of rock and stone, provides reliable protection against fires on site and improves the thermal insulation characteristics of any home. Due to the environmental friendliness of the Kiris finish, it is considered the most suitable for cladding any buildings.
Key Features
Basalt facade slabs have the following set of positive qualities:
- fire resistance;
- long service life;
- maintaining technical characteristics under any operating conditions;
- soundproofing;
- resistance to moisture and various chemical influences;
- such facade tiles can withstand even the most severe seasonal temperature changes;
- the opportunity to install facade tiles yourself.
Asbestos-cement
Asbestos-cement facade slabs are a type of cement facing materials, during the production of which stone chips of various colors and sizes are added to the prepared mixture. It is the stone chips that provide the decorative parameters of this type of cladding.
The basis of the asbestos-cement Rostov mini-slab is a fibrous, reinforced asbestos sheet. This is a completely environmentally friendly material that can be used in new construction and reconstruction of old buildings.
Advantages
Asbestos-cement facade tiles have excellent technical parameters; among its main advantages it is customary to highlight:
- the ability to carry out installation yourself in any weather conditions;
- affordable cost of this type of asbestos-cement tiles for facades;
- durability;
- fire resistance;
- variety of colors;
- imitation of natural stone and rock.
Polymer sand
A modern polymer sand panel or facade tile is a high-quality mini-slab that can imitate the surface of natural wood, brick, and rock. Due to the ease of fastening, polymer-sand finishing or facade tiles can be installed on the facade of any house with your own hands - by the owner of the building.
Among other things, polymer-sand finishing or facade tiles have excellent thermal insulation parameters, thanks to which mineral wool insulation does not need to be used when cladding.
Polymer sand products - facade tiles are perfect for owners of country and country houses.
Foam brick: 1st method
- Styrofoam,
- knife,
- soldering iron,
- glue for ceiling tiles or PVA,
- primer,
- dye,
- acrylic lacquer,
- brush.
To begin with, the foam must be cut into rectangles resembling a brick in shape.
To create a “brick-like” imitation, the best choice is not ordinary foam plastic, but a fine-grained polyurethane type. Its structure resembles transparent plastic bags. This foam plastic has a number of advantages, which include its heat resistance, as well as the fact that it does not crumble and does not emit harmful substances in any form, heated or supercooled.
First, the foam is cut into rectangles with the size required for a given interior, for example 200x60 mm. After this, the prepared bricks are glued to the wall using ceiling tile adhesive. In this case, you need to follow the masonry pattern of real bricks and leave gaps of 10 to 15 mm. Having finished gluing, using a soldering iron or a sharp object, cracks, potholes and grooves are made on a smooth surface, imitating structures like real brick. You can use plywood for work, which will serve as a base. To do this, foam bricks prepared to size are glued onto it; do not forget to leave gaps. Then the structure of a real brick is also imitated with a soldering iron.
Materials for decorating
Technologies and the modern construction market offer a huge variety of materials for creating an attractive, durable and durable facade of buildings for various purposes. Thanks to such materials, it is possible to create various types of facades. All materials for decorating the facade of a house are divided into several large groups.
Polymer concrete
A fairly popular material, it consists of resin, crushed stone and quartz sand. Its main advantage is that the material is very similar in appearance to natural stone. The finished elements are light in weight and quite easy to install. Working with a specialist, you can develop a wide variety of decorative designs of any format, shape, and size. Very often used to create railings and columns.
Polymer concrete is a durable and lightweight material for facade decorationSource penoprofil.ru
Styrofoam
One of the most common materials. It is chosen due to its special characteristics:
- high strength and low weight;
- easy installation anywhere;
- resistance to temperature changes;
- invisible seams at the joints;
- low price and easy delivery.
This material is mainly used for several types of decorative elements - arches, archivolts, balustrades, cornices, columns, capitals, pilasters, sandriks and so on.
Foam plastic is a very light and stable material at an affordable price. Source remotn.ru
Polyurethane foam
The decor of the facade with polyurethane foam elements is chosen due to the fact that the material is very light and durable, it easily tolerates temperature changes, is securely attached to the walls, has no deformation, and its special characteristics allow you to create absolutely any patterns.
Polyurethane foam is a lightweight, durable and durable material for facadesSource soart-m.ru
Glass fiber reinforced concrete
This is one of the types of high-strength stone that is made from artificial fibers. This is one of the strongest and most durable materials for decorating building facades. The elements are made in the form of shells, the thickness of which reaches 2.5 cm. It is these shells that are attached to the surfaces. Glass fiber reinforced concrete is chosen due to its resistance to cracking, strength, resistance to the negative effects of moisture, temperature changes, ease of installation and lightness. But this material has a rather high price, it weighs more than its analogues, and in addition, fastening requires the development of precise installation drawings and the use of a special installation system.
Glass fiber reinforced concrete is an imitation of natural stone, but many times lighter. Source hi.decorexpro.com
Advice from the experts
Clinker tiles absorb no more than 4% moisture. Such properties put forward special requirements for the consistency of the glue - it should not be liquid. Ceramic tiles absorb a lot of moisture; liquid adhesive is not a problem for them. At the same time, the glue should not be very thick. Why? Firstly, its adhesion to both load-bearing surfaces and tiles is significantly reduced. Secondly, the mixture hardens quickly, making the installation process much more complicated.
The consistency of the glue is extremely important
Any adhesive that gets onto the tile surface must be removed immediately. Pay special attention to clinker with an uneven front surface. Don't wait for the glue to dry. The fact is that high-quality glue is difficult to clean later; it adheres very firmly to the texture. Use a clean, damp sponge or cloth for cleaning.
The production technology allows for slight differences in color shades in one batch of clinker tiles. To avoid the appearance of large areas with different colors on the façade, periodically take tiles from several packages. The facade will look beautiful, and some difference in shades will serve as an additional decoration. When purchasing, pay attention to the batch number, it is indicated on the packaging. If you need to purchase additional tiles in a few months, then there is a high probability that this batch will no longer be available for sale.
It is not recommended to lay clinker tiles in very hot and windy weather. If it is not possible to wait for suitable conditions, then you can lightly spray the surface of the clinker tiles on the back side with water. This will improve adhesion and fixation reliability will increase.
Combination of clinker tiles and facade decor
Facade clinker tiles
Finishing the facade with plaster and clinker tiles