A handmade craft is filled with the incredible positive energy of the master, his mood and good thoughts. This means that a home refrigerator magnet, made with your own hands, will become an emitter of warmth, kindness and positivity. They make it funny for a friend, for parents - with words of gratitude, for a loved one - with a declaration of love.
But not everyone knows how to make a refrigerator magnet with their own hands at home. It’s easy to make, the main thing is to have the desire and follow some rules.
How to make a magnet with your own hands
First, you need to come up with a theme and idea for the future magnet. Next, decide on the choice of magnet holder:
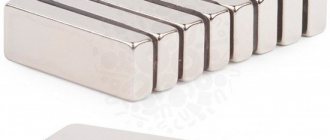
- ferrite - a hard magnet, round or square, will last 10 years, suitable for products made of light materials;
- vinyl – soft, produced in the form of a flexible plate on which a thin layer of glue is applied; used for small weight crafts;
- neodymium - withstands loads, does not lose its properties for decades, suitable for crafts with filling.
In order for the product to hold well, the adhesion force of the magnet must be 2-2.5 times the weight of the souvenir. It is not necessary to buy a magnet; you can use an old one.
Required tools:
- brushes for glue and paints;
- glue intended for gluing plastic and wood;
- scissors.
Additionally, you may need a glue gun, a knife, and a measuring tape. If you need to sew parts onto a craft, you will need a needle and thread.
Armed with the necessary tools, they get to work. Then everything depends only on the imagination of the master: you can make an exclusive thing from any available material. You can work in any direction, knowing the basics of making crafts.
Advice! Crafts made in the same style look better.
Master class 5. Magnets from clothespins
Let's reveal a little life hack - magnets made from clothespins can not only store lists and bills, but also clamp bags of food as shown in the photo below. It turns out to be very convenient - I took the clothespin off the refrigerator and immediately fixed the opened bag with it.
Wooden clothespins can also hold a piece of paper on the refrigerator door and at the same time clamp something between the teeth.
Clothespins can be painted, decorated with glitter, covered with colored tape or appliques, or decorated using decoupage technique, following the following simple instructions.
Materials and tools:
- Wooden or bamboo clothespins (you can take regular or decorative ones for scrapbooking);
- Scissors;
- Double-layer napkin with a pattern;
- One glue brush and one varnish brush;
- PVA glue;
- Glue "Moment" or its equivalent;
- Matte acrylic varnish;
- Small magnets.
Instructions:
- Separate the patterned layer from the napkin, then cut out a strip of it slightly larger than the end of a clothespin.
- Glue the cut strip onto one end of the clothespin using PVA glue, then use a brush to carefully spread the glue over the napkin. Leave the craft to dry.
- Trim the excess napkin with scissors.
- Coat the clothespin with varnish and wait about 2 hours for it to dry.
- Glue a magnet to the other end of the clothespin. Voila! The craft is ready!
"Live" magnet made from cork
Make a hole in the wine cork with a knife, being careful not to damage the walls. A magnet is glued to the cork.
When the glue has dried, dry soil is poured into the hole and a small shoot of the plant or its seed is planted and watered.
Hang the magnet on the refrigerator on the sunny side. When there is not enough space for the plant, transplant it into a pot, and a new seedling is planted in its place.
Advice! Lately, growing microgreens has become fashionable. It is convenient to germinate wheat, lentils and barley in a cork.
Master class 4. Magnets from plastic mini-toys
The most stylish magnets can be easily made from plastic toys, namely animal figurines.
Materials and tools:
- Scissors or sharp knife;
- Thermal glue in a gun;
- Paint and brush if necessary;
- Small magnets;
- Plastic animal figurines.
Instructions:
- Cut the toy in half or lengthwise.
- Pour hot glue into the inside of the resulting workpiece to the very edges and leave to dry.
- When the glue has hardened, start painting the craft (including the “filling”) in 1-3 layers. At the end it can be additionally varnished.
- Now just glue the magnet to the figure and enjoy the result!
Flower bouquet
In a craft store they buy flowers, leaves, curly branches and make a composition:
- Option 1. A frame for a future basket is cut out of a small calendar. Corrugated cardboard is glued onto it and painted with acrylic paint. A bouquet is created on the basket by attaching decorations. Foamiran is glued to the back side, and magnetic vinyl is placed on it.
- Option 2. Instead of a basket, a tree trunk is cut out of cardboard, painted with acrylic paint and varnished. The crown of the tree is decorated with flowers and leaves. When the glue dries, glue a strip of magnet onto the craft. If the bouquet turns out to be heavy, use a ferrite or neodymium magnet.
Flowers are also made independently. Using stamps, cut out petals and leaves from polymer clay or salt dough. After drying, the dough products are painted and varnished. Polymer clay is selected according to the desired color.
Master Class. 1. Hook magnets made from branches
You can hang keys, towels, ladles and other things on these branch hooks.
Materials and tools:
- A dry small but strong branch with a branch;
- Hand saw or jigsaw;
- Small neodymium magnets;
- Glue;
- Drill and drill bit equal to the diameter of the magnets;
- Acrylic paint (optional).
Instructions:
- Using a saw, cut the branch so that it looks like a hook. Then cut the branch lengthwise so that the back side is flat as shown in the photo below on the left.
- In this flat back of the branch, drill a recessed hole the size of your magnet.
- Glue the magnet into the resulting cell.
- If desired, paint the craft and cover it with matte varnish. Ready!
Magnets from caps and discs
CDs that are no longer needed will find a second life as decoration. A picture with a still life is glued to the surface of the disk, and a vinyl magnet is glued to the back side. You can paint the disc yourself. To do this, clean the surface with sandpaper, paint and draw.
Tin lids and crown caps are excellent materials for decoration. A photograph, landscape, words are inserted inside the lid. A magnet is glued to the back side, and the lid is varnished or painted.
If you glue the lid with the convex part up, first drawing cute faces on the surface, they will amuse others with their cool appearance.
Main points
- Permanent magnets are made from magnetized material and produce stable magnetic fields.
- Magnetized materials, as well as those that attract, are called ferromagnetic.
- In contrast to them, there is an electromagnet, which is magnetized only when an electric current passes through it.
- Magnets always have a north and south pole. If you break it into two parts, then both again have two poles.
- Permanent magnets are made of ferromagnetic materials, which are subject to pressure from a magnetic field and heat. This makes them difficult to demagnetize.
Magnetic bags
A nice bag is made from thick fabric, filled with filling for volume, and tied with a ribbon. There is no need to glue the magnet to the bag; it is placed inside. The outer side is decorated with applique, beads, or a coin is glued on. This refrigerator magnet can be used as a talisman or to attract wealth.
Master class 3. Magnets from tin caps (crown caps)
The idea of recycling soda or beer bottle caps as refrigerator magnets will appeal not only to environmentalists, but also to decorators. After all, they cost nothing at all, but provide a lot of opportunities for decoration.
So, for example, you can paste family photos or just nice paper (card scraps, magazine clippings, etc.) inside the lids.
Homemade photo frame magnets
You can paint the lids, fill the insides with hot glue or cork, and then glue magnets to them.
Sometimes bottle caps don’t need to be decorated at all.
Instead of beer caps, you can use larger caps, such as Nutella jars or baby food caps, to make refrigerator magnets.
Materials and tools:
- Scissors, or better yet, a hole punch for scrapbooking for cutting out circles with a diameter of 2.5 cm (sold in craft stores and costs 200-300 rubles);
- Epoxy resin, a container for preparing the solution and a stirring stick;
- PVA glue, as well as superglue;
- Small magnets;
- Photos that are suitable in size or any other pictures, for example, from a magazine;
- Beer caps (it's best to use bottles with screw caps rather than pop caps).
Instructions:
- Using a hole punch or scissors, cut round fragments with a diameter of 2.5 cm from the photographs. Of course, if you use scissors, you must first make a marking using one of the caps (or a plastic cap from a plastic bottle) as a template.
- Glue the pictures to the inside of each lid using PVA glue (the glue must be applied on top of the picture as well). Let the glue dry completely (!).
- Following the manufacturer's instructions, prepare the epoxy resin in the quantity you need. To find out exactly how much resin you will need, pour water into one of the lids, then multiply the resulting volume by the number of lids. Line your work surface to protect it from spills, then fill each lid to the brim. Let the crafts dry overnight.
- Glue magnets to the blanks. Ready!
See also: Crafts from bottle caps for adults and children
"Coffee" magnets
There are countless ideas for creating a magnet from coffee beans and it’s easy to make. The basis is fabric, paper, wood or polymer. Cut out the desired part and glue coffee beans onto it.
As an option, they make an animal figurine, a heart model, or a photo frame.
Master class on creating the simplest “coffee” magnet:
- A heart template is cut out of cardboard. If made from plain paper, several layers are glued together.
- Glue the magnet in the center of the figure.
- Wrap the heart in fabric, gluing its edges.
- The product is tightly covered with coffee beans and covered with a layer of varnish.
The original “coffee” magnet is decorated with a bow and a beautiful souvenir is ready. For a friend who can't imagine a morning without a cup of coffee, this would be a great gift.
Master class 2. Magnetic storage jars
If you have some cute tin or glass jars, put them to good use by turning your refrigerator door or magnetic board into an organizer.
Glass baby food jars are great for storing spices on the refrigerator or hood.
Next, we present a lesson on how to make magnetic jars for storing small items with your own hands, as in the photo below.
Materials and tools:
- Small aluminum cans (cans like those in our master class can be ordered on Aliexpress for 300 rubles/10 pcs.). You can replace tin cans with glass jars or small plastic containers;
- Paint of the desired color (it is more convenient to use spray paint) and matte varnish (not necessary, but desirable to protect the coating);
- Neodymium plate magnets (especially if you want to use large jars and store heavy items in them) or 0.6mm thick magnetic vinyl self-adhesive sheets;
- Superglue “Moment” (needed if you use neodymium magnets).
Instructions:
Make sure the prepared jars are clean and dry. Paint them, as well as their lids, in 2-3 layers, allowing each layer to dry thoroughly. Next, coat the jars with varnish, if any.
If you are using jars with a glass insert on the lid, you will need to remove it or seal it with masking tape before painting.
Cut circles from a magnetic sheet; their diameter should be slightly smaller than the diameter of the cans. If you use neodymium magnets, then glue them with superglue.
Glue the cut out circles to the bottom of the jar, removing the protective backing.
If desired, the lids of the jars can be further decorated. For example, as shown in the photo below.
Wooden magnets
After your baby enjoys the ice cream, there is no need to throw away the stick. Once you have a few of them together, you can make a nice little house.
Sequence of making a house:
- Cut out the desired piece of cardboard. It is better to take cardboard, which is used in scrapbooking. If this is not the case, take regular cardboard, cover it with colored paper and paint it with paints.
- The roof, body and pipe are cut out separately.
- Cut out a window of any shape.
- Glue all parts of the house onto a paper base and paint it several times.
- A fence is constructed from wooden sticks and glued to the body of the house.
Finally, decorate the façade of the house to your liking and glue a magnet to the back side.
You can make a simpler wooden magnet. An image of any silhouette is applied to a piece of wood of any shape through a stencil. A black lacquered silhouette will look interesting against a light wood background.
Required materials and tools
To make a search magnet, you must first prepare the following tools:
- inverter device;
- Bulgarian;
- sledgehammer or hammer;
- pliers, wire cutters and other devices for bending and fastening.
You will also need the following materials:
- pipe;
- metal rod;
- epoxy adhesive;
- magnet.
It is also recommended to prepare a protective mask when working with a welding machine.
The most important part of a homemade search device is the magnet itself. In order for the finished device to be as powerful as possible and can be used to search for various objects at a sufficient depth, it is necessary to take a neodymium magnet with N42 magnetization. It can be obtained from old hard drives, hard drives, subwoofers, speakers and other equipment.
If there is no N42 neodymium magnet, you can take any other neodymium device. But it should be taken into account that the higher its adhesion to metal, the more things you can get from the bottom of the reservoir. The best lifting power is considered to be over 200 kg.
How to make cool refrigerator magnets with your own hands
When creating cool magnets, the main condition is observed - they must be positive, amuse others and lift their spirits.
In a craft store they buy a small figurine, insert a funny inscription into its hands, attach it to a magnet and hang it on the refrigerator. You can sew the figurine yourself by cutting out the parts and filling them with cotton wool. It is not necessary to adhere to anatomical proportions; the funnier it is, the better.
This set of grannies will bring a smile to everyone who sees them. Each figure is given a facial expression according to their imagination. They are made from salt dough, painted and varnished. A “flock” of grannies is glued onto a flat surface, and a magnet is attached to the back. They can be hung in any order, then a magnet is attached to each grandmother.
Method six: oh, this is amazing Lego
To make a bright, colorful and functional souvenir, select your favorite parts from the construction set, prepare the required number of magnets and a hot glue gun.
The creation process is simple: you need to glue the part to a magnet. However, it is worth considering 2 important factors:
- DO NOT use magnetic tape. She is weak to hold the cube. Such a magnet will not last long.
- Hot melt glue can be replaced with super glue.
Legal and accounting assistance for your businessThe magic of photographs.
- Unusual and successful table setting using a table setting
It should be said that this product must dry for at least 24 hours. Such a bright magnet can be used not only by adults, but also by children.
Magnetic board for refrigerator
Some people not only want, but don’t even know what it is – a magnetic board. Moreover, they don’t know how to make a magnetic board for the refrigerator with their own hands.
A magnetic board on a refrigerator is a stylish fashion accessory that will not only complement the interior, but also has practical value. They write messages to each other, reminders, wishes on it. It becomes an indispensable element in the house, since family members communicate through it without being able to be together often. This board is also suitable as a gift.
It’s easy to do and the work won’t take much time. You can choose any template for the board - from a classic rectangle to the most bizarre patterns.
For production you will need:
- a large sheet of thick paper (whatman paper will do);
- vinyl-based magnet (it is sold by the meter in printing houses or advertising companies);
- transparent plastic (sold in the same place as the magnet).
Draw and cut out the desired template on a sheet of Whatman paper and paste it onto a vinyl magnet. If a human or animal figure is cut out, draw eyes, nose, and mouth with a marker. If necessary, paint in the desired color. Plastic is glued onto the paper; it is better to do this with tape along the edges of the figure.
That's the whole simple process. The finished board is hung on the refrigerator, written on it with markers, and erased with a regular flannel cloth. To erase records, a special sponge is sold that is attached to a magnet.
You can also make a world map board and hang all the magnets you purchase on your travels on it.
Making decorative magnets has many advantages:
- there is where to use your “golden” hands;
- joint creativity brings the family closer together;
- allows you to make changes to the interior at any time, you can do it every day.
The main thing is that the process is exciting, there is freedom for imagination and you can feel like a real designer.
DIY FRIDGE MAGNETS | PHOTOMAGNETS
Watch this video on YouTube
Magnet basket/DIY gift/March 8/Basket Magnet/DIY
Watch this video on YouTube
Do you want to understand better than others?
- Do-it-yourself magnets: how to decorate a household refrigerator - Refrigerator magnets are one of the most common ways to diversify the appearance and add personality to kitchen appliances. The souvenir shops offer a large…
- Is it possible to hang magnets on a household refrigerator? Many people, when traveling to other cities, buy magnets with images of various attractions or their photographs. Such souvenirs became widespread due to...
- How to keep lemons fresh at home - Thanks to the piquant taste of lemon and the presence of many beneficial micronutrients in its composition, it is a common ingredient in various dishes and drinks. Many even grow...
- How to prepare beets for the winter at home - Freezing is perhaps the most rewarding way to prepare vegetables for the winter. Firstly, it is very simple and quick (as opposed to conservation, which involves standing at the stove for a long time)….
- 13 unusual but effective ways to remove stickers from a refrigerator - Removing stickers from a new refrigerator is not as easy as it seems at first glance. Sometimes it takes a lot of effort to get rid of glue. We will share with you...
How to decorate a refrigerator to match your interior style
When choosing refrigerator magnets, you need to take into account the design of the kitchen:
- Classical. Strict shades, expensive fabrics, wood, precious metals or their analogues are suitable. It is better to choose colors that are as close as possible to the kitchen set. This design does not need bright accents.
- Shabby chic. Small details in light colors will fit perfectly into the interior. Most often, flower arrangements in beige or pinkish colors are chosen as magnets.
- Indian. Beads, bright colors, and gold are perfect for decorating a refrigerator.
- Country. It is better to give preference to magnets made of wood or burlap. Decorations with a burnt pattern or mini-plants in cork pots will fit well.
- Archaic. Magnets made of clay, painted or gold plated are suitable.
- Art decor. Bright accents and geometric shapes will fit perfectly into the kitchen interior.
- High tech. Metal, glass or plastic parts with patterns will be a wonderful addition to the kitchen.
- Eco-styles. Figurines with the addition of gifts of nature, flower arrangements, clay products, wood.
- Minimalism. Simple magnets with a laconic design, no bright accents or pretentiousness.
- Provence. Preference should be given to small floral combinations, bleached flowers and lavender.
A universal option for all designs is photographs on a vinyl magnet or a homemade frame. You just need to purchase a base with a magnet and print your favorite photo.
