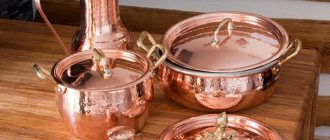
Copper utensils appeared a long time ago, around the 15th century. This is one of the first metals found. It is durable, but at the same time flexible. Utensils made from it have increased thermal conductivity, which is why professional chefs love them. Food cooks faster in it.
Copper cookware has non-stick properties. You can cook any dishes in it, including complex ones. Metal is hygienic and prevents the appearance of bacteria. In ancient times, people used copper jugs to disinfect water. Jam was cooked in tinned basins. During the war, soldiers drank (to prevent illness) from copper mugs.
How to clean brass at home
You love brass for its uniqueness and beautiful shine. You have a lot of jewelry, figurines and various small things made of this copper-zinc alloy. But then you notice with disappointment that your favorite brass things have become stained and darkened. How to clean them at home? And it's very simple. Cleaning brass won’t cost you much and won’t take much time. Do this.
How to clean severe darkening
Oxalic acid
You can use it to clean the most “burnt” stains. Remember: sorrel is a biting substance, so be sure to use gloves. A respirator is also highly desirable.
- Dilute in regular tap water. Per liter of h3O you take no more than 25 grams of oxalic acid. It is best to dilute in a plastic barrel.
- You soak a soft sponge in the resulting solution and thoroughly treat your brass figurines and rings with it.
- After 15-20 minutes, wash off the solution.
- Wash cleaned brass items thoroughly with soap and warm water.
- At the end you dry them thoroughly.
Acidic special agents
“Metalin”, “Delu” and some other products do an excellent job with heavy oxidation. All of them are acidic concentrates, so be extremely careful with them, don’t forget about a respirator and gloves.
- When cleaning, use a cloth.
- Follow the instructions.
- Finally, wash and dry the brass thoroughly.
Vinegar with salt
Here is another good product that helps remove oxide and soot from brass.
- Pour water into some container (a regular saucepan will do), add salt and vinegar. For one cup of vinegar, take one tablespoon of salt.
- Bring the resulting solution to a boil.
- Then you put your dull brass in it.
- You cook for a long time (3 hours, no less). Water, vinegar and salt will boil away, so add them little by little, but be sure to stick to the above proportions.
- Wash and dry well. The cleaning is over.
Acetone
Acetone is another powerful weapon in the war against brass tarnish.
- You soak a large piece of cotton wool, or better yet, a cotton swab, with acetone. Don't forget the gloves.
- You carefully treat everything dark on your pendants and candlesticks.
- Wash thoroughly under good running water. You use detergent.
- Wipe it dry with a cloth.
Sandpaper will clean the handle and fireplace grate well.
Vinegar dough
- Mix flour with vinegar and water. You take equal amounts of water and vinegar, and no more than one glass of flour.
- You apply the mixture to the brass and wait a little while for it to “stick” all the oxide to itself.
- Now you wipe the mixture with a wet cloth - the sour deposit will be wiped off along with it.
- And, of course, wash with water and wipe with something dry. Cleaning is complete.
How to remove “non-critical” tarnishing
Toothpaste
For “moderate” tarnish, toothpaste works well:
- First, wash the brass thoroughly in soapy water or a cleaning solution.
- Next, apply toothpaste to the brush and start brushing. Don’t be too zealous, do everything calmly, the dirt will start to “go away” quickly. If after 10 minutes there is no result, stop this and try more serious cleaning products.
- Finally, wash the brass items with running water and wipe thoroughly with a dry soft cloth.
Ketchup
Not just any ketchup is suitable for cleaning, but only one that contains a minimum of dyes and a maximum of “acidic” preservatives.
- Apply ketchup to a sponge and rub it over the oxidized brass objects.
- Do not touch for 20 minutes, and then remove with a cotton or terry cloth.
- Wash and wipe with a dry cloth.
Yogurt
Yogurt is another good brass cleaner. The more lactic acid it contains, the better the result will be.
- You pour yogurt into a saucepan and put tarnished figurines and earrings in it.
- You don't take it out for about an hour.
- Then wash the brass products with water and wipe with a soft cloth.
Detergent with oxalic acid
Oxalic acid is often found in detergents. It will thoroughly clean brass surfaces that are beginning to oxidize.
- Apply the oxalate-containing product to the darkened areas.
- Leave it for a short time (half an hour is enough). Don't worry when you see that the dirty places have become even darker. That's the way it should be. It was simply an acid deposit that began to separate from the brass surface.
- Running water and a brush with soft bristles “dispels the darkness.”
- Now apply a little baking soda and use a wet cloth to go over the remaining dirt.
- Wash with water and dry thoroughly with some soft cloth.
Soap solution
Helps only with relatively mild stains.
- Pour lukewarm water into a basin and add some detergent or soap (preferably laundry soap).
- You foam the solution.
- You dip dull brass into it. Keep it there until the solution begins to cool (that is, a maximum of 10 minutes).
- You take out your figurines and ring. You start cleaning them with a soft bristle brush. At the same time, wash with lukewarm water.
- Wipe with a soft cloth.
Important: After cleaning, always polish brass using special polishes. If you don't do this, it will be difficult to achieve the desired shine.
Polished brass reflects the world like a mirror.
Lime and soda
Lime in the company of soda does a good job of brass oxidation:
- Add 60 g of regular soda to 50 ml of water.
- Apply the resulting mixture onto the brass with a sponge. Don't touch for 20 minutes.
- Now cut the lime fruit in half.
- Treat your brass items with the pulp of this citrus fruit. Then do not touch for 40 minutes.
- Wash with water and wipe.
If you don't get the desired result, repeat the process again. The second try will almost certainly clear it.
Replacing varnish
If neither “tin” nor light means help, you will have to change the varnish. But don't be scared. There is nothing complicated about replacing this, it’s easy to do it at home:
- Lay out a waterproof film so that the removed varnish does not stain the floor. Put on a dressing gown or overalls.
- Take a special liquid intended for removing varnish, soak a brush in it and start moving it over the varnish. This is how you remove the varnish. Be sure to use a respirator and gloves, and do not light matches - nail polish remover is usually highly flammable.
- Now the brass needs to be polished. Use special products for this - polishes.
- Rub the polish into your jewelry and figurines, then polish until they begin to shine.
- Now is the time to start applying new polish. Distribute it over the brass surface in an even thin layer. It's best to do this with a brush. But if you’re not much of an artist, use cotton balls.
- Now wait until the varnish dries thoroughly.
- Wipe down your brass items with some soft, dry cloth.
If there is no polish on your brass, and nothing can be done to clean the alloy, then there is only one way out - contact a specialist.
And finally, a video “on topic”:
More on the topic:
damiko.ru
Video
We recommend watching videos that show the best methods for cleaning brass products:
Graduated from the economics department of the Aviation University. Married, has a daughter. Loves to play musical instruments and spend time in pleasant communication. She always strives to learn something interesting and master a new craft. Loves to cook for the whole family. Life motto: “Never give up!”
Found a mistake? Select the text with the mouse and click:
Stretch ceilings made of PVC film can withstand from 70 to 120 liters of water per 1 m2 of their area (depending on the size of the ceiling, the degree of its tension and the quality of the film). So you don’t have to worry about leaks from neighbors above.
Fresh lemon is not only suitable for tea: clean dirt from the surface of an acrylic bath by rubbing with half a cut citrus, or quickly wash the microwave by placing a container of water and lemon slices in it for 8-10 minutes at maximum power. The softened dirt can simply be wiped off with a sponge.
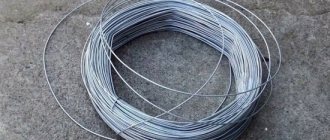
Threads made of gold and silver, which were used to embroider clothes in the old days, are called gimp. To obtain them, the metal wire was pulled for a long time with pliers to the required fineness. This is where the expression “to drag out the rigmarole” came from - “to do long, monotonous work” or “to delay the completion of a task.”
Before removing various stains from clothing, you need to find out how safe the selected solvent is for the fabric itself. It is applied in a small amount to an inconspicuous area of the item from the inside out for 5-10 minutes. If the material retains its structure and color, you can move on to stains.
The habit of using an automatic washing machine “sparingly” can lead to the appearance of an unpleasant odor in it. Washing at temperatures below 60℃ and short rinses allow fungi and bacteria from dirty clothes to remain on internal surfaces and actively multiply.
If your favorite things show the first signs of gestation in the form of untidy pellets, you can get rid of them using a special machine - a shaver. It quickly and effectively shaves off clumps of fabric fibers and returns things to their proper appearance.
The dishwasher cleans more than just plates and cups. You can load it with plastic toys, glass lamp shades and even dirty vegetables, such as potatoes, but only without using detergents.
The easiest way to remove scale and carbon deposits from the soleplate of the iron is with table salt. Pour a thick layer of salt onto the paper, heat the iron to maximum and run the iron over the salt bed several times, applying light pressure.
There are special traps to combat moths. The sticky layer with which they are covered contains female pheromones that attract males. By sticking to the trap, they are eliminated from the reproduction process, which leads to a decrease in the moth population.
Source
Cleaning brass to a shine at home
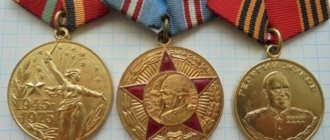
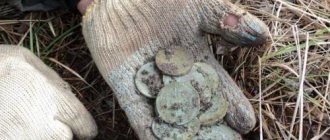
Many people probably have brass items in their home that require periodic cleaning. These are dishes, including old samovars, jewelry, interior items, figurines, coins, icons and other products. Not all housewives know how to clean brass at home. This process requires the right approach so as not to harm the metal. Antique items that have survived many generations require special care.
Oxidation and greens are removed quickly and easily using special modern means, as well as simple methods used at home. These techniques are completely safe and do not require special knowledge. With their help, you can effectively remove oxide and add shine to any thing. Before cleaning brass at home, you need to make sure that the item is actually made from this alloy. This is checked by applying a regular magnet to the surface. Brass should not attract it, but if on the contrary, the product has a steel base.
The most effective ways
Before you begin cleaning a brass item, you should examine it carefully. It can be made entirely of brass or alloy, or have a lacquered finish. Depending on this, the appropriate cleaning method is selected. It is not recommended to clean rare items, as this removes many years of patina, which gives special beauty and value to the historical item.
Before cleaning brass at home, the item must be thoroughly washed. This is carried out in a solution consisting of 10 liters of ordinary water with a mild detergent dissolved in it (1 tsp). The item is placed in a container with this liquid for 30 minutes, after which it is thoroughly washed with a soft brush or rag. This removes existing dirt, blackness, and green deposits. After each procedure, the item is wiped dry. Next, they move on to the main stage of cleaning the brass object using one of the methods that can be found in the video.
Oxalic acid
This acid is practically never used in its pure form. It is found in many detergents for cleaning bathtubs, tiles, and washbasins. The liquid preparation is applied to the item for a while until the product becomes dark in color. After this, the product is treated with a brush with the dissolved oxide and covered with baking soda. At the end of the procedure, the item is washed under regular running water.
Brass items that have not been cleaned for a long period have a thick layer of oxide. The use of products with a small amount of oxalic acid is ineffective in this case. These products are processed using a different method. Effectively cleaning brass at home when it is heavily oxidized requires preparing a concentrated solution. It consists of 200 g of acid, as well as 10 liters of ordinary water.
As a result of a chemical reaction on an object placed in a liquid, the surface should darken. After this, it is kept under running water and wiped dry. Please note that oxalic acid is a caustic solution, which requires the use of a respirator and protective gloves.
Acetone
Using acetone allows you to thoroughly clean the outside of a brass item from oxides. Under its influence, the outer surface will begin to shine and take on a beautiful appearance. A small cotton swab is moistened with a solvent, after which the product is wiped. It is necessary to clean the surface until the plaque is completely removed. If there is no visible result, pre-soaking is carried out. To do this, use an aqueous solution with vinegar and salt, which is brought to a boil. To increase the processing efficiency, brass items should be boiled for 3-4 hours. Darkening of the surface of the product is normal, which will gradually disappear during the soaking process.
Before cleaning contaminated brass with acetone, you need to know that it is not suitable for treating things that have a lacquered layer. The varnish may completely dissolve, which will require subsequent restoration of the coating.
Toothpaste
You can clean a brass product using your usual toothpaste. The item to be cleaned is washed in a soapy solution to remove and soften massive dirt. After this, a small layer of toothpaste is applied to problem areas. Use a regular napkin to clean the surface. The toothbrush is used exclusively for working in hard-to-reach areas.
Acetic and citric acid
To remove old stains on a brass surface, create a mixture of water, one glass of flour, and table vinegar. It covers the outer surface of the object and waits until the solution dries completely. After this, the mixture is removed from the product and polishing is carried out. You can use hot vinegar yourself. To do this, it is heated on a home stove and applied with a cotton swab to the area to be cleaned. The heaviest areas require multiple treatments.
Removal of oxides and stains is also done with citric acid. Juice is squeezed out of one lemon, salt is added to it until a paste-like mass is obtained. It is applied to the product, gently rubbed, and then washed off with ordinary running water. Don't forget to wipe the shiny brass thing dry.
Sandpaper
Heavily smoked brass products are cleaned with fine-grained soft sandpaper. In this case, the pressing force should be small to avoid damaging the surface of things. Hard-to-reach areas are additionally cleaned using a chemical method.
Soap solution
This solution is used to soak brass items. With mild oxidation, this procedure is quite sufficient to give the item the required appearance. Laundry soap (shavings) dissolves in a bowl of warm water and foams. Brass objects are placed in the liquid and left for several minutes until it cools. After this, the solution is drained and the items are cleaned with a soft bristle brush under running water.
Salt
You can add shine to brass items at home using regular table salt with a little lemon juice. In addition, use a mixture of 0.5 liters of buttermilk and 1 tbsp. l. salt. These methods allow you to remove even heavy dirt on the surface of objects and give them a good shine.
Another way is to use fine salt (1 tbsp) with skim cream. The paste is applied to the surface and wiped. For heavy areas, it is necessary to soak the mixture for one hour. At the end of the procedure, the item is washed with water and wiped. Before cleaning brass with salt, make sure it is completely dissolved so as not to damage the item being cleaned.
Specialized means
These drugs are sold in various stores and consist of a concentrated acid solution. These oxide converters are quite effective for items with problem areas. The cleaning procedure is carried out in full accordance with the instructions for the product. At the end of the process, the object must be rinsed to remove any remaining solution. These preparations do not allow the brass surface to oxidize for a very long period, and also maintain its good shine.
Cleaning Tips
Before cleaning brass at home, you need to familiarize yourself with the basic rules of the procedure. Products with lacquer or brass coating cannot be cleaned with aggressive preparations. To do this, wipe with a cloth or a cotton swab dipped in soft soapy water.
For severe oxides and contamination, cleaning agents that do not have abrasive inclusions are used. They can be purchased in specialized stores or prepared at home yourself. The effect of the drug is first tested on an inconspicuous area of the product. Soft brushes are used to remove plaque.
Compositions that are based on hydrochloric, citric or acetic acid give a quick effect, but if used incorrectly they can damage the brass surface. Do not forget about safety precautions when using acid preparations.
Removing varnish
Many brass products have a varnish coating. It prevents the surface from oxidizing and maintains the excellent shine of the object. If this layer is damaged, the metal oxidizes and a new varnish is required. Removal of varnish protection can be done under hot water jet. This is the most gentle method of removing nail polish.
In addition, boiling for 3 minutes in a container without aluminum alloy is used. You can purchase special varnish removers from hardware stores. Before cleaning brass with these preparations, carefully read the instructions for use. After the final removal of the varnish layer, the surface is cleaned using one of the selected methods.
Cleaning things made of brass at home is not particularly difficult if you understand the essence of the process and follow the technology correctly. With this approach, beautiful brass products will have a magnificent appearance and will constantly please the eye.
oxmetall.ru
What about special powder products?
In fact, if the jam is very burnt, store-bought powder products will not help you: without soaking or boiling down the soot, you will spend a lot of time and physical effort, and the result is still unlikely to please you.
But if you first softened the carbon deposits at least a little, then you can clean it with a special powder, a metal sponge, or ordinary salt or soda.
But think in advance about the integrity of the dishes.
- An enamel pan may not withstand exposure to abrasive particles well, and during cooking, harmful metals will get into the food through deep scratches. But this is precisely what enamel is designed to protect against!
- As the protective layer of aluminum cookware is damaged during further use, the metal will also penetrate into the food, although if you are using an old aluminum basin, then the protective coating on it is most likely no longer there. It all depends on the degree of your health concern.
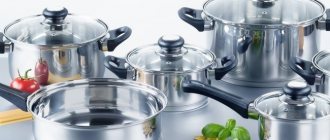
- Stainless steel pots and basins are quite resistant to such mechanical cleaning. The abrasive may only slightly damage the mirror shine, but otherwise it will only help you quickly clean the dishes.
Advice
If you made jam in a multicooker and did not calculate the mode, keep in mind that most of the containers of this technique have a non-stick coating, and under no circumstances try to clean the bowl with a metal sponge or, even worse, scrape off the carbon deposits with a knife. The jam will leave the bottom on its own if you fill the bowl with water, and the protective coating will not be damaged.
The best ways to clean brass products at home
Brass items can be found in any home, so it will be useful for everyone to know how to clean brass at home. At the same time, people simply remove figurines and souvenirs made from this material from prominent places as soon as the aesthetic properties are lost. However, each product, even if contaminants have become embedded in the material, is cleaned using specialized means.
The article provides some safe and simple ways to return brass products to their original appearance, how to clean brass coins, mechanical mods, or clean a brass samovar (the given methods are universal for products made from this material).
What is brass?
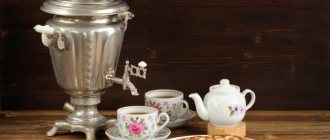
Samovar brass alloy has been valued by people since ancient times. One of the famous objects is still a brass samovar, which is presented in museums and some homes. This alloy consists of two metals: copper and zinc.
In color and appearance, such a product is close to bronze: it is resistant to the corrosion process, as well as to friction. Since the properties of brass and bronze are similar, identical cleaning products are used. But you still need to take into account some of the features of brass.
Often such products are coated on the outside with a layer of varnish - this serves as protection from contact with water and air. The fact is that the environment adversely affects the appearance of the product - the object darkens and becomes stained (this is due to oxide). A striking example is the same samovar.
Cleaning a brass samovar was a common thing for people in Ancient Rus'. Due to frequent contact with water, the samovar oxidized and lost its original shine. People began to invent ways to clean such a brass samovar.
Product testing and professional cleaning methods
Specialized household chemical stores offer a range of cleaning products for brass products. However, before you clean brass at home and apply this or that product to the product, you should determine the material from which the item is made. One way is to use a magnet.
To check the product, you need to bring a magnet to one of the sides of the product. If attraction does not occur, then this is a sure sign that the figurine or object is made of brass. If the magnet sticks to the item, this means that there are other components in the composition and the use of the following cleaning methods is undesirable, since it sometimes has a negative effect on the condition of the item.
After checking, feel free to use one of the existing cleaning methods: professional or folk.
In fact, there are many ways to clean brass, and all of them are safe and easy to use. At the same time, the use of strong chemicals is replaceable - enough household products that can be found on the shelf in every home. Effective and simple cleaning methods (according to researchers) are:
- Gel with oxalic acid - this product is suitable for combating minor stains on the surface of the product, which are still quite fresh. Most standard detergents contain oxalic acid. Gently apply this product to the brass item and leave for a while until the surface acquires a dark shade. Then move on to cleaning with a brush. After this, you need to sprinkle a little soda on the item, and then rinse off all the product under water (the product is suitable for cleaning mechanical mods and samovars).
- Pure oxalic acid - if the contamination is quite serious, then it is better to use oxalic acid in its pure form for the item. Dilute the acid with water in the ratio of 1 liter of water per 20 g of acid. After this, leave the brass object in the resulting solution for a short period of time - then you need to walk over it with a brush. It is important to use gloves and a respirator when doing this.
- Acetone - another product that almost every housewife has is acetone. To clean, soak a swab in an acetone solution and wipe all parts of the item. If contaminants remain, then the product is first dipped in a solution containing water, salt and vinegar (it is heated to a boil). It is worth noting that the item should be boiled in this solution - a period of 3 to 4 hours is allowed, adding water as necessary. If the product begins to acquire a dark color, then there is no need to panic - just wait and then rinse the souvenir or figurine under tap water. Perfect for cleaning coins and mechanical mods.
- Acid concentrates - these products are sold in almost all household chemical stores. To clean, just apply it to a napkin (preferably fabric), and then wipe the brass object.
Folk remedies for combating stains on brass
Many people are wary of using strong chemicals to clean products. That is why people have come up with cleaning products that are absolutely harmless to humans and do not require the use of special safety measures.
- Toothpastes - this hygiene item can easily be found in every home. To clean a brass item, first soak it in soap and water to soften the stains and remove the lightest stains. After this, apply toothpaste to the remaining stained part, and use a toothbrush for more thorough cleaning (especially if there are hard-to-reach places). Also, sometimes a simple napkin is used to avoid damaging the product.
- Vinegar – also use the following solution for cleaning: 1 glass of flour, 1 glass of water and table vinegar. After this, the resulting mixture is applied to the contaminated areas of the product, and then wait some time until it dries completely. The solution acts in such a way that the flour gradually absorbs the main dirt, and the vinegar dissolves the deposits. Then you need to go over the product with a cloth. If after the first time all the contaminants are not gone, then repeat the procedure again.
- A solution of lemon juice and salt - to prepare this remedy, first squeeze the juice from half a lemon. Then gradually add table salt to the resulting juice until the resulting mixture becomes like a paste. Apply the resulting solution to the product, and then remove dirt with small movements using a rag. Then the composition must be washed off with running water, and the item itself must be dried.
- Soap solution - most often this method is used as a preparatory method for main cleaning. However, if the contamination of the item is minor, then a soap solution can remove them without difficulty. The item should be soaked in warm soapy water in a basin for some time. Then you need to wait until the liquid cools completely. Then, use a brush to clean off the main dirt on the product and rinse it off under normal water (an acceptable method for cleaning coins and mechanical mods).
- Hot vinegar solution - this product can help if foreign stains appear on the product. Heat the vinegar and then wet the cotton pad. Can I start removing stains on the item after this? Without a doubt. Since vinegar has a pungent odor, the apartment or house must be thoroughly ventilated when using this cleaning method.
- “Sandpaper” - it is often used when cleaning products such as candlesticks and fireplaces. If objects have soot stains, then just go over them with sandpaper. However, it is better to then carry out additional cleaning using chemicals.
- Composition of salt and buttermilk - for cleaning use the following mixture: for 0.5 liters of buttermilk you need to add 1 tbsp. spoon of salt and mix this solution. This solution is suitable for treating particularly contaminated areas - after applying it, the product should be rinsed under running water and dried. Can be used for a cleanable mech mod.
Video: how to clean brass products at home?
Removing the varnish layer of a product
Despite the fact that all of the above methods do not pose a danger to humans, they cannot be used to process products too often. If the dirt has become too deeply embedded in the product, then it is necessary to resort to more drastic cleaning methods - removing the protective layer of varnish. To do this, you need to take the following steps:
- It is necessary to line a horizontal surface with newspaper.
- Using acetone liquid or another solvent, it is necessary to apply the solution to the product, thereby removing the top layer.
- It is necessary to rub the product with polish until the desired shine appears.
- It is imperative to remove all contaminants that are visible on the surface.
- It is necessary to cover the item with a new layer of varnish. To ensure that it lays evenly and does not spoil the appearance of the item, work with auxiliary means (a brush or a cotton pad).
- Dry the item. It is advisable not to touch it at first until the effect is fully established, because you should use specialized gloves.
In general, in order for a brass product not to lose its appearance, you must try to promptly remove dust and plaque from such products, as well as polish the product until it shines. If stains or more serious contamination appear, they must be removed immediately using chemical or folk remedies. In this case, the product will delight its owner with its beautiful appearance for a long time.
metmastanki.ru
What is brass and where is it used?
Brass is an alloy of copper and zinc. Tin, manganese, lead, nickel, and aluminum can be added to it. The composition affects the color and properties.
Zinc, the main component of brass, was only discovered in the 16th century. At the same time, people knew about it before our era. For example, in Rome they made alloys of copper with zinc ore and created dishes and jewelry.
Then production began in Central Asia, from there the accessories came to Rus', where their unique shine and high quality were also appreciated. After zinc was discovered in 1746, brass appeared in the form familiar to modern times.
The standard formula is the proportion of copper and zinc 1 to 2. Now zinc can be added much less, no more than 30 percent. For technical alloys the percentage increases to 50%. The more zinc there is in a product, the lower its price.
Such alloys are considered one of the most common; they are called eternal metals because they hardly wear out. Two-component types, where zinc is 20 percent, are used for automobile spare parts, coils, and heating equipment. The 40% composition is suitable for stamped products and accessories. Multi-component brasses have a very wide range of applications. They are used to make aircraft, pipes, watches, springs, and ships.
Tombac, which contains up to 10 percent zinc, is used to create artistic accessories and decals. Cages, fittings and bearings are made from cast brass to provide rust resistance. Automatic alloy is used for fasteners.
Resistance to magnetic attraction makes it possible to make compasses, and high heat capacity makes it possible to make samovars. Objects for the church are made from brass, such as the frame of an icon. The cost of the alloy is quite low, and prestigious items such as the famous Zippo lighters are made from it.
Storage rules
You can preserve the beauty, strength and safety of use of a copper basin if you follow simple rules of care and storage:
- when mixing jam, you can only use wooden spoons and spatulas;
- wash the copper basin only by hand using soap, lemon, ammonia and other available means;
- Do not wash copper utensils with products containing chlorine, abrasive pastes, hard brushes and sponges.
After preparing the jam, the bowl must be immediately emptied (pour out the jam) and the dishes must be rinsed to remove any residue. A clean basin is wiped dry, rubbed until shiny with a clean cloth and sent for storage.
You can preserve the shining shine of a copper basin by storing it in a case with a piece of chalk. It is also important that the copper basin is not exposed to direct sunlight. Do not store copper utensils near heating appliances.
In a situation where a copper basin is used extremely rarely, then at the end of the process of cleaning the jam, the dishes are wiped with machine oil. These steps will help maintain the bright color of the copper. The main thing is not to forget to rinse the basin in hot water and soapy water before the next use.
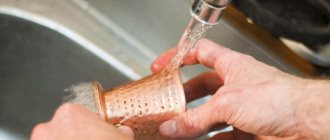
Copper cookware should be washed and dried immediately after cooking.
If there is still heating
One of the most effective schemes is to “boil out” the burnt residue by pouring boiling water over it or simmering it on the stove for some time. The softening process in this case is faster, but if it is quite safe for an aluminum saucepan or stainless steel basin, enamel cookware can react to a sharp temperature change by cracking the enamel and quickly deteriorating. That is why it is recommended to heat the enameled water gradually by pouring warm water and bringing it to a boil on the stove.
Is it possible to intensify this process? Quite! A solution of salt, soda or citric acid instead of plain water will allow you to clean burnt jam from the pan a little faster. Just keep in mind that baking soda can cause aluminum to become covered with dark spots, and long-term contact with salt also harms this type of cookware. For stainless steel and enamel, some even prepare an explosive mixture of soda, salt and citric acid: this way the burnt jam at the bottom of the pan will certainly have no chance!
Sometimes when boiling carbon deposits on the stove at home, an onion cut in half is added to the water. They say that the effect is sometimes even better than using special products.
But as for heating vinegar, this is a controversial issue. Many people boil things in vinegar to make things white or try to clean metal utensils with a boiling solution, but we want to remind you that when heated, vinegar begins to release harmful substances into the air, which can affect your well-being. Be careful, and if you choose to boil with a vinegar solution, at least ventilate the room well and do not stay in it for those 10-20 minutes while the burnt substance “boils down.”
How to clean a burnt brass jam bowl
Author Plus Reading time: 8 min.
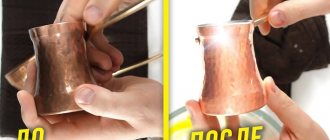
Copper utensils are durable, beautiful and wear-resistant, but under the influence of moisture and acids, over time, plaque appears on its surface and the copper darkens. You cannot cook in such containers, as the cooked dishes acquire an unpleasant taste and smell. Knowing how to clean a copper jam bowl at home will help you quickly restore the dishes before preparing the delicious delicacy again. The main thing to remember is that it is strictly unacceptable to clean copper utensils with coarse abrasives and chemical compounds. By ignoring this condition, you will achieve only one thing - the dishes will be irrevocably damaged.
Tips for removing oxide
Knowing how to clean a copper jam bowl at home will help you keep your copper utensils suitable for use. You can do this in several ways:
- Vinegar and salt:
- a copper basin is doused with vinegar solution and generously sprinkled with table salt;
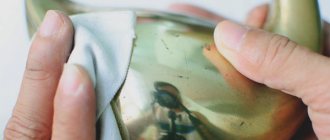
- rub the surface of the basin with a soft cloth until it shines;
- The basin is washed with water and rubbed again.
- Lemon and salt:
- Squeeze the juice out of the lemon and mix it with salt to form a thin paste;
- The copper basin is carefully treated with the resulting composition;
- The dishes are washed, dried, and rubbed until shiny.
- Soap solution:
- add shavings of laundry soap to a container with warm water (you can use liquid dishwashing detergent);
- Thoroughly wipe the dirty, darkened basin with a sponge and solution;
- The dishes are washed and polished until shiny.
- Ketchup (unusual method, but it really works):
- Ketchup is poured into a container with a copper basin (you will need a lot of it). The tomato sauce should completely cover the bowl;
- leave the basin in ketchup for forty minutes;
- The dishes are washed, dried, and polished.
- Ammonia:
- a soft cloth is generously moistened with a solution of ammonia previously diluted with water;
- if the basin is very dark, it can be completely covered with a solution of ammonia and left for twenty minutes;
- As soon as the copper begins to acquire a natural reddish tint, the dishes are washed with warm water and rubbed to a shining shine.
Ketchup is great for cleaning copper cookware.
More complex ways to remove burnt marks
It is not known how they even thought of this, but it is also recommended to clean pots using such exotic substances as silicate glue or bleach! We warn you in advance: they are unlikely to be significantly more effective than the methods that we have already talked about, but if you have a craving for experiments, then you can give them a chance.
- It is recommended to remove strong burns by “boiling” the burnt jam in water with the addition of 2-3 tablespoons of soda and a small amount of silicate glue.
- You can also rub the bottom and walls of the dishes with a mixture of laundry soap shavings and PVA glue and leave for several hours to act.
- If you have cleaned the carbon deposits, but do not want to wipe away the dark traces of it, some housewives recommend boiling a pan or basin with a “Whiteness” solution, but we, as in the case of vinegar, do not recommend doing this because of the harmful fumes that will fill the air .
The faster you start getting rid of burnt marks, the less effort and time it will take. If you let the crust completely dry and harden, then you will have to “boil” the carbon deposits on the stove more than once, and you will need to soak the pan for days!
We are sure that it is quite possible to clean your favorite pan from burnt jam, and now you have all the effective ways to deal with such deposits in your arsenal.
Source