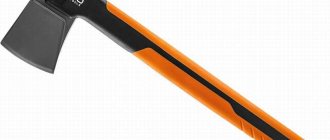
The quality of an axe, such a useful and necessary tool in everyday life, is one of the main factors when choosing it. It should be practical, comfortable to use and fit well on the axe. The presence of these signs significantly increases labor productivity and protects a person from possible injury. Our recommendations will help you put the ax on the ax handle correctly so that it does not fly off. The attachment will hold well if you wedge it and secure it properly.
Types of ax
Due to the fact that an ax is a rather traumatic tool, and working with it involves intense dynamic physical activity, it is necessary not only to be able to handle it, but also to make sure that it is firmly seated on the ax handle. Not everyone realizes that an ax wedge flying off the handle can cause serious damage to health. Therefore, it is extremely important for a person who often works with this tool to master the skill of attaching an ax to an ax handle.
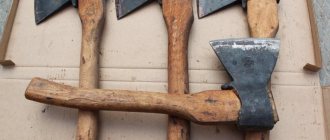
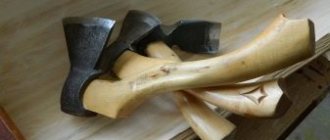
Today you can find about 10 different types of chopping tools. And each of them has its own specific method of planting. Accordingly, before starting the procedure itself, it is advisable to decide what type of weapon you will have to deal with. At first glance, it may seem that there are no characteristic differences between the varieties. However, despite the fact that the design of the ax is unchanged (it consists of a handle and a metal wedge), each type of weapon has its own distinctive features and purpose. For example, an ax can be: carpenter's, combat, tourist, or specially designed for a woodcutter.
Hardening steel over an open fire
It is possible to harden metal at home. For an easy and useful hardening process, you need to light a fire and prepare two large containers. There should be a lot of hot coals in the fire.
Diesel or motor oil is poured into one container, clean water, preferably from a well, is poured into the other. You should first prepare a tool with which you will need to hold the hot product.
It is advisable to find blacksmith pliers, but if they are not among the tools, you can arm yourself with something else similar to pliers.
When the preliminary work is done, metal drills or other objects are placed in the very center of the flame, that is, on hot coals.
Rich white coals are hotter than others
It is important to watch the hardening process - the flame should be crimson, not white. If the fire is painted in the last color, then there is a threat of overheating and even burning of the metal
It is necessary that the color is distributed evenly across the entire area of the fire. Black spots should not appear on the edge of the product that is being hardened.
And if the metal turns blue in places, this indicates that the material has softened too much and become too plastic. This should not be allowed under any circumstances.
IMPORTANT TO KNOW: Tapping a pipe
Therefore, the process requires increased care, because you can overdo it and heat the ax blade white-hot.
When the metal equipment is heated in the fire, it is time to remove it from the high heat.
A hot object must be lowered into a container of oil many times with a frequency of 3 seconds, gradually increasing this period of time.
You cannot hesitate with these actions; you need to carry out operations to harden the metal edge quickly and sharply.
Next, the object is immersed in a bucket filled with water, which will have to be shaken a little.
At this stage, do not forget to be careful, as oil droplets on a knife or ax may burst into flames if they end up in water. The table shows how to correctly and incorrectly immerse various parts, including drills and disc cutters, in water:
The table shows how to correctly and incorrectly immerse various parts, including drills and disc cutters, in water:
Very often there is a need to harden drills. It is not recommended to immerse thin long elements flat into water, otherwise the lower layer of metal, cooled first, will shrink.
Video:
Drills should be lowered into the liquid with the thicker end.
If you follow all the rules and precautions, then hardening yourself will not seem like a complicated and dangerous procedure. It will bring the desired guaranteed effect
But sometimes at home you have to harden steel equipment or melt non-ferrous metal. Such operations require extremely high temperatures, 700-900 degrees.
And only a muffle furnace or an electric furnace can heat metal objects to this level. You can make a muffle furnace yourself. It is unlikely that you can make an electric oven at home.
Attaching the ax
Attaching the ax handle to a metal wedge can be done in several ways.
- Welding. Thanks to this method of fastening, it is possible to achieve high strength and reliability of the implement during operation.
- Manufacturing of ax elements as a single structure. Characterized by rigidity and strong feedback when working with such a tool.
- Gluing of structural elements of the ax in specially designated rooms. Epoxy material is used for gluing. And the ax handle is made of polymers. It is quite difficult to carry out such a procedure on your own, since the manufacturing process will require a room with recirculation ventilation.
- Putting a metal wedge on the handle of a gun and then wedging it. This method is considered optimal for carrying out this procedure independently. If the recommendations are strictly followed, the tool is characterized by fastening strength.
It is worth noting that the successful execution of putting an ax on an ax handle depends on the availability of existing skills, knowledge and the required tools.
It is possible to carry out such a procedure on your own, but you need to objectively assess your abilities. Because if the metal wedge is not securely attached to the handle, the tool will become loose after a period of intensive work. Thus, planting will have to be done again.
Secrets of hardening a heat source
There are several options for devices that can bring the heating of a steel part to the desired temperature threshold. The ideal option is an industrial or home-made muffle furnace.
In the absence of such a tool, you can use another home assistant - a blowtorch.
A fairly powerful jet of flame makes it easy to heat parts of small thickness to the required temperature. Remember to move the torch along the plate being hardened to achieve even heating.
In addition, it is possible to use ordinary charcoal together with a blowtorch. To do this, dig a small hole in the soil, pour coal into it, and place the hardened blades of the knives on the edge. Heat the coal together with the plates with a lamp until the latter reaches the required heating. This method prevents the rapid cooling of the unheated part of the workpiece and its overheating.
The third option is to make a small forge. It can be either coal or gas. The main structural elements of the device are the housing and the source of forced air. The base of the coal hearth can be made of a steel sheet 10 mm thick with a piece of pipe with a diameter of about 20 cm welded at the bottom and an outlet from it for connecting a hose from the outlet of a household vacuum cleaner.
Do not forget to drill several holes in the sheet of sufficient diameter to supply air. Wood (barbecue) or coal is used as fuel.
Sources
- https://SevenTools.ru/metally/kak-pravilno-zakalit-topor.html
- https://setafi.com/instrumenty/topor/kak-zakalit-topor-v-domashnih-usloviyah/
- https://smm-star.com/kak-pravilno-zakalit-topor/
- https://VashNozh.ru/topory/zakalka-topora
- https://kovkapro.com/kovka-tehnologiya/zakalka-topora/
- https://printeka.ru/prochee/kak-zakalit-topor-v-domashnih-usloviyah.html
- https://2lzz.ru/stolyarnyj-instrument/kak-zakalit-topor
- https://teplobloknn.ru/metally/zakalka-topora.html
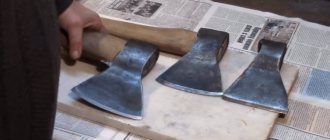
Placing an ax on an ax handle
At first, such a procedure seems simple. This false impression is formed due to the simple connection of elements - mounting and wedging. However, the procedure is quite labor-intensive and has a number of subtleties that in no case should be ignored. To make this job easier, a professional and experienced carpenter always follows strict step-by-step instructions.
Preparatory work with the tool
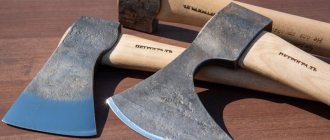
First of all, you need to get an ax handle. You can buy it at any specialized store or make it yourself. The ideal material is pre-dried birch. Carpenters with extensive experience prefer wood of this particular species. It has the necessary set of properties and that is why it is so popular. When choosing a handle, it is recommended to pay attention to its density and shape. An important criterion is grip comfort. If you do not take this point into account at the initial stage, your hands will experience discomfort while working with an ax, which will quickly lead to severe fatigue.
Next, you will need to purchase a handle of suitable dimensions that will fit tightly into the metal hole. Using a woodworking device or a sharp knife, it is necessary to trim the handle so that it acquires the required shape (straight or ellipsoidal). The ellipsoidal hole in the ax is considered more reliable due to its fastening. Small cuts are then made on the top surface of the handle. Visually they resemble longitudinal grooves.
The most important nuance at this stage is the depth of the grooves. The cut grooves should be hidden in the hole of the axe. Otherwise, during the wedging process or during use, the handle may simply crack. It is necessary to strive to ensure that the width and thickness of the wedges are the same.
Creating wedges
The reliability of fasteners is largely due to high-quality wedging. The use of wedges made of metal and wood will help with this. As in the case of an axe, wedges can be purchased in a specialized department of the store or made at home. An important condition is compliance with the shape and size between the wedges and the material used in the manufacture of the axe. The best wooden wedge, according to professional carpenters, is made from dried birch, and the best metal wedge is made from hard tin, the so-called shovel.
Perhaps the main difficulty faced by everyone who decides to mount an ax on a handle themselves is driving in steel or wooden wedges. In fact, this process is not as complicated as it might seem at first glance. This stage can only be started after the handle and wedges have been completely prepared. To begin with, the longitudinal wedges are hammered in using light blows with a hammer. It is not worth making strong blows due to the fact that the wood may be deformed. And this can subsequently lead to instability of further fastenings.
Once the wedges fit snugly into the grooves, use a hacksaw blade to carefully cut off the remainder. You can verify the successful completion of the work by the strength of the grip of the ax and the handle.
Wedging
There is an opinion that a wooden wedge must be made from the same type of wood as the handle. However, this is a misconception. The main condition when choosing a material is its strength. In turn, the direction of the wood fiber should also be taken into account, since it is recommended to maintain parallelism in the narrowing of the wedges. This will protect the weapon from possible damage.
Successful wedging can be considered complete filling of the groove space with wedges, and removing the ax from the ax handle is considered impossible.
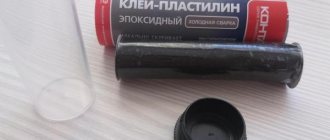
Sometimes it is still not possible to avoid gaps in the ax hole. Then an ordinary piece of gauze, which has been previously treated with epoxy resin, will come to the rescue. This composition allows you to provide wood with protection from moisture and impart reinforcing properties. To remove any gaps that have arisen before mounting the ax, its upper part is wrapped several times with treated gauze. Thanks to epoxy resin, any gap, crack or gap is filled, forming a reliable and strong attachment of the ax to the handle.
How to harden steel at home?
Rural residents often resort to self-hardening of metal, thus increasing the service life of household items: plow shares, carpentry and plumbing tools, hunting knives, axes. It is more difficult for a city dweller to process stainless steel - a special workshop is required.
Required Tools
In order to harden steel at home, you need to arm yourself with:
- Pliers with an extended handle;
- Hammers of different sizes;
- Files for subsequent processing;
- Electric oven;
- Gas burner;
- Blowtorch.
Hardening methods
Stainless steel can be hardened in different ways. First of all, the product heats up well. For this use:
- Burner;
- Electric oven;
- Blowtorch;
- A fire on coals.
The last option will be the best; the fire will be able to provide a much higher temperature.
The most commonly used cooling medium is:
When cooling with oil, the part is dipped into it twice with a short interval of a couple of seconds. The first dive takes 3-4 seconds, and the second - 5-6 seconds. Immediately after this procedure, the steel is immersed in water until it cools completely.
In the second cooling method, the part is immersed in wax several times. If the stainless steel no longer penetrates into the liquid medium, the cooling process is considered complete. Simply clean the surface with turpentine.
How to choose a temperature mode?
The choice of temperature mode plays a big role when hardening steel. Overheating is fraught with loss of inherent strength; this occurs due to a quantitative decrease in carbon in the metal structure.
In some cases, after completion of the stainless steel hardening process, residual stresses appear; they are removed through further mechanical processing. This problem can be prevented if the product being hardened is cooled in stages, with a measured decrease in temperature conditions. This step-by-step hardening technique is used in the manufacture of parts with very high strength values.
How to gradually lower the temperature of the cooling medium? To do this, prepare several containers with different liquids: saline solution, alkaline solution, mineral oil, synthetic oil. This method allows you to completely eliminate internal stress, which negatively affects the useful properties of steel. A small disadvantage of the technique is the high cost of implementation.
Master class on hardening a kitchen knife
After hardening, the knife gains strength and elasticity. The procedure does not require a lot of time.
- Gas burner or electric oven.
- Wax for cooling.
- Turpentine.
- Ticks.
How to attach an ax to an ax handle: step-by-step instructions, tips, features
- November 9, 2018
- Equipment
- Ivan Gresko
In order for wood to be cleaved continuously, the working tool must be properly prepared. Beginners often ask the question: how to attach an ax handle to an axe? According to experienced carpenters, this is not difficult to do. To do this, it is enough to know a few nuances. Information on how to properly place an ax on an ax handle is contained in this article.
Getting to know the chopping product
A chopping tool can be a carpenter's tool, a fighting tool, a camping tool, or a woodcutter's tool. Before placing an ax on an ax handle, you need to decide which type it belongs to. Despite the fact that any ax has a handle and a metal part, each type has its own purpose and design features. Due to the fact that an intense dynamic load is placed on the chopping tool, it is important that the ax is mounted correctly on the shaft. Otherwise, it will fly off the handle and injure a person.
How to attach an ax handle to an axe?
This work involves attaching a metal working part to a wooden handle, followed by wedging using special wedges. They can be made of wood or cut from sheet metal. At first glance, this connection method seems simple. However, there are several nuances in the work that should be taken into account. For those who do not know how to place a cleaver on an ax handle, experienced craftsmen recommend following the sequence of actions. First you should prepare for work. Then you need to make steel or wood products for wedging. Only after this can you proceed directly to installation.
Methods for heating a blade to hardening temperature
Many amateur workshops have a muffle furnace, electric or gas. The temperature in its chamber is sufficient for firing ceramics, melting glass and heating metal to the required temperatures.
In the cell
The oven has a temperature regulator, so heat treatment is not difficult. For annealing and hardening of one tool, you can make an electric muffle furnace with your own hands.
How to make a camera yourself
To heat the ax blade, you need a small chamber. Required:
- Body – any metal container with a wall thickness of 2 mm or more.
- The heat insulator is a mixture of fireclay clay and refractory brick chips.
- The heating coil is a wire made of fechral alloy.
- Thermostat.
- Network voltage stabilizer.
Before turning on the stove, you need to check that the wiring is working properly. To achieve the desired temperature, about 4 kW is required.
- A chamber is made from the refractory mixture, and grooves for the heating coil are laid in it. Allow it to dry, lay the spiral, cover it with a layer of clay, and bring out the ends of the wire to connect to the network.
- The dried heating chamber is inserted into the housing. The ends of the spiral are connected to the thermostat terminals.
Before making a muffle furnace yourself, study detailed instructions and watch videos of experienced craftsmen.
On an open fire
To reach 800 degrees, you need coals. It’s better to build something like a blacksmith’s forge from a bucket or barrel. In camping conditions, a large fire is lit. There must be a constant supply of oxygen to the coals.
A kind of bellows for blowing is made from a plastic bag. Use a boat pump and other available means. The coals should burn as brightly as possible. The ax blade is ready for hardening when it turns scarlet.
Preparatory stage
Before attaching the ax handle to the axe, its handle should be treated. It is made from a rough wooden block, mainly from birch. Due to the fact that the metal working parts come in different sizes, shafts are sold a little larger than they should be. This was done to ensure that the ax handle did not dangle and that it fit tightly into the ax. You will have to reduce the diameter of the shaft yourself. The handle is trimmed with a knife or other woodworking tool. Next, using a pencil, mark the contours of the eyes, as well as the places where the wedges will be located. Eyelets can be straight or conical.
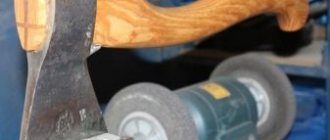
Then you need to measure the height of the shaft and mark on it the place to which the ax will be lowered. Afterwards, measure the depth of the cutouts on the handle into which the wedges will be inserted in the future. To make the shrinkage more reliable, these recesses must be smaller than the wedges themselves. Make cuts using a hacksaw for metal. After marking and cutting, the shaft itself is finished. At this stage, craftsmen use sandpaper. It doesn’t matter what grain size it will be. The fact is that rough work will be done with this tool, and then the section of wood will be covered with an ax. Due to this fact, the surface may remain rough. The main thing is not to remove too much.
How to understand whether hardening is needed
First, you should check whether such a procedure is required. Not all manufacturers produce high quality products. It happens that the purchased ax was either not hardened at all, or it was carried out in violation of the process:
- in the first case, the material of the tool will be too soft, and this leads to the appearance of dents and nicks, as well as to rapid dulling during use;
- a violation of technology, as a rule, consists in excluding the tempering stage after heating from the process - the metal is brittle and quickly becomes covered with cracks.
Compliance with quality requirements is checked using a flat file. You need to take it with a fine notch. If it glides freely over the surface without catching it or leaving marks, this indicates the high hardness of the alloy.
If, by all indications, the tool needs to be hardened, it is necessary to determine what kind of steel was used to make it. This is necessary for proper processing.
The best steel used for a quality ax is carbon. It is marked U7, U8, U8A.
About cuts
Their location is the upper part of the shaft. The cut is a longitudinal groove into which the wedge will be inserted. Often, beginners, in addition to the question of how to attach an ax handle to an ax, are interested in how many cuts should there be in the handle? According to experienced craftsmen, you can limit yourself to one cut that stretches along the end. Judging by the reviews, this method of attachment is the most popular. Less commonly, the ax handle is equipped with one longitudinal and three or four additional ones on the sides. When making a cut, you should take into account its width and depth, which depend on the size of the wedges. They should not enter freely, since the whole point of wedging is lost. At the same time, it is undesirable for the wedges to fit into the cuts too tightly, otherwise the ax handle will simply split.
About making wedges
Quite good wedges are sold in hardware stores. However, it is not difficult to make them yourself. Dried birch is suitable as a material for making wedges. If a home craftsman wants to carry out wedging using metal products, then he will have to cut them out of solid tin. Judging by the reviews, good wedges are made from shovels.
According to experts, driving is a simple process. It is started after the wedges and handle are completely ready. How to put an ax on an ax handle? This is done as follows. The first step is to align the ax and the shaft so that they are located in the same plane. The metal part is seated using a blunt, non-sharp object. For this purpose, it is best to use a board and a weighted rubber mallet, which is used to lay paving slabs. At this stage it is important not to damage the wood. You need to shrink it gradually, removing excess with a sharp knife or sander if necessary. After the ax is seated to its maximum depth, you can begin wedging. More about this below.
Hardening with self-tempering
Another method of hardening a tool is self-tempering. First, the tool is heated in a furnace to the hardening temperature. Then, the cutting part is cooled to a temperature of 150-170 degrees. After this, the cutting part is cleaned of scale in order to see the tarnish colors. Let's see how the purple color goes. The tool is kept in air until the heat from the hot part heats the cooled part to a temperature of 250-300 degrees. We judge this by the color of the tarnish. Everything is purple. Cool. Water is used as a quenching medium. Only to cool the cutting part it is heated to 30 degrees. And for the final cooling of the ax it is heated to 50 degrees.
Final stage
There is an opinion that wooden wedges should be made of the same type of wood as the ax handle. However, according to experts, the wedges and shaft can be made of different wood. The main thing is that the propping products are durable. During wedging, you should take into account the direction in which the wood fibers are located. They must be parallel to the narrowing in the wedge. In this case, it will not break during the driving process. If the wedge breaks, it will not provide high-quality expansion of the ax handle. The work can be considered successfully completed if the entire cut is filled with the wedge and it is not possible to remove it. The distance between them must be at least 3 mm. The remains of the wooden wedges are carefully ground off.
If the master decides to also use iron ones, then they should be driven in last. The end of the steel wedge protruding from the shaft is bent so that it covers the wooden one.
It happens that the home handyman, due to inexperience, left gaps in the eyelet. The situation can be corrected using a bandage and epoxy resin. You can also use regular gauze. The material is soaked in resin and then wrapped in several layers around the axe. In this case, the resin performs a protective function, namely, it prevents the wood from getting wet. In addition, it is used as a reinforcing agent. Wedging begins after it has completely cooled down. Some craftsmen coat wooden wedges with resin.
Which side should the ax be placed on the ax handle?
A standard Soviet-made ax is equipped with a cone-shaped chopping part. This design has a positive effect on the quality of the instrument. In addition, it is impossible to make a mistake when placing it on the handle. Mostly, the ax is placed with the wide part towards the ax handle, and the narrow part towards the wedge. Thus, the end part of the shaft should protrude 0.5 cm beyond the eye. With this method of installation, the loose chopping part can be easily put into place by tapping the ax on a hard surface.
Carpenter's ax - what should the correct argun be?
Since humanity mastered metal, the ax has become an integral tool present in every household, and it has survived almost unchanged to this day. Among all types of axes, it was the carpenter's ax that was the very tool that was once used to build houses, since it is moderately light enough to climb with it even to a height and work there, holding the tool in one hand. For the same reasons, you should choose it today - of course, you are unlikely to build a hut, but in farming and construction there are a lot of tasks that are important to perform while holding an ax in one hand.
Therefore, choose a tool that is no heavier than one and a half kilograms; with this weight, the optimal length of the ax will be about 45-50 cm.
You can find out the optimal dimensions for yourself only experimentally - take the product in your hand, feel its weight, evaluate the ease of gripping the handle, wave it several times. Nobody can tell you the ideal proportions - everyone has their own individual requirements. It is important that the cross-section of the ax has the shape of a drop - for centuries this shape was considered the most convenient for stable fixation, and modern technologies have only confirmed the rightness of our ancestors. If you want to truly love your tool, buy the metal part of the ax and the ax handle separately, in which case you can fit it, as they say, to your hand. In this case, you will need to master a separate science - how to wedge an ax!
How to remove excess metal hardness yourself using tempering
Tempering removes the excessive hardness and brittleness of the material acquired during hardening. Tempering is essentially the same heating to a critical point and slow cooling in air, when the structural lattice changes again.
- Tempering at low temperatures requires gentle heating to 250ºС. It removes structural stress and maintains high strength. Suitable for cutting and piercing tools made of carbon material, as well as low-alloy steel.
- Tempering at average temperatures already requires intense heating in the range from 350ºС to 500ºС. It makes it possible to achieve such transformations of atoms when the structure becomes uniformly fine-grained, and therefore elastic and wear-resistant. Parts under dynamic load - springs, spirals - are subjected to this tempering.
- Tempering at high temperatures requires high heat in the range from 500ºС to 700ºС. Then a structural shift occurs, returning the over-hardened part to viscosity and ductility while maintaining the highest strength. Such tempering is required for parts subject to shock loads.
To summarize, it is necessary to clarify the picture of the process during vacation. In the first case, a slight decomposition will be observed in the metal, in the second, decomposition will occur, but the restructuring of the structure will not begin, in the third, a restructuring of the structure or crystalline structure of the grains will occur.
Wedge with wedge - wedge the ax!
In fact, there is one huge advantage in doing wedging yourself - you will be 100% confident in the safety of the tool and will be insured against accidents that may happen if other people perform this procedure poorly. Most often, purchased products are wedged with just one long, vertical wedge, whereas in the old days they knew that this needed to be done with at least three, and even better, five wedges.
The first method is cross-shaped wedging. It is very simple to do - one wedge is driven in the center over the entire width, then along the wedge from above and below. True, if you have a high eye of the ax relative to the width, then the sectors separated by wedges turn out to be quite thick and not flexible enough. By hammering in the wedges, you can get a crack, if not the entire handle, then half the handle. The second method is 5 wedges. Relevant if the ax is large and the eye is long enough. In this case, it is better to divide the handle into 6 sectors, which will be thinner and more flexible. Wedging is performed with five wedges, which are driven into two transverse and three vertical slots.
Possibility to make a tool with your own hands
A simple version of the dash is made from thick diameter wire. A similar solution is to drive two long nails into a suitable wooden handle. A mechanic's compass is also used to mark wood. The accuracy of drawing increases as the distance between the teeth of the tool decreases; skill and experience play an important role.
The scriber is a mechanical compass with a built-in level. The latter is intended for precise marking of lines horizontally and vertically. If everything is done correctly, then marking with your own hands will allow you to assemble the log house in such a way that it will not be possible to push a match between the logs.
Scriber is an advanced carpentry trait that has been given two levels. This saved time for the carpenter. After all, now they don’t draw a rough line for marking, but immediately draw a finishing mark.
Wedging an ax - step-by-step diagram
Step 1: Making a place to plant the ax
First you need to cut out a place for the ax to fit. This must be done in such a way that the ax handle protrudes from the eye by at least 1 cm - this is a kind of reserve for better holding the ax on the shaft. Try to fit the shape of the seat as closely as possible to the shape of the eyelet.
Step 2: Making the cuts
Using a regular hacksaw for wood, make cuts from the end of the ax handle at a depth of at least 2/3 of the height of the eye, this does not take into account the height of the protrusion.
Step 3: Making Wedges
For wedges, a hard wood such as oak is best. Many people believe that the wood should be the same from which the handle is made, but this is not an entirely correct statement. If the ax handle is birch, then the wedges will be very soft, and you will have to hit them quite hard, and in the end they will simply break. It is important to make wedges in the direction of the grain so that they run along the entire length of the wedge, otherwise even a hard wood wedge will break upon impact.
In this case, it will be almost impossible to get it out of the cut. When the wedges are ready, try them on the cuts, where necessary, reduce the width. By the way, the transverse wedges should be tried on the eye - they should be the same width, since the ax handle will move apart after wedging. With vertical ones it will be more difficult - you need to calculate the total length of the vertical ones, taking into account the width of the transverse ones. The resulting figure should be equal to the height of the eyelet.
Step 4: Epoxy and Gauze
No matter how hard you try, it’s almost impossible to make an ideal ax handle for a specific eye, especially if you don’t often take on such things. There will always be small gaps and voids. In order to avoid this annoying disadvantage, you will need gauze cloth with epoxy resin. Epoxy is an excellent adhesive, does not shrink and forms a monolith when it dries.
Gauze acts as a kind of skeleton that prevents the resin from cracking and crumbling. In total you need to make 4-5 layers of gauze - it depends on the size of the gaps. First, try on the fabric by putting it on the end of the ax handle and placing the ax on it. It should fit tightly, but without much effort. If you are happy with everything, soak the gauze in resin, put it on the ax handle and pull the ax properly. When it is installed, excess tissue should be trimmed.
Step 5: Wedges
Before wedging, pour epoxy into the cuts so that it fills them by a quarter. Filling the cuts with resin will help you out if a crack appears in the ax handle during wedging - the resin will fill it, preventing it from developing in the future. In addition, it will fill voids that may form under the wedges. It is also recommended to moisten the wedges in epoxy and only then hammer them in - first transverse and then vertical.
Step 6: Finishing
If you did everything correctly, then the next day, when the resin has dried, all you have to do is cut off the protruding pieces of the wedges and sand the end. Such an ax will never become loose or dry out.
Source: remoskop.ru
What is metal hardening and its types
Hardening is understood as a type of heat treatment of a metal, consisting of heating it to a temperature, upon reaching which a change in the structure of the crystal lattice occurs (polymorphic transformation) and further accelerated cooling in water or an oil medium. The purpose of this heat treatment is to increase the hardness of the metal.
Hardening is also used, in which the heating temperature of the metal prevents a polymorphic transformation from taking place. In this case, its state is recorded, which is characteristic of the metal at the heating temperature. This state is called a supersaturated solid solution.
Polymorphic transformation hardening technology is used mainly for products made of steel alloys. Non-ferrous metals are subjected to hardening without achieving a polymorphic change.
After such treatment, steel alloys become harder, but at the same time they become more brittle, losing their ductility.
To reduce unwanted brittleness after heating with polymorphic change, a heat treatment called tempering is used. It is carried out at a lower temperature with gradual further cooling of the metal. In this way, the stress of the metal is relieved after the hardening process, and its fragility is reduced.
When hardening without polymorphic transformation, there is no problem with excessive brittleness, but the hardness of the alloy does not reach the required value, therefore, during repeated heat treatment, called aging, it is, on the contrary, increased due to the decomposition of the supersaturated solid solution.
Features of steel hardening
Mainly stainless steel products and alloys intended for their manufacture are hardened. They have a martensitic structure and are characterized by increased hardness, leading to brittleness of products.
If you heat treat such products by heating to a certain temperature followed by rapid tempering, you can achieve an increase in viscosity. This will allow the use of such products in various fields.
Types of steel hardening
Depending on the purpose of stainless steel products, it is possible to harden the entire item or only that part of it that must be functional and have increased strength characteristics.
Therefore, hardening of stainless steel products is divided into two methods: global and local.
Video:
Cooling medium
Achieving the required properties of stainless materials largely depends on the choice of cooling method.
Different grades of stainless steel undergo cooling differently. If low-alloy steels are cooled in water or its solutions, then for stainless alloys oil solutions are used for these purposes.
Important: When choosing a medium in which to cool the metal after heating, it should be taken into account that cooling occurs faster in water than in oil! For example, water at a temperature of 18°C can cool an alloy by 600°C in a second, but oil by only 150°C.
In order to obtain high metal hardness, cooling is carried out in running cold water. Also, to increase the hardening effect, a brine solution is prepared for cooling by adding about 10% table salt to the water, or an acidic medium containing at least 10% acid (usually sulfuric) is used.
In addition to the choice of cooling medium, the cooling mode and speed are also important. The temperature decrease rate must be at least 150°C per second. Thus, in 3 seconds the temperature of the alloy should drop to 300°C. A further decrease in temperature can be carried out at any speed, since the structure fixed as a result of rapid cooling will no longer be destroyed at low temperatures.
Important: Cooling the metal too quickly leads to its excessive fragility! This should be taken into account when hardening yourself.
The following cooling methods are distinguished:
- Using one medium, when the product is placed in a liquid and kept there until completely cooled.
- Cooling in two liquid media: oil and water (or saline solution) for stainless steels. Products made of carbon steel are first cooled in water, since it is a fast cooling medium, and then in oil.
- Using the jet method, when the part is cooled with a stream of water. This is very convenient when you need to harden a specific area of the product.
- Using the method of step cooling in compliance with temperature conditions.
Temperature
The correct temperature regime for hardening stainless steel products is an important condition for their quality. To achieve good characteristics, they are uniformly heated to 750-850°C, and then quickly cooled to a temperature of 400-450°C.
Important: Heating the metal above the recrystallization point leads to a coarse-grained structure, which worsens its properties: excessive brittleness, leading to cracking!
To relieve stress after heating the metal to the desired hardening temperature, step-by-step cooling of products is sometimes used, gradually lowering the temperature at each heating stage. This technology allows you to completely remove internal stress and obtain a durable product with the required hardness.