Wood has many advantages, but it also has disadvantages. This is sensitivity to a humid environment. Upon contact with liquid, untreated wood fibers swell and deform, and with prolonged exposure they begin to rot. Is it possible to avoid this? Yes, and wood wax oil is used for this.
We are talking about a composition that is either sold ready-made or made with your own hands. The second option is preferable for those who are not afraid of experiments and would like to try different ways of processing wooden surfaces.
Features of wax oil
Oil wax for wood has recently taken the lead among other wood protectants, such as varnish. Oil wax processing agent has many advantages:
- It contains only natural ingredients and does not emit a toxic odor when applied. That is why it is safe for allergy sufferers and for treating children's rooms.
- The protective material does not prevent the surface from “breathing”.
- The product is easy to apply without changing the structure of the wooden base. If pigment is added to the composition, the coating colors the wood.
- The protective layer is resistant to water, temperature fluctuations, and does not support fire. The wood is protected not only from above, but also from the inside.
- If there are damaged areas, spot repairs are possible without removing the entire coating.
- Oil and wax are used in apartments to cover heated wooden floors. If such floors are varnished, then when they are heated and cooled, the wood changes in size, causing the varnish layer to burst. Oil wax is plastic and does not collapse.
Liquid wax for wood
Wood has been used by humans for a long time for the construction and decoration of houses, the manufacture of furniture and interior items. This material remains popular today due to its environmental friendliness and decorative qualities. However, wood products require protection from external damage, minor scratches, moisture, and dirt. To protect wood and to emphasize the texture and beauty of natural patterns, various coatings are used.
Among the possible wood processing options, waxing has the advantage of being an environmentally friendly method that uses natural products. Thus, many wooden products coated with wax can be safely used even in children's rooms. The advantage of wax over varnish is not only its naturalness, but also that, while covering and protecting the surface, it does not clog the pores of the wood, and the wood breathes. Unlike varnishes, which create a film. At the same time, the appearance only benefits, the water-repellent properties of the wax are good, and the coating is durable.
Scope of application of liquid wax
Depending on the consistency and composition, wax is divided into liquid, solid and water. Each type of wax has its own area of application. Thus, liquid wax is especially convenient when it is necessary to treat a surface with a complex relief shape. For example, furniture richly decorated with carved elements. Hard wax is applied with a piece of soft cloth, and in this case it will not work.
Liquid wax is applied with a brush, easily spreads over the surface of any shape, and is used to cover the most complex and delicate decorative elements. It is possible to play with the color saturation depending on how many layers of liquid wax are applied. There are options to make the surface shiny or matte. As a rule, liquid wax for wood contains beeswax and a natural solvent – turpentine.
Making liquid wax at home
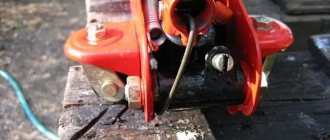
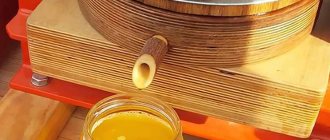
This wax can be prepared at home. To do this, you will need beeswax and turpentine in a 1:2 ratio to obtain a liquid product. The wax is crushed and melted in a steam bath or in a microwave oven. Then carefully and constantly stirring, pour in turpentine. If the mixture turns out to be too liquid, the procedure is repeated, heating the solution and adding more crushed wax. Sometimes a small amount of "carnauba wax" is added. It is not a bee product, but a hard tree resin extracted from palm leaves in Brazil. Thanks to carnauba wax, the coating becomes stronger.
Depending on what kind of wax is used, a waxing composition of different shades is obtained. So, to preserve the natural light color of the wood, it is recommended to coat it with a composition based on bleached wax. Other options give rich honey tones. When working with turpentine, you should follow safety precautions and ventilate the room well.
Criteria for choosing a wood preservative
It is not difficult to prepare your own finishing material for wood. If you purchase a ready-made composition, then you need to focus on some issues:
- Components included. Its constituent elements: oil, solvent, wax, pigment. Benzene, an aggressive solvent, is not allowed. The rate of hardening of the material depends on the proportion of solvent in it. Less solvent means oil and wax dries faster;
- Tree species. Oil is purchased taking into account the type of wood. The composition that is applied to elite breeds is not suitable for soft breeds.
- Type of treated surface. Compositions with pigments do not radically change the shade of wood. They emphasize the pattern of its structure. The floor is treated with matte oil wax so that it does not slip on it like on a glossy coating. A product with additives that give a gloss effect is used for interior work.
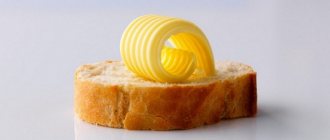
Dish oil Borma Wachs VOC FREE
Natural protective oil for wooden kitchen products in direct contact with food, such as steaks and pizza trays, plates, wooden bowls
Natural protective oil for wooden kitchen products in direct contact with food, such as steaks and pizza trays, plates, wooden bowls.
Oil for protecting the surface of wood products in direct contact with food, such as bread cutting boards, countertops, steak and pizza trays, plates, wooden bowls.
This is a wood protective oil made from a blend of natural oils that are odorless and contain no VOCs.
It is applied to clean and sanded raw wood surfaces and provides a high degree of surface protection against water and stains. Ready to use. Consumption: 12 – 14 m²/l.
What does VOC Free mean?
Volatile organic ingredients (VOCs) are a group of different liquids and gases, most of which are colorless and odorless. Liquids can evaporate easily at room temperature—in other words, they are “volatile.” VOCs are critical when they react with other environmental pollutants (such as nitrogen oxides) to form the ozone layer in the low atmosphere. If VOCs are found in high levels in the ozone layer, they harm the health of people on earth, rubber, etc. affect materials. Some VOCs directly harm human health (such as carcinogens), cause global warming (such as methane gas), or damage stratospheric ozone, which is supposed to protect the Earth from ultraviolet radiation.
Non-VOC products use substances that do not contain such organic volatile components and are the most sensitive products to human health and the environment.
Algorithm for applying finishing material
The size of the painting tool is selected depending on the surface being treated:
- for the ceiling and floor, choose a roller with a long handle;
- for small areas - a brush with soft bristles. Her stubble should not be fluffy.
The protective layer is applied in stages:
- The surface is prepared: screws and bolts are drilled below the floor level, these places are treated with wood putty. Its shade should match the tone of the coating.
- Damaged areas of the old layer are first restored.
- Large areas are sanded with a machine or grinder, hard-to-reach areas are sanded with coarse sandpaper. If the grain is small, then dust particles will clog the pores of the wooden base.
- The surface is cleaned of dust.
- Oil and wood wax are applied in a thin layer without sagging. It should be uniform.
- The next layer is applied after the first has dried. The protective coating is applied in two or three layers.
- A cotton cloth is used for polishing.
Application technique
So how do you apply wax to wood? First you should clean the product. There should be no dust, small debris, dirt or paint on it. The same can be said for grease stains. Apply the mixture with a brush, and also make sure that the bristles do not fluff and do not leave lint on the surface.
Oil-wax is applied in a thin layer over the overall coating of the product, and it is important to avoid the appearance of seams and sagging. The surface should be smooth and uniform. Thick formulations often leave excess on the bristles of the brush, which quickly hardens. This is how clots appear. If you notice this, it is important to regularly wipe your brush and remove any lumps.
After applying the first layer, you should let it dry. It's better to take your time and be patient. If you do not wait the required amount of time and start checking the wax, fingerprints will remain on the surface. This procedure should be performed 2-3 times, since the wooden surface can be saturated with oil and wax, and the ingredients will get into small, hard-to-reach cracks, thereby filling them and protecting them from moisture. Polishing the wood surface can be done with a simple cotton cloth. If you have a sanding machine at home, you should use it, but you should avoid abrasive materials and discs, as they damage the wood surface and leave characteristic abrasions and marks on it. The processing procedure is simple. With practice, you'll be able to apply the product to woodwork like a pro.
Recommendations for purchasing ready-made composition
Wood wax oil of the Sigma brand is in demand on the Russian market. This is the only manufacturer that produces oil material with wax and Sigma Color pigment . The composition is tinted at the factory. Tinted wax is available for sale in 27 variants. Material consumption: 0.8 l/m2. The manufacturer does not stop with the existing range of colors and new shades are added every year. The coating dries after a day, and after 10 days complete polymerization occurs. If the composition is used to finish wood indoors, then you can get by with applying one layer, without first priming the surface.
Finishing material with a natural color will emphasize the natural grain of the wood. The composition without pigment gives the surface a “wet wood” effect.
For outdoor and indoor work, Sigma Universal is recommended . You can purchase 0.8 kg or 1 liter of container for 810 rubles. The manufacturer declares material consumption: from 50 to 90 g/m2. A protective layer is formed that resists exposure to water and direct sunlight. The composition is available with factory tinting and the ability to add Sigma Color paste to obtain the desired color.
Wood is treated with oil and wax at positive temperatures. Service life of the oil composition for external use: from 8 to 10 years; for interior work – more than 10 years. The main advantage of oil wax is that it does not flake or flake off.
Wax mixtures with added oil
Wood impregnation is done with the addition of oil. Such compositions are good from all sides.
- The oil composition allows the impregnation to penetrate much deeper into the wood;
- All oil mixtures, after hardening, remain either liquid or turn into a paste, which means they are always ready for re-application without heating;
- Oil gives the wood additional shine and a beautiful sheen.
Recipe No. 3. Universal composition
Theoretically, this mixture can be used to treat any wood, from walls and floors to dishes, but many are afraid of the presence of turpentine and rosin there.
In this regard, it should be noted that turpentine is a volatile substance and it completely evaporates, and rosin, firstly, is harmless to humans and secondly, it is only 5% of the total mass.
Universal oil-wax composition for interior work.
Flaxseed oil is almost ideal for wood, but, nevertheless, this is not the only option; it can be replaced with olive oil and even sunflower oil. The only thing I wouldn’t recommend doing is pouring machine oil into it; you won’t be able to remove the smell with anything.
Impregnation of wood with linseed oil in its pure form is also practiced, but on large objects the oil must be generously applied 3 to 5 times at intervals of 24 hours, plus after the first time the surface is sanded with fine sandpaper to remove the lint.
It is much easier to saturate dishes with clean oil, plus here the wood can also be tinted. To explain it in a nutshell, oil is poured into a container and dishes or crafts are thrown into it.
You can not only soak dishes with oil, but also tint them.
If the wood just needs to be soaked in oil, then all this is brought to a boil and after 5 - 7 minutes the products are removed. To tint, the pieces will have to be deep-fried, like potatoes. The entire process is shown in detail in the video in this article.
Recipe No. 4. Add propolis
Propolis is also a completely natural product, which is obtained as a result of the vital activity of bees; moreover, propolis is considered medicinal and is even included in some medications.
Treatment with propolis mixtures is not only environmentally friendly, but also therapeutic.
The technology is the same as in the previous versions: melt, apply 2 times and polish. Perhaps the only disadvantage of the recipe is that this mixture will be much more expensive than the others, because propolis is not cheap, so only dishes are usually impregnated with this composition.
Recipe No. 5. Add lard
For those who don’t know, lard is rendered pork fat or lard. Externally, the results of processing with a mixture with propolis and a mixture with lard are no different, but lard costs a penny, so the recipe is much cheaper.
Lard can be a successful replacement for propolis.
As you probably already understood, the step-by-step instructions do not change: heat in a water bath, mix well and apply the composition to the product at least 2 times, followed by polishing.
It is more difficult to make colored wax for wood at home; you can make a mistake in the proportions and not guess the tone. It is easier for you to first tint the wood, for example, with a solution of potassium permanganate, and then treat it with one of the compounds listed above.
What you need for waxing
In order to apply wax correctly, you will need a number of tools. You need to prepare them before work:
- Directly wax;
- Sandpaper for polishing the surface;
- Solvent or cleaner;
- Sharp knife;
- Brushes for applying the composition;
- Brush;
- Cloth.
After everything is ready, you can proceed directly to the work itself.
Step-by-step instructions for waxing wood
The procedure is carried out in several stages:
- Before application, the surface must be thoroughly cleaned. If there is old coating, it must be cleaned down to the wood itself. Then you need to polish the material using sandpaper. If necessary, it is also impregnated with stain;
- Then the wax itself is applied in 2 or 3 layers. Initially, the composition is applied along the fibers, then the first layer, and after everything has dried, as a final stage, it is applied again, as the first time, in the direction. Apply the composition using a brush or cotton swab, rub it in with a piece of lint-free cloth;
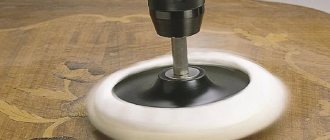
- Once the composition has dried, it can be polished. It takes 7 hours for final drying; you can check whether the wood is ready for polishing or not with your hands. If nothing sticks, proceed to the beginning of the stage. A large area is polished with special devices; for a small area, you can use small pieces of lint-free fabric;
To make the coating last longer, you can coat the top with a special varnish. it must have a water base.
How to properly apply wax to wood so that the wood does not rot and lose its attractiveness?
Wood is used in interior design, as a facing material for floors, stairs, walls, and during construction work. In order for it to remain beautiful, textured and retain its natural shade, it is important to process the lumber in a timely manner using special products, such as wax.
Waxing has been known to mankind as one of the ways to protect wood for more than 1000 years. Modern market wax impregnations and similar products contain additional components that significantly improve the primary properties of wax as a protective agent.
Wax for impregnating wood is suitable for various types, it interacts especially well with coniferous species, ideally preserving their amazing aroma and special texture.
Top 6 reasons to wax before or after tiling:
- A thin protective film is formed on the surface, which will protect the material from the influence of moisture. Due to this, coated lining and other lumber can be used in kitchens and hallways.
- The product penetrates the fibers as deeply as possible, strengthening them and making them stronger. But at the same time, the wax does not clog the pores and leaves the wood the opportunity to “breathe”. High-quality air exchange allows you to avoid rotting processes and various deformations.
- Applying wax to wood makes it possible to significantly improve the visual characteristics: emphasize the natural texture, enhance the natural shade, give a charming matte shine, for which builders and designers love this finishing material. If you use wax with coloring components, you can additionally adjust the color scheme of the source material.
- Effectively protects the coating from mechanical stress and excessively active loads. Thanks to the dense layer of wax, it is almost impossible to make scratches.
- A natural product containing exclusively beeswax. Can be used on surfaces that come into direct contact with food, such as countertops.
- Amazingly high-quality masks a variety of scratches and cracks on wood.