Vise for metalwork: do it yourself
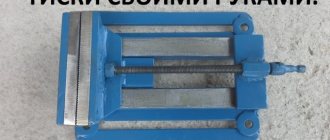
When doing plumbing and carpentry work, a home-made craftsman cannot do without a powerful vice. Larger, newer vises are expensive. The solution is to either look for a used vice on the secondary market, or roll up your sleeves and, if you have a welding machine and an angle grinder, make an inexpensive vice with your own hands. Let's look at an example of a portal user with the nickname Korkus and tell you:
- How to make a metal bench vise yourself.
- What parts are needed to make a homemade vice.
- What tools will be required?
Do-it-yourself vice for a mechanic: step-by-step instructions
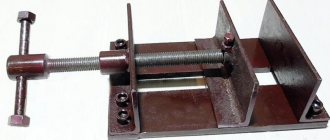
On the Internet you can find many options for homemade vices made by yourself. I also decided to make a bench vise from the metal I had, so as not to buy factory ones. And this is what came of it.
To make a homemade vice you need the following parts:
- The base of the vice is a metal plate 4 mm thick;
- Guide prism – profile pipe with a cross-section of 5x5 cm, wall thickness 4 mm;
- The base of the sponges is a corner with a shelf 7.5 cm, wall thickness 8 mm;
- The lead screw is a pin with a diameter of 20 mm;
- Also required was a metal strip 5 cm wide and 1 cm thick, a reinforced nut for the stud and an angle with a shelf 60 mm and a wall thickness of 5 mm.
The work on manufacturing bench vices was divided into a number of stages:
1. The base for the Korkus vice was welded from two metal plates measuring 20x16 cm.
Then the welding areas were cleaned.
2. In the center of the base, the user drew a line to mark the place for the lead screw - the pin. The nut for the lead screw is welded to a spacer 10 mm thick.
3. The vice guide is made of a square profile pipe, in which a longitudinal groove is made with a grinder slightly wider than the welded stand with a nut.
4. To attach the guide, a 60th corner (2 pieces) 20 cm long was used.
The corners wrap around the profile pipe, and a lid made of a strip 1 cm thick and 5 cm wide is welded on top of them. The result is a box.
In order for the profile pipe to move freely in the box and create a gap, spacers were used - 2 blades from a metal saw.
Because the gap between the plate and the corners turned out to be quite large, then, after welding the plate on top, I cut off the tacks and welded the same plate from the inside.
5. The base of the bench vice jaws is made of a durable angle with a 75 mm flange and an 8 mm wall.
The vise jaws are made of 1 cm thick strip.
Through holes with a diameter of 4.2 mm are drilled in the corners and jaws.
Then the user cut M5 threads in the corners, drilled holes in the jaws with a 5.1 mm drill and countersunk the holes for countersunk.
Bolts are screwed into the jaws, and nuts are screwed on the back side, which are then scalded.
Drawing of jaws for a bench vice.
6. Two corners are welded at the end of the profile pipe.
The jaws are reinforced with triangular stiffeners and welded with a metal plate 4 mm thick.
Quick release soft pads
In the process of machining various workpieces made of metal or wood, when fixing them in a bench vice, it is better to use soft pads on the jaws so that dents and scratches do not remain on the surface.
Also, homemade rubber pads allow you to grip parts of non-standard or round shapes.
To make quick-release soft pads for the jaws of a vice, you will need two large rubber erasers (you can buy them in a store) and neodymium magnets.
You will spend about 5-10 minutes making them, and it will take a few seconds to remove or install soft pads for a carpenter's vice.
Main stages of work
First of all, using a ruler and marker, we make markings and cut off the beveled edges of the erasers. The easiest way to do this is on a band saw.
But you can use a regular hacksaw for metal. The result should be two identical rubber pads on the vise jaws in the shape of a rectangle.
Next, in the upper part of the soft pads, you need to drill two holes for installing neodymium magnets. The drilled holes should be deep enough to fit a pair of magnets. In this case, the pads will be better held on the jaws of the vice.
At the last stage of the work, we “mount” the neodymium magnets on the glue, and the homemade quick-release soft pads on the jaws of the vice are ready. For more information on how to make them, watch the video on the website.
How to Make Soft Jaws for your Vice - Cheap and Easy
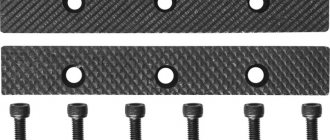
Need jaws for a vice
Good day to all! I can't find jaws for a 140mm vice. If anyone has it, please suggest it.
milling machine operators have
Use electric welding to weld a metal strip several times, and do it yourself
Mutru4, It's clear what they have.
LexxLexx wrote: Use electric welding to weld a metal strip several times, and do it yourself
LexxLexx, Hack work to be honest.
Kolbenschmid, . In terms of? Are there any special requirements for the vise jaws? With minimal effort, the result will be indistinguishable from the original.
LexxLexx wrote: Kolbenschmid, . In terms of? Are there any special requirements for the vise jaws? With minimal effort, the result will be indistinguishable from the original.
LexxLexx, This work cannot be called hack work. Cook from a strip (Oh, sorry
Kolbenschmid, -Saw! Saw, Shura! Saw! They are golden. )))) These sponges will cost you more than new yew trees ))) Are you, by any chance, building the Zenit Arena?
LexxLexx wrote: Are there any special requirements for the vise jaws?
At least hardness. The strip that is sold in the markets is St3
Improving the mini
Modern mini-vises cannot be improved much, but if you come across or already have old Soviet ones (for example, pos. A in the figure on the right):
Their functionality can be significantly expanded as follows:
Drill out (carefully, not all the way!) the flared shank of the set screw, which holds the set clamp plate. You need to drill with a drill with short “poke” diagonally from different sides. The plate is removed and the mounting clamp screw is unscrewed (do not lose either it or the plate). A hole is drilled in a section of the channel for a bolt with the same thread as on the clamp screw. The vice is mounted on the resulting stand and secured with a lock nut (pos.
B). In the clamp screw, through the remainder of the shank, a blind axial hole is drilled for the M2-M3 thread. This is not difficult to do, because... There is a conical depression left in the peg from the shank. A thread is cut in the axial hole. The plate is put back in place and is kept from falling out by a screw with a conical head (shown by an arrow in position B). The clamp screw is stored in the stash, sorry, stash.
Thus, we get, neither more nor less, a rotary table for small drilling work. True, without an angular divider, but instead of it, a protractor can be attached to the channel base, and a pointer arrow can be attached to the vice bracket. The resulting accuracy of 1 degree is sufficient for amateur home work. And if you remove the vice from the base and return the clamping screw to its place, they can be used for their original purpose.
Do-it-yourself vice: making different options
A vice is one of the most important devices for facilitating the work of any craftsman, whether when working with metal or when working with wood. By holding the part in a vice, the master frees his hands for the tool. In addition, a vice can hold a part more tightly than by hand. Moreover, manufacturing accuracy is improved.
There are different types of vices – general purpose (universal) and specialized (for specific jobs).
Regular benchtop vice, small benchtop vice, hand jewelry vice PHOTO: Leonid Shalman
Basic elements of a vice for a home workshop
The vice consists of several parts. The main elements are jaws - movable and fixed, between which the workpiece is clamped. The fixed jaw is made as one piece with the base. A nut is fixed in the movable jaw, through which a powerful lead screw passes. At one end of the screw there is a handle by which it is rotated, the other end rotates freely in a stationary jaw. When you rotate the handle, the movable jaw moves towards the stationary one.
The base can be made of two parts. The lower one is tightly attached to the work table (workbench), and the entire vice mechanism is assembled on the upper one. Some models can rotate around a vertical axis.
Main elements of a vice PHOTO: usamodelkina.ru
Vise for tying fishing flies
The device for tying a popular fishing lure is a rotating mechanism with a vice for the hook fixed at a certain angle.
The rotating mechanism can be made from anything, but the vice should be approached with special care. The jaws must be strong, otherwise it will be impossible to hold the steel hook.
The secret is simple - a homemade vise for front sights can be made from two high-speed cutters for a lathe. First, the metal is “tempered”, then after processing it is hardened again.
In conclusion, a video about a homemade vice made from what was in the garage. Suitable for everyone
DIY bench vice
Factory-made vices can be purchased at a tool store. But you have to pay a lot of money for them. In addition, a true master always has a set of individual requirements for tools and devices. That's why many craftsmen make their own vices. But to perform such work, you need to be able to do a lot: make competent drawings, be a good mechanic and welder, work on lathes, milling and drilling machines. But you can make a unique vice that no one else has.
DIY vice for a drilling machine
A drill press vise differs from a regular bench vise in its overall height. They are significantly lower.
Materials and tools
The materials and tools used are the same as in the previous case.
Blueprints
The drawings differ only in the chosen design and the dimensions of the parts.
Manufacturing instructions
The manufacturing technology is determined by the fact that metal is being worked. Specific parts are manufactured according to specific drawings. Between the variants of different models of vices, the only fundamental difference can be in where the running nut is installed - on the moving or stationary part. This determines how the lead screw is secured. And another nuance: a vice for a drilling machine usually moves freely around the workbench.
Vise for drilling machine PHOTO: usamodelkina.ru
Dimensions
A vice is a standardized equipment that is manufactured in accordance with GOST. There are several standards for them:
- small vice: jaw height – 50 mm, maximum stroke – 80 mm;
- medium: height – 180 mm, working stroke is 120-125 mm;
- large: height – 220 mm, stroke length is 140-160 mm.
Chair models have similar characteristics. In them, the height of the jaws is in the range of 65–75 mm, and the length of the working stroke is 120–150 mm or more.
The protrusion of the linings from the grooves should be 2–3 mm (for large bench vices). In more compact copies it may be smaller.
There are models with other sizes of clamping bars. But if for some reason they are not suitable, then the linings can be made independently.
Carpenter's vice for workbench
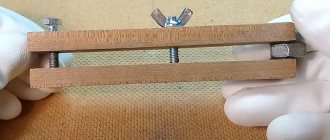
Wooden vices are quite suitable for carpentry and carpentry work. They will have to bear significantly less load than when working with metal.
Materials and tools
As initial blanks, you can take three bars with a cross-section from 40×40 mm² to 60×60 mm² and a length of 250 – 300 mm. Dimensions are determined from the requirements for the size of future parts. You also need a lead screw with nuts; a commercial stud with an M10 - M12 thread will do. For the base, you can use a sheet of plywood with a thickness of 10 - 12 mm and a size of 300x500 mm. For fastening, you will need self-tapping screws with a diameter of 6 mm and a length of at least 40 mm.
Common carpentry and carpentry tools: wood saw, plane, drill.
Blueprints
The structure is visible from the photograph.
Wooden vice for a workbench PHOTO: youtube.com
Replaceable plastic jaws
Sometimes you have to work with soft materials (leather, wood, etc.), the surface of which, when fixed in a vice, can easily be damaged by corrugated metal jaws.
But this problem can be solved very simply - just make replacement jaws for the vice from plastic.
Empty plastic bottles and cans of household chemicals can be used as the main raw materials for making sponges.
The prepared containers must be cut into small pieces with a knife or scissors, then poured into an aluminum mold and placed in the oven, which must first be preheated to 350 degrees for 10–15 minutes. The result should be a rectangular plastic block.
