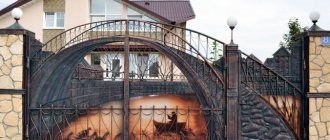
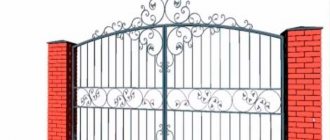
Forged automatic swing gates. Photo MetalStyle
Forged swing gates covered with wood. Citadel Photos
Let us consider here, for those who want to make gates with their own hands, what types there are, the elements used, equipment and skills required, and how exactly to do it.
Types of forged gates
The variety of types and shapes of forged gates is amazing. Forged structures differ in the method of opening, design, and combination with other cladding materials.
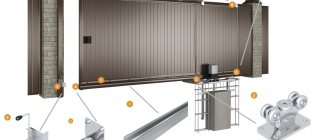
Sliding wrought iron gates are convenient. To open them, you need a wide space along the fence. The mechanism is almost invisible and durable. It is based on the use of guide rails and roller carriages. Can be opened manually or electrically. Sometimes gates are made sliding (sliding) in both directions.
The swing design of forged gates has a simple design. The swing gate leaves are attached to the mounting plates located on the support pillars. As a rule, locking elements and fittings are reinforced with bearings. This facilitates quick opening and closing of the gate. Moreover, they can open not only inward, but also outward.
The gate can be a separate element of the entire structure, or it can be part of the gate. The first option not only looks good, but also has high-strength properties. Forged gates with a wicket inside will cost less, but look less aesthetically pleasing.
If you need to lighten the structure and reduce its cost, while at the same time closing the yard from prying eyes, forged gates with polycarbonate would be the ideal solution. Polycarbonate is cheaper than structures combined with metal. This material conducts light well.
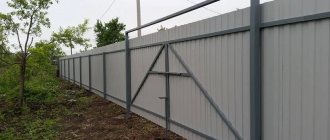
Forged gates made of corrugated sheets look democratic, although they may seem unattractive to some. However, this design will save your budget, despite the presence of expensive forged elements. Corrugated sheeting is durable due to the strong steel alloy included in its base. It can be adjusted in shape, so it can easily adapt to a forged fence.
Wealthy homeowners prefer to make exclusive custom-made wrought iron gates. This work is usually done manually. Hence their extremely high cost, which is not affordable for everyone. Forged gates often feature special monograms and family coats of arms.
Manufacturing technology for forged elements
The production of forged elements is not an easy task. First of all, a sketch of the future creation is made. You can also find photos on the Internet of those parts that you like.
Cold forging
With this processing method, the metal is impacted with a heavy object or tool, such as a hammer. Cold forged gates are considered more affordable, but not the most aesthetically pleasing.
Hot forging
Forged gates, which were made by hot melting, look beautiful. Simply put, this technology is comparable to modeling from plasticine. This simplifies the work and allows you to forge elements of any complexity. The metal lends itself well to manipulation when hot. Therefore, it can easily be used to create patterns and weaves of various shapes, lengths and thicknesses.
Advantages of gates with forging elements
The main feature of gates with forged elements is their attractive appearance. In addition, forged gates have other advantages:
- Unique details according to your own sketch are forged by hand.
- High quality materials that will last over 100 years.
- The protective function of forged gates is undeniable.
- Versatility. Combines well with other materials.
- Eco-friendly raw materials.
- Forged gates will never lose their relevance.
Video: DIY patterns
Making forged metal gates is, first of all, a creative process. To create an attractive design, you usually only need the ability to use a welding machine and blacksmith tools.
- Author: Ksenia Zubkova
I am a philologist by training and have been writing texts for more than 5 years. Rate this article:
- 5
- 4
- 3
- 2
- 1
(0 votes, average: 0 out of 5)
Share with your friends!
Preparatory work
At the preparatory stage, it is necessary to make a drawing with exact characteristics, as well as select the necessary tools and materials.
Drawing
To begin with, a drawing of a forged gate is created. On it it is necessary to note the shape and size of the entire structure, as well as its individual components. The shape of the gate can be: classic, rectangular, round, with elements of bends and peaks. The diagram must accurately reflect the distance between elements, the location of components and decorations.
The sketch includes the type of fastening of the gate with the fence, the configuration of the leaves and the type of their connection. Near the gate there is a wicket with its characteristics.
drawing of a forged gate
Tools
Make sure you have the tools listed below in advance. The material hardens quickly when welding, so to avoid failure, all means must be at hand.
- Welding equipment;
- Forge and anvil;
- Hammer;
- Ticks;
- Machine;
- Stitching;
- Gas welding machine (for spot welding);
- Vise;
- Electrodes;
- Metal grinding machine.
Materials
It is better to purchase materials in advance too. To save money and time, compare prices at different stores. Some materials will have to be ordered in advance, and this will take time.
- Steel sheets for continuous filling of 1 mm sashes;
- Sheet steel for forging pointed peaks;
- Bricks;
- Pillars;
- Mortar for installing pillars;
- Profile pipes for the frame;
- Tetrahedral elements.
Tools
To make such a gate, you will have to temporarily imagine yourself as a blacksmith, whose work requires the presence of tools such as:
- bugle;
The device will be needed to heat the parts
- anvil;
- large and small vices;
- stitching for making holes;
- metal products welding machine;
- Sander;
- pliers (holders of hot objects);
- a machine that twists and bends metal products;
- several clamps;
- hammers of different sizes.
In addition to these tools, you will need an open fire source that will heat the metal to a high temperature, a drill with an attachment, a square and a trowel.
Installation of support pillars
To prevent the sashes from sagging, they install powerful pillars, for example, brick ones. A metal pipe is placed in the ground, and then covered with brick on the outside. Next, the installation points are determined, not forgetting about the brick finish of the pipe, and a meter-long hole is dug. The width of the trench should exceed the girth of the structure by 10 centimeters. The supports are covered with crushed stone and placed under a press. After this, compaction of the soil occurs. It is necessary to approach this stage with all responsibility, since if the technology is incorrect, the doors will warp and the appearance of the fence will deteriorate.
You can install support posts for fastening using mortar. To create a solution, cement (M300) and sand (1:3) are used. Water is added to the mixture, after which the mass is beaten with a drill until lumps are eliminated. After the solution is ready, crushed stone is poured into it.
After the mortar has hardened, bricks are laid. At the same time, it is important to follow the technology in which each subsequent brick closes the seam of the previous one. Next, they begin to weld the shank and pass it through the seams. Jointing is carried out only after all seams have hardened.
Making the foundation
First step. We mark the places for installing vertical supports. There will be 3 such posts in total: one for attaching the gate and a pair for mounting the sashes.
Second step. We dig holes with a diameter of about 20-25 cm (depending on the size of the selected racks, more on this later) for installing supports. We calculate the depth of the pits so that it is approximately 30-35% of the height of the above-ground part of the supports. We take into account that the height of the gate leaf is usually 50 cm less than the height of the supports.
Thanks to this reserve, the required 20-30 cm gap between the ground and the lower edge of the sashes will be provided, and the rest of the reserve, at the request of the owner, can be used for installing various decorative elements at the top of the structure.
Third step. We fill the bottom of each depression with a 10-15 cm layer of crushed stone. Carefully compact the pillow.
Fourth step. Preparing the solution for pouring the supports. We take part of M400 cement, a couple of parts of sand and 4 parts of fine crushed stone. Mix the dry ingredients, gradually adding water to them until the mixture has a viscous consistency.
Fifth step. We insert support posts into the holes. They can be made from different materials, namely:
- timber with a section of 15x15 cm;
- round log with a diameter of 20 cm;
- channel beam with walls at least 1.5 cm thick;
- profile pipe with a cross section of 8x10 cm with walls no thinner than 7 mm.
We insert support posts into the holes
The pillar is installed in the pit, its vertical position is achieved using a level.
We set the supports strictly vertically and fill them with solution to the top of the pits. In the case of using wooden racks, we pre-treat their buried parts with an antiseptic and wrap them in roofing felt or tar them.
To make the metal supports more stable, we can first weld 3-4 horizontal strips of steel reinforcement, metal angle or pipes to their lower ends.
Let the concrete set. He needs at least 2-3 days for this. According to GOST, concrete gains strength on average within a month.
While the concrete dries, let's start making the frame.
We weld the transverse fence pipes to the gate posts
We weld the transverse fence pipes to the gate posts
We weld the transverse fence pipes to the gate posts
Assembly of forged gates and wickets
If you have time and desire, you can try your hand at forging and create elements of a forged gate with your own hands. More often, ready-made fragments and cold forging patterns are used.
Making the sash
As soon as the materials are prepared, we begin to manufacture the rigid frame of the doors. First of all, the frame is welded from a profiled pipe. For one-sided sheathing of the frame with a metal sheet, it is better to use a thicker corrugated pipe. Preliminary welding is done spotwise to avoid twisting.
It is important to promptly check the compliance of the frame parameters indicated in the drawing.
The seams are welded using an inverter. Next, the handles are welded and cleaned with an angle grinder.
Then all metal elements are treated with an anti-corrosion coating. The white coating that appears after treatment is removed with a rag. Next, the cleaned and treated sashes are painted in the desired color. Metal painting not only serves as a decorative function, but also, no less important, protects against the harmful effects of external factors.
Installation of forged gates and wickets
Particular attention should be paid to the quality of the finished forged structure. Decor with forging elements is secondary. It should be borne in mind that forged structures are the heaviest type of gate. To strengthen the fittings, it is important to take a responsible approach to the choice of frame, support posts and hinges, focusing on the total weight of the finished product.
The entrance gate can be made using cold forging. To do this, certain tools are used: a profile bending machine, a vice, a pattern yew.
How to sew the sashes
To ensure that the gates are not only pleasing to the eye, but also fulfill their main protective function, they are sheathed with fabric made of opaque materials. The most successful combinations are made from forging with polycarbonate, corrugated sheet or wood.
Polycarbonate
Polycarbonate can be cellular or monolithic. Honeycomb material is suitable for cladding. The sheets are light in weight and easy to transport. Polycarbonate bends well and is easy to use. It has a fairly wide color palette with different levels of transparency.
Profiled sheet
Profiled sheets are very often used in cladding wickets and gates. Easy to install and also wear-resistant. Has a large selection of colors.
Tree
Perhaps forged elements look best with wood. Plus, this material is environmentally friendly. However, wood is susceptible to moisture and damage by insects, and therefore requires special care and treatment with special protective agents.
How to choose corrugated sheets
According to their intended purpose, they are classified into load-bearing, wall and load-bearing-wall corrugated sheets, which directly determines the loads that it can withstand. The wave height of the supporting sheet can reach up to 13 cm, and such gates will be the strongest and most durable. But they will also cost more than wall corrugated sheeting with a wave height of up to 2 cm.
If you prefer wall or load-bearing wall sheets, choose grades with a thickness of 1.7 cm. In addition to them, metal-polymer corrugated sheets of the MP-A or MP-B categories are suitable. There is also the MP-R brand, but it is used for roofing.
Pay attention to the type of coating: anti-corrosion aluzinc or multi-colored acrylic. With electrolytic galvanizing, the protective layer is too thin and is easily damaged. Of the polymer coatings, these are thin but practical polyester, heat- and damage-resistant plastisol, durable textured pural or the most reliable, but most expensive polyvinylidene fluoride.
Do-it-yourself canopy over the porch: types, how to make
