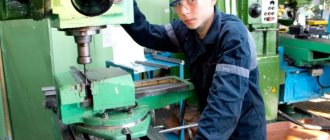
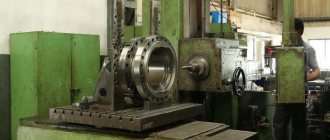
The basic configuration of any equipment includes a set of mandatory functions, but often this is not enough to perform some operations. Additional equipment expands the possibilities. One type of such device is a rotary table for a milling machine. It is fixed to the base of the main structure and allows you to process complex shaped parts. Depending on the purpose, the size and brand of the rotary table is selected. It is important to consider equipment compatibility. Although in most cases such problems do not arise, since industry standards are as unified as possible and make it easy to use third-party products.
Rotary table device
Regardless of the class and complexity of the product, the principle of operation is the same for all. The basic elements of the device include:
- Base. Analogous to a machine bed. A system of attachment to the machine is required.
- Faceplate. Rotating part of the device. There is a hole in the center of the part (straight, but more often a Morse taper). There are T-shaped grooves on the working plane for fixing the workpiece or clamping mechanism. Modern models may use an original part fastening system. After installing the workpiece, the faceplate must be securely fixed in the desired position.
- Control. The faceplate can rotate around the central axis using a mechanical handle or an electric motor. CNC machines and specially designed rotary tables in modern design are programmable.
DIY table for a router with drawings and manufacturing tips
Below are step-by-step instructions “in pictures” on how to make a milling table for a manual router with your own hands, using available materials:
- MDF board, chipboard or plywood 19 mm thick, dimensions 1000x1800 mm - 2 pieces;
- steel plate size 30x30 mm (depending on the router model), thickness 2...3 mm;
- aluminum guides, approximately 2.3...2.5 m;
- matching wheelset with brake – 4 pieces.
A diagram of the tabletop and stops with a pipe for a vacuum cleaner is presented below.
The following parts are cut from MDF sheets (chipboard, plywood):
1. work surface; 2. support base; 3. stop wall; 4. headscarf (4 pieces); 5. drawer (2 pieces); 6. side bar (2 pieces); 7. connecting strip (4 pieces).
Next, markings are made on the main part (working surface) for the future support plate. The dimensions of the plate are chosen so that the sole of the router can be placed on it freely (with gaps of at least 20 mm at the edges) and there is room left for resting on the tabletop.
First, the internal contour is cut out (for installation of the router), then a selection is made for mounting the plate “flush” with the tabletop.
Accordingly, the sampling depth is equal to the thickness of the plate. Before installation on the tabletop, the attachment points for the router and the hatch for the working cutter are marked on the plate; the sole of the tool is used as a template.
Additionally, holes are made in the corners of the plate for fastening to the tabletop. As shown in the diagram, the places for attaching the plate in the tabletop are reinforced with nuts.
Taking into account the position of the mounting plate on the tabletop, select a place to install guides and stops, assembling them according to the diagram.
1. side bar for fixing to the base; 2. drawer; 3. guide holes, they need to be countersunk; 4. front wall of the stop; 5. self-tapping screws with a countersunk head; 6. headscarves; 7. support base.
Do-it-yourself parts for the base of the table for the router are made and assembled.
1. outer side stand; 2. internal side stand; 3. rear support; 4. bottom of the table.
The video will help you understand in more detail how to make a table for a manual router with your own hands according to this diagram.
This is roughly what a finished homemade table looks like from the side with a connected rigid pipe for a dust collector/vacuum cleaner.
Operating principle of the equipment
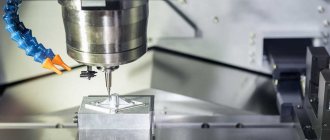
The main task of the rotary table is to process parts in ways that are impossible on a conventional milling or lathe. The device allows you to realize the advantages of the above equipment. Parts in the form of a body of revolution are made on a lathe. It is impossible to leave unprocessed a part of the workpiece that extends beyond the cutting perimeter, but there is such a need. On a milling machine, a stationary part is processed using coordinate vectors. By installing a rotary table, you can make unfinished rotation bodies and bore holes that cannot be installed in a lathe.
The video shows how an automatic rotary table works for a 5-axis CNC machine.
This result is achieved by the fact that the workpiece is fixed not on the frame of the milling machine, but in a device that allows the workpiece to have an axis of rotation. This became the basic principle of operation of the turntable. Programmable equipment allows you to produce complex-shaped parts not on expensive machining centers, but using a regular milling machine, but with this wonderful device.
How to make a rotating table: design and design choices, plus simple assembly instructions
Thanks to the centrally located rotating tray, each banquet participant can get any dish
Rotating tables are furniture that is in demand in various fields, from advertising to metalworking. But this time you will learn how to make an easy-to-use turntable for home use. I bring to your attention simple assembly instructions, plus recommendations for choosing a suitable design.
Equipment classification
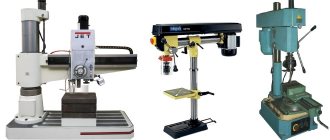
It is customary to divide rotary tables according to several parameters. Firstly, in terms of working position. The equipment can be horizontal, vertical and universal, that is, it can work in two planes.
Secondly, in terms of size. The size of the faceplate is taken into account. It can vary from ∅ 110 mm to ∅ 630 mm. Tables of other sizes are possible, but these are special products made to order or for specific operations.
Thirdly, according to the method of adjustment and configuration. The equipment can be equipped with a simple mechanical handle, driven by the main machine and equipped with its own electric motor.
And finally, fourthly, a rotary table with expanded functionality. For example, it may have not one axis of rotation, but two, vertical and horizontal.
Rotating base on a ring bearing for mounting a round tabletop
The rotating base consists of three parts : 1) The lower support circle ensures the stability of the entire structure on the table. 2) The turntable is designed for attaching a tabletop to it (for this there are holes for self-tapping screws).
3) The rotation mechanism is a metal ring ball bearing.
Rotating base, side view:
The rotating base is a product completely ready for installation. To assemble the rotating center, you will additionally need: a round tabletop, a screwdriver, a ruler, a pencil and self-tapping screws of the appropriate length (usually 3.5x20 or 3.5x25 mm).
Performance characteristics
The variety of models from different manufacturers opens up wide possibilities for choosing a specific product to achieve clearly defined goals. The specifics of the enterprise determine the characteristics of the installed rotary table. For exclusive high-precision work, models from proven companies of the highest accuracy class are chosen. The tolerances for such equipment are minimal and are:
- Rotation angle - 1 sec;
- Straightness of the working surface - 3.0 microns;
- Faceplate end runout - 1.5 microns;
However, such rotary tables are not cheap and in practice there is no need to use them in normal production. Most devices in this category are offered at more affordable prices, but with quite acceptable characteristics:
- Rotation angle - 1 min;
- Straightness of the working surface - 10-20 microns;
- Faceplate end runout - 12-20 microns;
The central hole, as a rule, is made in the form of a Morse cone No. 3 or No. 4. A universal way to effectively center the workpiece. Morse tapers are used in a similar way in almost all metalworking machines.
MX series. Rotation mechanisms with additional support for large diameter wheels
The mechanism is fixed on a support platform (round or square):
The large support area allows you to install a tabletop circle with a diameter of up to 140 cm on the mechanism.
The future rotating circle is attached to the ring mechanism with self-tapping screws. Before installing the rotating circle, it is necessary to remove the mechanism from the support platform. Attach the mechanism to the rotating circle. Then screw the platform back to the mechanism in its original place.
If necessary, the support platform is additionally attached to the table surface, for example, with self-tapping screws from below (through the table).
If you need advice on where to buy a circle tabletop, write to us. Tabletops are offered by various suppliers in Russia; round tabletops are available in a variety of decors and colors.
The load on the MX mechanism is up to 50 kg.
Recommendations for installation of MX mechanisms
Prices for MX rotation mechanisms:
Mechanism | Price, rub | Production time | Order |
| MX-50. Mechanism with a round support made of 16mm chipboard with a diameter of 50cm. We recommend for installation of a rotating tabletop with a diameter of 70-80 cm. Height 2.8 cm. Product weight 3.5 kg. | Top view | Bottom view | 3600 | January |
How to order. Payment. Delivery. Guarantee
Need some advice? We will answer your questions:
What kind of work is a rotary table used for?
The scope of application in metalworking is extremely wide.
Manufacturing of complex parts, such as flanges with fasteners, elements of mechanism housings. Effectively machining holes in parts that cannot be properly oriented in the lathe chuck. Workpieces with certain angular distances. Milling of grooves, ledges. Drilling holes at the same distance from the center of the part with a precisely specified angle relative to each other. It is very reasonable to use tooling for small- and medium-scale production. CNC machines and programmable rotary tables do much the same work as jig boring machines and machining centers.
Limitations in processing can only be caused by the size of the workpiece. The departure relative to the fixation point is regulated by the norms and rules of operation. The larger the part, the larger the diameter of the turntable faceplate should be. Exceeding the recommended values is unacceptable.
What is a milling table?
This is a fairly large plane, made of durable material that can withstand loads well. The horizontality of the surface and the absence of unevenness are important - otherwise the work will be very difficult. Typically, the countertop is made of wood or its derivatives. This is due to the fact that wood (plywood, chipboard and similar materials), produced in the form of a slab, already has a flat and smooth surface and dampens vibrations well during operation. A cutout (hatch) is made in the tabletop, and a manual router is attached to the bottom. Standard models provide for fastening to a horizontal plane, and which side to do this on – top or bottom – is left to the user’s discretion.
In addition to the tabletop, supports are needed - strong, stable, capable of withstanding significant loads. Suitable for them are massive timber (section from 40x40 mm), flat panels, metal racks or a welded metal frame (assembled on corners and plates).
In addition to the already listed mandatory elements of a do-it-yourself milling table, there are additional ones that significantly facilitate the work:
A metal plate placed on the tabletop at the cutout location
It protects wood from excessive loads and mechanical damage, and simplifies work with cutters. Another important advantage is the reduction in the thickness of the table, that is, providing a larger working stroke of the cutter compared to a thick tabletop. When using a plate with a thickness of 2...3 mm, you can use almost the entire stroke of the cutter (35...70 mm, depending on the model), and for a tabletop with a thickness of 20 mm, all these millimeters are “subtracted” from the possible processing depth. The plate is attached to the tabletop with screws (self-tapping screws) and must be quickly removed if necessary, so it is better to reinforce the mounting sockets with nuts or other elements with an internal thread of a suitable diameter driven into the wood. In this case, the router itself is attached from below to the plate, and not to the tabletop, and can rise with it - this is convenient if you need, for example, to replace the router with an electric jigsaw or drill for drilling numerous holes in a long part.
The plate for a router for a table with your own hands must be made of high-quality, preferably non-rusting steel, rigid and durable, at least 2 mm thick (depending on the weight of the router and the properties of the steel). The hole for the cutter must be processed along the edges, since the cutters will have to be changed quite often and it would be stupid to remove the device for this each time. I feel sorry for my fingers; they don’t need wounds from metal burrs.
Guides
Designed for uniform, smooth displacement of the workpiece along a given direction. The simplest guides are a flat beam screwed/nailed/glued to the tabletop at the required distance from the cutter. A more “advanced” option is guides with the ability to move and/or rotate. The easiest way to do this is to fasten the guide to the table with clamps, but this option does not guarantee a strong fastening - under the influence of vibration, the threads on the clamps “relax” and the guide begins to move out of the given position. Therefore, it is better to provide a number of fastenings for the guides - with the ability to move the guide relative to the cutter axis, with the ability to rotate by a given degree.
By gluing (cutting) markings in the form of a regular measuring tape along the side edges of the tabletop and providing latches at the ends of the longitudinal guide for tight fastening, you can quickly change the distance from the working tool to the extreme plane of the workpiece.
You can also make a parallel stop for a milling machine with your own hands using screw fastenings, but then you can only move it with a certain pitch corresponding to the pitch of the threaded holes for fastening in the tabletop. Another convenient option is to fasten aluminum (steel) guides along the end sides of the tabletop and equip the parallel stop with sidewalls with screw fastenings for these guides. Then smooth movement is possible.
If you make a horizontal insert from an aluminum (steel) profile with vertical stops moving along it in a displaceable guide, it will be easier to secure the workpiece.
You will still have to press it with your hands, but at least initial fixation can be ensured. Also, these stops can be end stops, that is, they limit the movement of the part from and to - for the entire milling length.
You can make your own guides for a milling table using ready-made elements (from other machines, purchased at a hardware store) - for example, a factory-made clamping stop with grooves for vertical movement, or even the entire upper part, mounting only the support.
Another important point: in the rip fence, in the place where it will be closest to the working cutter, it is worth making a rectangular or rectangular cut with a rounding at the top of the shape. On the reverse side, a vacuum cleaner hose or at least just a dust bag is attached to it.
Vacuum cleaner
A very useful addition when milling. A pipe attached to the work area helps remove small chips and dust directly to the receptacle without polluting the atmosphere of the workshop.
Additional switch
It is better to mount it on the side surface of the table (on a support) under the right hand (under the left for left-handers). Believe me, crawling under the table every time to turn off the router is extremely inconvenient; the switch allows you to get rid of this need. It’s good to make fastenings for the wire there so that it doesn’t get tangled underfoot, and perhaps an additional outlet at a stationary workplace.
Folding wings
They will help to significantly increase the table area if you need to mill large/long parts. They are mounted on special folding brackets or on piano (furniture) hinges with supports.
Drawers and shelves
It is better to arrange them below, under the tabletop, since the upper plane of the table should not be occupied. Boxes can be made with additional plates - holders for replaceable cutters, small equipment, and other things.
Important: the location of shelves and drawers should not interfere with comfortable seating at the milling table! If the width of the tabletop is not sufficient for this, it is better to move the fastenings for the shelves outside, securing them on the side supports of the table in a cantilever manner. If the master is standing while working, this parameter is not important; you can place the boxes as you like.
Wheels on legs will be very useful for a mobile table for a hand-held router - you never know, you will have to move the device from one part of the workshop to another. If the floor is uneven, they can - and should - be replaced with adjustable supports in order to be able to make the tabletop exactly horizontal.
Installing equipment on the machine
There should be no difficulties when fixing it to the base plate of the milling machine. The freely movable mounting bolts in the T-slots are brought into the mating holes or slots and the nuts are tightened. The operation is simple, but the considerable weight of the device requires caution during transportation. Place the turntable on a surface completely cleared of debris. The fit must be complete. The next stage of work will be setting up the equipment. The operation requires knowledge, experience and qualifications.
There are several ways to position the turntable correctly. Simple work where there is no need to maintain micron accuracy allows adjustment without special tools. A touch is made on a test workpiece with a cutter, then the table is rotated 180° and the operation of the cutting tool is repeated at a similar value. Tolerances and deviations are measured and adjusted by the required amount. It is much more difficult to configure equipment for high-precision work. Only qualified craftsmen can do it efficiently using special tools. Stops and limit switches are installed. A test sample is tested and if the accuracy requirements are met, then work begins. The technical specifications indicate the number of required measurements. All critical details are checked. When releasing a batch of products, you can measure not each one, but through the recommended number of pieces.
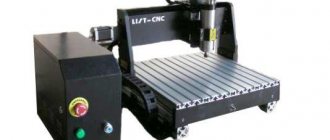
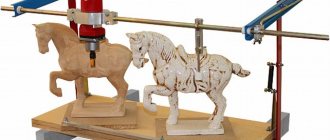
Homemade tilt-rotary machine for metal and wood machines
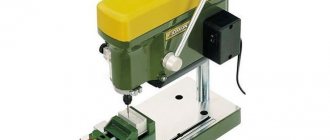
In a home workshop where there is a milling machine, it is good to have a rotary table among the devices. They are sold in stores if you need to make a lot of parts. Hobbyists can make the device themselves.
Required tools and materials
The easiest way to make a device yourself is from a lathe chuck. To do this you will need the following tools:
- screwdriver;
- Bulgarian;
- hex and socket wrenches;
- welding machine.
The rotary table consists of parts:
- scroll chuck;
- base with 2 ears;
- limb from the drawing board;
- clamps;
- bolts;
- 2 disks.
Ears with holes for bolts are welded to the base for fastening to the working surface of the machine. The limb is installed between 2 washers above the base. An inspection window is cut out in the body of the cartridge to see the divisions. The part is clamped into the jaws and rotated manually.
Drawings and calculations: When making a device yourself from scrap materials, a calculation is made of the stroke of the worm shaft and the number of teeth on the disk through its radius. Then a tap with the required pitch for cutting the disk is selected.
Step-by-step instruction
The disk is fixed on the workbench and put on the axle. Fasteners are installed. A screw is screwed in near the edge, against which the tap inserted into the electric drill rests. On its side it rests against the surface of the disk. When rotated, it cuts the tooth. The worm is installed in the housing in engagement with the cut teeth on the disk. A dial with a handle is attached to its end. Everything is attached to the base.
Safety precautions
When making a device, it is necessary to check the condition of the tool and the wires of the electric drill and welding machine, the grounding of the equipment and sockets. Even in a home workshop, you should wear overalls with long sleeves and safety glasses. The workplace must be cleared of unnecessary objects and well lit.
A rotary table for a milling machine increases the functionality of the equipment and allows you to make more complex parts with less time. For home use, you can make the device yourself.
Advantages and disadvantages
Unsatisfactory performance of the equipment may be due to the wrong choice of model, or insufficient qualifications of the employee. The characteristics are clearly stated in the accompanying documents and, as a rule, guaranteed by the manufacturer. Individual cases of manufacturing defects are resolved on an individual basis.
The turntable has plenty of advantages. Having such equipment in your arsenal, you can master additional types of work or launch the production of new products. Some operations can be optimized. One of the applications of the rotary table is the processing of complex welded structures. They are often processed by hand. It takes a lot of time, and the quality leaves much to be desired. By setting up a milling machine with a rotary table for such an operation, the geometric dimensions of the parts become an order of magnitude more accurate, and the processing time is reduced many times over.
The payback of equipment depends on production volumes and can vary within significant limits, but there is no doubt that the enterprise will benefit in the quality of manufactured products.
Tools
Having decided to make a rotating cake table with your own hands, prepare the following tools and materials :
two bearings (they can be purchased at any auto store);
Important: bearings are double and pressed. The second option is preferable when assembling a rotating cake stand, as they are more convenient to install.
Capabilities
Lively systems have two axes of rotation:
- one can move 360 degrees relative to the center in the axis of rotation of the tool, most often this is the Z coordinate;
- 120 degrees - movement along the axis of swing of the structure.
To hold the part, a collet clamp can be used: manual or pneumatic. Vacuum systems that operate on the suction cup principle are also used. The advantage of the latter is the ease of changing the workpiece without clamping devices.
The rotation speed can reach 1000 revolutions per minute, which can significantly speed up the processing of parts. To protect moving parts, a bakelite panel is used. If the tool makes unexpected contact, the automatic cycle will stop.
Versatility
Inclined structures can be installed on traditional systems. For this purpose, the design included the installation of a single-axis GSA+ controller. Electronics are connected via conventional interfaces. Control is implemented by means of M-code transmission.
No matter what traditional three-axis machine can simply be converted into a five-axis system. Small configurations are made to the system, positioning sensors are often added, and the type of clamping device is selected:
- Manual drive.
- Pneumatic.
- Hydraulic.
The inclined pallet can also be used for routine processing operations. When necessary, control is activated through CNC commands and continues to work further. It is convenient to produce complex products on five-axis systems: helical grooves, fan blades, which are widely used in radial milling.
pros
A rotary table for a milling machine eliminates the need for changeovers to produce a single part. Labor costs and equipment downtime costs are reduced. No additional clamping equipment is required.
The accuracy of the contours and parts of the part is not inferior to the conventional processing method. In order to save money, you can purchase a used rotary table for a milling machine. But you will need specialists who can coordinate the movements of the axes.
Ready-made solutions eliminate the need for modifications. Equipment that has a rotary table for a milling machine can be immediately put into production. Modern software shells make the process of creating codes intuitive and easy to understand, even for those who have never dealt with complex electronics.