Step-by-step instructions: how to make a miter box
Finishing an apartment is not complete without installing skirting boards and door frames. For an aesthetic appearance, the joints are sawn at an angle of 45. Doing this yourself without a special device is problematic, especially if the material has a relief profile.
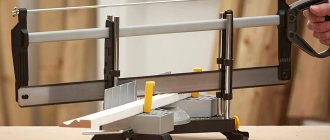
A miter box is an auxiliary device for cutting boards at the correct angle. It looks like a tray with a U-shaped profile and side cuts at the required angles. The knife blade or saw blade will move along them. You can buy a miter box at a hardware store or make it yourself, saving your budget.
Modern models are made from durable materials: plastic, hard chipboard, wood, metal. Advanced - equipped with rollers to prevent the cloth from moving, this allows you to reduce errors to a minimum.
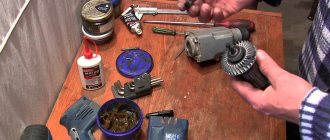
To make a miter box, you need to select a hardwood: ash, oak, pine needles. In addition to the material, you need to prepare a tool for the job. First we decide on a hacksaw. It should have a thin blade with fine teeth.
Then we select the rest of the tool:
- Ruler, pencil, protractor;
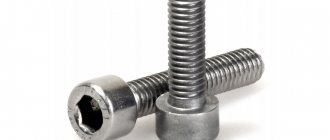
- Screwdriver, self-tapping screws;
- Vise;
- Sandpaper.
Next we move on to cutting out the side and base. Typically, the width of the structure is 150 mm, length 250 mm, and the height of the sides reaches 50 mm. Then they move on to marking the cuts.
Algorithm of actions:
- 2 sidewalls are applied to each other;
- Align the edges;
- Fix with a vice;
- Mark the middle;
- Set aside an angle of 45 degrees and make markings so that you get a cross;
- 90 degrees are measured on the sides and marked with a line;
- Use a hacksaw to cut through 5 mm and replace it with a carpentry saw;
- Continue cutting to the base of the miter box, do not cut deeper;
- Do the same at 90 degrees;
- Use sandpaper to clean the inside of the cuts;
- The parts are released from the vice.
Next you need to assemble the box. The sidewalls are placed on glue and secured with self-tapping screws. If it is necessary to make a dismountable device, then glue is not used.
Principle and rules of working with the device
For many owners of an apartment or house who carry out renovations on their own, it is news that there are special devices for cutting the corners of a baguette. Therefore, they are poorly versed in how to use a miter box for baseboards.
The very principle of using the device is extremely simple. Take a baguette and fasten it in a miter box opposite the 45o slot in the same position as it will be glued to the wall. At the same time, it should protrude 1-2 cm beyond the boundaries of the zone in which the corner will be cut, which will make it possible to obtain a smooth, chip-free end. The workpiece is fixed with clamps, and in their absence, it is pressed to the base of the device by hand. There is a little trick here: it is more convenient to cut if the saw is located on the side of the working hand (the grooves in the tool allow this to be done).
Knowledge of the operating principle does not guarantee accurate and beautiful connection of the baguette in the corners. You also need to know the basic rules of how to cut a ceiling plinth using a miter box.
- The cutting tool must match the material of the fillet. It is best to cut polystyrene foam with a knife with a replaceable blade. Plastic - with a knife, a hacksaw or a grinder with a diamond-coated cutting wheel. Wooden fillet - using a fine-tooth wood saw.
- Baguettes with relief or ornament must be combined according to the pattern.
- To avoid mistakes when determining the direction of the cut, you need to mark in advance with a pencil the line along which the saw will go. There is no need for special precision here: the main thing is to correctly indicate the chosen direction.
- You need to start cutting after checking the quality of fixation of the plinth in the tool: whether it is installed correctly; How securely is it fixed?
Correct work with a miter box
You don't just need to make a miter box. To cut a skirting board well, you need to know how to handle it. Before performing the main work, it is better to practice on scraps of wood or leftover foam.
Angles are divided into external and internal, and joints have a right and left side. The right plinth is placed in the miter box on the right side, the corner is made on the left. The left one is placed on the left side, the corner is sawed off on the right.
There are 4 main mistakes made by beginners:
- Incorrect measurement.
- Confusion with internal and external angles.
- Lack of knowledge of the features of sawing ceiling and floor skirting boards. The technology is different.
- Lack of matching angles after cutting.
To make the inner corner of the floor plinth, the miter box is placed on the tabletop, and the plinth is pressed against the far side. The right part is placed on the right and brought to the diagonal, the cut is made from right to left. The part that is placed on the left side is cut from left to right. To cut the part evenly, the cut is made with smooth movements. The pressure is directed towards the thrust wall. The skirting boards are joined together. The angles must match, the top is directed in the opposite direction from the observer.
How to use a miter box
Working with a miter box is quite simple. It is necessary to place the board in the box, set the required angle if necessary, place the saw blade in the groove and make the cut.
This is not so difficult, but only magnetic or electric tools cannot be interfered with by the human factor. In other situations, some unevenness in the cut is possible. However, even such a tool can significantly simplify household carpentry work. In addition, it is possible to use a miter box under the baseboards. This method of processing them is very convenient.
The quality of the cut largely depends on the quality of the saw. An ordinary hacksaw leaves a rather uneven cut, and therefore any need for a miter box is lost. Why is it needed, if what’s wrong with it, that without it you get uneven cuts?
Therefore, instead of a hacksaw, it is better to use saws with a smooth blade and as many small teeth as possible. With such a blade you can make a really smooth and high-quality cut, which will not require unnecessary processing in the future.
The tool can also be made at home. There is nothing complicated in the design itself; the main thing is to have a small set of carpentry tools on hand. This device is a universal tool for working with wood. It greatly simplifies the life of the master. Everyone can find a miter box to their liking and requirements.
External and internal corners
The technology for sawing off the internal ceiling plinth is similar to the floor plinth. The difference is in the location of the fillet in the miter box.
Work rules:
- The miter box is placed on the table;
- The plinth is pressed against the near side;
- The right element is placed on the right side, the cut goes from left to right;
- Left - on the left side, sawing from right to left.
The angle must be joined - the vertex is directed away from the observer. For convenience, you can draw drawings to speed up the work. Next, the plinth is fixed to the ceiling. The corner should be smooth. The fillets can be glued to the ceiling surface or wall.
The outer one is made in a similar way, but the plinth is placed on the far side of the miter box. The right one is cut from right to left, but the left one is cut from left to right.
Sometimes it is not possible to remove the fillets accurately, and small gaps remain. Cover the corner joint with gypsum putty, mixed with water-based paint. You can install decorative corners.
If you have a good eye, use a paper template. To do this, on a thick sheet of paper you need to draw a model of the miter box in the form of a rectangle, and mark the corners. Next, draw bold lines. The plinth is trimmed as in a miter box. In this case, it is not inserted, but placed on the template, the lines are aligned, and the cut is made in accordance with the markings.
Practical advice
Unfortunately, this method is not ideal, and no matter how hard you try, you may end up with a gap at the joint.
You can fix this in the following ways:
- Take your time when gluing the cornices along straight sections. Take care of the corners first - in this case, you can trim them if necessary, or sand them until you get a good joint.
- If the task of cutting did not work out perfectly, simply fill the cracks with a compound suitable for the material of the cornice, and then paint it.
Cutting ceiling plinth is not a complicated process at all. The main thing is to do everything carefully, following the rules for performing work. After this, all the butt seams of the ceiling moldings will be practically invisible, and apartment renovation will bring pleasure to its owner.
A miter box is a carpentry tool designed for sawing material at a certain angle. The use of this device greatly facilitates the work of cutting skirting boards.
The tool is fixed on a workbench or table, pressed with a clamp, and is completely safe and easy to use. In this article we will look at how to use a miter box, how to make a tool with your own hands and its types.
Read also: Soldering lead with a torch video
A simple way: how to correctly make a corner of a plinth for a ceiling
There is another way to make a corner on a ceiling decorative strip without using a miter box. To do this, markings are applied to the wall and ceiling.
Work order:
- The fillet is applied to the ceiling surface, pressing the smooth edge tightly to the corner;
- Draw lines above and below, one on the ceiling, the other on the wall under the baseboard;
- Similar actions are carried out on the opposite side;
- Dots are placed at the intersection of the upper and lower lines;
- The plinth is applied again, pressing it into the corner, and the marks are transferred to it;
- The points are connected into one line;
- They are cutting.
Next, the fillet is checked for alignment. If the walls are not level, make an allowance of 1 cm. In case of errors in measurement, the corners are joined first. Additional insertions must be made on the periphery.
Even with all your efforts, the angles are not always perfect. Therefore, it is necessary to make a homemade miter box, install and fix the plinth in it. It’s better to spend time on manufacturing, so that later the work will go faster. Correctly adjusted corners look neat and aesthetically pleasing, completing the design composition.
DIY miter box: choice of wood, tools and drawings. How to properly install and use the tool.
During repairs, a variety of tools are required. Sometimes it is necessary to cut parts at an angle of 45. This can be done with high precision using a special device. A DIY miter box will help you save your budget and will be an excellent assistant in repairs.
Preparing the side walls for the future miter box
As side boards (photo 5.), to make a miter box with your own hands, we use scraps of plywood or an edged board, approximate dimensions:
- thickness 10 mm for plywood and 20 mm for boards;
- the height of the sides is 30-50 mm, selected individually, for polyurethane skirting boards you can choose a height of 30 mm, and for wooden skirting boards - 50 mm and higher;
- The length of the sides of the miter box is 250 mm, a little more can be done, it is not advisable to significantly increase the length of the miter box, it is inconvenient to work with, the exception is a miter box that is not of a standard size, for cutting corners on massive boards.
We cut out absolutely identical sidewalls. This is important because parts with different sizes will be difficult to mark correctly. At the bottom of the blanks we make markings for confirmations.
Photo 5. Side parts (1) and base of the miter box (2)
Return to content
Step-by-step instructions: how to make a miter box
Finishing an apartment is not complete without installing skirting boards and door frames. For an aesthetic appearance, the joints are sawn at an angle of 45 degrees. Doing this yourself without a special device is problematic, especially if the material has a relief profile.
A miter box is an auxiliary device for cutting boards at the correct angle. It looks like a tray with a U-shaped profile and side cuts at the required angles. The knife blade or saw blade will move along them. You can buy a miter box at a hardware store or make it yourself, saving your budget.
Modern models are made from durable materials: plastic, hard chipboard, wood, metal. Advanced - equipped with rollers to prevent the cloth from moving, this allows you to reduce errors to a minimum.
To make a miter box, you need to select a hardwood: ash, oak, pine needles. In addition to the material, you need to prepare a tool for the job. First we decide on a hacksaw. It should have a thin blade with fine teeth.
Then we select the rest of the tool:
- Ruler, pencil, protractor;
- Screwdriver, self-tapping screws;
- Vise;
- Sandpaper.
Next we move on to cutting out the side and base. Typically, the width of the structure is 150 mm, length 250 mm, and the height of the sides reaches 50 mm. Then they move on to marking the cuts.
Algorithm of actions:
- 2 sidewalls are applied to each other;
- Align the edges;
- Fix with a vice;
- Mark the middle;
- Set aside 45 degrees and make markings so that you get a cross;
- 90 degrees are measured on the sides and marked with a line;
- Use a hacksaw to cut through 5 mm and replace it with a carpentry saw;
- Continue cutting to the base of the miter box, do not cut deeper;
- Do the same at 90 degrees;
- Use sandpaper to clean the inside of the cuts;
- The parts are released from the vice.
Next you need to assemble the box. The sidewalls are placed on glue and secured with self-tapping screws. If it is necessary to make a dismountable device, then glue is not used.
Kinds
In construction markets and in specialized stores you can find different types of miter boxes. They can differ in a number of ways, each of which affects the functionality and final cost. The simplicity of the design allows it to be produced from different materials, expensive and cheap. Mainly used for production:
- wood;
- iron;
- plastic;
- polyurethane.
A miter box for skirting boards can be made entirely of one material or combine several. Here you need to take into account the type of construction. Because here there is a variation:
- simple miter box;
- swivel mechanism;
- electrical appliance.
Each of them has advantages and disadvantages. The simple design is similar to troughs with through slots for cutting at an angle of 45 and 90 degrees. The second type is more functional, allows you to fix the position of the cut at different angles, and also includes a saw mechanism with a replaceable blade. The electric wort is similar to the previous analogue, it can also have a turning point, but together with the hand saw it is equipped with an electric one.
Wooden
It is difficult to purchase this type of miter box today, even though it was the first prototype of all other analogues. Wooden models are good because, in comparison with metal ones, when a saw hits the body of the device, the teeth are not damaged, but the body itself is damaged.
Therefore, you need to be especially vigilant and careful when handling, or use a special saw for skirting boards. Due to impracticality, companies currently do not produce this type. But it is noticeably cheaper than others, especially if you do it yourself.
Plastic
Wooden ones were quickly replaced by plastic options, made of plastic and special polymers. If the previous type had the main disadvantage of rapid wear, then here this problem is even more acute.
The design is developed very quickly and becomes unusable. Therefore, you need to monitor the tools in order to notice the moment of breakdown and not use an unusable tool. And among the advantages we can highlight:
- low cost;
- wide model and size range;
- low weight of the product.
Metal
Not every craftsman uses this type because of the prices, but metal products last much longer than their analogues. Because the equipment is difficult to damage during operation. Even in the steel body of the miter box, you can saw structures made not only of wood or plastic, but also of iron.
Correct work with a miter box
You don't just need to make a miter box. To cut a skirting board well, you need to know how to handle it. Before performing the main work, it is better to practice on scraps of wood or leftover foam.
Angles are divided into external and internal, and joints have a right and left side. The right plinth is placed in the miter box on the right side, the corner is made on the left. The left one is placed on the left side, then it is sawed off on the right.
There are 4 main mistakes made by beginners:
- Incorrect measurement.
- Confusion with internal and external angles.
- Lack of knowledge of the features of sawing ceiling and floor skirting boards. The technology is different.
- Lack of matching angles after cutting.
To make the inner corner of the floor plinth, the miter box is placed on the surface of the table, the bar is pressed against the far side. The right part is placed on the right and brought to the diagonal, the cut is made from right to left.
Left - placed on the left side, the cut is made from left to right. To cut the part evenly, the cut is made with smooth movements. The pressure is directed towards the thrust wall. The skirting boards are joined together. The angles must coincide, the top is directed in the opposite direction from the observer.
How to set up a saw for an even cut?
The saw blade must be strictly perpendicular to the support platform. This can be seen both in the position of the disk and in the degree scale on the adjusting arc. If the disk is at an angle:
- The locking screw is released.
- The platform tilts to the desired position.
- The screw is fixed.
You should be more careful with tightening. On some models, over-tightening can strip the threads or break off the head.
Then it depends on how and what to cut.
across the board
When cutting in this way, the length of the workpiece must be accurate. Use a tape measure to measure the desired size. Two marks are made with a pencil (marker, sharp object) - at the beginning of the future cut and at the end. The marks are connected by a line. This is the place of the future cut.
On the front part (end) of the platform of each manual circular saw there is a notch. It is located opposite the disk and shows where the cut will go. The notch is aligned with the cut marking and sawed, making sure that the notch follows the marking.
Sometimes it is more convenient to make a marking strip not at the place of the cut, but along the left edge of the platform. Then it will be easier to control the accuracy of the cut. With this marking, the full length of the workpiece is marked, the saw blade is placed against it, and a mark is made on the left along the edge of the platform.
When sawing problematic workpieces (hard, thick, steamed or twisted wood with twisted fibers), there is a possibility that the blade will move away from the mark. In such cases, instead of a mark, a guide block is screwed from the edge of the platform with screws or pressed with clamps. They saw, pressing the platform to the block.
Board along
The easiest way is to make a cut along the entire length on an edged board. To do this, use a support bar on two rods, which is included in the delivery of most models. Also, it is also called a rip fence.
Rip fence
The rods are inserted into the eyes on the platform. Set the desired cutting width and secure the rods with screws. They saw by pressing the support bar against the edged board. Pencil markings are not needed.
They are required when you need to cut a wedge-shaped blank from an edged board (one end is wider, the other is narrower) and for cutting along or trimming the wane of an unedged board. In these cases, a circular saw is used to follow the markings, similar to the cross-cut described above. But we must remember that longitudinal cuts are many times longer than transverse ones.
At the same time, the engine operates with a fairly large load, especially on thick boards (35-50 mm). Therefore, they saw, moving the circular saw at such a speed that the engine does not lose speed, and the disk has time to select the wood and throw sawdust out of the cut.
External and internal corners
The technology for sawing off the internal ceiling plinth is similar to the floor plinth. The difference is in the location of the fillet in the miter box.
Work rules:
- The miter box is placed on the table;
- The plinth is pressed against the near side;
- The right element is placed on the right side, the cut goes from left to right;
- Left - on the left side, sawing from right to left.
The angle must be joined - the vertex is directed away from the observer. For convenience, you can draw drawings to speed up the work. Next, the plinth is fixed to the ceiling. The fillets can be glued to the ceiling surface or wall.
The external version is made in a similar way, but the plinth is placed on the far side of the miter box. The right one is cut from right to left, the left one is cut from left to right.
Sometimes it is not possible to remove the fillets accurately, and small gaps remain. Cover the corner joint with gypsum putty, mixed with water-based paint.
If you have a good eye, use a paper template. To do this, on a thick sheet of paper you need to draw a model of the miter box in the form of a rectangle, and mark the corners. Next, draw bold lines. The plinth is trimmed as in a miter box. In this case, it is not inserted, but placed on the template, the lines are aligned, and the cut is made in accordance with the markings.
Pros and cons of a homemade miter box
If we talk about the advantages of a homemade miter box, then we should start with the ability to choose the optimal length of the device, which is extremely important in cases where long elements, for example, baseboards, are processed. In addition, you can place several cutting angles on one box, and select only those that are most often required
By choosing a resistant and durable material, you will be able to increase the service life and protect the device from all kinds of damage.
We must not forget that purchased miter boxes are usually made of plastic. This material can hardly be called resistant and reliable, and after several uses, deformation of the grooves is often detected, which negatively affects the actual work.
It makes sense to mention the high cost of purchased equipment. As a result, it is easy to conclude that a homemade miter box has no disadvantages - only continuous advantages. The only thing that can be noted is the inability to match expensive electric high-tech models. The latter are a combination of a rotary miter box and an electric stove, equipped with laser markings.
This is interesting: Miter box for baseboards: how to cut a corner on a baseboard
A simple way: how to make an angle correctly
There is another way to make a corner on the ceiling plinth without using a miter box. To do this, markings are applied to the wall and ceiling.
Work order:
- The fillet is applied to the ceiling surface, pressing the smooth edge tightly to the corner;
- Draw lines above and below, one on the ceiling, the other on the wall under the baseboard;
- Similar actions are carried out on the opposite side;
- Dots are placed at the intersection of the upper and lower lines;
- The plinth is applied again, pressing it into the corner, and the marks are transferred to it;
- The points are connected into one line;
- They are cutting.
Next, the fillet is checked for alignment. If the walls are not level, make an allowance of 1 cm. In case of errors in measurement, the corners are joined first. Additional insertions must be made on the periphery.
Even with all your efforts, the angles are not always perfect. Therefore, it is necessary to make a homemade miter box, install and fix the plinth in it. It’s better to spend time on manufacturing, so that later the work will go faster. Correctly adjusted corners look neat and aesthetically pleasing, completing the design composition.
Preliminary marking
Instead of this tool, you can make even angles on the slats by first trying them on in place. To do this you will need: a small piece of fillet, a marker, a tape measure or ruler, a construction knife, a saw or a hacksaw.
Before cutting the plank, it is leaned against the corner and a line is drawn along the outer edge on the horizontal surface where this plank will be installed. After this, it is applied to the opposite wall and a line is drawn in the same way.
As a result, an intersection will form on the surface where you will join the cut. The mark is alternately transferred to the parts that will subsequently be cut for joining.
Next, you will need to take a ruler and connect both edges of the plank with the previously applied markings. Then, the product is placed on a horizontal surface and cut strictly along the line.
Note! Before directly installing the product, you should check on site how much the edges stick out in the cut areas. Only after this can you proceed to using glue or other fasteners.