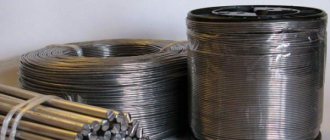
Soldering stainless steel is a rather labor-intensive process, but at the same time there are no great difficulties here. Alloys containing up to 25% nickel and chromium are alloyed together quite simply. Moreover, these alloys can create strong bonds with other metals, with the only exceptions being magnesium and aluminum alloys.
But you need to pay attention to the fact that some nickel-plated alloys when heated to a temperature of 500-700 degrees. They can form carbides, their release level depends on the duration of soldering, so the procedure time must be reduced
The choice of solder for stainless steel depends entirely on the following characteristics: steel composition, soldering conditions. It should be noted that products that are made in corrosive conditions must be soldered using silver tinols, which contain a small amount of nickel in the composition. Copper, silver-manganese, and chromium-nickel solders are used during oven soldering in dry conditions.
Today, borax is most often used as a flux for processing stainless steel. It is applied to the joint in powder or paste form. When the borax melts, the rest of the metal gradually heats up to a bright red heat (850 degrees). When this temperature is reached, solder is injected into the joint.
Removal of material adhering to the stainless surface upon completion of soldering is done by rinsing the soldered product in water or by sand blowing. Hydrochloric or nitric acid, which can be used in cleaning, are very undesirable at this stage of working with stainless steel, since they, along with the solder, will corrode the base metal.
Soldering stainless steel at home
Now that you have decided on the soldering tool, you need to know the steps to perform the actions:
- To process stainless steel, you must initially ensure that you have flux and a 100-watt electric soldering iron. You need to know that there is no point in choosing a more powerful soldering iron for processing stainless steel. The flux is ordinary soldering acid. Also, do not forget to always have tin-lead solder on hand.
- When all the necessary tools and materials are ready for soldering, you can begin work. First you need to clean the stainless steel joint: this can be done using sandpaper or a file. Upon completion of cleaning the work areas, it is necessary to apply soldering acid followed by further treatment. If the treatment does not work (the solder does not stick to the surface of the stainless steel), then you need to re-manipulate the soldering acid on a thoroughly heated surface, then perform the treatment again.
- In the case when you made a second attempt, and it was not successful, and the solder lags behind again, then the working surface of the stainless steel needs to be cleaned with a special brush, which you can make your own: you will need a piece of pipe with a cross-section of 5 mm, where you place thin wires pulled from a metal cable . Now, apply acid to the soldering area, and then bring the brush and soldering iron here at the same time. Then start working with two tools. It should be noted that this process is very helpful in removing the oxide film from the surface of stainless steel.
- When the parts have been tinned, begin soldering stainless steel using a soldering iron and flux.
Expert opinion
It-Technology, Electrical power and electronics specialist
Ask questions to the “Specialist for modernization of energy generation systems”
Tin does not stick to the soldering iron, asked by the author Ksyusha, the best answer is: There are Chinese wires that cannot be soldered with any flux, although they look like copper. Ask, I'm in touch!
Error The new soldering iron does not solder well!
Remember that immediately after purchase or processing with a file, a shiny copper tip will not solder normally.
To do this, it must be tinned to such a state that it is completely covered with an even layer of solder.
Only in this case the tool is considered ready for full-fledged work.
Materials and tools for tinning wires
In order to tin wires you will need special substances, plumbing and electrical tools. It is advisable to prepare them in advance so that you do not have to be distracted from your work and redo certain stages in a new way.
These include:
- Stripping tool – necessary for removing dielectric from live parts, allows you to clean polymer, fabric or varnish composition from the surface of wires. You can use specialized devices, but their purchase will cost a decent amount of money, so novice radio amateurs and craftsmen use a sharp knife or scalpel to strip the veins.
Rice. 1: specialized stripper - Devices for holding and manipulating wires - pliers, wire cutters, tweezers and others. They allow you to cut through current-carrying conductors, hold them under the influence of high temperatures, bend them, bring them to a soldering iron to tin, etc.
- Devices for heating solder - depending on the soldering method, devices for local and general effects are distinguished. The first of them are represented by soldering irons and stations that allow you to tin a wire at a certain point. They are suitable for tinning small and medium-sized wires locally. The latter are represented by crucibles and furnaces, which are filled with a tinning mixture for immersing metal cores or soldering points; they allow large volumes of work to be performed and tinning of large cross-section wires or entire parts.
How to Record a Song in Adobe Audition
How to learn to solder. I decided to prepare just such a small special lesson, not directly related to the main topic, for those who not only have to solder cords, sockets, plugs, but anything else in general. So, let's begin…
What do we need for soldering?
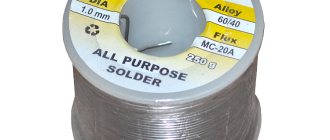
Of course, a soldering iron (ideally a soldering station), tin solder, rosin, ideally solder wire, which is a long, thin tin tube wound on a reel, similar to a wire, in the cavity of which there is rosin. Those. when soldering, in this case, we do not need, as in the old fashioned way, to lower the tip of the soldering iron, now into the rosin, now into the solder, but all this happens simultaneously at one point. More on this below...
You can purchase all the necessary components at your nearest radio store.
If you do not have a soldering station, which is initially ready for soldering immediately after switching on, but a regular soldering iron, then before work (especially if it is new) you need to prepare it in a special way - tin it, otherwise it will not solder. Now let’s look at what “tinning” means.
Never cool the tip in water
If the tip is too hot and you need to reduce its temperature, you should not put it in cold water. Ideally, let it cool naturally. To speed up the process, you can turn off the soldering iron and wipe it with a rough cloth. It will take on some of the heat.
Do not attempt to solder parts if there is an oxide film on their surface. It will simply prevent the tin from sticking. It must first be wiped off with an abrasive.
Not only a noticeable green oxide film, but also a recently appeared dark one can interfere with soldering. Ideally, always first wipe the surface with an abrasive, and only then solder, especially if it is a board.
Expert opinion
It-Technology, Electrical power and electronics specialist
Ask questions to the “Specialist for modernization of energy generation systems”
Why the soldering iron does not take solder If the manufacturer decided to save money and deliberately increased the percentage of lead, we have a more refractory solder with low fluidity, and perhaps not suitable for soldering. Ask, I'm in touch!
Main reasons
Tin-lead (the most common) solder melts at a temperature of 250-300 ℃, and this temperature is quite sufficient for work.
If at some point the tip gets hotter, then the solder and flux on it can simply burn out, leaving unsightly traces of their presence.
In addition, the copper from which the tip is made will begin to oxidize due to overheating and a thin film of copper oxide will appear on the surface. Because of it, the solder does not stick, and the “slag” remaining on the tip does not add “stickiness” at all.
So, there are two main reasons why solder does not stick or hold. The first is contamination of the tip, the second is oxidation. If you eliminate them, the work will go like clockwork.
Easy sponge cleaning
By soldering you can remove a layer of carbon deposits. We make a small bath of solder. You will need a solder rod and flux. Preferably activated (for example, LTI - 120). You can even use regular alcohol rosin. This is in the case of “light” soot, of small size.
Now we divide the solder bar into small pieces and pour a little rosin or flux (even if you have solder containing rosin, this is not enough for this case).
And we begin to bathe the tip in solder. If the solder does not melt, then you need to increase the temperature.
We coat the tip in solder from side to side, without pulling it out, so that the tip is completely enveloped. In a couple of minutes, a small amount of carbon deposits will evaporate, and it will be possible to take a little more fresh solder onto the tip after “bathing”. We leave the soldering iron heated with a drop of water for 10 - 15 minutes.
When doing this work, thoroughly ventilate the room! If the carbon deposits are still difficult to clean off after several attempts, then now you need to use soldering acid. The procedure is the same.
Do not tin the wire with solder from the tip
And in general, most people write that they can easily remove BHA components by heating on one side, but do they know that they need to solder using a thermal profile, i.e.
Expert opinion
It-Technology, Electrical power and electronics specialist
Ask questions to the “Specialist for modernization of energy generation systems”
Don’t breathe smoke from solder and flux. At what temperature is it best to warm up the following microcircuits, I’m afraid of overheating Flash CPU RA Flash and CPU are most interested in I will be grateful for the answer icq16. Ask, I'm in touch!
Error Working without glasses
When soldering, remember that you are dealing with molten metal. And if a drop of tin falling on the hand can scare few people, then a spring-loaded hot leg from a radio component that accidentally gets into the eye leads to sad consequences.
Soldering overhead or near the ceiling is especially dangerous. In this case, the wires may jump out of their place and the tin will “bullet” into your eye.
Therefore, try to always wear and use safety glasses in such cases. And don’t forget about the respiratory system.
At least basic ventilation of the room or a small USB Carlson fan on the desktop will never be superfluous.
Why do you need to tin wires?
Despite the fact that most conductors are made of non-ferrous metals that are not particularly susceptible to corrosion, their surface does oxidize over time. This leads to the appearance of a semiconductor layer with a fairly large ohmic resistance, significantly exceeding the resistance of the metal. Because of this, in places where aluminum and copper wires are oxidized, excessive heating will occur both of the metal and the elements surrounding it - insulation, parts, structural parts. Overheating, in turn, can both damage the equipment and lead to ignition of flammable parts.
The tinning process involves applying a protective conductive layer to the conductor. Such a layer must be evenly distributed over the contact surface and firmly fixed to it, for which a special technology has been developed.
In case of nickel plating
Soldering irons with a so-called “eternal tip” coated with a thin layer of nickel are often used for soldering. For some reason it is believed that it does not tin. In fact, who would think of sanding off a nickel coating?
However, the time comes and it becomes noticeable that the solder does not hold! At best, it sticks in small drops. So what should we do? The answer is the same - cheat!
The reason is often that the sting is dirty. First, you should still make sure that the nickel plating is not damaged.
After this you need to remove the deposits. This can be done on a slightly heated soldering iron with a damp cloth folded in several layers.
Next steps are:
- immediately after removing carbon deposits, the tip must be lowered into a jar of rosin, in which a piece of solder was previously placed;
- with a soldering iron you need to melt the rosin around the solder so that it sinks;
- under a layer of liquid hot rosin, touch the solder. It will immediately cover the entire working surface of the tip.
The best way to avoid solder not sticking is to avoid overheating the tip.
Prevention has always been the most effective remedy. If it is not possible to purchase a tool with temperature control, you can purchase a dimmable voltage regulator or make one yourself. If you monitor the heating temperature, you will have to tin the soldering iron much less often.
Question from the section “Science, Technology, Languages”
It is not possible to tin the wires; tin does not stick to them, although I apply flux. I start to hum the minijack, apply solder and a soldering iron to the jack. The solder is melting, I remove the soldering iron, all the tin remains on the soldering iron. What to do ?
User Answers:
For a man, this is a very shameful salary. Average for a girl. Many girls in our city earn
Because the sting is dirty! Clean it thoroughly with a file until it is pure copper, then plug it into a power outlet. When it warms up a little, poke some rosin
User Answers:
we didn’t need to... everyone did it, themselves without any problems, but one who couldn’t. at school this is already... In my opinion, there can be no subjectivity here (who noticed what or didn’t notice and what they think) - that’s all... Your college is kind of leftist... It’s clear that a veterinarian, for example, doesn’t understand dog breeds
Perhaps the metal you are trying to tin is aluminum or silumin alloy. Then it's useless. If not, any acid to remove oxides - acetic, hydrochloric (toilet cleaner), sulfuric (electrolyte from a car battery), orthophosphoric (found in Coca-Cola). When soldering with acids, protect your respiratory organs and eyes from exposure to vapors, it is very dangerous!
what kind of wires? In headphones there are often lacquered, twisted veins in the flagellum. they are insulated - a very thin varnish - you must first burn it through, to do this you need to move a drop of solder along the tip of the wire for a long time with a well-heated soldering iron and the varnish will burn out
Expert opinion
It-Technology, Electrical power and electronics specialist
Ask questions to the “Specialist for modernization of energy generation systems”
Solder doesn't stick: Why doesn't it stick to the soldering iron and stay on the wire? what to do if the soldering iron tip turns black? We think, we understand, we go to the store, buy a good pyrometer for 5000 rubles, calibrate our hair dryers, IR-gun preheaters with REAL boards installed on them. Ask, I'm in touch!
Why does solder not stick to the soldering iron?
Does solder not stick to the soldering iron? This is a problem not only for beginners, but also for experienced professionals. There is no single universal way to overcome this obstacle in work. The reasons for this inconvenience, as well as ways to eliminate it, may be different. We will limit ourselves to a brief listing of them. And if a master finds himself in such a situation, he will independently select a method suitable for his case. Possible reasons for solder not sticking:
- dirty soldering iron tip;
- dirty rosin;
- overheating or insufficient heating of the working part of the soldering iron;
- poor solder quality;
- no flux during soldering;
- incorrectly selected flux and solder;
- soldering outdoors, in a draft;
- lack of heating of the metal product before soldering;
- accidental contact with a hot tip of any plastic;
- carbon deposits and chemical oxides on the surface of the tip;
- insufficient concentration of self-prepared liquid fluxes;
- low power soldering iron.
For mechanical stripping of copper tips
What to do if there is no flux?
How to replace soldering flux
- Aspirin. ...
- Ammonia, as well as citric or acetic acid, can also be used as a replacement for fluxes, and their concentration does not require additional dilution with water.
Interesting materials:
How to join a ceiling molding? How to join a ceiling cornice? How to join the lining along the length? How to weld cast iron at home? How to weld semi-automatically without gas? How to weld aluminum with a welding inverter? How to drill concrete without a hammer drill? How to drill a brick wall with a drill? How to drill a stainless steel sink? How to drill stainless steel?
Cover the wire with solder
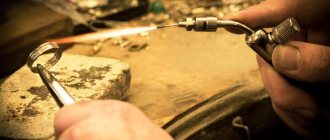
We touch the rosin with the stripped end of the wire and begin to heat it with a soldering iron, slightly drowning it in the rosin. The rosin melts and covers the surface of the wire.
As soon as the end of the wire is covered with rosin, immediately remove it. Now we take a little solder on the tip of the soldering iron tip and begin to move it along the wire from all sides so that the solder spreads over the surface.
If everything was done correctly, you will immediately see how the solder has covered the entire surface of the wire.
Let's figure out how to solder wires - two methods and recommendations for the soldering process
- 1. Soldering methods
- 2. Recommendations
- 3. Conclusion on the topic
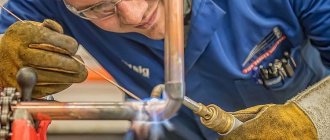
The process of soldering wires may seem simple, and in fact it is. But not everyone succeeds in connecting two wires to each other in a high-quality manner. Why? Because there are certain requirements for the soldering iron itself, as well as for the soldering process. So, let's consider the question of how to solder wires?
Let's start with the tool itself - the soldering iron. Before soldering, you need to prepare the soldering iron. What do I need to do?
- Clean his sting. To do this, you can use a file or sandpaper. It is important to remove any remaining tin and dirt from the file tip, that is, the main thing is to get to the copper from which the soldering iron is made.
- Now we plug the soldering tool into a 220 volt outlet. We begin to heat it up.
- Now we periodically touch the tip of the tip to either rosin or solder. We do this several times. Our task is to uniformly cover the working surface of the tool with solder.
So, the soldering iron is ready, you can move on to the question of how to properly solder wires with a soldering iron.
Soldering methods
Before moving on to the main question of the topic of the article, how to solder two ends together, I would like to give some tips on how to properly carry out soldering.
Firstly, it should be noted that the soldering iron itself only plays the role of a heating element. With its help, the wire is heated, which itself melts the solder. And this is exactly how you need to act, and not the other way around, the solder is heated by the soldering iron and sticks to the wire. This is not true.
Secondly, the solder adheres to the conductors at the molecular level. This is not just a layer of metal stuck under temperature, it is a strong molecular connection that makes two metals one.
Thirdly, apply the soldering iron to the heated element over the entire plane of the tip. This increases the heat transfer of the tool.
Fourthly, the process itself must be carried out quickly.
Attention! If soldering does not work out the first time, you should not start the process right away. You need to let the wires cool down and then try again.
Fifthly, soldering time is determined only experimentally, so to speak, at random. If you carry out the process too quickly, the wire may not warm up. Please note that flux must be applied only before soldering so that it does not evaporate.
Sixth, a high-quality soldering process is visible to the naked eye: the solder layer is shiny, it is laid evenly without bumps or dents.
So, our soldering iron is ready, we now know the requirements, we can move on to the main process. What is its sequence?
- First of all, preparation is necessary. If it is a multi-core cable, then the insulation must be removed from it and twisted so that the small veins become a single whole.
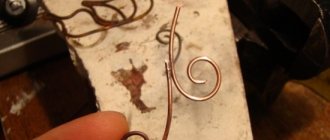
- Next, you need to take a little solder on the tip of the soldering iron, place the wire in rosin and begin to melt it, applying solder evenly to the bare wire. This is called tinning. We do the same with the other end.
- Now everything is simple, you need to lay the two ends of the wire next to each other, press them and solder them, that is, heat them with a soldering iron with solder applied to the tip. Again, please note that the top layer of solder should be shiny and evenly applied.
- There is another way. To do this, the two tinned ends must be twisted together, and after that the connection must be soldered. But it is better to carry out twist soldering in a manner similar to the tinning process. That is, you dip it in rosin, heat the latter with a soldering iron and apply solder inside the rosin.
Recommendations
Some useful tips have already been given, but I would like to highlight some additional recommendations. For example, how much solder is needed for the soldering to work properly. It’s impossible to say for sure here, but if there is not enough solder, then there will not be enough to cover the entire joint. If there is a lot of it, the soldering will end up in the form of a drop, which is also unacceptable, especially in a gasket system (in a bundle).
Proper preparation for work
Direct preparation of the tool for soldering involves tinning. After all, it is to untinned metal that the soldering material does not stick.
Tinning is the process of covering a surface with a thin layer of tin.
By the way, parts are prepared for soldering in the same way. How to tin the soldering iron? Yes, very simple. Only it is not the entire instrument that needs to be tinned, but only its tip.
First you need to clean it mechanically. A file or sandpaper is suitable for this. You need to clean thoroughly, without leaving grooves or scratches in which an oxide film could remain. Of course, the soldering iron must be cold.
After thorough cleaning, you need to cover the working surface with a layer of flux. If a liquid composition is used, then immediately after cleaning it is applied with a brush; if solid rosin is used, then the soldering iron must be immersed in it as the tip heats up.
There is no need to wait for the soldering iron to heat up, because an oxide film will inevitably form in the air, which will again prevent the solder from sticking. Overheating is the reason that the copper tip does not tin.
After the soldering iron has warmed up to the desired temperature, touch the solder with the tip and rub it. You can grind the solder using a sliver of hard wood - birch or oak. In this case, do not allow the soldering iron to overheat.
The solder sticks perfectly to a properly tinned soldering iron and does not lie on it in lumps or drops. It evenly coats the copper tip and leaves it quietly when needed.
How to tin wires
If you use pine rosin for tinning wires, but the wires are not tinned, then try replacing it with another flux. You can try using regular citric acid as this. You only need a couple of granules to tin the wires. Most often the problem is solved in this way.
You can also use copper sulfate for tinning wires. It must be carefully applied to the products to be soldered using a copper brush. Alternatively, you can use an aspirin tablet, which is also often used for tinning wires.
In general, if the wires are not tinned, then most likely they contain stainless steel. The metal is quite difficult to solder, so you need to use appropriate materials for these purposes. Often it is aspirin that helps solder and tin stainless steel wires.
To solder stainless steel, you must use oleic or phosphoric acid as a flux. It is also important not to forget that the soldering iron must be at the appropriate temperature. If the soldering iron overheats greatly, it becomes very difficult to solder with it.
What can you tin with citric acid?
You can solder any radio elements
Citric acid is, first of all, an acid, and a fairly strong one. Therefore, with its help you can tin elements made of “white” metal. For example, solder a tulip-type plug.
In the photo below you can see a uniform layer of tin on the connector contact.
Now you can solder the wire to the “tulip”