Vessel dimensions
The dimensions of the boat affect the following technical parameters:
- load capacity;
- weight;
- capacity.
The value should be selected taking into account the purposes for which the vessel is being manufactured. Determining the required dimensions is not an easy task, so the optimal dimensions of a wooden vessel should be announced:
The length should be from 2 to 4 meters. For one person, 1.8-2.5 m is enough, but for two people you will need about 3 m. If you plan to transport more than 5 people, you can make a boat whose length is 4 meters, but this figure may be higher. The width, as a rule, is 1-1.5 m. The larger this figure, the more stable the boat
However, it is important to know: this parameter affects the maneuverability of the vessel. The height of the side is most often 50 cm
Before starting work, it is necessary to draw up a design and diagram of the vessel. You can make your own drawings of a wooden boat. The drawing should indicate all the structural parts of the floating craft. For a visual example, below is one of the diagrams of a wooden ship.
Exhaust pipe with cooling. Tank ventilation head. The engine is powered by two gas tanks.
Exhaust pipe with cooling.
You can avoid thermal insulation of the exhaust pipe if you cool it with water injected from the engine cooling system.
Water is injected at a distance of 0.5-0.6 m from the flange of the exhaust manifold 1 of the engine (Fig. 198) after the exhaust pipe 4 is slightly bent upward, which prevents water from entering the engine when idling at low speeds.
Cooling water from the manifold jacket is introduced through tube 3 into the exhaust pipe in one of two ways shown in the figure. Supplying water through a cylindrical water jacket 6, which has 20-25 holes with a diameter of 2 mm, better atomizes and cools the exhaust gases. Pipe section 2 is insulated with asbestos before water is introduced; then the pipe can even be made of rubber (durite) hose 5.
Injecting water into the exhaust pipe also reduces noise, especially on two-stroke engines.
Kingston filter.
The water intake of the engine cooling system and the filter can be combined in one device
(Fig. 199) .
Housing 2 has a flange at one end for fastening to the casing, and at the other - a thread for cover 4. A thin-walled tube is inserted inside, into which holes with a diameter of 2.5-3 mm are drilled. The number of holes and the length of this filter tube 3 are easy to calculate: the total area of the holes should be 1.5-2 times greater than the area of the hole in the pipe 6. Instead of a tube, you can use a metal mesh with a corresponding cell.
Valve 5 is installed on the pipe; The hole in pillow 1 must be made smaller than the diameter of filter 3.
Tank ventilation head.
To reliably protect the gas tank from water ingress, a deck head is placed at the outlet of the air tube (it can also be installed on vertical walls).
Housing 6 (Fig. 200) with an air tube 7 inserted into it from the gas tank is attached to deck 3 with a nut 5 with gaskets 4.
One central (pos. a) and four external (pos. b) air holes are drilled in the body, closed with a package 2 of six to eight layers of thin copper mesh, pressed with a mushroom-shaped cap 1 on the thread. The mesh pack protects the device from sparks and water.
Additional gas tanks for Kazanka.
Gas tanks shown in
Fig. 201 , are conveniently placed between the first and second (counting from the transom) frames along the sides of the Kazanka.
The capacity of each tank is 35 l; they can be welded from 1.5mm thick aluminum alloy sheets or made from galvanized iron roofing. The tank is bent from one sheet of 750x890 mm in such a way as to create one longitudinal seam located on the top side. All connection locks on iron tanks must be soldered and their tightness checked.
The filler plug is used to secure the intake tube and place the air hole.
Gas tank for Progress.
Under the front seat of the Progress it is advisable to place a permanent gas tank with a capacity of up to 100 liters
(Fig. 202). To prevent fuel from overflowing from one side to the other when heeling (the boat may end up with a dangerous heel as a result), the gas tank is divided by several baffle partitions 3. Small holes must be made in the corners of these partitions so that the fuel flows to the intake tube 4. Air tube 2 is better bring up and onto the deck of the boat; Plug 1 can be taken from a standard outboard motor tank.
Preparation: tools, materials
After theory, practice begins - purchasing materials and finding all the necessary tools. The main thing for a boat is the boards. In this case, it is better to buy spruce, larch or pine lumber that does not have cracks or knots that might fall out. Those that hold tight do not pose a threat to the future ship. It’s easy to check their reliability; just hit them with a hammer or sledgehammer. The optimal wood is one that has been stored in a dry place for at least a year and has been lying on a flat surface for the entire period.
The rest list includes:
- wood antiseptic;
- beam for spacers and triangular - for the bow of the boat;
- water-repellent paint - Pentacryl, Progress, Raptor (for cars), brushes (spray gun);
- nails (preferably galvanized self-tapping screws) of different lengths and a hammer for them;
- primer;
- low power drill, screwdriver;
- glue (polyurethane), its replacement is resin, a syringe for application in hard-to-reach places;
- varnish (yacht) - Alpina Yachtlack, Belinka Yacht, Eskaro Marine lakk 90, Premia;
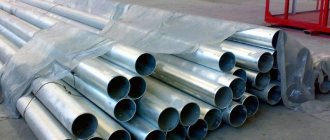
- sheet metal for the bottom and fastening elements of the boat;
- sandpaper (or grinder);
- file;
- tow (sealant);
- paracord (Kevlar, nylon, polypropylene) - to give the sides of the boat the desired shape;
- roulette;
- clamps;
- jigsaw (hacksaw).
Frame assembly process
After preparing all the parts for the boat, we begin the actual process of assembling the boat from galvanized sheets and boards with our own hands. To do this you need to do the following:
- In the bow, it is necessary to combine two sides and a triangular blank for the bow. Nails or screws can be used as connecting elements. If the block protrudes above the sides, then it needs to be sawn to one level.
- The next step will be to install a temporary spacer. This process must be approached carefully. To prevent the sides from bursting when bent, the spacer is filed at a not too large angle.
- After installing the spacer, you need to bend the sides further. A rope or a couple of assistants are suitable for fixation.
- We substitute the back part, adjust it, remove the necessary chamfer. It is necessary to fit well so as not to leave gaps. Everything should fit snugly.
- Having finished fitting, we knock together the sides and saw off all the protrusions.
- After the sides are assembled, we install permanent spacers and remove the temporary ones. How many parts to install depends on the owner’s preferences.
Before fastening wooden parts with nails or self-tapping screws, it is worth pre-drilling holes with a drill. This method prevents the boards from cracking.
The final stage of assembling a wooden structure will be chamfering the lower parts of the sides, spacers and coating with a protective layer of antiseptic.
How to choose the right sand for a sandblasting gun?
For quite a long time, simple quartz sand was used as a consumable for sandblasting. This is where the name of the unit comes from. Today, the majority of developed countries do not use sand for sandblasting; this is prohibited due to safety regulations. Because sand for sandblasting, when it hits a surface, breaks into fine dust, which can travel far and is extremely dangerous for human lungs. In any case, the worker must wear a respirator and special glasses. In addition, sand is much softer than modern materials, which causes high consumption per unit area. However, ordinary sand for sandblasting is actively used in Russia and neighboring countries due to its exceptional low cost and some other positive factors. Let's list them below:
- The low strength of the abrasive guarantees a minimum of damage to the surface being cleaned, even if the grain size is incorrect. Suitable for non-ferrous metals.
- Waste sand from cleaning and sandblasting devices can be sold as construction material or reused.
- You can use any nozzles, including the most expensive ones made of tungsten carbide or boron, and they will last an order of magnitude longer.
- Any sand is suitable for work - sea, river, quarry, desert. The main thing is to sift it well and dry it. This significantly reduces cash costs.
- With all this, sand includes the widest range of fractions for any effect.
Sand suitable for sandblasting
Sand suitable for sandblasting:
- Ordinary river sand for sandblasting. We need to sift through.
- Career. Smaller than river water, it needs to be washed and sifted.
- Industrial quartz sand for sandblasting. Significantly more expensive, it is produced by sifting and dividing simple sand into fractions.
- Special abrasive crushed sand for sandblasting is obtained by crushing quartz rocks; it has an acute-angled grain shape, therefore it is effective in terms of speed and abrasive consumption.
- Nickel, cooper slag. Made from industrial slag of copper and nickel. More durable and harder than sand (especially nickel).
- Pomegranate sand. Much harder than usual. Suitable for cutting metal with hydraulic sandblasting.
- Fractions made of steel and cast iron. Ten times stronger, but more expensive. The base is hardened, like forging. Split shot is designed for faster and coarser processing.
- Electrocorundum. Aluminum oxide in crystalline form. The hardest of all, therefore it is practically not damaged when processing any material.
Preparation
The prepared wood is brought into a dry room and laid on a flat surface. Then a small weight is placed on top to avoid distortions. The board will remain in this position for a year.
Boat hull sheathing with sheet metal
After waiting the allotted time to prepare the material when building the boat, we proceed to the following stages of preparation:
- We measure the length of the sides, leaving a small margin, and file them down, maintaining an angle of 45 degrees. The location of the cut will be the bow of the boat. Next, take a plane and plan the board along the entire length on both sides; chamfer is removed at the cut points in order to fit the parts tightly to each other. After the preparatory work, it is necessary to cover all cut areas with an antiseptic.
- Next, you need to make a triangular block to fasten the bow of the vessel. The length of the workpiece should be one and a half times the width of the side. The block is planed and coated with an antiseptic.
- To make the back part, you will need a wider board, preferably fifty. Don't forget about small reserves after sawing.
Marking using a sheet of paper
One of the easiest ways is to mark the corner using a sheet of paper. We fold the square sheet strictly diagonally. We take the pipe and wrap it with a folded page so that the edges of the diagonals are opposite each other. So, on the smaller side of the page we have an angle of 45 degrees. We take any marking tool and mark the location of the future pipe cut along the mowing line. To prevent the markings from being accidentally erased, you can use narrow tape. This marking method is convenient for a long pipe of enormous diameter, and the cut point of which is somewhere in the middle.
Construction process
It is necessary to complete the following steps to make a wooden boat:
Creation of all parts taking into account the dimensions indicated in the drawing. The main thing is to make the sides from two wide boards. Saw off the edges of each board on one side at a 45° angle. In order for the bow of the vessel to be made correctly, when joining, both lumber must be attached to each other without gaps. The boards must be secured in this position. In this case, you should take a triangular block and apply it from the inside to the joint
It is important to know: before this stage, the boards must be thoroughly treated with an antiseptic solution and resin. Next, you need to take a rope and tie it around the sides to give the boat the required shape
We should not forget about the spacers, the width of which must match the corresponding parameter of the vessel. They must be installed inside the structure being manufactured. The next stage is the finished rear part, made earlier according to the drawings, should be attached to the sides of the boat using polyurethane glue and nails. The bottom of the vessel can be made of wood or metal sheets. In the case of iron, you should cut a piece of steel, the size of which should be several centimeters larger than the bottom of the boat. For fastening, you can use glue and resin, as well as screws, which must be fastened at a distance of 15-20 mm from each other. The joints should be carefully treated with tow to prevent the vessel from leaking during operation. It is more difficult to make a wooden bottom, so it is recommended in this case to use one wide board. The finished structure should be treated with various means: antiseptic, paint and varnish. The final step is interior decoration, the essence of which is to install benches, chairs and other additional elements around the perimeter of the vessel.
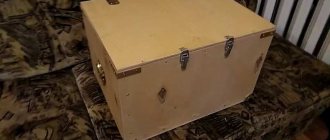
The finished wooden boat looks amazing in the photo (photo below).
How to dry sand for sandblasting
Modern industry produces various installations for drying bulk substances. These include a drum sand dryer. A drying chamber with a built-in sieve allows you to significantly reduce the drying time and combine it with sifting sand, which will ultimately improve its quality.
At home, drying sand for sandblasting is possible using one of the following methods. Secure a sheet of metal or metal box to the legs. Light a fire under it, or install a heater or other heater. Pour raw river sand onto a metal surface to dry. You can also dry sand scattered on film or other material using a heat gun.
Correct dimensions and drawing
They are a separate discussion, because the weight, capacity, carrying capacity and stability of a small vessel on the water depend on the size. If we write about recommendations, they are as follows:
Side height. The optimal value is 500 mm, but no one prohibits a slight change up or down. Length. This parameter depends on how many people will be in the boat at the same time. If the craft is designed for one person, then a length of 1800-2500 mm is enough. For a duet of “seafarers”, 3000 mm is needed, for 3-5 people 3500-4000 mm is enough. The latest design can accommodate six people, but in this case the question is different - the comfort of such a large company. Width. Here the recommended value is 1000-1500 mm, however, it must be taken into account that the maximum figure will significantly reduce maneuverability, but will make the vessel more stable
You need to take into account the weight of people, the potential cargo that will be transported on the boat, and the length of the craft.
Based on the recommended (or chosen by the builder) dimensions, it is necessary to make a drawing. If the master is not good at drawing up such diagrams, it is better to stick to ready-made, proven sketches that are easy to find on the Internet: just enter just two words into the search engine - “boat drawing”, and then switch to “Pictures”.
Repair
For boats that you have built, your best option is to do the repair work yourself. You should first inspect the boat, find the cause (hole, etc.) and be sure to correct the existing defect.
You can repair the hole with pieces of boards, after degreasing the surface and gluing a new piece of wood. If the problem is more serious, then it would be best to contact a specialist who can carry out professional repair work.
Thus, now you know how to make a boat yourself and repair it at home.
Types of boats and choice of materials
The ideal option is a boat purchased in a store, but, alas, this is not affordable for everyone. That’s why you have to get out and invent something, having little construction skills.
To make a boat, you can use any material at your disposal, for example, it could be:
As for the optimal characteristics, all of the listed materials have their pros and cons, but wood is most often included in the list of preferences when making boats.
And this is no coincidence; its choice is justified by such properties as:
- Environmental friendliness
- Strength
- Long service life
- Excellent buoyancy
- Light weight
- Possibility of equipping a wooden boat with a motor, sails and oars
If the choice fell on wood, then you must immediately make a choice in favor of one of two models:
- 1st is a keel boat;
- 2nd flat-bottomed boat.
The second option is a higher priority among fishermen. This model is more stable on the water, which allows you to fish even while standing. In addition, its spaciousness can be envied; all the necessary gear will fit into the vessel and there will be room for a comfortable stay for the fisherman himself. Despite this, the design is very maneuverable, which allows you to choose the most convenient place for fishing and, if necessary, easily change it.
As for keel models, they are more maneuverable and fast, but fishing on them is not very convenient. The main disadvantage is the ability to maintain balance, which is not very convenient during fishing.
No less interesting information on how to make a bench out of wood can be read at the link
Homemade wooden boat
Before starting work, you need to have basic knowledge - the properties of the material itself, which boards are suitable for construction, how to bend. For those who are curious and have no experience, there is enough useful literature on the Internet to understand how to work with wood, and drawings of a boat for making it yourself.
It is immediately necessary to determine the material that holds the boat together and protects it from leakage. The assembly area must be dry, and beginners will have to prepare for a work period of at least two weeks. It is advisable to have assistants.
Standard dimensions of the boat: 3-4 m long, 50 cm side height; 1-1.5 m width. Think through the details in advance, what is more important - the number of people, maneuverability of the vessel, stability.
Sizes can be changed. A drawing of important small parts is attached to the boat drawing.
Using the computer program
To implement this method of marking pipes for cutting, you will need a computer with special programs. First, you need to draw up a drawing that shows the transverse dimensions of the product, as well as the planned cut angle. You need to get a virtual template.
Print it on your printer. And here it is worth understanding that the larger the diameter of the pipe, the more sheets will be required to print it. Then you need to carefully cut out the details of the drawing from all the pages and glue them together; it is best to use stationery tape for this. All that remains is to attach the template to the pipe and apply the markings.
This method of solving the problem is highly accurate. All necessary programs can be downloaded on the Internet, they are free to download and use. There you can also find a template for cutting pipes at an angle. All you have to do is print it and cut it out. To mark, the pattern is simply wrapped around the pipe.
Some tips
Some tips from craftsmen who have already figured out the question of how to make a boat with their own hands:
- When choosing materials for the manufacture of a floating craft, you must forget about the word economy. Quality above all!
- When preparing workpieces, always leave a small gap. It is easier to fit parts and cut off excess than to cut out a new blank, increasing material consumption.
- It is better to have consumables such as tow, sealant or resin in large quantities.
- The holes that are needed to fasten the parts must be made smaller in diameter than a nail or self-tapping screw - this is necessary so that the board does not crack during the process of fastening the parts.
Hacksaw machine
This tool consists of a handle, a mobile frame, a cutter and an adjustment screw. Before cutting, the product is secured using a vice and then cut. A mechanical machine for cutting profile pipes is quite convenient to use, but has several disadvantages:
- The cutter may become very hot during operation;
- Mechanical cutting takes a lot of time;
- The edge of the cut pipe will have burrs that will have to be sanded down.
Cabin boat
If other types of vessels are successful, then you can begin more serious shipbuilding. To build even a small version, you need to have a large area in reserve, protected from the sun and rain.
You will have to build using several types of materials; you must call friends or a neighbor for help. The highlighted photos and drawings of how to build a boat with a cabin with your own hands will help in the implementation of the project
It is unlikely that a homemade product will withstand high water, but for a summer cottage and fishing in the rain it will definitely do. For inspiration, you can look at alternative models:
- Doerak Sneek.
- UZOLA.
- Amadeus.
Drawings and diagrams of how to make a boat with your own hands can be found in the public domain. It is impossible to say that it will be cheap and fast.
Cutting pipe at an angle of 45 and 90 degrees
If you need to cut a pipe at an angle of 45 degrees, which is often required when laying water and heating pipes. Often steel and cast iron pipes that have a cylindrical shape are used. In installation work, rectangular or profile pipes are used. However, you should cut the pipe correctly with a grinder so that you can easily connect it later. Therefore, you should carefully mark the pipe.
Some craftsmen try to mark the cutting area using a tape measure, but we warn you that the result will most likely be negative. And for a positive result, consider the following recommendation from professionals.
Take a sheet of paper or cardboard, preferably A4, fold it diagonally and wrap it around the pipe where you plan to make an even cut. The edges of the paper must be absolutely aligned with each other. And the side of the paper that is closer to the end of the pipe was perpendicular to the axis. Then mark the cutting line in a circle.
If you need to cut exactly at an angle of 90 degrees, then solve the problem quickly using paper or masking tape. Wrap it around the pipe so that the ends match. Make an even mark and saw off.
READ How to cut metal without a grinder
Craftsmen advise using a square when cutting a profile pipe. To do this, apply the square to the sides one by one, and turn and apply marks with smooth movements. After the steps, secure the pipe and cut. Prepare yourself a template that will be useful in the future and will save time. It is better to carry out the action with a grinder, so the cut will be smoother.
When working with cast iron pipe, keep in mind that it is a fragile material. Therefore, we will find a way to cut such metal without damage.
Before starting work, make notes for the cut, as you would when working with steel pipes. Place a wooden beam for support. Run a grinder around the circumference of the pipe, making small cuts. Then take the chisels, insert them into the groove and hit them hard with a hammer. Please note that Bakelite-based cutting discs are used to cut cast iron pipes.
If you don’t have a grinder at hand to cut a cast-iron sewer pipe or other purposes, use a hacksaw, chisels or special pipe cutters.
Cutting a gas pipe is a dangerous action, so it is best to leave it to professionals. But if you are confident in your abilities, then use a grinder, welding, hacksaw, or gas welding to cut metal.
- Before work, turn off the gas supply riser. Then release the rest of the gas from the pipe. To do this, light the gas in the burners and wait for it to go out.
- After these steps, cut. Using a welding method, the metal base burns when exposed to high temperature. The result is fast and effective. But remember that cutting or rooting gas pipes again requires experience.
Fastening galvanized bottom
The main material for the manufacture of the bottom will be galvanized sheet. The most suitable option would be the appropriate sheet length to match the dimensions of the boat frame. If you cannot purchase iron of this size, you can take two sheets, but some difficulties may arise during the construction of the boat. The main actions when performing such work are:
- We cut out a piece of galvanized sheet along the bottom of the boat. To do this, you can outline the outline with a marker and trim it.
- We apply sealant to the lower parts of the sides in a straight line, and a special thread is laid on it. If there is neither one nor the other, then everything can be replaced with paint and tow. These steps will prevent the boat from leaking.
- We lay galvanized sheeting on top.
- We secure it with self-tapping screws with a press washer or nails (1.8x32). You need to start fastening from the middle to the edges. The distance is approximately 2-5 cm between the fasteners.
- Galvanized iron protruding beyond the edges is trimmed and tapped with a hammer.
- Next, you need to strengthen the bow. We also do this using tin.
Further work consists of varnishing and drying the boat. Drying must be done in the shade. If desired, you can protect the bottom from corrosion by covering it with oil paint in several layers.
How to choose the right sand for sandblasting?
First of all, it is necessary to take into account the nature of the planned work. What are you going to do: clean an old rusty tank or paint an elegant design on the glass?
Additionally, please note the following:
- What is the strength and thickness of the contamination? Perhaps the abrasive is too fine or not hard enough to cope with this.
- The stronger the surface being processed, the harder the consumable is needed. The softer the base itself, the higher the likelihood of damage from too hard sand. For example, to process steel parts of a car you need steel or cast iron shot. Garnet sand and electrocorundum are used when working with alloy steel, titanium, and so on, when the hardness of quartz and slag is already low. To apply beautiful designs on mirrors and glass, as well as to frost glass, you will need the purest, fine, uniform sand. For working with tempered glass – electrocorundum 0.1-0.8 mm.
- To what condition does the surface need to be brought? The larger the fraction, the rougher the work. For example, to polish a base made of copper or aluminum to a shine, use a small consumable - up to 0.3 mm. If you want to peel off a durable paint coating without damaging the surface, you need a fraction of 0.3-0.6 mm. To remove rust, you need sand or slag of medium size - 0.6-1.6 mm.
- Work completion time. Particles with sharp edges and high hardness (crushed sand, crushed shot, electrocorundum) will level or clean the surface much faster, but rougher than round sand of a similar fraction. Coarse sandblasting abrasives are used to remove welding scale or remove thick bitumen coatings.
- Possibility of collecting the remaining mining. In its absence, it is economically correct to load Cooper, Nickel slag and quartz sand into the gun.
History of the use of aluminum in shipbuilding
The first experience of using light metal in shipbuilding dates back to 1891, when a Swiss company used aluminum in the production of the eight-seater boat Le Migron. In 1894, the Scots produced the Falcon torpedo boat with an aluminum hull for the Russian Empire. Saving weight allowed us to increase speed. "Falcon" reached a speed of 32 knots. In 1985, an aluminum boat won the American regatta. The weak points of aluminum at that time were low corrosion resistance and high cost of the material.
A revolutionary solution came only in 1954, when alloy 5083 appeared. The alloy turned out to be resistant to salt water, molded well and welded well. In 1995, the French company registered a new alloy, 5383, with higher corrosion resistance, increased toughness and increased yield strength of welded structures. At the very end of the 20th century, the Germans registered the Alustar alloy (5059), which surpasses the French development in many respects.
Homemade iron boat
I discovered one of my former boats. It is third from you on the left and second on the right, with a rusty bottom and sides of an incomprehensible yellow-rusty color. My former iron boat in the photo is third to your left or second to your right: it’s red. I don’t remember when I bought it: twenty years ago? Sold it quickly! The boat not only leaked heavily, but was also made incorrectly: it was difficult to row, despite its small size. I had to row on large iron kayaks “under the venter”, almost six meters long and with a bottom a meter wide, but the rowlocks were shifted towards the bow and there was a slight bend in the bottom, and therefore the boats easily moved under the oars despite their impressive size. And this small boat stuck into the water like an iron. I sold it and bought something else. The sequence of my boats is out of order on the website, as I don’t remember when I had which boat.
If you type “iron boat” in the search, you will find boats made of thin galvanized iron that can be transported on the roof of a car and questions from fishermen on forums like: “why aren’t boats made of sheet iron”? How can they not? That's how they do it! We can confidently say that now boats are welded only from sheet iron.
Where to get sand for sandblasting
My version of sandblasting... or in other words, my personal experience and the use of sandblasting for myself in garage conditions. And so: My compressor is Werk ZBM 60-50
• Power: 2 kW • Receiver: 50 l • Capacity: 300 l/min • Pressure: 10 bar • Weight: 52 kg
I’ll answer the question right away: Is it enough? For small jobs - yes, it’s enough, but if you do it professionally or sand the whole car - the answer is NO! My experience began with this device:
I was not happy with the result... the fact is that there is a tube that captures sand of a very small diameter, so the gun is of no use. Then I bought this device:
For garage use it’s just super, but there are some disadvantages - high consumption of sand and air (which is not at all good for low-performance garage compressors), and you have to carry a bucket of sand with you. But the main thing is that it works, not so fast, but it works and cleans very well. Next I would like to thank one person - Vadyaha! He made this device for himself:
And he gladly agreed to do something similar for me. For which I thank him very much! And here is his work:
Scheme of operation of this device:
After I started using it, I had a couple of ideas for improvements: Well, first, it’s terribly inconvenient to open the taps on the device itself, I moved all the controls, thus making a pistol. And I added an additional air hose directly to the gun... Well, by the way, so as not to tell you too much, here is a diagram:
There are plans to add a pressure gauge and definitely a moisture separator because it’s hard to work without it! Well, a few words to process? Personally, I tried: quartz sand, corundum, soda. Soda is expensive and a big expense. Gentle handling. Corundum is expensive but can be used repeatedly (3-4 times more than quartz sand), plus it processes much faster and causes much less harm to the body than sand. Quartz sand - well, this is the cheapest and most widely used abrasive.
What kind of lamps are they and what is their cost? And what mesh do you sow through?
Probably UFO type lamps, which we have for 100-150 green? I dry it on a potbelly stove without a lid, in a saucepan, stirring slowly so as not to burn): Honestly, it’s a disgusting task!
the exhaust will be from a sealed chamber directly outside into the atmosphere.
tobol added 12/20/2009 at 04:29 pm What does silicosis have to do with it?
Dear raddan. Thank you for the advice. Of course, you can’t ensure 100 percent tightness, but I think the hood plays a major role in this matter, and it will draw all the dust into the atmosphere, that is, onto the street. And through the existing micro-slits, the air flow will flow into the chamber and not into room. Tell me why a filter is needed then if all this crap will fly into the atmosphere?
tobol added 12/20/2009 at 5:13 pm Yes, and I think the camera can be made airtight if desired.
So quit smoking!))). And as for the atmosphere, it’s unlikely that anyone will dispose of all the nasty stuff from the filter, they just throw it into the same atmosphere or pour it on the ground.
tobol added 12/20/2009 at 5:45 pm I agree about the mask. How much does one cost?
So quit smoking!))). And as for the atmosphere, it’s unlikely that anyone will dispose of all the nasty stuff from the filter, they just throw it into the same atmosphere or pour it on the ground.
tobol added 12/20/2009 at 5:45 pm I agree about the mask. How much does one cost? A half mask costs around 2500, but a full mask costs 6000 (I recommend taking a full one; it fits nicer and doesn’t interfere with your view. Spare filters are 800 rubles per set. This is not a cheap thing, but compared to it, our army gas mask is superior in all respects. Well, in terms of In my opinion, the best way to dispose of dust is to bury it.
A half mask costs around 2500, but a full mask costs 6000 (I recommend taking a full one; it fits nicer and doesn’t interfere with your view. Spare filters are 800 rubles per set. This is not a cheap thing, but compared to it, our army gas mask is superior in all respects. Well, in terms of In my opinion, the best way to dispose of dust is to bury it.