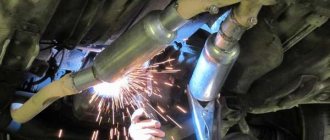
The inverter machine is designed for metal welding. However, this is far from its only purpose. Often, during the welding process, metal sheets are burned due to high current. Thanks to this property, the welding machine can also be used for cutting metal products, as well as creating holes. Usually, a conventional drill and drill bits are used for this, but if it is necessary to create large-diameter holes, selecting suitable drill bits is not so easy. If such a problem arises, manual arc welding will come to the rescue.
With its help you can burn a hole of any diameter or cut even very thick metal. But in order for the result to meet expectations, you must be able to use welding equipment and know the technology of cutting metal sheets and some of the nuances.
Required tools and equipment
During the work process you will need:
- a welding inverter (transformer), which produces a current of a given strength necessary to create a welding arc;
- metal hammer;
- cleaning brush;
- electrical wires with couplings;
- electrodes and holders for them.
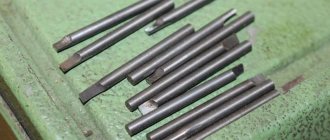
For cutting metal, it is advisable to use electrodes that are marked with the OZR marking. They are distinguished by a special coating with a certain heat resistance, ensuring high productivity and good quality of the cutting strip. When used, a stable arc is formed, which creates the required amount of heat. Special OZR electrodes allow cutting with direct or alternating current from any spatial position.
Welding cutting
- This is a process of increased danger to humans. Failure to comply with safety precautions and lack of necessary equipment can result in electric shock. Visible and ultraviolet rays have a negative effect on the eyes. Harmful substances released during cutting affect the functioning of the respiratory tract. There is a risk of getting burns to the surface of the skin from hot metal. Therefore, during the cutting process it is necessary to ensure:
- reliable protection of the metal body of the welding machine;
- the presence of exhaust ventilation in the room;
- special protective clothing: canvas overalls, mittens, protective mask with dark lenses, shoes with rubber soles, respirator.
When cutting metal in a confined space, it is advisable to have an assistant watch the worker’s actions from outside, ready to help in an extreme situation.
Technique for welding thin metal with an inverter
[Welding sheets of thin metal with an inverter] allows you to quickly and efficiently produce a metal product.
Thin-sheet material is a material with a thickness of up to 5 mm; it is often used in the production of blanks for cars, motor boats, as well as for the manufacture of pipes, various hull structures, etc.
The main problem when welding thin sheets of metal is the high probability of damage.
The reason for this may be careless movement of the welder, as a result of which a burn may form on the workpiece.
In addition, welding of thin metal, carried out by a person without experience, may turn out to be of poor quality due to non-compliance with the technology.
Since the welding process is performed by an inverter exclusively using low current, even a slight gap in the working distance between the part and the electrode should not be allowed.
Otherwise, a break in the electric arc cannot be avoided. Therefore, it is not recommended to start welding thin sheets with an inverter without knowledge of the process features.
Next, we suggest that you familiarize yourself with a step-by-step lesson, specially created for novice welders, with which you can learn how to properly weld thin metal with an inverter semi-automatic machine.
ortodox69 › Blog › welding thin sheets with an inverter (summary note)
Thin-sheet is a material with a thickness of up to 5 mm
Since the welding process is performed by an inverter exclusively using low current, even a slight gap in the working distance between the part and the electrode should not be allowed.
Otherwise, a break in the electric arc cannot be avoided.
The electrode must have a small thickness
If you weld thin metal with an inverter and at the same time maintain a small arc gap, then the welded seam joint will be convex for the reason that the main part of the metal does not heat up well.
A high-quality seam can be achieved through circular and zigzag movements of the electrode along the surface to be joined.
If you move the electrode too vigorously during the welding process, then all that can be achieved is a deformed joint.
for sheets of thin metal with a thickness of up to 1.5 mm, products with a diameter of 1.6 mm should be used.
The current strength during inverter welding of metal sheets should not exceed 40 Amperes.
In the process of welding thin-sheet metal products, spot or intermittent welding technology can be used.
Due to the short operation of the arc, tacks are formed, subsequently the electric arc is extinguished, then the process is repeated at a distance equal to the size of 2 or 3 electrode diameters.
PS: I just tried to cook MP-3C 3 mm with rutile coating, I’ll immediately say that the “+” on the mass-burns is significantly less than when “+” is on the electrode! Cooked thin iron.
Comments 413
What happens if you weld a horizontal seam using movements 1?
An inert gas environment allows you to keep the arc more stable; in simple welding, this is achieved by the composition of the electrode coating. The smaller diameter of the electrode in an inert gas reduces the thermal load on the part outside the weld zone (and this is even better in resistance welding). It will rot both here and there if it is not treated after welding.
I myself once cooked a threshold of 0.8mm, by touching, the electrodes were Esab, 3mm, current 35-40A (sometimes I changed it). These electrodes do not go out at low currents, like holding a pencil, and they burn, but do not splash. Combustion doesn’t even look like welding with an electrode... OZS-2 and ANO-21 did not allow me to achieve such a result.
Why do all the craftsmen weld bodies semi-automatically, and not with electric or gas welding?
With an electrode, the metal burns through, it warps, the seam is crooked, it slags, etc., but with a semi-automatic welder you can even cook foil - the seam is even, it cooks completely, it does not lead to metal, etc. And if you need to boil something thicker, arc welding is the way to go!
Metal does not lead if you grab a lot of points correctly.
Let me remind you that in the best case, the car body is 1 mm (this is literally a tank-shaped zil), a typical case is 0.6-0.8 mm, and in the average case, when the body is already being cooked to a level of rust, this layer after cleaning off rust is reduced to 0. 4 mm. So it’s not that it’s impossible to weld a body with an electrode, it’s almost impossible.
I don’t know, a relative was welding cars for a year while they were using a semi-automatic trans for him... Why did he cook the sills so much that they were all useless...
The work was done masterfully, although of course welding automotive steel with an electrode of any brand and diameter is wrong)), labor-intensive, of lower quality, and not all even masters can do it. Still, a semi-automatic machine is needed, and sometimes an argon-arc one. I have Rebel ESAB at work, he generally has 3 types of welding, p/a, argon and piece electrodes. But we mostly use it... If you’re interested, I’ll take a photo at work. elektrod.ru/esab/?page=eq…&name=Rebel%20EMP%20215iс
What flux-cored wire (for welding without gas) would you recommend?
Otherwise, you don’t even have the strength to carry a cylinder to the village, even with a fire extinguisher, there’s a couple of kilometers of mud on foot there, by car is not an option
just tell me the brand of wire if you have one, thanks
so that it doesn’t splash, doesn’t spit and gives a beautiful seam. thank you
Hello! It’s a pity that it’s not possible to take regular wire and a balloon. It's simple and the stitching is good quality. But again, my beloved ESAB has coreshield 15 self-shielding wire, elektrod.ru/esab/?page=wi…mild&name=Coreshield%2015, the seams from this wire are really like gas. And it doesn't splash much. It is important to remember that it is better to weld at an angle backwards, as if blowing off the slag, and laying the metal under it, and change the polarity, putting it on the wire (-). Successful work to you!
How can you insert a gypsum galvanized guide into the threshold?
LB is better electrodes
they make a riveter and nothing
rutile electrodes Ergus 2.0
I was not mistaken. Ergus electrodes turned out to be much more interesting - ignition of the arc occurs faster and there are practically no holes made:
I didn’t weld with a continuous seam - I extinguished the arc after a second and immediately, without allowing the electrode to cool, ignited it again. After some time, I learned how to seal small holes with the same electrode.
Did he just “poke” or did he also make some movements within a second? I tried 1.6mm, 2mm, and 3mm - I came to the conclusion that at a current of 37A I “spark” with a 3mm electrode at reverse polarity.
depending on the metal, I managed to weld galvanized secc steel, thin rolled steel from which they made the side cover of the system unit
in fact they don't cook at all...
I welded 2 of these sidewalls with crooked seams, which was basically impossible
so it's a matter of self-confidence, stupidity and lack of money and experience
By the way, it turned out that almost everyone who says that they cook thin sheets with an arc must be aware of what inverters are now. They are used to cooking with trances and were very surprised when they were shown what a modern smart Chinese can do...
which, however, does not compete with wire
1) In general, the correct step is 5-6 diameters. Those. if the rivet is 3.2 mm, then the pitch should be 16-19 mm. 2) A correctly installed riveting is stronger than welding 3) But this is all bullshit, since the threshold cannot be riveted with blind rivets, especially aluminum rivets - only solid ones.
Rivets - and finally, the method that I chose as a working method for my case is rivets. Cheap (rivet tool 1500 + rivets themselves for 1-2 rubles per piece + drills on average 60-70 rubles per piece for a hundred holes). The only downside is high labor/time costs,
strength comparable to welding
Disadvantages of blind rivets: 1. very high labor costs 2. very high time costs 3. leaky connection, that is, a stainless gasket must be provided between the parts, the rivets themselves must be coated with sealant or mastic to become airtight 4. it is difficult to rivet complex shapes, rivets are best used for fastening parts overlapping, and this is not always convenient, especially in modern cars, only a semi-automatic machine is suitable for fastening parts directly; for an UAZ you can still rivet, but for modern cars you can only rivet what is not visible to the eye.
3. steel - rivets are made of ordinary steel, the core is steel, they can withstand greater loads, they are slightly more expensive than aluminum ones, they require a reinforced riveter, which costs a couple of dollars. 4. stainless steel - rivets do not rust, do not form galvanic couples, can withstand loads comparable to welding, require a good riveter, and cost like a spaceship :-))) just a joke, about 4-5 rubles apiece, but they are worth it
Galvanized welding
Galvanized steel is the same thin sheet, only coated with a layer of zinc. If you need to weld it, you will have to completely remove this coating on the edges for welding, until you get clean steel. There are several ways. The first is to remove it mechanically: with an abrasive wheel on a grinder or grinder, sandpaper and a metal brush. There is another way - burn it out by welding. In this case, they pass the electrode twice along the seam. In this case, zinc evaporates (it evaporates at 900°C), and its vapors are very toxic. So this work can be carried out either on the street, or if there is an exhaust hood at the workplace. After each pass, you need to knock off the flux.
It is better to weld galvanization outdoors: evaporating zinc is very harmful
After complete removal of zinc, the actual welding begins. When welding galvanized pipes, to obtain a good seam, two passes with different electrodes will be needed. The first seam is welded with rutile-coated electrodes, for example, MR-3, ANO-4, OZS-4. In this case, the vibrations have a very small amplitude. Make the top seam wider. It is approximately equal to three electrode diameters. Here it is important not to rush and cook well. This passage is used by electrodes with a basic coating (for example, UONI-13/55, UONI-13/45, DSK-50).
How to control arc gap?
The arc gap is the distance formed during welding between the elements being connected and the electrode.
It is imperative to maintain a stable size of the specified distance while operating the inverter.
If you weld thin metal with an inverter and at the same time maintain a small arc gap, then the welded seam joint will be convex for the reason that the main part of the metal does not heat up well.
If you weld thin metal with an inverter semi-automatic and at the same time keep too large a distance between the electrical conductor and the workpiece, then such a large gap can interfere with weld penetration.
The electric arc will jump, the deposited metal will lie crookedly.
A correct and stable distance will allow you to obtain a high-quality seam joint; however, it is necessary to weld thin metal with an inverter, as mentioned above, with a gap corresponding to the diameter of the electrode.
Having gained experience and the ability to control the inverter welding arc length, you will be able to achieve optimal results.
Due to the electric arc, which is fed through the gap and melts the base metal, a weld pool is formed. It also helps to move the molten metal into the weld pool.
The right technology
- Preparing parts.
- Welding process.
- Cleaning seams.
The main differences are in some nuances that allow high-quality welding of sheet metal and galvanized steel.
Preparation
All preparation begins with cleaning the surface of the material from contamination. It is important to more thoroughly clean the area where the device's mass holder will be installed.
Galvanized sheet metal at the site of future welding can be cleaned with a grinder to remove the protective coating. But you can cook directly over it; the zinc layer will burn during the process.
Welding
- The electrode at the end can be cleared of coating to a length of about 5 mm, this will facilitate rapid ignition of the arc.
- Along the entire length of the future seam, spot tacks of the material must be made (to avoid further deformation). To do this, make a short-term arson and weld the edges of the metal in the form of a point or to a length of 10 mm.
- The arc is ignited simply - this is done in two ways. Either by tapping the tip of the electrode on the metal, or by striking. The arc length is optimal within 2-3 millimeters. Typically, the distance of the electrode from the metal must be maintained within the diameter of the consumable!
- After this, a bath of molten metal is formed and the weld begins. During operation, the weld pool should have an elongated oval shape. This indicates that a high-quality seam has been obtained.
- To avoid sticking of the electrode, do not “stick” it into the surface.
- The seam is made by placing the holder with the electrode at an angle of 60 degrees. It is best to choose a position close to a right angle, but maintaining a view of the weld pool and the seam itself. If the angle is too sharp, a convex connection is obtained. This means that the seam floats up and does not weld the metal.
- The electrode can be guided from left to right, or towards you; vertical connections are made from bottom to top. In this case, during welding you need to make transverse movements in zigzags (herringbone).
- You also need to control the speed of movement. It should be progressive and identical.
After finishing the work, you need to knock off the slag and inspect the connection for lack of penetration and burns on the metal surface.
How to weld thin metal
Welding thin metal is a challenge even for some experienced welders. Beginners in welding generally have a hard time. The rules that apply here are completely different from those when welding thick products: there are many features and difficulties, which makes it more difficult to select modes and electrodes. It’s easier to do this with semi-automatic welding machines, but they are quite rare in everyday life; inverters are much more common. We will talk about welding thin metal with an inverter.
And the first difficulty when welding metal of small thickness is that you cannot heat it too much: it will burn out and holes will form. Therefore, they work according to the principle “the faster, the better” and there is no talk of any trajectories of electrode movement at all. Thin sheet metal is welded by passing the electrode in one direction - along the seam without any deviations.
Features of welding thin sheet metal with an electrode
The problems that arise when welding thin metal are similar to defects when working with thick-walled workpieces. Joining sheets less than 2 mm thick is complicated by several factors:
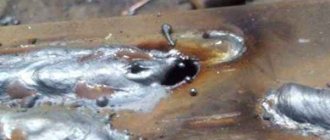
- Due to the small thickness, the metal is often burned through when the current is set incorrectly or the electrode is moved slowly.
- If, for fear of burn-through, welding of thin sheet metal is carried out too quickly, unconnected places will remain. Uncooked areas also remain as the arc length increases, which is why the edges heat up weakly and the melt spreads over the surface. After cleaning, the seam will not be sealed and its resistance to fracture and tearing will decrease.
- When welding on thin metal, a convex bead is formed on the back side of the joint. The problem of influx is solved by placing substrates, reducing the current strength, and changing the method of applying the seam.
- Due to strong heating, deformation of the workpieces in the form of waves and bends is possible. After cooling, they are straightened with a rubber hammer, unless there are special requirements for appearance. Otherwise, before welding thin metal, measures are taken to prevent overheating.
- Due to the inability to hold a short arc or when setting a low current, beginners often get stuck electrodes when the gap between them and the joint is reduced. The seam becomes uneven and of poor quality.
What should you have on hand?
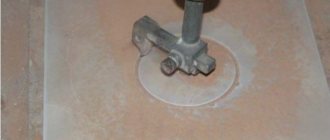
To make a hole in metal, you must have an inverter, electrodes, as well as a hammer and a brush with metal bristles.
Inverters come in different types: cheap and expensive, professional and household, powerful and not very powerful. In essence, it does not matter which inverter you use for cutting. The main thing is that it is in good order.
As for electrodes, there is a wide choice. Previously, cutting was performed with the same electrodes as welding. But now there are many brands on sale that are designed specifically for cutting. They are all good in their own way. The most popular brand of cutting electrodes is OZR. They provide a more or less even cut and allow you to get the job done quite quickly.
If you decide to use conventional electrodes for welding, then be prepared that the cut will not be the most aesthetically pleasing, and the work itself will proceed more slowly, and the arc will burn unstably.
We carry out cutting
Light the arc. This can be done in two ways: by tapping the end of the electrode on the surface of the metal or by striking it, as if lighting a match. The first method is easier. If you have never used a welding inverter before, we recommend starting with tapping.
Adjust the current on the inverter. The current strength is selected based on the thickness of the workpiece and the diameter of the electrode. We recommend that you first set the setting as if you were just welding, and then add about 30% more of the set amperage.
Next you need to mark the edges of the future hole. Use a chemical pencil for this. It's great for marking and is easy to see when cutting. If the hole is small (a couple of centimeters in diameter), then cutting can be done immediately. If there is a lot of work, then it is better to make the hole smaller and then gradually expand it.
Guide the electrode perpendicular to the workpiece. Do not tilt it too far when cutting. The process itself is very similar to regular welding, so you shouldn't have any difficulties.
note
Although cutting is simpler than welding, it also has its own characteristics that need to be taken into account. We will list the main ones.
First of all, be prepared that this method of cutting metal is unlikely to provide a perfectly straight cut line. If you need an impeccable result, use plasma cutting technology. Cutting with electrodes is suitable for home use when quality is not so important.
When cutting thin workpieces, increase the amperage. If cutting electrodes are not available, welding rods can be used. But their use makes cutting a little more difficult. Some craftsmen use welding electrodes that are no longer suitable for welding work.
In essence, the type of electrode is not that important. What's more important is its diameter. Remember: the thicker the metal, the larger the diameter of the electrode. For thin metal workpieces, 3 mm electrodes can be used.
general information
Many home craftsmen are accustomed to thinking that welding should be used only when two metal workpieces need to be connected. However, having a welding inverter and electrodes in your hands, you can perform not only welding, but also metal cutting. This technology is useful if you need to make a hole in a workpiece.
You don't need to be a professional to make a hole in metal with an electrode. It is enough to know the operating principle of the inverter and be able to apply it in practice. The cutting process is simpler and faster than welding, since there are no such high requirements for the quality of the seam. With practice, you can achieve a fairly smooth cut with neat edges. Therefore, cutting is suitable even for those who have never used a welding inverter.
Advantages and disadvantages of electric arc cutting
Welding cutting, like any technology, has its advantages and disadvantages, taking into account which will allow you to get the job done quickly and achieve the expected result. The main disadvantages of the method include:
- low productivity, which is due to low speed;
- poor quality of the cut obtained as a result of hardening of leaks from the back side of the workpiece.
The listed disadvantages make the method inapplicable in conditions where it is necessary to maintain precise markings when cutting metal.
The main advantages that distinguish this method:
- no need to purchase special expensive equipment and tools;
- no special requirements for environmental conditions;
- quick training in operating techniques and mastering equipment;
- ability to work with direct or alternating current.
Many organizations in the construction, repair, and automotive industries, as well as home craftsmen, successfully use electric welding cutting, since this method is intended for simple, inexpensive cutting of various metal surfaces.
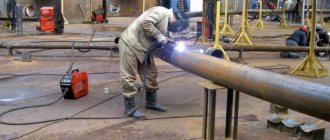
Welding current
What about welding current? As you, I hope, have already understood, the higher the welding current, the more energy is transferred to the welding zone, the stronger and deeper the metal melts and the “thicker” products you can join. And to transmit a greater current, a thicker conductor is needed. Accordingly, we can reach a direct relationship: metal thickness - electrode thickness - current strength. Welding machines are often marked with signs corresponding to the thickness of the electrode and the welding current. I recommend that you do not take such tables as dogma - they are just a starting point to guide you. For household use, a current of up to 160A is sufficient, which allows you to use a 4 mm electrode. In my memory, I very rarely used this diameter of electrodes. Basically it is 2 and 3 mm. There is also a diameter of 2.5 mm for electrodes of the UONI-13/45, 15/55, NIAT-3M brands (types for carbon steels). Approximately the strength of the welding current can be determined by the formula: I=Kdel. Where K is an experimental coefficient equal to 40-60 mm for electrodes made of low-carbon steel and 35-40 mm for electrodes with a rod made of high-alloy steel, and del is the diameter of your electrode.
Selecting electrodes and setting welding modes
To weld thin 3 mm metal, you need grades with rutile coating, which slow down the melting of the core, otherwise they will quickly burn out. At the ends of the electrodes with a refractory coating, a visor is formed that prevents re-ignition of the arc. The core must be made of the same material as the workpiece or similar in composition. The work is performed by an AC or DC device, so universal electrodes are preferred. Before welding thin metal, they must be heated at a temperature of 170⁰C. After preliminary calcination, the arc is easier to ignite and hold without the formation of splashes.
Depending on the thickness of the workpieces, the diameter of the electrode and the current strength are determined from the table:
Problems of welding thin-walled products
The main problems that arise in the process of welding thin metal with electrodes are similar to ordinary defects due to poor-quality connections.
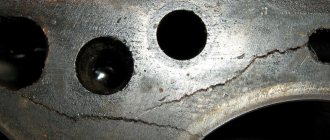
- Burning the workpiece.
- Electrode sticking.
- Unwelded seam.
- Material deformation.
Burning is the most common phenomenon when working with thin-walled structures. This is a consequence of incorrectly selected current strength. It is the excess power that contributes to the rapid melting of the metal and the formation of holes.
Electrode sticking occurs in two cases: at low current and when the tip of the consumable is brought close to the metal surface. These two negative factors contribute to the formation of an uneven joint and, as a result, the quality of welding decreases.
An underwelded seam is a common mistake made by beginners in welding. For fear of burning through the metal, the tip of the electrode is removed a long distance and the melt simply spreads over the surface. As a result, during stripping it turns out that the seam is uneven and there are areas that are not connected.
Deformation is also a fairly common occurrence when welding thin sheet metal. This is a consequence of exposure to high temperatures.
How is welding of thin metal carried out and what are the ways to solve the problem of defects?
What to do if welding burns through metal
To prevent welding from burning through metal, you need to have at least a little experience as a welder and knowledge of what current to set on the inverter and what electrodes are best for welding thin metal. It is with welding of thin metal that this problem most often arises, when the electrode is moved upward from the surface, a long arc appears, completely burning a hole in the metal.
It is for this reason that when welding thin-walled pipes it is necessary to keep the arc as short as possible so as not to burn through the metal. Also, the thickness of the metal should not be less than the diameter of the electrode, since it is much easier to burn through the metal with thick electrodes. What to do if welding burns through metal and how to avoid this will be discussed below.
Metal cutting by welding, welding machine, burning
Now let's speculate - what happens if we take an electrode with a diameter of 2 mm for a sheet of steel 2 mm, and set the current to about 100A, which usually corresponds to an electrode diameter of 3 mm? What will happen is that the electrode and steel will begin to actively melt and evaporate. The electrode will have to be supplied very intensively to the welding zone. You won't get any bath, but you will get the so-called. through burning. It seems like a nuisance, but let’s turn it into a good thing - we’ll start moving the electrode progressively, controlling the occurrence of burnout. And lo and behold, we cut steel! Moreover, in this way you can cut a fairly thick-walled sheet. Of course, the quality of the edges will be much lower than when cutting with an angle grinder (grinder), but this method is sometimes quite applicable when high demands on the quality of the edges are not made. The current for cutting metal is usually 25-30% higher than the current required for welding.
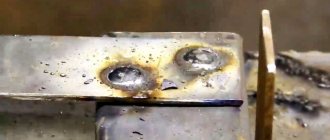
How to burn a hole in metal yourself using electric welding?
Reading time: 4 minutes When we need to make a hole (or, more correctly, a hole) in metal, we use a regular drill and metal drills. However, this method is not always convenient and simple if you need to make a hole of large diameter. In this case, a welding machine and an electrode will help. With its help you can burn a hole of any diameter, even in thick metal. In this article we will briefly explain how to cut metal using electric welding technology.
Video text
My VK page: https://vk.com/svarkaptz My welding helmet from China: https://ali.pub/2i5npx Welding helmet with optical class 1.1.1.1 from China: https://ali.pub/34qtij Buttonhole ( microphone): https://ali.pub/2t9oty
If you want to support me and my channel, then: - Subscribe to my channel, - Like, - Write a comment, - Tell your friends about this video! And so you don't miss new videos, set the bell to be notified!
Hi all! In this video I will show you how to cut a hole with an electrode so that no metal or slag gets inside the pipe! If you think this is impossible, then look carefully)))
Electrode position during welding. Electrode holder, holder
You insert the electrode into an electrode holder (welders call it a 'holder'). It should be comfortable, lightweight, and have grooves for installing the electrode at different angles. There are many different electrode holders in design and application. As a rule, well-known manufacturers equip welding machines with quite decent electrode holders, and you do not need to think about their modifications. When you insert the electrode into the holder, be sure to check (by rocking) that it is securely fastened in the holder. Otherwise, sparking will occur at the attachment point and your arc will either be unstable or not ignite at all.
So how do we hold the electrode? In relation to the seam plane, it can be at an angle of 30-60° from the vertical, or at a right angle. When making vertical seams from bottom to top, the angle should be 45-50° down from the horizontal. If from top to bottom - 10-20° down from the horizontal. In addition, the process is determined by the direction of movement. When welding at an angle 'forward' (away from you), the depth of penetration decreases, the height of the convexity of the seam decreases, but the width of the seam noticeably increases, which makes it possible to recommend this position for joining metals of small thickness. In this case, the melt and slag moves ahead of the electrode. This method has a number of disadvantages - for example, a lot of liquid slag accumulates in front of the electrode, it flows onto the metal and interferes with maintaining the arc. Lack of penetration and slag inclusions are possible. In this case, it is necessary to align the position of the electrode to vertical.
Generally speaking, you will observe how the metal flow and arc 'repel' the melt in the weld puddle and will observe differences at different electrode positions.
'Right angle' welding (the electrode moves away from you) allows the liquid slag to follow the weld pool, covering the liquid weld metal just behind the electrode. This ensures the formation of a high-quality roller.
In addition, when welding with rutile-coated electrodes, the inclination of the electrode towards the future weld should always be greater than for electrodes with a basic coating.
cut metal using electric welding
This causes the weld metal to cool quickly. This negatively affects the quality of the seam. The seam is uneven, with scales and significant differences along the edges to the base metal. It is necessary to maintain such an angle that the liquid slag follows directly behind the electrode and is not displaced by the arc force.
(read more...) :: (to the beginning of the article)
Unfortunately, errors are periodically found in articles; they are corrected, articles are supplemented, developed, and new ones are prepared. Subscribe to the news to stay informed.
If something is unclear, be sure to ask! Ask a Question. Discussion of the article. [4] messages.
'Since the electrode-product polarity changes 50 times per second, this causes...' mmmmmm, that is, you are not aware that the frequency of the alternating current is 50Hz, which does not mean a change of 0/phase 50 times per second. Or do you also think that '+' is the flow of protons, and 'minus' is electrons? In general, I thought that the zero is connected to the product, and the phase is supplied to the electrode. Read the answer...
I myself have been working as a welder for 25 years. I can do everything, but I’m not very good at explaining. Now my son has decided to follow in his father's footsteps. I searched the Internet for material to learn the basics. And settled on yours. Thank you. Read the answer...
Inaccuracy in polarity: direct polarity part '+' electrode '-', reverse polarity respectively part '-' electrode '+' Read the answer…
I welded a frame for the door leaf, size 2.2x1.2 (m). How to properly weld a sheet (2mm thick) so that it does not “pull”. Read the answer...
Why does concrete crumble, crack, or deteriorate in the foundation, walkway,... The path and foundation were poured in the summer. After winter, serious damage is visible, observing...
Do-it-yourself garden bench at your summer cottage... Design of a garden bench. How to make a comfortable bench in your country house with your own hands...
Fence posts, DIY fences. Put up, install, dig in... Fence posts, fences. We will make a good support for the fence so that the fence will last...
How to eliminate a leak in the heating system, heating boiler... What to do with a small leak in the heating system?…
Let's connect aluminum and copper wire. Cable, wiring. Apartment, house, ... How to connect aluminum and copper wire? Connection of copper and aluminum wires…
Malfunctions of infrared (IR) remote controls... The remote control began to act up, stopped working, and broke down. Pe…
Homemade thermal bag with a cold accumulator (cooling element)… How to make a cooler bag and cooling elements for it with your own hands…
Grounding a laptop or TV to prevent electric shock... How to ground a household appliance in a plastic case: laptop, TV and others...
View Queue
Queue
- delete everything
- Disable