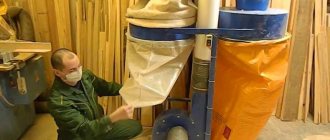
One unpleasant feature when working with wood is the presence of a large amount of shavings, sawdust and finer wood dust. Accumulating in the workplace, they create unbearable working conditions. In addition to the fact that they interfere with technological operations, they are dangerous to health. To solve this problem, many complex and expensive machines are equipped with industrial vacuum cleaners. The presence of such an option significantly increases the price of the entire unit. However, this problem can be solved in a budgetary way. To do this, you need to assemble the chip pump yourself. Such a system does not require complex equipment, and can solve the problem of chip collection quite effectively.
How does the chip pump work?
A flexible hose, preferably corrugated, of small diameter, is connected to the mechanism. The smaller the cross-section of the hose, the higher the speed of the sucked air, which means the quality of cleaning will be better. Along with large chips, small particles several microns in size will be removed from the room.
The air in the device is discharged due to the rotation of an impeller connected to an electric motor.
Principle of operation
You can do a cyclone-type chip ejector with your own hands only after determining the basic principles of operation. The features include the following points:
- A corrugated hose of small cross-section is connected to the main body, which concentrates and enhances traction. The tip may have different attachments, it all depends on the specific task at hand.
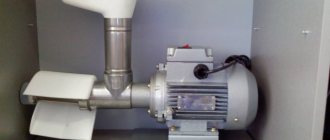
- At the top of the structure there is a motor, which is directly connected to the impeller. During rotation, the air is discharged, thereby creating the required thrust.
- During suction, the chips settle in a special container, and the air is discharged through a special pipe on which a coarse filter is installed.
- A fine filter is also installed at the outlet pipe, which traps small particles and dust.
Operating principle of a cyclone
In general, we can say that the operating principle of cyclone-type chip ejectors is quite simple, due to which the design is characterized by reliability.
Selection of material
A hose, preferably with a fabric braid, from an old vacuum cleaner, is suitable for removing air with debris. You will need a plastic sewer pipe D = 50 mm and a length of 150 mm, a plastic corner bend of 45 degrees and a length of 200 mm, a plastic bucket from 10 to 25 liters with a lid, and a second bucket can be purchased in smaller sizes (5 - 10 liters).
You will also need 20 mm thick plywood, screws and sealant.
Chip removal materials and fasteners
A self-made structure must be airtight and light enough. At the same time, it must withstand the pressure that occurs during cyclic rotation of air. To make a reliable device you will need:
- Plywood thickness within 4 mm. A durable case can be easily made from it;
- Wooden blocks of different sections;
- Polycarbonate;
- Filter. A filter from an injection VAZ is suitable for the chip suction filter system. It is inexpensive, but does a good job of retaining large and small particles;
- Engine. You can buy it new or take it from an old vacuum cleaner;
- Sealant, self-tapping screws, bolts and nuts. Fasteners must be selected so that they provide reliable sealing of the equipment;
- Snail type fan. Inside such a device there should be a powerful impeller for chip removal, that is, blades that capture air;
- Adapters for connecting individual hoses (pipes) of the chip ejector. They are mainly required if the device is designed to collect large amounts of chips.
Cyclone assembly
The design of the chip ejector must include the use of a cyclone filter.
Cyclone assembly:
- Installation of a ring for fixation;
- Side pipe fastening;
- Assembling a figured insert;
- Making a cyclone.
Design options and operating principle
A classic cyclone type chip ejector is a vertically mounted cylinder, smoothly tapered at the bottom. The vacuum created by the fan draws polluted air into the housing. Spinning and falling under the influence of centrifugal force, wood waste falls into the lower part of the cyclone chip suction machine, where a storage hopper is installed.
To collect dispersed dust suspension, a filter unit of bag filters is installed, capable of periodic regeneration by shaking.
Offers various models of chip ejectors. From the smallest - weighing only 8 kg, to a professional installation weighing 76 kg, which allows you to simultaneously connect four air ducts.
In addition to the main operating mode, it is possible to collect chips from the floor. Anchor chip ejectors are produced under the Corvette brand and are distinguished by the numbers added to the name. They are equipped with two types of bags – filtering and dust collection.
“Jet” is a brand under which a line of chip ejectors similar to the “Corvette” is produced. Often, the consumer has to make a choice between these two suppliers. According to some of them, Jet chip pumps are distinguished only by their color and higher price, but experts note the longer service life of this brand.
When paying attention to the design, we must not forget about the main functional characteristics: flow power and performance. Fans of German quality can pay attention to chip ejectors
The company, founded in 1924, is a leader in the introduction of new technologies and materials into production
Thus, some design elements of Metabo chip ejectors are made using ABS plastic: volute body, fan, impeller. This made it possible to reduce the weight of the device, and most importantly - to reduce the noise level at maximum engine speeds.
The company, founded in 1924, is a leader in introducing new technologies and materials into production. Thus, some design elements of Metabo chip ejectors are made using ABS plastic: volute body, fan, impeller. This made it possible to reduce the weight of the device, and most importantly - to reduce the noise level at maximum engine speeds.
Admirers of German quality can pay attention to chip ejectors. The company, founded in 1924, is a leader in the introduction of new technologies and materials into production
Making a ring and insert
- Cut off the side of a small plastic bucket.
- Having placed the container on the plywood, you need to circle its bottom and determine the center of the resulting circle. To find the center, it is enough to draw 2 perpendiculars to the drawn tangents.
- Another circle is drawn 30 mm larger than the first.
- Using a jigsaw, cut out a ring along the drawn circles.
Difficulties that you may encounter during work
It is not difficult, as we have seen, to create a cyclone filter with your own hands, or even a homemade vacuum cleaner, if you have the necessary materials.
In some cases, it is recommended to take metal containers for collecting garbage, as they are considered more durable. If you have a vacuum cleaner with enormous power, the plastic bucket can “collapse,” so to speak. It is drawn inward due to the strong flow of intake air. This happens extremely rarely, but it is better to immediately provide for this option. It can be leveled, but the damage to the product will be obvious. So you always need to take into account the quality of the plastic and the power of the device. In the case of a traffic cone, this problem does not arise.
Cyclonic designs of household vacuum cleaners are considered one of the most successful technology options in terms of operating efficiency. The cyclone system is a relatively simple separation mechanism that makes it possible to effectively filter suspended particles present in the air stream.
Based on the theoretical principles of constructing such a system, it is quite possible to create a cyclone for a vacuum cleaner, acting as an additional tool - for example, a construction separator. Interested in the question, but don’t know how to make a simple cyclone yourself? We will help you realize your plans.
The article provides detailed information about the design of the cyclone separator, as well as step-by-step instructions for assembling it and connecting it to a vacuum cleaner. A description of all stages of the work process is accompanied by visual photographs.
Ring retainer installation steps
The ring is attached to the cut out side of the plastic container.
- Screw the side using self-tapping screws.
- To prevent the plywood from bursting from the screws, you need to drill holes at the fastening points of a smaller diameter than the thickness of the screws.
- On the lid of a large container, a circle is marked equal to the diameter of the bottom of the container itself.
- Cut out the resulting circle, securing it to the side of a small container with screws.
How to make a cyclone type filter and air duct with your own hands?
First you need to determine the fan power, because the performance of the entire system will depend on it. There is no clear formula. But in most cases, to service one jointing machine with a drum length of 30 cm or one milling machine with a cutter diameter of 10 cm, a power of 1.5–2 kW is sufficient.
If it is impossible to get a fan of sufficient power, then you can use an old model household vacuum cleaner, but such an aspiration system is only suitable for hand-held power tools.
When working with the machine, such ventilation will often become clogged, because the speed of air movement is not enough for the normal movement of chips through the air duct.
After this, you need to select the type and design of the filter. It is quite difficult to make full-fledged cyclone filters.
But from an ordinary iron or plastic barrel with a volume of 200–500 liters, you can make a cleaning device suitable for use in a garage or a small carpentry workshop.
To do this, you need a barrel with a sealed, closing lid; any gap will dramatically reduce the efficiency of the system.
You need to insert two pipes into the lid - one short and straight, the other a little longer and bent at an angle of 45 degrees. Ordinary PVC pipes with a diameter of 50–110 mm are suitable as pipes.
A short and straight pipe must be inserted into the lid in the center, and a longer and curved one (it is made from a straight piece of pipe and a 45-degree angle) - at a distance of 1 cm from the edge of the barrel and turned approximately parallel to the wall.
Both pipes must not only be secured, but also sealed, for which hot-melt adhesive is well suited. The short pipe will be the outlet, and the long pipe will be the inlet of the filter, so the air duct leading to the machine is connected to the long pipe, and the air duct leading to the fan is connected to the long one.
Installing the inlet pipe not in the lid, but in the wall of the barrel so that the air flow goes along the wall, will complicate the design, but will increase the cleaning efficiency.
Sequential installation of two filters of this type will increase the cleaning efficiency, because large and small chips will settle in the first, and the second will retain fine dust. If you make a plexiglass cover, you can control the filling of the filter and choose when to clean it.
Having chosen a fan and made a filter, you need to select the material for the air ducts.
Flexible PVC hoses are convenient and inexpensive, but have low abrasion resistance, so their service life is 1–3 years.
Polyurethane hoses last 3–5 years, but are several times more expensive than their PVC counterparts. Sometimes PVC sewer pipes are used.
However, due to the need to seal each joint, such an air duct is noticeably more expensive than one made from a hose.
An air duct made of metal pipes is as expensive as possible, but its service life is unlimited, and the resistance to air movement is minimal.
We have also prepared links to forums where users discuss how to make a cyclone with their own hands, as well as the independent production and use of other aspiration systems:
- artisan;
- metal forum;
- forum of professional furniture makers;
- Forum for lovers of CNC machines.
Installation of the pipe
Before installation, you need to make a hole in the bottom (not in the center) of a small container, and insert a 45-degree elbow into it. The outlet is attached with self-tapping screws and sealant to ensure tightness and strength of the joints.
Types of chip ejectors
Almost all models of cyclone chip ejectors are similar. In this case, the main mechanisms, for example, the engine or the cyclone system, may differ slightly, which determines the main classification. All cyclone type chip extractors can be divided into several categories:
- For household use.
- Universal.
- For professional use.
When choosing a model for a home workshop, you should pay attention to the first two groups of equipment. This recommendation is due to the fact that their cost should be relatively low, while the performance will be sufficient
Professional chip suction
If you frequently carry out work in the workshop, there is a large amount of shavings, and if you are providing professional cleaning services for workshops and other premises, you should consider when choosing cyclone-type chip ejectors from the professional group. This is due to the fact that it is characterized by higher performance and reliability, and can withstand long-term use.
Top outlet mounting
- The entries are drilled in the center of the bottom of the small bucket.
- The plastic pipe is attached to a sheet of plywood with a prepared hole equal to the thickness of the pipe.
- The structure is screwed from below with four screws.
- Fill all formed joints with sealant. In addition to tightness, it gives the assembly additional strength.
The insert is attached to the outer wall of the filter using self-tapping screws.
Design options and operating principle
A classic cyclone type chip ejector is a vertically mounted cylinder, smoothly tapered at the bottom. The vacuum created by the fan draws polluted air into the housing. Spinning and falling under the influence of centrifugal force, wood waste falls into the lower part of the cyclone chip suction machine, where a storage hopper is installed.
To collect dispersed dust suspension, a filter unit of bag filters is installed, capable of periodic regeneration by shaking.
Offers various models of chip ejectors. From the smallest - weighing only 8 kg, to a professional installation weighing 76 kg, which allows you to simultaneously connect four air ducts.
In addition to the main operating mode, it is possible to collect chips from the floor. Anchor chip ejectors are produced under the Corvette brand and are distinguished by the numbers added to the name. They are equipped with two types of bags – filtering and dust collection.
“Jet” is a brand under which a line of chip ejectors similar to the “Corvette” is produced. Often, the consumer has to make a choice between these two suppliers. According to some of them, Jet chip pumps are distinguished only by their color and higher price, but experts note the longer service life of this brand.
When paying attention to the design, we must not forget about the main functional characteristics: flow power and performance. Admirers of German quality can pay attention to chip ejectors. The company, founded in 1924, is a leader in the introduction of new technologies and materials into production
Thus, some design elements of Metabo chip ejectors are made using ABS plastic: volute body, fan, impeller. This made it possible to reduce the weight of the device, and most importantly - to reduce the noise level at maximum engine speeds.
The company, founded in 1924, is a leader in introducing new technologies and materials into production. Thus, some design elements of Metabo chip ejectors are made using ABS plastic: volute body, fan, impeller. This made it possible to reduce the weight of the device, and most importantly - to reduce the noise level at maximum engine speeds.
Admirers of German quality can pay attention to chip ejectors. The company, founded in 1924, is a leader in introducing new technologies and materials into production. Thus, some design elements of Metabo chip ejectors are made using ABS plastic: volute body, fan, impeller
This made it possible to reduce the weight of the device, and most importantly - to reduce the noise level at maximum engine speeds.
Thus, some design elements of Metabo chip ejectors are made using ABS plastic: volute body, fan, impeller. This made it possible to reduce the weight of the device, and most importantly, to reduce the noise level at maximum engine speeds.
How does a cyclone chip pump work?
The air purified by the cyclone along with the garbage from the room is thrown outside. The filter involves the use of an electric motor with a power of 3.5 kW.
It sets into rotation the impeller, which can withstand a fairly large load and create the necessary air vacuum. Filtration in such a chip ejector is carried out in several stages.
Large debris, after passing through the filter, is collected in a special bag. The installation housing must be sealed. To reduce noise, the housing can be covered with absorbent material.
It is possible to make such a device yourself.
Construction of a household cyclone
There are no universal cyclones for cleaning operations. For example, the chip ejector must have increased strength of the pipe walls, which will prevent wear
Regarding the cyclone intended for the collection and removal of sawdust, it is important to take into account the minimum losses in the suction air ducts
When providing a cyclone to clean the air from cement dust generated during construction work, special attention is paid to the design of the filters
In domestic conditions, cyclones that purify the air from coarse particles are considered universal. By changing the design of the filters, such devices can be adapted for dust removal, as a chip suction unit, or for cleaning the air from sawdust in a woodworking workshop.
The components of such a unit will be:
- body - conical and cylindrical parts. The main influence on the quality of the process is the shape of the conical part;
- pipe - one or more, where dirty air enters;
- exhaust pipe for removing dust-free air;
- inlet filter (or system) as a chip suction device;
- receiving bucket;
- drive motor;
- fan.
All parts and components can be purchased or made by yourself.
Choosing a motor for a cyclone
A homemade cyclone is installed in a workshop. The main parameter of the engine is power and number of revolutions. If there is a fan, the engine power does not matter much. Dust particles will still not get into a working machine, sawmill, etc. The power and diameter of the cyclone scroll must be effectively combined with each other. For diameters up to 350 mm, a high-speed motor up to 1.5 kW is suitable. With smaller diameters, the power may be lower, but the cleaning performance will also decrease. If there is a metalworking machine in the workshop, a motor of 1 kW or more is used.
The engine power increases significantly if you need to equip the device with your own hands outside the premises. There will be more free space, but cleaning efficiency will decrease due to losses in the air ducts. It is worth noting that in cold weather such a homemade cyclone will remove heat from the workshop.
A good option is to purchase an engine complete with a volute. The most common parameters of snails and the electric motors recommended for them are shown in the table:
The systems are sold with rubber vibration isolators. They are capable of creating operating pressures of 0.8 kPa and above.
When choosing or making a snail yourself, preference should be given to a radial air intake pattern rather than a tangential one.
In the latter case, the homemade snail becomes less effective.
When choosing an engine, you need to take into account that the speed of air movement in the device must be at least 2.5-3 m/s. If cleaning is poor, the elements of a homemade cyclone quickly become clogged with shavings, sawdust and other waste.
Filter from plastic buckets
To make a garbage disposal, you will need a cutting tool, a tool for drilling, surface treatment, a heat gun, a pencil, a ruler, and a knife.
The material you can use is laminated chipboard, a plastic thirty-liter tank, a PVC pipe, hot melt adhesive, silicone sealant, bolts, nuts, and screws. You will also need a vacuum cleaner with a hose.
Making a cyclone using plastic buckets
When assembling a cyclone filter from a bucket, 2 plastic paint containers with a volume of 10 liters are used as a base.
Material with tool
In addition to two containers, you will need: a plumbing pipe and an outlet with a diameter of 32 mm, an air filter for a car, plywood, iron roofing sheet, fasteners, corrugated tube, glue, silicone sealant. Tools required: knife, felt-tip pen, jigsaw, screwdriver, compass, hacksaw, awl, glue gun.
Assembly
The assembly process has the following order.
- Remove the lids from the buckets and cut one of the containers in half.
- Make a narrow box out of plywood and place a plumbing pipe inside so that it holds very tightly. Fill the empty space between the walls and the pipe with silicone sealant.
- Step back 7-10 cm from the edge of the bucket and use cardboard and a sheet of paper to make a template that exactly follows the bend of the side surface of the container.
- Place the template against the box and mark the bend.
- Using a jigsaw, cut the structure along the line along with the tube.
- Place the box against the wall of the container and use a felt-tip pen to mark the hole for the pipe from the inside (you need to make sure that the pipe is at an angle inside). Cut a hole and install the pipe.
- Place the box with the pipe against the cutout, use an awl to pierce holes in the container around the perimeter of the plywood, screw in the screws and secure the structure to the bucket. Fill the joints of the container and box with sealant.
- Step back 70 mm from the bottom of the bucket, measure the diameter of the circle, transfer the dimensions to the roofing iron and cut out the circle, and then cut it in half from the middle and spread the edges at an angle of 300°. The resulting shaped insert should be placed sideways in the container. It is designed to create a vortex flow of sawdust, tiny dust and shavings, as well as to transfer debris to a collection container (half of the second bucket).
- Cut off the bottom of the bucket with the tube and insert it into the storage tank.
- Cut a hole with a diameter of 32 mm in the lid of the bucket, into which insert a pipe 30 cm long, leaving a 7 cm long piece outside. The pipe must be glued and the cracks sealed with sealant.
- Attach a corrugated tube with a nozzle for removing debris to the side tube.
- Attach the vacuum cleaner hose to the section of pipe coming out of the cover. Place a universal car filter on the tube from the inside of the cap.
- Measure the diameter of the filter from the outside, cut out a tin plug of the appropriate size with three tongues. Fix three tin strips with bent upper ends onto them with rivets or screws.
- Attach the bent ends of the strips to the lid from the inside. Install the plug into the filter hole from below and seal it. That's it - the cyclone filter is assembled.
https://youtube.com/watch?v=nOO_PKw3pEs
Features of work
When the cyclone filter assembled in this way becomes clogged, it is pulled out of the garbage receptacle and thoroughly cleaned. It is recommended to service the car filter as often as possible, otherwise it will become completely clogged and cleaning efficiency will decrease.
Manufacturing procedure
- A partition is cut from a sheet of laminated chipboard to connect plastic containers.
- Grooves are cut on it for a tight connection with the edge of the bucket.
- A plate is cut to cover the cyclone filter.
- The jumper is attached to the buckets using sealant, then a hole is drilled that connects both vessels.
- The bottom of the container is cut out to create a cone.
- The assembled structure is tightened using clamps and left alone until the sealant dries.
- The recess on the hopper lid is filled with hot melt adhesive.
- Using a drill, you need to make a hole with a diameter of 50 mm. A 120 mm long pipe with sealant is installed into it.
- A PVC corner outlet is inserted into the side hole. It is secured with bolts and nuts.
The cover is put on the mechanism and the vacuum cleaner is connected. The connected hose can be wrapped with electrical tape for better tightness.
Design features
In most cases, when making a cyclone chip pump yourself, a low- and medium-capacity motor is installed, which can be powered from a standard 220V network.
More powerful units are equipped with three-phase motors, which can cause quite a lot of difficulties in powering them in domestic conditions.
Among the design features, it should be noted that the impeller is installed to ensure spiral turbulence of the air flow. In this case, heavy particles are dumped into a special container, after which centrifugal force again lifts the air to remove it.
Preparatory work
When making a structure with your own hands, you can save a lot, but some mechanisms still cannot be assembled yourself. An example would be the most suitable motor and impeller. The preparatory stage includes the following actions:
- Formation of an action plan for assembling homemade equipment.
- Searching for a suitable electric motor, checking its condition.
- Selection of other mechanisms that cannot be made by hand.
Chip suction drawing
In a carpentry workshop, much of what is required to create cyclone-type chip ejectors can be made with your own hands.
Tools
Depending on the chosen scheme, a variety of tools may be required. The easiest way is to make the outer casing from wood. It is to this that other elements will be connected. The recommended set of tools is as follows:
- Indicator and multimeter.
- Chisel and other tools for working with wood.
- Screwdriver and various screwdrivers, hammer.
The simplicity of the design determines that it can be manufactured with the most common tools.
Materials and fasteners
The device being created must be light and airtight, and also withstand the pressure exerted by air swirling. To make it you will need:
- The body can be assembled from plywood, the thickness of which is about 4 mm. Due to this, the structure will be durable and lightweight.
- To make other parts, you will also need pieces of wood of various thicknesses.
- Polycarbonate.
- The filter can be taken from a VAZ injection type. Such a filter is cheap and will last quite a long time.
- The engine can be removed from an old powerful vacuum cleaner, the impeller will be mounted on the output shaft.
- To connect the main elements you will need screws, self-tapping screws, bolts with nuts, and sealant.
Plastic housing for cyclone
After finding everything you need, you can start doing the work.
Making a cyclone filter
As previously noted, making a filter is quite difficult; it is best to purchase a cheap, ready-made version. However, it will also require a sealed seat.
The seat is also made of wood. In this case, the main thing is to correctly choose the appropriate diameter of the outlet hole, since too small will lead to a decrease in throughput. There is no need to attach the filter, just create a block for it that will fit perfectly in size.
Creating a retaining ring and a shaped insert
To fix the polycarbonate during the manufacture of the case, wooden rings are required. They must have an internal diameter that provides the required volume of the storage tank. Between the two fixing rings there will be vertical strips holding the polycarbonate sheets.
You can make such rings in a home workshop if you have the appropriate skills and equipment. At the same time, do not forget that they must have high strength.
Installing the Retaining Ring
Assembling the case can begin by placing the locking wheels and polycarbonate sheets. Among the features of this stage the following points can be noted:
- The sheets are fixed on both sides with strips.
- The connection is made using self-tapping screws.
- To improve sealing, slots are created in the lower and upper rings for sheets, after installation of which the seams are sealed with sealant.
Homemade cyclone for vacuum cleaner
After assembling the housing, you can begin installing other structural elements.
Installing the side pipe
In order to eliminate the possibility of rupture of the structure due to clogging of the filter element, a side pipe with a safety valve is installed. To do this, a hole is created in the polycarbonate sheet, which is closed on both sides by the body of the safety pipe.
A rubber gasket should be placed between the wooden planks and the wall; the degree of sealing can be increased by using sealant. The element is secured to the body using bolts and nuts.
Top entry installation
Suction of chips and air occurs from the top of the structure. To accommodate the upper input, a small housing is created in which the pipe from the old vacuum cleaner is placed.
When using a special pipe, reliable fixation of the suction hose is ensured, which, moreover, can be quickly removed if necessary. That is why you should not make it yourself.
Installing a shaped insert
A shaped insert is also required to connect the inlet pipe. It must be positioned so that air containing particles can flow in without difficulty.
Homemade chip sucker
As a rule, the figure is located opposite the fan, due to which the air flow swirls. It is best to seal the seams with sealant, which will increase the degree of insulation of the structure.
Cyclone filter assembly
After creating a housing to house the filter, it needs to be installed in its place. It is worth considering that there will also be electronic elements inside that provide power to the electric motor.
Another pipe is removed from the outer part of the cyclone filter housing. It will be needed to divert the air flow.
Making a cyclone from a traffic cone
A very simple and quick way to make is to use a traffic cone.
- You need to cut off the bottom and top of the cone and, turning it over, place it in any container to accumulate waste.
- Make a round lid approximately equal to the top of the chip by drilling a 40 mm hole in it.
- Secure the corner bend into the opening made in the side wall with glue.
- Glue all connections with a heat gun for tightness and strength. The waste collector is connected to the vacuum cleaner through a corrugated hose.
The chip ejector can be made from a wide variety of available materials with your own hands.
Manufacturing of chip ejector
The desire to create wooden products with your own hands for a summer house or country house will require the acquisition or manufacture of appropriate equipment. A carpentry workshop will definitely need a unit capable of quickly removing accumulating chips. For a home workshop in which you plan to process a small number of wooden parts, you can make a vacuum cleaner yourself.
The simplest design of such a unit is considered to be a chip ejector from a vacuum cleaner. It is quite simple to manufacture and requires the least amount of parts that you need to make yourself. Instead of a vacuum cleaner, you can make a device for sucking chips from a fan. A snail will be attached to the engine. The speed of the generated flow, and therefore the quality of chip collection, largely depends on its shape.
Preparatory work
Before starting work, so-called preparatory work should be carried out. These include:
- Choice of design.
- Selection of necessary materials and fastening elements.
- You should draw a drawing and make a technological map.
- Prepare the required tools and consumables.
The better the preliminary work is done, the easier it will be to assemble the chip ejector. This will reduce the time spent doing DIY work.
Tools
To manufacture all elements of the chip ejector you will need the following tools:
- saw, hacksaw or electric jigsaw for cutting out individual body elements;
- drill (manual or electric) with a set of drills;
- a set of screwdrivers (the shape of the heads and the length depend on the hardware and electrical contacts used);
- construction knife;
- tool for measuring and marking.
Typically, a home workshop stores its tools well. The main task will be their preparation. You should only use well-sharpened tools.
Materials and fasteners
The availability of the necessary material and fasteners depends on the chosen design. For a simple chip suction you will need:
- The material for the body can be plywood. It is easy to process. From it you can easily make a tank of the required volume.
- To fasten the plywood blanks you will need wooden blocks.
- Finished hoses. They will be used as air ducts.
- Engine. It is advisable to use finished products from old vacuum cleaners or other household appliances. The impeller will be attached to the shaft.
- To make the impeller, polycarbonate is required.
- The connection of all structural elements should be made using self-tapping screws or bolted connections.
To obtain a reliable, efficient chip ejector, you should choose high-quality materials and proven products.
Making a cyclone filter
The problem associated with creating such a unit can be solved in two ways. Take the path of least resistance and purchase a finished product. Modern industry produces a wide variety of such vacuum cleaners, differing in volume, design and performance.
For manual production, skills in using hand and electric plumbing tools are required. The cyclone filter housing can be made from any container of suitable size. It can be made by hand from your own material. This can be an empty container or a barrel with a lid. The filter must be equipped with a sealed lid. It should fit snugly to the body and be easily removed if necessary. This will allow you to quickly clean and remove accumulated chips.
Creating a retaining ring and a shaped insert
Before assembling the housing, it is necessary to prepare the fixing rings. They will be the fastening elements for the side walls. The rings are made of the same material as the walls of plywood or polycarbonate. The diameter of the rings depends on the volume of the storage tank.
The shape of the figure bet depends on the configuration of your tank. For ease of manufacture, the shape of a rectangular parallelepiped is chosen. In this case, the curly inserts will have the shape of a rectangle or square. These inserts are made by hand and fixed using self-tapping screws. To eliminate possible leaks of incoming air and create a complete seal of the chip ejector, the seam is filled with sealant.
