Types of welding materials
The functions performed by welding materials are as follows:
- Protecting metal with gas or slag from the harmful effects of air.
- Increased stability of the flame and the entire welding process.
- Measuring the dimensions of the weld being formed.
- Formation of the required metal composition of the weld according to the specified properties.
- Cleaning the seam from impurities after welding.
Types of welding consumables can be classified in different ways. Based on their composition, they can be divided into two large groups: those directly related to welding as a chemical process and so-called gadgets that facilitate the welder’s work at one stage or another.
By function, welding materials are divided as follows:
Electrodes and rods
Electrodes are either consumable or non-consumable. Fusible, in turn, differ in the type of coating: mixed, acidic, basic, rutile, etc. Filler rods are placed inside the weld. The electrodes are designed to efficiently supply electrical current to the melting zone.
Welding wire
Available in three versions: powder, activated, solid.
Flux mixtures
Marking of welding wire.
They are divided into heat-conducting and protective. Designed to protect the arc welding process. They contain chemical components that protect the welded metal from exposure to air.
Inert protective and flammable gases
Used to protect the arc and support the flame. Inert gases include argon, helium and their mixtures in various concentrations. Carbon dioxide and its mixtures are among the active types of gases that interact with metal or dissolve in it.
Combustible gases are used in gas cutting and gas welding, these are acetylene, hydrogen, oxygen and various mixtures.
Linings, triangles, etc.
Ceramic pads come in different shapes: round, all-position, for specific types of seams, etc. They facilitate the work process and contribute to the formation of a reverse bead in a high-quality seam.
Welding process control
Before starting welding, the welder gets acquainted with the technological maps, which indicate the sequence of operations, the diameter and brand of the electrodes used, welding modes and the required dimensions of the welds. Failure to comply with the order of sutures can cause significant deformation of the product, which is difficult to eliminate later.
Equally important is adherence to the welding regime. The strength of the welding current and arc voltage are controlled using the readings of an ammeter and voltmeter. The welding speed and electrode wire feed speed are determined by replaceable gears and the position of the speed controller, as well as by direct measurements.
When manual arc welding, in addition to observing the ammeter readings, the welding technique is checked. The gas welding mode is determined by the number of the tip used.
After welding of the product is completed, the weld seams are cleaned of slag and sagging, and the surface of the assembly is cleaned of metal splashes. Then the finished product undergoes a series of control operations.
Quality control of welding materials
The quality of the seam depends on many factors. But the highest dependence is always on the same factor: the quality of consumables. This quality must be constantly monitored by complying with standards and rules for control and, most importantly, storage and use of all welding components.
Consumables for welding must necessarily have certificates with data that meet the requirements of GOSTs, technical passports and other technological documents.
The very first and simplest requirement is compliance with the labeling of packaging products in the form of boxes, packs, cylinders or pallets, on which the main passport data must be indicated.
Without this type of data, the entire batch of consumables must be checked for all established indicators and the packaging must be opened, until the end of which the use of these products is prohibited.
The question of how and to what extent consumables that do not conform or whose packaging is damaged can be used is decided by management on a case-by-case basis.
Inspection of workpieces for welding
Before entering the assembly, the cleanliness of the metal surface, the overall dimensions of the workpieces, the quality of edge preparation and their bevel angles are checked.
Defects in workpieces for welding significantly affect the quality and productivity of welding work. For example, an increase in the bevel angle of the edges leads to an increase in the amount of deposited metal, an increase in welding time and unnecessary consumption of electricity and electrodes. In addition, the connection after welding will be more deformed, since the more deposited metal, the greater its shrinkage when cooling. Preventing defects in workpieces will eliminate unnecessary work to correct them.
Electrode quality control
Electrodes are the most “tested” consumables. Their quality begins to be controlled at the factory. Repeated inspection is carried out in areas with welding; sometimes it is called incoming inspection of welding materials.
Coverage check
First of all, we check the coating, which should be dense. The electrode should not crumble or collapse if thrown flat onto a steel surface from a height of one meter. One meter is for thin electrodes with a diameter of 3 mm or less.
For more impressive electrodes with a diameter of more than three millimeters, the drop height should be exactly half a meter. If there are partial chips of the coating, they should be no more than 20 mm in length.
Types of electrodes for welding various metals.
An important requirement for electrode coating is its moisture resistance and resistance to being in water for 24 hours.
Defects on the surface of electrodes that are allowed during quality control:
- roughness with a depth of no more than a quarter of the thickness of the coating itself;
- dents with a depth not exceeding half the thickness of the coating and a length of no more than 12 mm, the total number of dents should not be more than three;
- Pores with a depth of no more than half the thickness of the coating, no more than three in number in a section of the electrode 100 mm long.
- Cracks no longer than 12 mm and no more than two in number.
If the welding process takes place under extreme conditions such as high pressure or powerful vibration, quality control of the electrodes can be limited to checking certificates and randomly checking the condition of the external coating of the electrodes.
In addition to these parameters, the chemical and technological qualities of the deposited metal are checked. An advanced version of such control is special metallographic analysis. It is carried out in cases of defects in the seams or during the melting process.
When conducting a selective external examination, about 10–15 electrodes are taken from different packages. If any defect is detected, the number of copies inspected doubles. Well, if a defect is discovered a second time, a report is drawn up to reject the entire batch of products.
The quality of the coating is checked through its concentricity, which must be maintained around the rod. For such control, special cuts are made along the entire length of the consumable, after which the thickness of the coating is measured.
There are special tables with the values of the permissible difference between different coating thicknesses depending on the diameter of the electrode.
Weldability and mechanical properties
The following electrode control parameters are weldability and mechanical properties. They are tested using periodic samples from different batches.
Technically, this is done like this: test surfacing is performed on steel plates with a thickness of 10 mm, and the steel must be carbon or low-alloy.
Ferrite control
If electrodes that produce surfacing from high-alloy iron alloys are tested, then the so-called ferrite phase is controlled - the ferrite content at this stage. To do this, the alloy from the electrode is fused onto the plate in 5-6 layers.
The plate should also be made of a high-alloy alloy. Ferrite is determined by a magnetic ferritometer or in surfacing samples by metallography.
Intergranular corrosion
Intercrystalline corrosion is another parameter for monitoring the quality of electrodes. These actions fall under the rules of GOST 6032-58.
Hot cracks
GOST for welding electrodes.
All electrodes and filler wires intended for use with high-alloy iron alloys are tested for hot cracking. Such control is carried out on special samples with six layers of surfacing. Such samples are made from the same material as the consumables from the batch being tested.
Surfacing in six layers is carried out in the lower position, each layer is added only after the previous layers have cooled to a temperature of 20 - 25°C. When all layers are ready and cooled, the slag is removed.
The sample is broken along the weld seam, and possible cracks are checked visually. Then the sample is cut into pieces and macrosections are prepared for etching in hydrochloric acid. After washing and drying, they are checked through a magnifying glass.
Consumables that have passed the test are placed in a dry room. Before work, they must be calcined at a temperature of 180°C for 2 - 3 hours. Drying should be carried out in a drying oven and under no circumstances on gas burners.
Metallographic studies
Metallographic analysis is used to check the quality of the metal structure of the welded joint. Depending on the magnification with which the metal grain is viewed, a distinction is made between macrostructure and microstructure.
Macrostructure refers to the structure of the metal of a welded joint, viewed either in full size or through a magnifying glass. The macrostructure is studied on thin sections etched with special reagents. After etching on a macrosection, accumulations of sulfur and phosphorus can be detected along the boundaries of the crystals. The accumulation of sulfur is detected as follows: an illuminated piece of photographic paper moistened with a 15% solution of sulfuric acid is placed on a macrosection. In cases where the paper has come into contact with sulfur inclusions, brown spots remain on it. The macrostructure is studied not only on specially processed sections, but also on the fracture of samples after their mechanical tests.
Macrosection or fracture of a welded joint is examined when the test program provides for the production of control samples.
Macro control of a welded joint can also be carried out using drilling. In this case, a certain place in the seam is drilled so that the resulting depression reveals the top of the seam. The drilled area is sanded with sandpaper, then etched with a reagent, examined through a magnifying glass, and if there are no defects, welded again.
Unlike a macroscopic examination, which gives an idea of the weld metal as a whole, a microscopic examination examines individual sections of the welded joint. Microstudy is carried out using a microscope with a magnification of 100-500 times. Micro-examination allows you to identify structural defects, microcracks, etc.
Flux quality control
The requirements and technology for testing flux mixtures are set out in GOST 9087-59. The overall quality is checked in accordance with the factory certificate, which sets out data on the chemical composition of the mixture. The test is simple in principle: it is welding with the flux being tested.
If defects in the form of cracks or pores are found in welds produced using this flux, a more in-depth check of the mixture is carried out: homogeneity of granules, weight, percentage of moisture, contamination, etc. Humidity should not be higher than 0.1%.
The next stage is surfacing the weld on the sample under submerged arc followed by testing for the presence of sulfur and carbon. To do this, a sample is taken from the top layer of the surfacing for chemical analysis.
If there are significant defects, the flux is sent for calcination with subsequent rechecking or is completely rejected and a report is drawn up.
https://youtu.be/rMF3I_u3zjw
Penetrant testing of welds
The quality of welding can be checked using the capillary method, which is based on the ability of the liquid to penetrate into the smallest cavities and cracks. The peculiarity of this method is that it allows you to identify hidden defects that are difficult to determine by visual inspection. The capillary method is relatively simple and inexpensive; such tests do not require the use of complex, expensive equipment.
When using this method, special substances are used that have low surface tension - penetrants. They are able to easily penetrate even small cracks, while they are visually visible. Penetrating into small cracks, they color them, making them visible to the human eye. The most sensitive penetrants can detect defects with a diameter of 0.1 microns.
There are many recipes for penetrant. They are mainly made from water, kerosene or other liquid with low surface tension. This method of testing welded joints is rightfully considered one of the most practical and effective.
Quality control of protective gases
The main thing in gas control is checking the condition of the cylinders in which it is supplied.
Cylinders must have factory certificates with GOST, which indicate the following parameters:
- gas name;
- composition of chemical impurities in percentages;
- humidity;
- Date of issue.
If certificates are available and they meet all requirements, then gas testing is not carried out. Special inspection with in-depth inspection can be carried out if there are serious defects in the welds.
Pneumatic test method
Pneumatic leak testing is performed using compressed air. It is used to control welds of pipelines that operate under high pressure. To do this, the product is immersed in a bath of water, after which compressed air is supplied inside it until the pressure inside the product exceeds the working pressure by 30-50%.
If we are talking about a large-sized product that cannot be placed in a bathtub with water, then it is covered with a special foam solution, after which compressed gas is supplied inside, which will indicate a defect by the presence of bubbles on the surface.
Inspection of welding and surfacing wire
Example of a certificate of conformity for welding materials.
Like any other quality control of welding materials, the inspection begins with certificates from the manufacturer determining the weight and composition of the consumable, product brand, diameter, metal melt number, chemical components by percentage.
Wire for welding is sold in special coils, each of which necessarily contains a special metal token with embossed data from the certificate.
GOST standards vary and depend on the metal from which the consumable is made:
- steel welding wire is GOST 2246-70;
- steel surfacing wire – GOST 10543-63;
- wire made of aluminum and its alloys - GOST 7871-63.
Check for contamination, traces of oil or oxides. If necessary, the wire is cleaned either mechanically or chemically.
An in-depth inspection is carried out, as with other consumables, if cracks or other serious defects are detected in the deposited metal. In this case, using the wire being tested, plates with a thickness of 10 mm or pipes with a thickness of at least 8 mm are welded.
The welded plates or tubes are then cut into specimens for further mechanical tensile and bend tests.
If the wire does not have a certificate, it is tested for chemical composition and weldability.
Chemical control method
The chemical method is used to control the quality of tightness of welded seams of pipelines and elements of hydraulic systems. It is based on the properties of the indicator substance to change its color due to chemical action with the control substance.
The surface of the seam is cleaned and a phenolphthalein solution is applied to it. The treated area is covered with a cloth soaked in silver nitrate. In this way, it is possible to determine the presence of local leaks, since in these places phenolphthalein turns red and silver turns silver-black.
This method of checking the quality of welds is quite simple. Monitoring does not require expensive equipment and does not require special knowledge and skills of personnel. But it has sensitivity due to the instability of indicator spots.
Tack welding
Tacks in welding can be classified as temporary auxiliary devices. These are special short seams that are located according to their own rules and regulations.
Rules for performing tacks.
The main function of tack welds is to keep parts from moving by means of fixation, reducing gaps between workpieces to be welded, reducing possible deformations and increasing the strength of the entire welded structure.
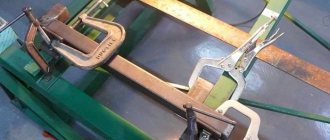
Most often, tack welding is performed using the spot method with special clamps. Clamps are excellent assistants in assembling the structure. This can be done either manually or automatically. The more complex the welding unit, the higher the automation of its assembly should be.
Requirements for tacks:
- The length of the tacks should be no more than 20 mm, as for the thickness, they should be exactly half as much as the weld seam itself.
- The composition of the tack electrodes must fully correspond to the brand of electrodes used for further welding.
- The parameters of the welding current for complete penetration of the gripping areas must comply with the standards and be 20% higher than its value during further welding.
- Localization of tack welds always takes place where there is a risk of deformation and where there will be maximum stress. They are never placed at the intersection of major seams.
- By the time of the main welding, the tacks should be free of slag and drops of metal, so that the area with their location is as even as possible.
Radiation testing of welded joints
The radiation method for detecting internal defects uses gamma rays, which arise from the spontaneous decay of the elements radium or uranium. The surface being tested is exposed to gamma rays that pass through the metal. If there are voids, irregularities or other defects, they are reflected on the film. This method is considered one of the most effective. It allows you to identify even a small, hidden defect and create the most accurate picture of the quality of the welded joint.
Great Encyclopedia of Oil and Gas
Page 1
Quality control of welding materials consists of checking certificates or labels indicating the basic passport data for each batch of welding wire (rods), fluxes, gas cylinders before welding: In the absence of certificates, welding materials are checked for all required indicators and the possibility of their use is decided by the service chief welder of the organization. [1]
Employees of these laboratories carry out quality control of welding materials, check the qualifications of welders, including mechanical testing of samples, external inspection and flaw detection of welded joints. [2]
Storage, preparation and quality control of welding materials must be carried out in accordance with the requirements of regulatory and technical documentation. [3]
Storage, preparation and quality control of welding materials must be carried out in accordance with the requirements of regulatory and technical documentation. [4]
The hardness of the deposited metal during quality control of welding materials is measured in accordance with position VII of the line. [5]
For all types of structures and structures, it is mandatory to control the quality of welding materials, the qualifications of welders, the welding process and external inspection of finished seams. [6]
For all types of structures and structures, quality control of welding materials, qualifications of welders and control of welding modes are mandatory. [7]
For all types of structures and structures, quality control of welding materials, welding modes and qualifications of welders is mandatory. [8]
Preliminary and current operational control consists of the following operations: quality control of the base metal, quality control of welding materials, quality control of workpieces and their trimming for welding, control of welding equipment. [9]
These tests require destruction of samples and are therefore carried out selectively. Similar tests are used to control the quality of welding materials (electrodes, wire and flux); for selective testing of the mechanical properties of welded joints made by press welding methods. [10]
Pages: 1
www.ngpedia.ru
