The quality of any steam room is determined by the correctness of its layout and the organization of heating of the room. You can use a brick oven, a steel or cast iron firebox, or a gas burner, but all this is unsafe and not always convenient. Experts rightly believe that the best choice would be a specially designed electric sauna heater. A relatively simple device, there will be a minimum of problems with fire or carbon monoxide, and most importantly, it is relatively easy to make with your own hands.
Sauna heaters can have a very unusual design
Construction of an electric sauna stove
The design of the electric furnace includes a housing, a tubular heater and a container for stones.
The inside of the oven has ventilation channels through which heated air passes. An electric fireplace for a sauna is controlled using a separate unit placed outside, which is due to safety requirements that require the location of this element of the system in a dry room. You can start the system and regulate its activities either directly from the unit or from a remote control. When the oven starts, the temperature of the heating elements rises and heat is transferred to the stones. To regulate the degree of heating, a thermostat is used to keep the temperature within specified limits.
To ensure proper heat distribution in the steam room, it is necessary to install more than one sensor in it - this will give the system the most complete information about the atmosphere in the room.
Main rules
Over many years of using electric ovens, a standard way of using them has developed:
- The designated corner is carefully insulated with mineral wool and covered with aluminum foil. The waterproofing must be secured with a reflective layer inside, and the joints must be securely taped.
Proper insulation of steam room walls
- Typically, an insulation thickness of 5-10 cm is sufficient. It is believed that every open 1 square meter of a stone wall increases the power consumption of the furnace, which is equivalent to increasing the volume of the room by 1.5-2 m3.
- The top of the walls is finished with clapboard 12-16 mm thick. There should be about 1 cm of free space underneath for ventilation.
- The optimal height of the steam room is 190-210 cm. This will reduce the power of the stove and speed up heating. The distance from the top shelf to the ceiling should be 110-120 cm, since the warmest air is at the top.
Assembly technology
To assemble an electric sauna heater with your own hands, you need to follow these steps:
- First, a drawing of the future furnace is drawn up, which depends on the following data: furnace area, required heating power, maximum and minimum dimensions, location. Typically, electric furnaces are made small; the main space of their design is a cage for stones.
- Calculation of the number of heating elements for the furnace. Their number depends on the power of the future design, the size of the furnace, and the power of one heating element that will be used.
- After this, you can begin assembling the sauna stove. To do this, heating elements are fixed on the frame and connected by jumpers. A sheet of steel with a thickness of 3 mm is used as a base, and other parts are attached to it using bolts and welding.
- If the frame is ready, it is necessary to lay the stones on top as tightly as possible, there should be almost no gaps between them.
- Next, a protective casing is installed, which can also be made of steel sheet, like the main structure. Additionally, you can put up a brick wall, providing for this the construction of a small pedestal for the stove.
- The connection of the electric furnace is carried out using serial, parallel connections of heating elements; it is necessary to have a thermostat, with the help of which the heating of the stones will be controlled. In this case, it is recommended to use rotary or drum switches; the control element itself must be positioned so that it is in a place convenient for use. Usually the regulator is placed in the steam room so that you can independently set a comfortable temperature in the room without leaving it.
- The last step is to check the functionality of the stove, the safety and comfort of its use.
https://youtube.com/watch?v=Ri3xGo8QyUE
Today, for small home saunas, it is best to use not massive brick stoves, which take up a lot of space, but small and compact, but convenient electric ones. The cost of such structures can be quite high, but you can save money by installing an electric furnace for heating stones with your own hands. The technology for its production is accessible. This is a cage for stones, in which heating elements are used for heating.
1. We draw up graphic images of the future design, determine the dimensions of the room, which will determine the size of the furnace, location, and required power. Standard electric furnaces do not have large dimensions; they are very compact.
2. We calculate the number of heating elements. Their number will depend on the required power of the furnace, its dimensions, as well as the power of one electric heater used.
Diagram of an electric heater with heating elements
3. We assemble the electric heater itself. The heating elements are fixed to the frame and connected using jumpers. A pre-prepared steel sheet with a thickness of about 3 mm is fastened with bolts or welding.
4. We lay the stone filler tightly so that the stones are located tightly, without cracks or gaps.
5. Install the protective casing. It can be made of the same material as the base for the stove - sheet steel. You can also install a brick wall that performs the same protective function.
6. The electric furnace should be connected using parallel and series connections of heating elements. A necessary design element is a thermostat, using which you will regulate the heating of the stones. The use of drum or rotary switches is recommended.
7. The final stage is checking the serviceability of the furnace, operational safety and ability to perform all specified functions.
Obviously, today it is appropriate to use electric stoves for baths or saunas that do not have a large area. A massive brick stove is too bulky for small spaces. In addition, stoves that use wood fuel require too much maintenance. Since the cost of electrical structures is quite high, you can save a lot by making an electric furnace yourself.
Materials
To make an electric sauna stove with your own hands, you will need to purchase the following materials:
- several electric heating elements (3-4 pcs.);
- stainless steel sheets with a thickness of at least 3 mm;
- fittings with a diameter of 6 - 10 mm;
- power cable;
- rheostat that regulates power;
- temperature sensor;
- asbestos cement slab;
- a can of heat-resistant paint;
- backfill made of stone.
Power selection and installation
First, calculate the volume of the existing steam room and select the required number of heating elements.
For a wooden bath you will need to achieve a power of 1 kW per 1 m² of space. For a brick building, it will be enough to have a power of 0.8 kW for the same volume. As a rule, it is convenient for users to connect all electrical systems to a 220V network. In this case, all heating elements must be connected in parallel.
But first you need to prepare a sheet metal case, inside of which all the heating elements will be located.
There is no fundamental difference in the location of the heating elements: they can be placed either vertically along the walls or horizontally in the lower part of the body.
The latter option should be considered more preferable, since in this case the stove will operate with the highest possible efficiency. Convection and high thermal conductivity of the stone will contribute to this.
Heating elements should be mounted on a metal body very carefully, using asbestos sheets as a gasket between the heating elements and the metal. This material has a minimal heat transfer coefficient, so the housing will not heat up directly from the heating elements.
But it will have to be protected from infrared radiation. For this you will need a heat insulator with a reflective surface.
Above the heating elements, it is necessary to weld a metal grid made of thick wire or fittings. The grate must be strong, since a large mass of stones will be placed on it.
It is recommended to make the upper part of the heater as open as possible. This means that the stones must be kept from falling off the heater by a minimum amount of metal.
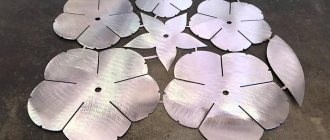
Try welding a kind of basket for stones from the same reinforcement. It won't look very good, but it can be decorated with elements that imitate forging. Such things will give the steam room a special charm, and you will be pleased to watch the creation of your hands.
Forged elements can be different: leaves, flowers, various kinds of curls
What is important here is not their quantity, but their skillful combination. Create a pattern that will be pleasing to your eye and weld all the elements of the resulting structure
Decorating an electric fireplace
You can decorate the portal of a false fireplace with stucco molding, which is fixed with glue. If the frame and cladding are strong enough, real plaster decor is used. It is better not to overload the plasterboard structure - use a lightweight imitation of polyurethane stucco.
You can hang torch-shaped lamps on the wall on both sides of the portal.
Another trick from the same opera is to install a woodpile next to the fireplace. It is a box, quite high, but shallow - the bottom is cut in almost at the very top. Several real logs or dummies made of plastic or ceramic (sold in stores) are placed on it.
The surroundings in the form of a woodpile make the false fireplace more realistic
You can make a rather naturalistic dummy yourself using corrugated cardboard as a material. Here's how it's done:
- Parts are cut out of cardboard, which are then rolled into cylinders of various lengths and diameters. Larger cylinders will act as logs, while smaller cylinders will act as knots.
- Using wide tape and glue, we attach the “knots” to the “logs”.
You can make logs from corrugated cardboard that are very similar to real ones. - The finished dummies need to be painted and placed in a woodpile.
To make cardboard firewood look realistic, you need to paint it
Opponents' opinion
Those who believe that during a cold, a bath is the first remedy, always give the following arguments:
- A visit to the sauna increases blood circulation, which means that the blood can more quickly cleanse itself of pathogenic bacteria and viruses. This happens because in the steam room, with a gradual increase in steam temperature, body temperature rises and the number of leukocytes increases.
- Plant phytoncides and hot steam help cleanse the nasopharynx of pathological microorganisms. This means that a bath for a cold can alleviate the patient’s condition.
- Inhaling moist steam in a steam room acts like inhalation, cleansing the lungs and bronchi.
- Increased humidity and hot steam help soothe cough.
- A bath broom is at the same time a powerful dose of phytoncides, the best massager for hot skin and an excellent way to relieve aching joints during illness.
And if you consider that after a steam room in a bathhouse it is customary to drink fragrant herbal tea, then we can say that the body receives a full range of therapeutic and supporting procedures in order to quickly renew itself and overcome a cold.
Doctors who are not sure that it is possible to take a steam bath for a cold also give quite reasonable arguments in defense of their opinion:
- A cold is accompanied by general malaise and fever. For some, the temperature rises slightly, but in the steam room it will gradually increase by at least 2 °C. The patient may not even notice an increase to 37 °C, but an increase to 39 °C can lead to resuscitation.
- 2-3 days after the onset of a cold, a dominance of bacteria and viruses is observed in the body. Moist, warm air can speed up their reproduction.
- A bath for a cold is contraindicated for those whose illness is accompanied by a headache. Heat and overheating will aggravate the situation and may cause fainting.
- A cold itself increases the load on the heart, and a bath makes this load prohibitive. A harmless steam bath can result in a heart attack.
- Many colds are accompanied by herpes on the lips or body. Overheating of the body in this case will complicate the course of herpes and may cause the spread of this disease.
All these arguments are quite reasonable. Therefore, when answering the question: “Is a bath for a cold good or bad?”, you need to proceed from your condition. At the initial stage of the disease, with the first minor manifestations, a bath will help, but in the acute stage it will most likely harm.
The advantage of using an electric heater
There are a number of advantages of using an electric sauna stove. Everyone can get this entire list of advantages; you just need to understand how to make an electric oven with your own hands.
1. Such stoves provide rapid heating of the room, as well as maintaining the desired temperature throughout the entire period of operation.
2. A chimney, as we said earlier, is not required. Since fuel is not used, the combustion of which produces ash, the cleanliness of the bathhouse is maintained. The need for a separate ventilation system also disappears.
3. The stove does not require complex maintenance, as is the case with a stone structure. In addition, it does not need to be cleaned of soot, unburnt fuel residues and soot. To heat a room, you simply need to provide electricity, turn on the heating and specify the desired temperature.
4. Operating an electric furnace is quite simple. The temperature regulator is located directly in the steam room. A constant temperature is maintained throughout the entire time the electric furnace is used, and overheating is simply impossible thanks to the fuse.
5. Operational safety. There is no release of carbon monoxide (carbon monoxide), so poisoning with it becomes impossible. In addition, due to the fact that there is no open fire, there is no chance of wooden objects catching fire.
6. Since the stove is small in size and weighs little, it can be installed wherever it is convenient for you. It makes no sense to install a special foundation in advance; all you need is a compact pedestal. Sometimes there is a need to build a brick partition, which performs a protective function and ensures safe rest.
Vertical type oven.
When choosing an electric sauna stove, you get a whole list of advantages:
Fast heating while maintaining a given comfortable temperature throughout the entire period of use, which is simply impossible when using wood-burning stoves. There is absolutely no dirt during use, since the stove runs on electricity and no fuel is burned. In this regard, an electric stove does not need a chimney to remove combustion products or a special separate ventilation system. The air in the room does not dry out that much. Caring for the stove is extremely simple; it does not need to be constantly cleaned of traces of soot, remnants of unburned fuel, and soot. To start heating, you just need to turn on the structure, ensuring the supply of electric current, and setting the required temperature. Unlike other types, the electric furnace is very easy to adjust and operate. The thermostat is installed directly in the steam room. The temperature is maintained exactly at the set level throughout use, which is a huge plus
The thermostat has protection against overheating, which is very important when installing a sauna stove with your own hands. The stove is safe, no carbon monoxide is released during its use, there is no open flame, which does not pose a danger to the wooden furnishings of the sauna. The dimensions of the oven are compact and its weight is light. Such a structure can be installed in any convenient place; there is no need to first install a massive foundation; a small pedestal for equipment is sufficient; in some cases, a small protective brick wall is required, which ensures safety of use during recreation.
Manufacturing instructions
Making an electric stove for an indoor sauna with your own hands consists of the following steps:
- Development of a detailed drawing on paper with determination of the optimal dimensions, power required for heating, and location of the future device. Typically, the body of an electric furnace is made to be small in volume; the main space in their design is occupied by a basket for stone backfill. The body shape can be any, but a rectangular oven will be more convenient for operation. It is more stable and can maintain its shape for a long period of time. Due to the fact that its corner zones almost never become hot, a balance of heat flows and uniform heating of the room are maintained.
Calculation of the number of heating elements for the furnace, based on the power of one element.
Marking body parts on a steel sheet and cutting off the required parts.
Connecting heating elements into one structure using metal strips.
Fastening the heating elements on one of the sides. They are mounted to one of the sides of the furnace - side or bottom, using bolts or welding. The distance from the heating elements to the metal walls of the housing must be such that a sheet of asbestos can fit into this gap. Its heat transfer coefficient is minimal, so no heating of the housing directly by the heating elements will occur.
Furnace body assemblies. Sheet steel parts are fastened by welding or bolts.
Welding reinforcement legs from the bottom of the furnace body for installation on the floor.
Laying stones in dense layers, without gaps or large cracks. Larger stones are placed at the bottom, and then smaller fractions. There should be a small gap between the heating elements and the filler for air convection; the last row of it should completely cover the heating element, but not be higher than 8 cm. When laying stones, the heating elements must be held.
Making a protective casing for the furnace from sheet steel or fireclay bricks.
Installation of power tools in the oven. For this stove, a simple circuit diagram is taken as a basis: voltage from the network is supplied to the terminals of the remote control controller, and the wires coming from the heating apparatus are connected to the output terminals.
Installation of the furnace control panel. The steam room maintains a high level of temperature and humidity, so the remote control should be installed on the wall in another room, where the temperature is not higher than 25 - 28 degrees. The wires from the control panel must be connected to a separate circuit breaker in the electrical panel and laid in protective corrugated sleeves. Previously, special grooves are punched in the walls for wiring, which, after installing the wires, are sealed with non-flammable building materials, for example, a cement-sand mixture.
Installation of temperature and humidity control sensors for an electric oven. To connect them, heat-resistant cables are used, one-piece in length, without joints. Usually they are mounted on top of the unit, above the shelves or above the entrance door to the steam room.
Ground loop devices. The electric stove must be connected to the line of its own grounding loop, which is recommended to be laid in the ground during the construction of the sauna. It is connected to the furnace using protective cable channels. If you didn’t worry about grounding at the time, then the grounding cable of the stove must be connected to the neutral terminal of the electrical panel.
Installation of a thermostat. It is installed inside the structure and is used to measure and adjust the heating temperature of the stones.
Improvement of the appearance of the stove. The body parts are cleaned with sandpaper, degreased with gasoline or acetone, primed and painted with two layers of heat-resistant paint;
Checking the operation of the oven, installation safety and connection.
Preparatory stage
Before you start making a false fireplace, you need to think about its installation location and power supply.
Selecting a location
Work on creating a homemade electric fireplace should begin with choosing a place for it, since the shape of the portal will depend on this. The following options should be considered:
- Wall-mounted location: this is the most preferable option - it is the wall-mounted electric fireplace that is most similar to the real one. But such an installation is possible only under one condition: the room must be quite spacious. In the wall-mounted version, the electric fireplace is made rectangular.
- Corner: this method is used if the room is of modest size. The corner is usually the least used area, so installing a false fireplace here has almost no effect on the amount of free space. The corner portal will no longer have a rectangular, but a triangular base.
A corner electric fireplace will not take away useful space from the room - Wall-mounted option: as you know, a floor-mounted fireplace is considered classic. But the mounted option will look good, provided that the space in front of it, at least a few steps away, is not cluttered with anything.
- Built-in fireplace. This option will significantly save space.
An electric fireplace built into the wall is ideal for small rooms.
If the problem of lack of space is so critical that none of the above options are suitable, an electric fireplace can be built into a partition or furniture. Especially for such tasks, “ultra-thin” fireplaces with a depth of only 7 cm are produced. By the way, it’s worth considering that perhaps such an almost flat fireplace could be made wall-mounted.
Some users are faced with a problem: no matter where they place the fireplace, it always ends up close to one or another piece of furniture - a table, sofa, pouf, etc. The way out of this situation is to create a wall-mounted fireplace located at a certain height. In this form it will not lose its decorative qualities. At the same time, at any distance from the wall and even under the fireplace itself, it will be possible to place a low piece of furniture.
Hanging electric fireplace significantly saves space
Electricity supply
An important point: at the preparation stage, you should think about the power supply to the fireplace. To prevent the impression of the decoration from being spoiled by an extension cord stretched across the entire room, you need to attach an electrical outlet to the wall near the installation site of the portal. In this case, it is useful to listen to these recommendations:
- You should not install the socket so that it is inside the portal, although this option seems to be the most successful from an aesthetic point of view. A false fireplace, like any other electrical device, is potentially dangerous, and the user should be able to quickly unplug the power cord if something happens.
- It is better to install an outlet with a switch. After installing the fireplace in the portal, the standard power button will most likely be difficult to access, and it will be inconvenient to constantly pull out and insert the plug into the socket to turn the device off and on.
We invite you to familiarize yourself with: Assembly of the passage of a vent pipe through the roof
How to choose an electric heater for a mini sauna
“Mini” is considered a sauna with a small room of no more than 1.5 cubic meters. It is designed for the simultaneous presence of 1-2 people in the steam room. The recent trend is to install small bathhouses directly in the apartment of an urban building. They consume little electricity, the main thing is to ensure reliable thermal insulation. The heaters in the mini-sauna are small in size. Manufacturers put the words “Mini” and “Compact” on these devices.
The market presents mini-heaters with the following trademarks:
- Sawo; Mini and Mini-X series;
- Harvia; Vega Compact, Delta series.
These are the most common brands of mini ovens. Other manufacturers have them too. The positive and negative aspects of using mini-ovens are common to all electrical units installed in a home bathhouse.
pros
- making electric heaters from different metals;
- electricity is converted directly into thermal energy;
- mobility of devices, possibility of installation anywhere in the steam room;
- the power of small heaters installed in apartments is compared to an electric kettle, the device consumes less energy than home steam irons;
- Proper grounding ensures fire safety.
Minuses
- using electricity is quite expensive;
- the mini-sauna is designed for no more than two people present;
- difficulties with wires; you need to invite an electrician to install a three-phase wire when the heater consumes 380 volts; for proper grounding.
There are mini-heaters that are designed to operate from networks with standard 220 volts; if the owner knows how to do grounding, he can connect such a stove himself
It is important to be sure that the wiring is secure.
Dimensions
The smaller the sauna, the more important the size of the stove becomes. Low-power heaters are usually very modest in size. An example is the Harvia Compact stove - its width is 24.5-30 cm, depth 22 cm, height 54 cm. It weighs only 9 kg (without stones). Another model from the same company - Vega Compact - weighs even less: 7 kg and has dimensions: 28x29.5x50.5 cm.
IMPORTANT! Information on sizes is essential for selection, therefore it is always indicated in catalogs.
Yes, and one more interesting point: ovens of the same size (within the same line) can have different power. This allows the manufacturer to reduce production costs, and the consumer to choose a standard-sized heater for the volume of the steam room.
Further information will be useful to those who have already purchased a stove and need information on how to properly install and connect it.
Electric stove for saunas and baths
Drawing of a small sauna with an electric heater.
But an electric oven can definitely be called more convenient to use.
Please note a number of significant advantages of such a stove:
- It is small in size, so it can be used even in small spaces.
- This electric heater is installed quite simply and without the use of expensive materials.
- For an electric furnace, there is no need to additionally think about and assemble gas exhaust and ventilation systems.
- There is no need to stock up on fuel.
- The need to clean the stove from combustion products automatically disappears.
The only drawback of electric ovens is their high energy consumption. But now the question is not about savings, but about functionality and reliability. An additional benefit from an electric heater is that it can be used both to produce dry steam and for use in a Russian bath.
An electric stove today is one of the popular options used for heating a sauna, in addition to using the classic option - a wood-burning stove in a Russian bath.
- You can install the stove yourself - no special preparation of the room is required before installation (additional strengthening of the foundation, chimney structure).
- Ease of use - very precise temperature control using a control panel and a mechanical switch.
- Increased safety - automatic operation using protective elements (thermostat) reduces the risk of hazards during equipment operation. Such a stove does not emit suffocating flammable gases.
- It does not require fuel storage and storage space, chimney cleaning and similar procedures associated with cleaning solid fuel stoves. All you need is an electrical outlet.
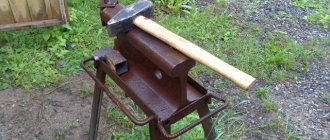
Tools
The tool kit should consist of:
- tape measure and square;
- Bulgarians;
- welding machine with a set of electrodes with a diameter of 3 mm;
- cutting wheels for metal;
- file;
- hammer, pliers.
You also need to take care in advance about personal protective equipment during welding work:
- protective mask;
- workwear made of dense material;
- closed shoes;
- rubber (dielectric) gloves.
Is it possible to pour water on the Harvia electric heater?
Yes, you can pour water, but in limited volumes (see model data sheet), especially if the number of stones is small - 20-40 kilograms. The reason is that with so many stones, you can easily flood the heating elements and damage them.
If the heater is larger in size, and the heating elements are securely covered with stones, then you can give in more. The main thing is not to overdo it. The steam will be heavy from an open heater, and the temperature in the steam room will most likely be more than 60 degrees. Take care of your heart!
Video
In parting, we suggest you watch a simple video in which the guys show the device of one of the models:
+++
We hope that the article helped you figure out whether a Finnish electric furnace is suitable in your particular case. Customers who prefer to opt for domestically produced products should familiarize themselves with the range of electric heaters made in Russia.
Specifications
All electric sauna stoves have the following parameters:
- Power. Being the main characteristic of any stove, power directly affects the heating of the sauna. To calculate this indicator, you need to start from the area of the steam room. To warm up one cubic meter of room, about 1-1.5 kW of power is required. If the walls of the building are thin and the thermal insulation is not of sufficient quality, the power of the electric heater should be increased.
- Volume. The degree of heating of the room and the amount of steam depends on the number of stones. In small steam rooms, stoves designed for 2.5 kg of stones can be used. For large rooms where long-term steam procedures will be carried out, it is worth choosing an electric heater designed for at least 6.5 kg of stones.
- Availability of a steam generator. Some models of sauna stoves have a built-in steam generator that produces wet steam, often used in sauna procedures. However, this point is far from the most important - if necessary, purchase a separate electric steam room that operates independently of the stove.
Classification of electric furnaces
There are several parameters by which electric heaters in a steam room are classified:
- Type of allocation. There are two types of stoves - wall-mounted and floor-mounted. Attachment units are well suited for small saunas, saving space and reducing the risk of burns. Floor-standing heaters are used in large rooms. Their bodies are made in the form of cylinders, rectangles, squares, balls or corners. When choosing a shape and placement, you need to start from the dimensions of the room.
- Type of shell. Depending on the type of housing, all electric furnaces are divided into two types - open and closed. A distinctive feature of closed models is their long-term heat retention, while open ones provide quick heating of the room and allow you to create the driest atmosphere possible. An open body is best suited for saunas, but a closed electric sauna heater is suitable for lovers of wet steam.
- Case material. To create electric furnaces, stainless steel, aluminum and cast iron are used. Cast iron and steel models are more efficient due to longer heat retention. In addition, they are highly durable and can last a very long time. When installing cast iron products, it is worth considering their considerable weight, which does not allow such models to be installed on a weak foundation or second floor.
About the future design
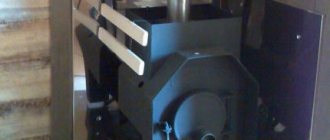
Construction of a homemade electric stove for a sauna
The simplest model of an electric stove consists of a box-shaped body, inside of which there is a tank with a door on the neck for adding water and several heating elements welded together. Stones are laid on top and between them. When heated, the stones release thermal energy into the steam room, raising the temperature in it to the optimal level.
For metal structural elements, stainless steel is used, which does not corrode in water, does not burn out under high temperatures and does not emit harmful substances.
If possible, the device is controlled by an electronic remote control, which should be located outside the steam room. It is connected to the furnace heating unit with an electric cable.
The heating system is activated by turning on the timer. The maximum permissible heating level for heating elements is 650ºС. If the temperature drops to 600ºC, the sensor is triggered and the “Heating” light comes on. The stones are heated when the timer is in standby mode.
As soon as the top layer of stones heats up to 550ºC, the timer is triggered and the light turns on in the “Ready” position.
Stones can also be placed on top of the body above the heating elements on a metal grid welded from reinforcement and during bath procedures, water them or herb infusion to create steam.
Additional recommendations for the master
But here all calculations must be made especially carefully in order to avoid excessive heating of the heating elements and their premature failure. Care must be taken when installing heating elements into a single electrical circuit. You definitely can’t do without some knowledge of electromechanics and electrical engineering. And if you don’t have such knowledge, then seek help from an experienced master.
Sometimes combined types of heaters are used in the interior of steam rooms. In addition to the electric stove, users install a brick wall finished with natural stone. This will increase heat transfer slightly, but additional safety measures will be required. You will need to lay a layer of thermal insulation between the load-bearing and imitation wall
This is important if the bathhouse is built using a large number of wooden elements (log house). For brick baths, there is no need for additional walls, since they only increase the percentage of heat losses
Operating rules
A do-it-yourself electric oven must be operated in a room with a reliable ventilation system. The electrical wiring must be in good working order, its energy capabilities allow it to withstand the load from this electrical appliance, eliminating the risk of a short circuit.
In addition, there are a number of rules that must be followed:
- Do not connect the device to the power supply system without sufficient water in the device.
- Before the first fire and periodically during operation, measure the resistance from the network, which should not exceed 3 - 5 ohms.
- To prevent damage to the heating elements due to scale, you need to fill the device with water softened with vinegar or citric acid.
- Once every six months, the stones are moved into the electric furnace and cleaned of dust and cracked elements.
- If in winter the bathhouse is not heated regularly, then after each visit to the bathhouse the water from the stove must be drained, since it can expand when freezing and break the connecting seams of the body.
Do-it-yourself electric heater for a bath (sauna)
The heating elements of the heater are located at floor level. The room has 2 shelves, upper and lower. The suction hole is located below the floor level, under the electric heating elements. The exhaust is located approximately 30 cm higher than the exhaust. When you turn on the electric heating elements, hot air rises from the heating elements and draws air into the bathhouse (sauna) from the exhaust hole.
You can see everything in the photo below.
Electric heating elements. Stones are laid on top (for example: soap chloride, gabrodiabase, etc.). Under the indicated shades there is a suction hole - below the floor level (from the dressing room side).
View of the heater from the side of the steam room. Electric heating elements and the heater itself are located at floor level so that the entire bathhouse room (its lower and upper parts) is heated.
Exhaust vent (under the bottom shelf). Located in the far corner from the heater.